
Workflows
A Workflow is the sequence of steps required to produce a set of documents, like a Factsheet, that is ready to be published and distributed. Workflow steps include approvals and pdf generation. A well designed workflow, ensures that all content is revised and approved by the right person or group of people before being made available to the public. We recommend that your Workflow includes steps that ensure your documents meet all compliancy regulations.
To create a new Workflow:
Step 1: Navigate to Documents > Document Production Center
Step 2: Click on Workflow Editor
Step 3: Click on the + icon
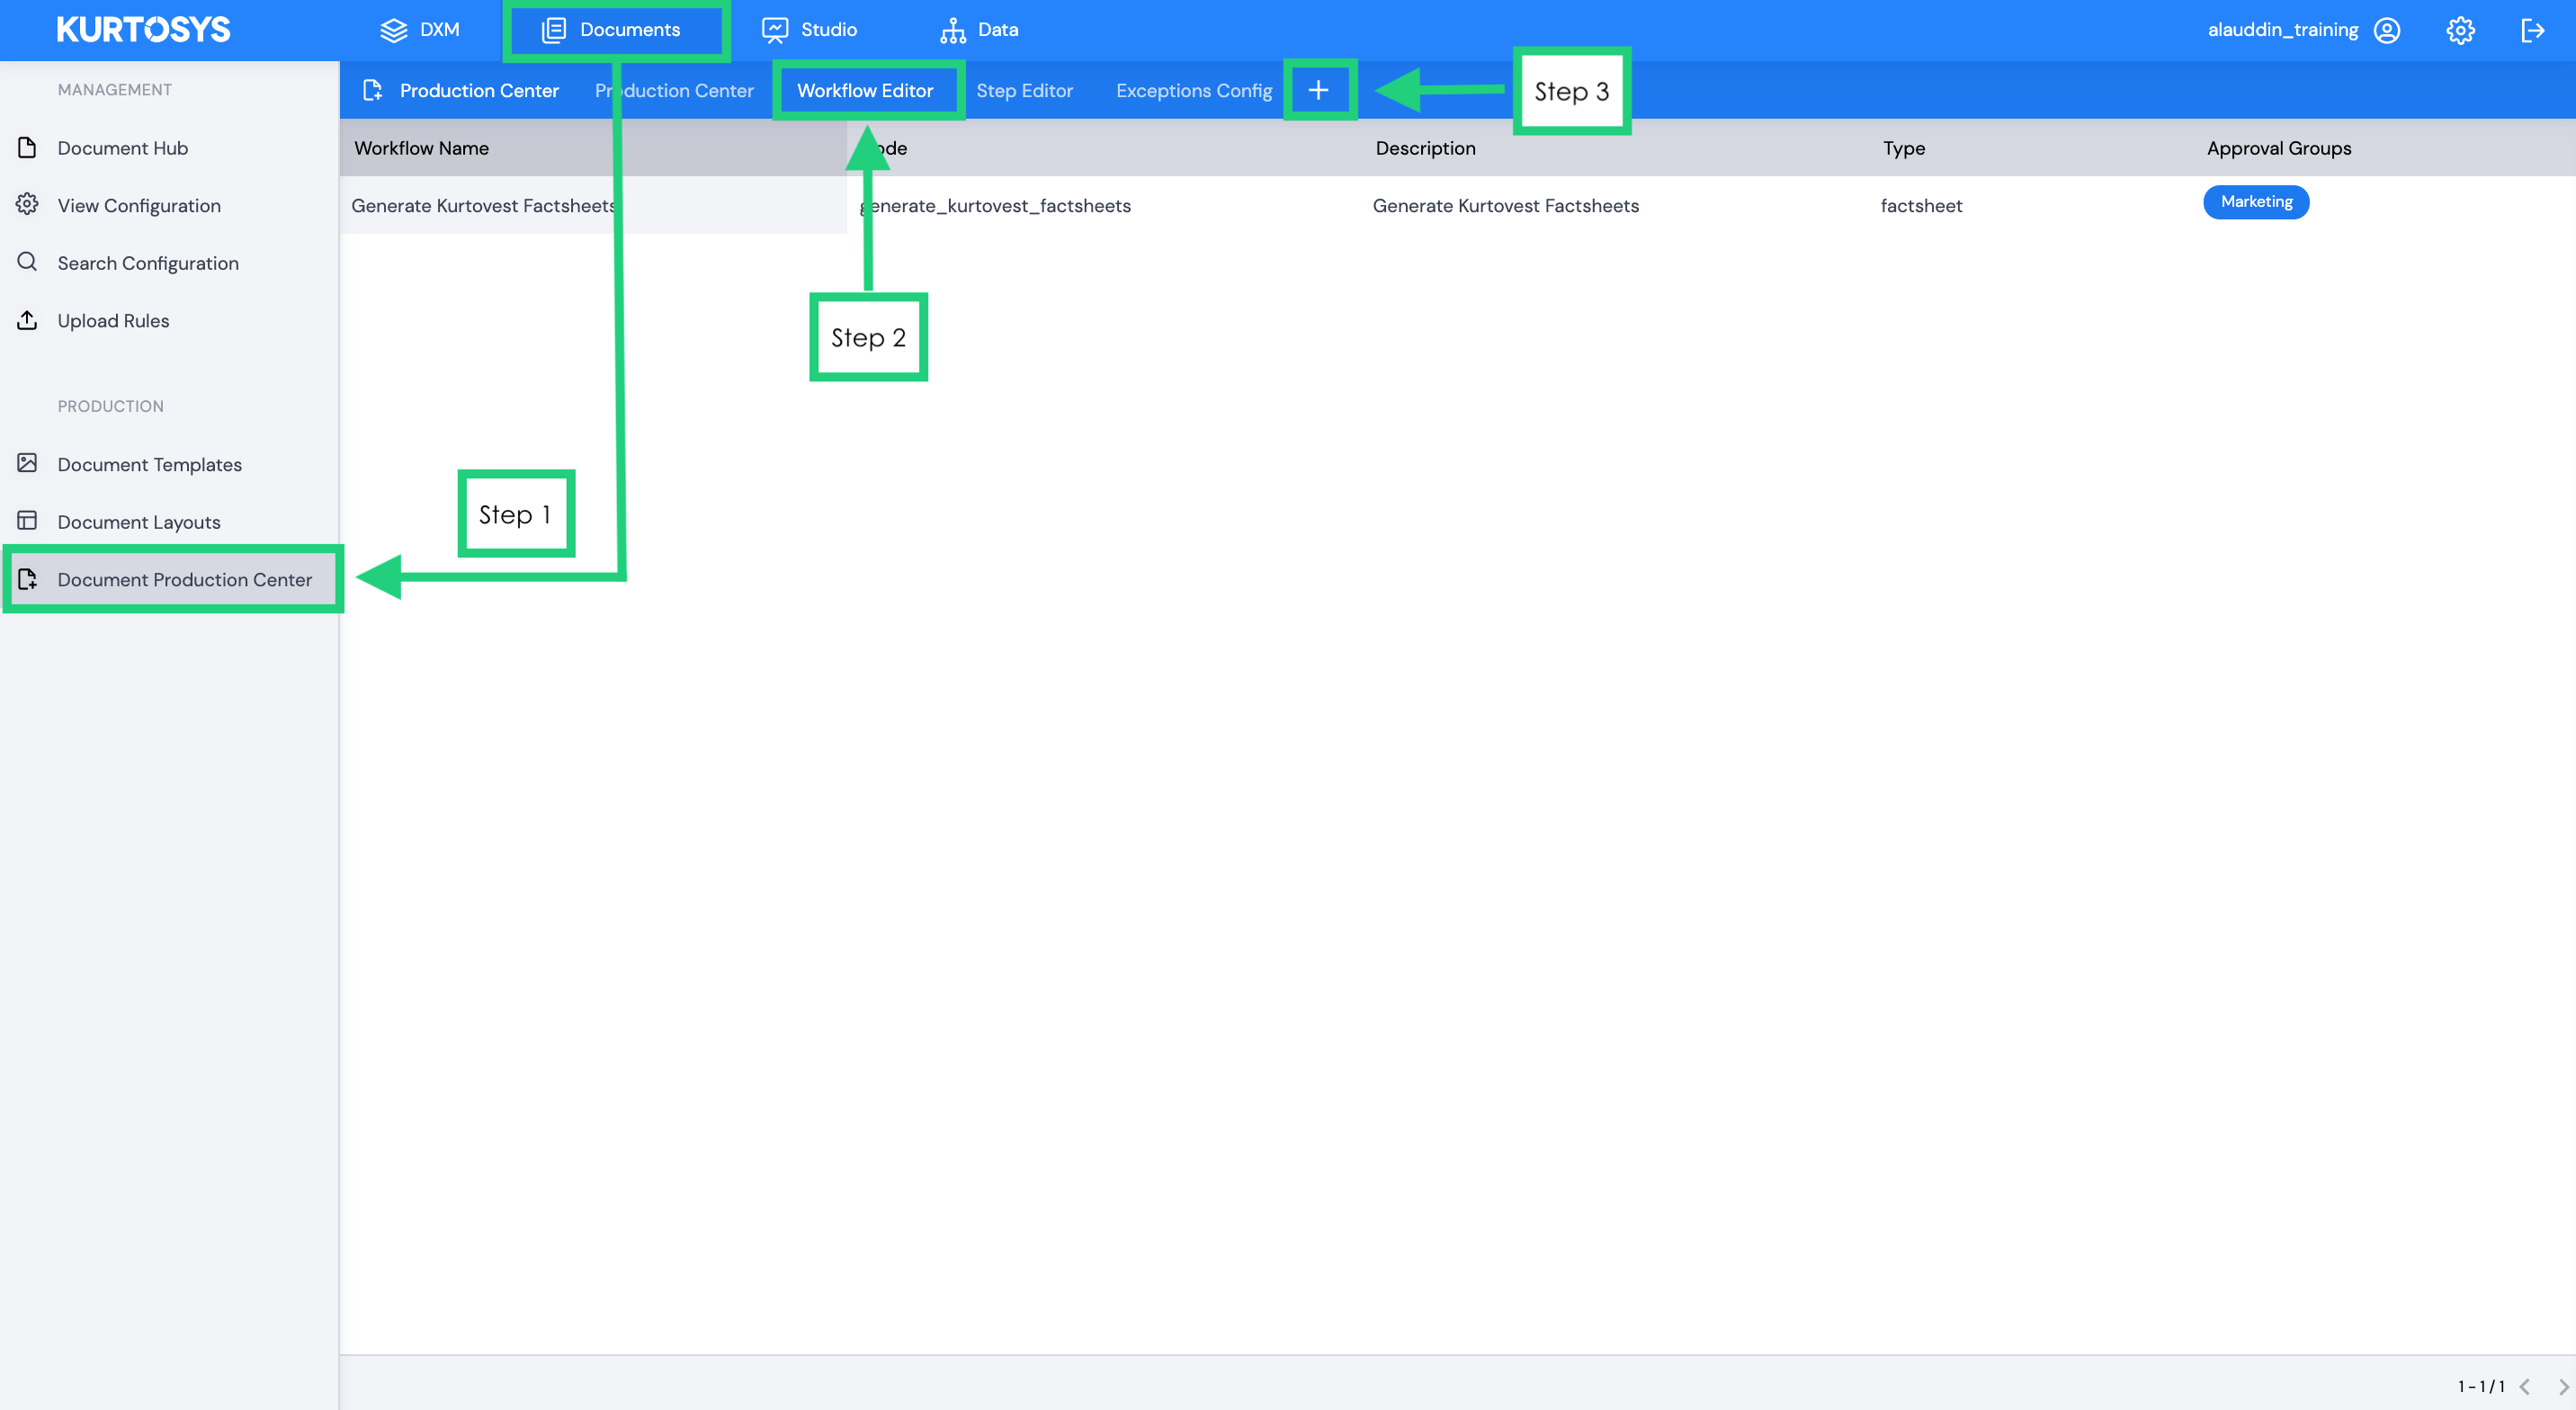
Workflow Editor
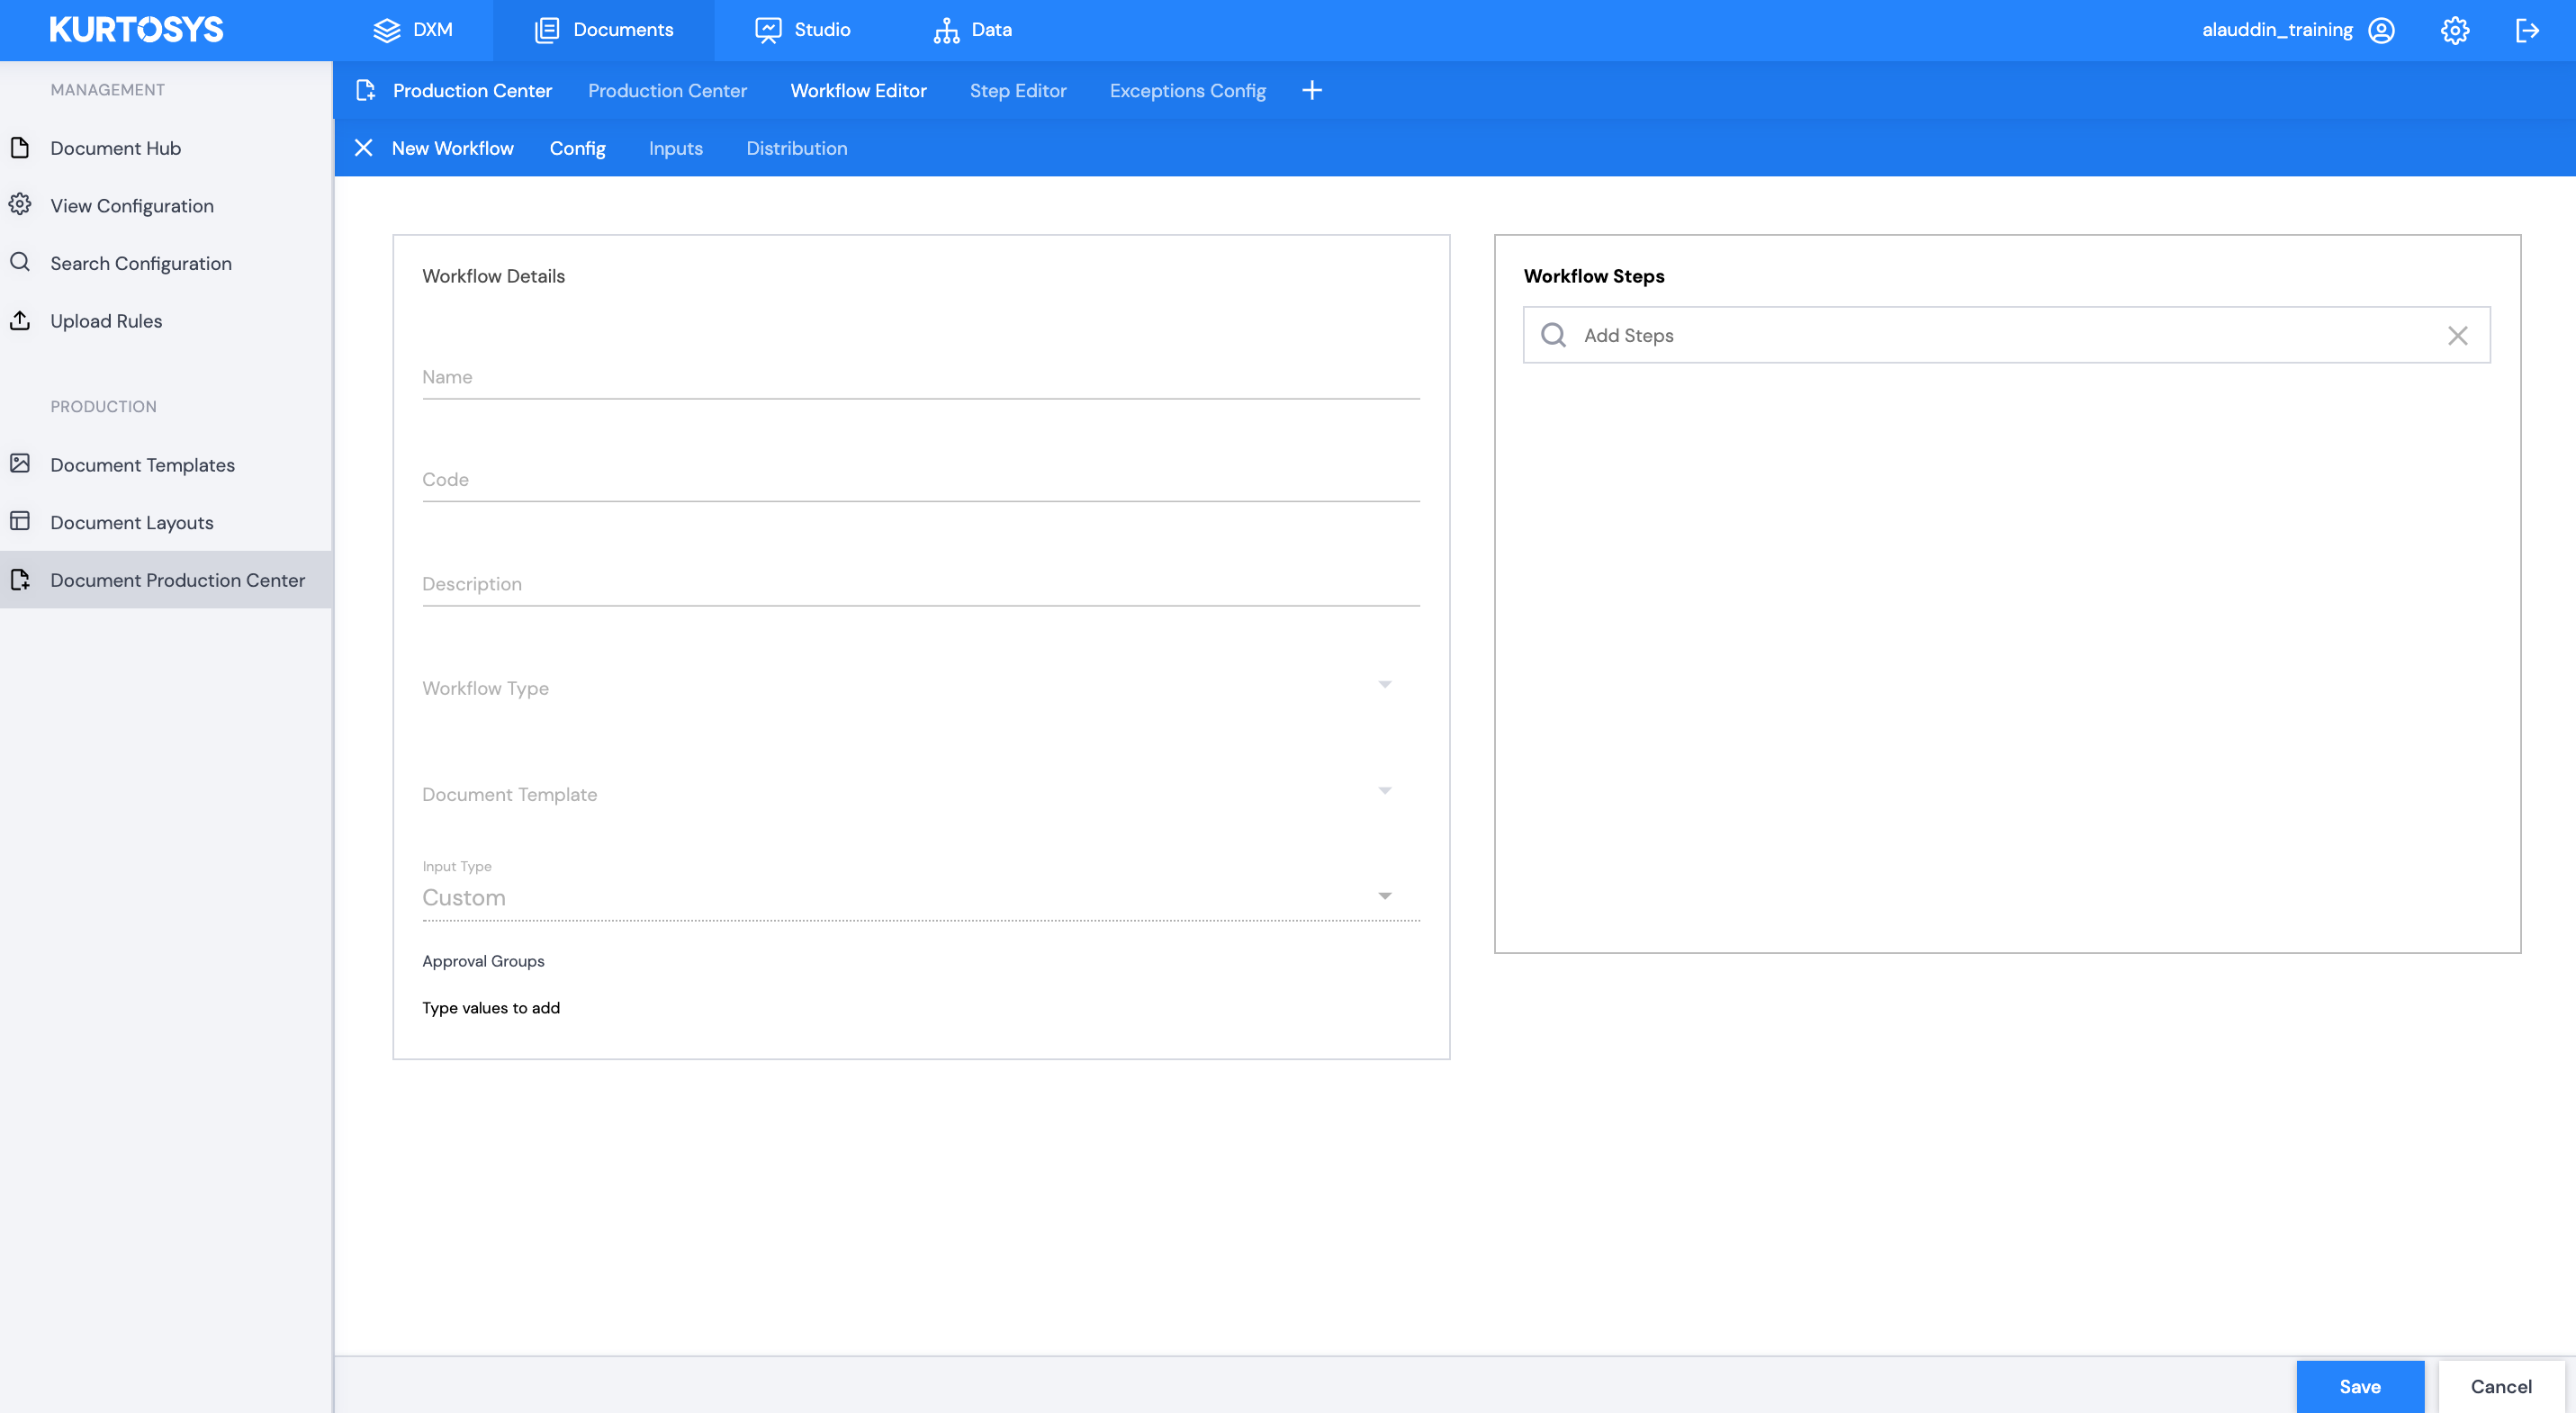
The New Workflow panel will slide out.
Setting up a Workflow is a 2-step process. First you will need to setup basic configurations under Config. You will then need to provide the list of funds or share classes or select a Segmentation List (if you have chosen Segmentation as Input Type) to which this workflow will need to be applied under Inputs.
Config
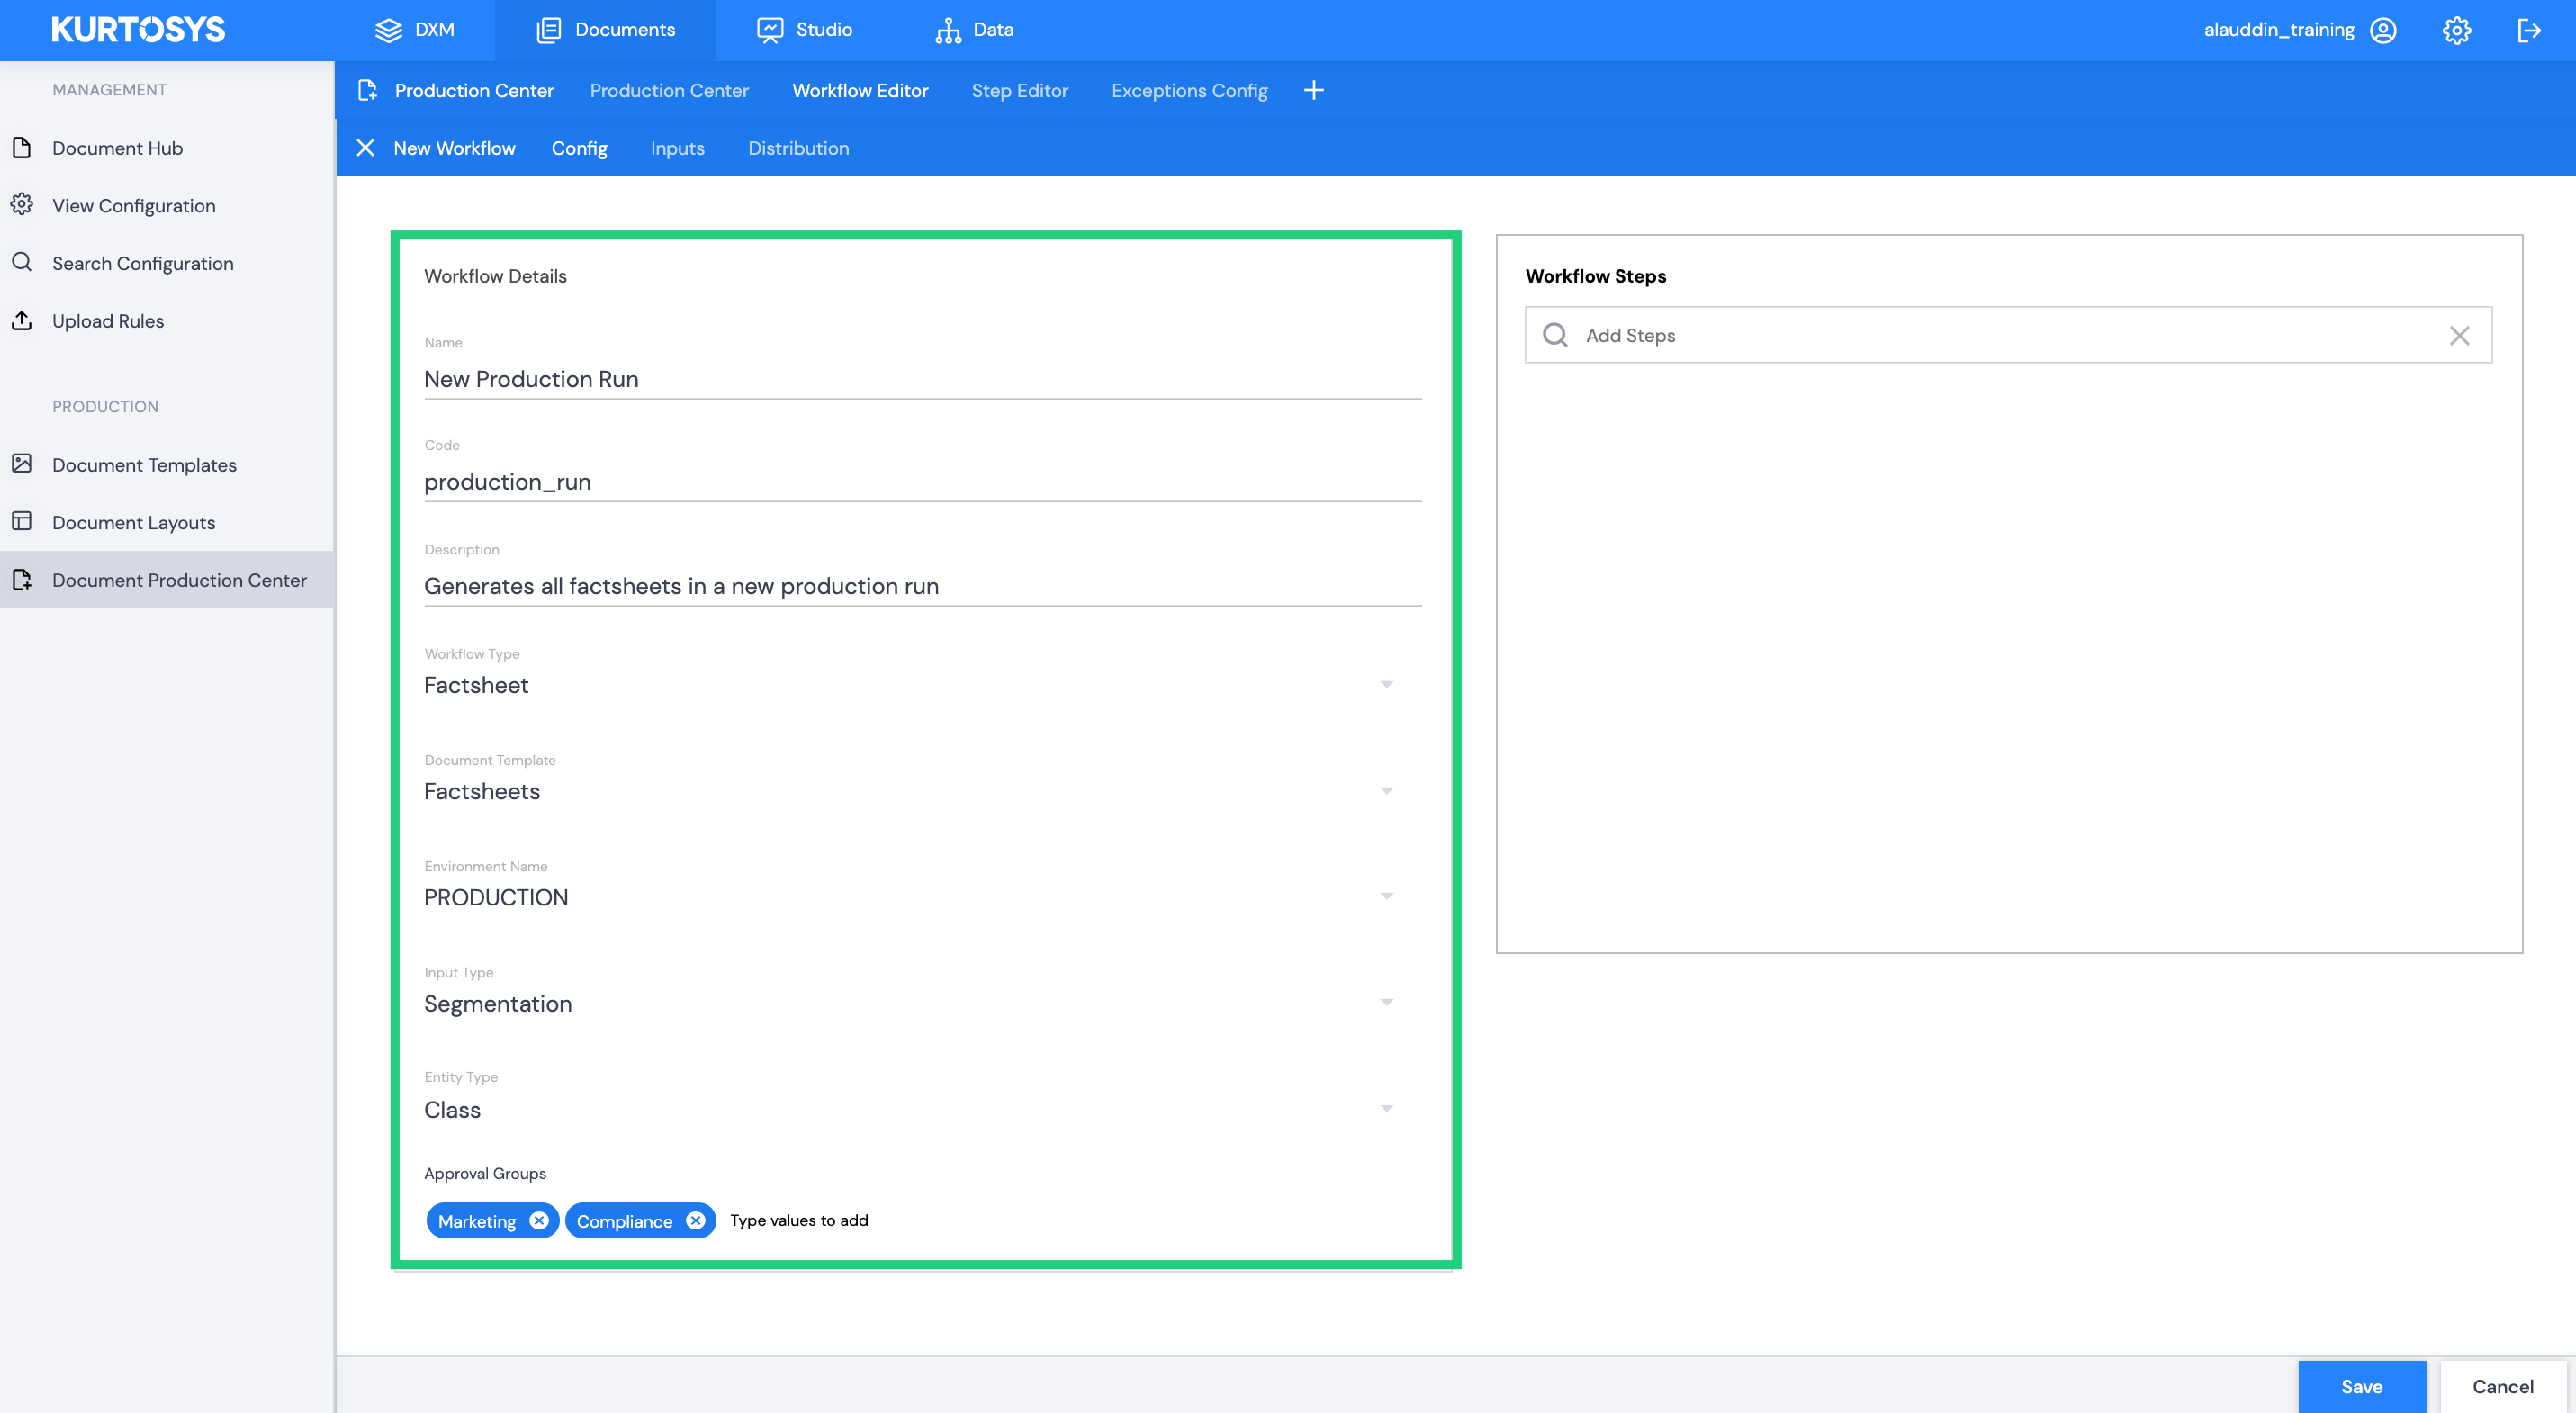
Workflow Details
Complete the following form fields:
Name – this is the label used within Kurtosys to identify the step on screen.
Code – this is the system name given to the Workflow so that it is usable in the code. Code should always be written in lower, snake case e.g. workflow_code_name
Description – allows the user to give more detail about the workflow according to their unique business needs. It will serve as a further guideline to whoever will be initiating or participating in a Workflow run.
Workflow Type – is a label describing the type of document that will be produced. There are three options to choose from:
- Factsheet
- Data
- Kiid
Document Template– choose a predefined document template for the workflow to use.
Environment Name – choose the environment to create the workflow.
Input Type – choose whether you would like to provide custom input values for the production workflow or whether you would like to apply a Segmentation List. If you choose Segmentation list you will have to choose between a fund list or class list.
Approval Groups – select user group/s responsible for the Workflow as a whole. Only these users will be allowed to complete and approve or reject all steps in a single Workflow. Start a Workflow is a Role-permission based setting. Approval Groups are created under Data | Approval Groups.
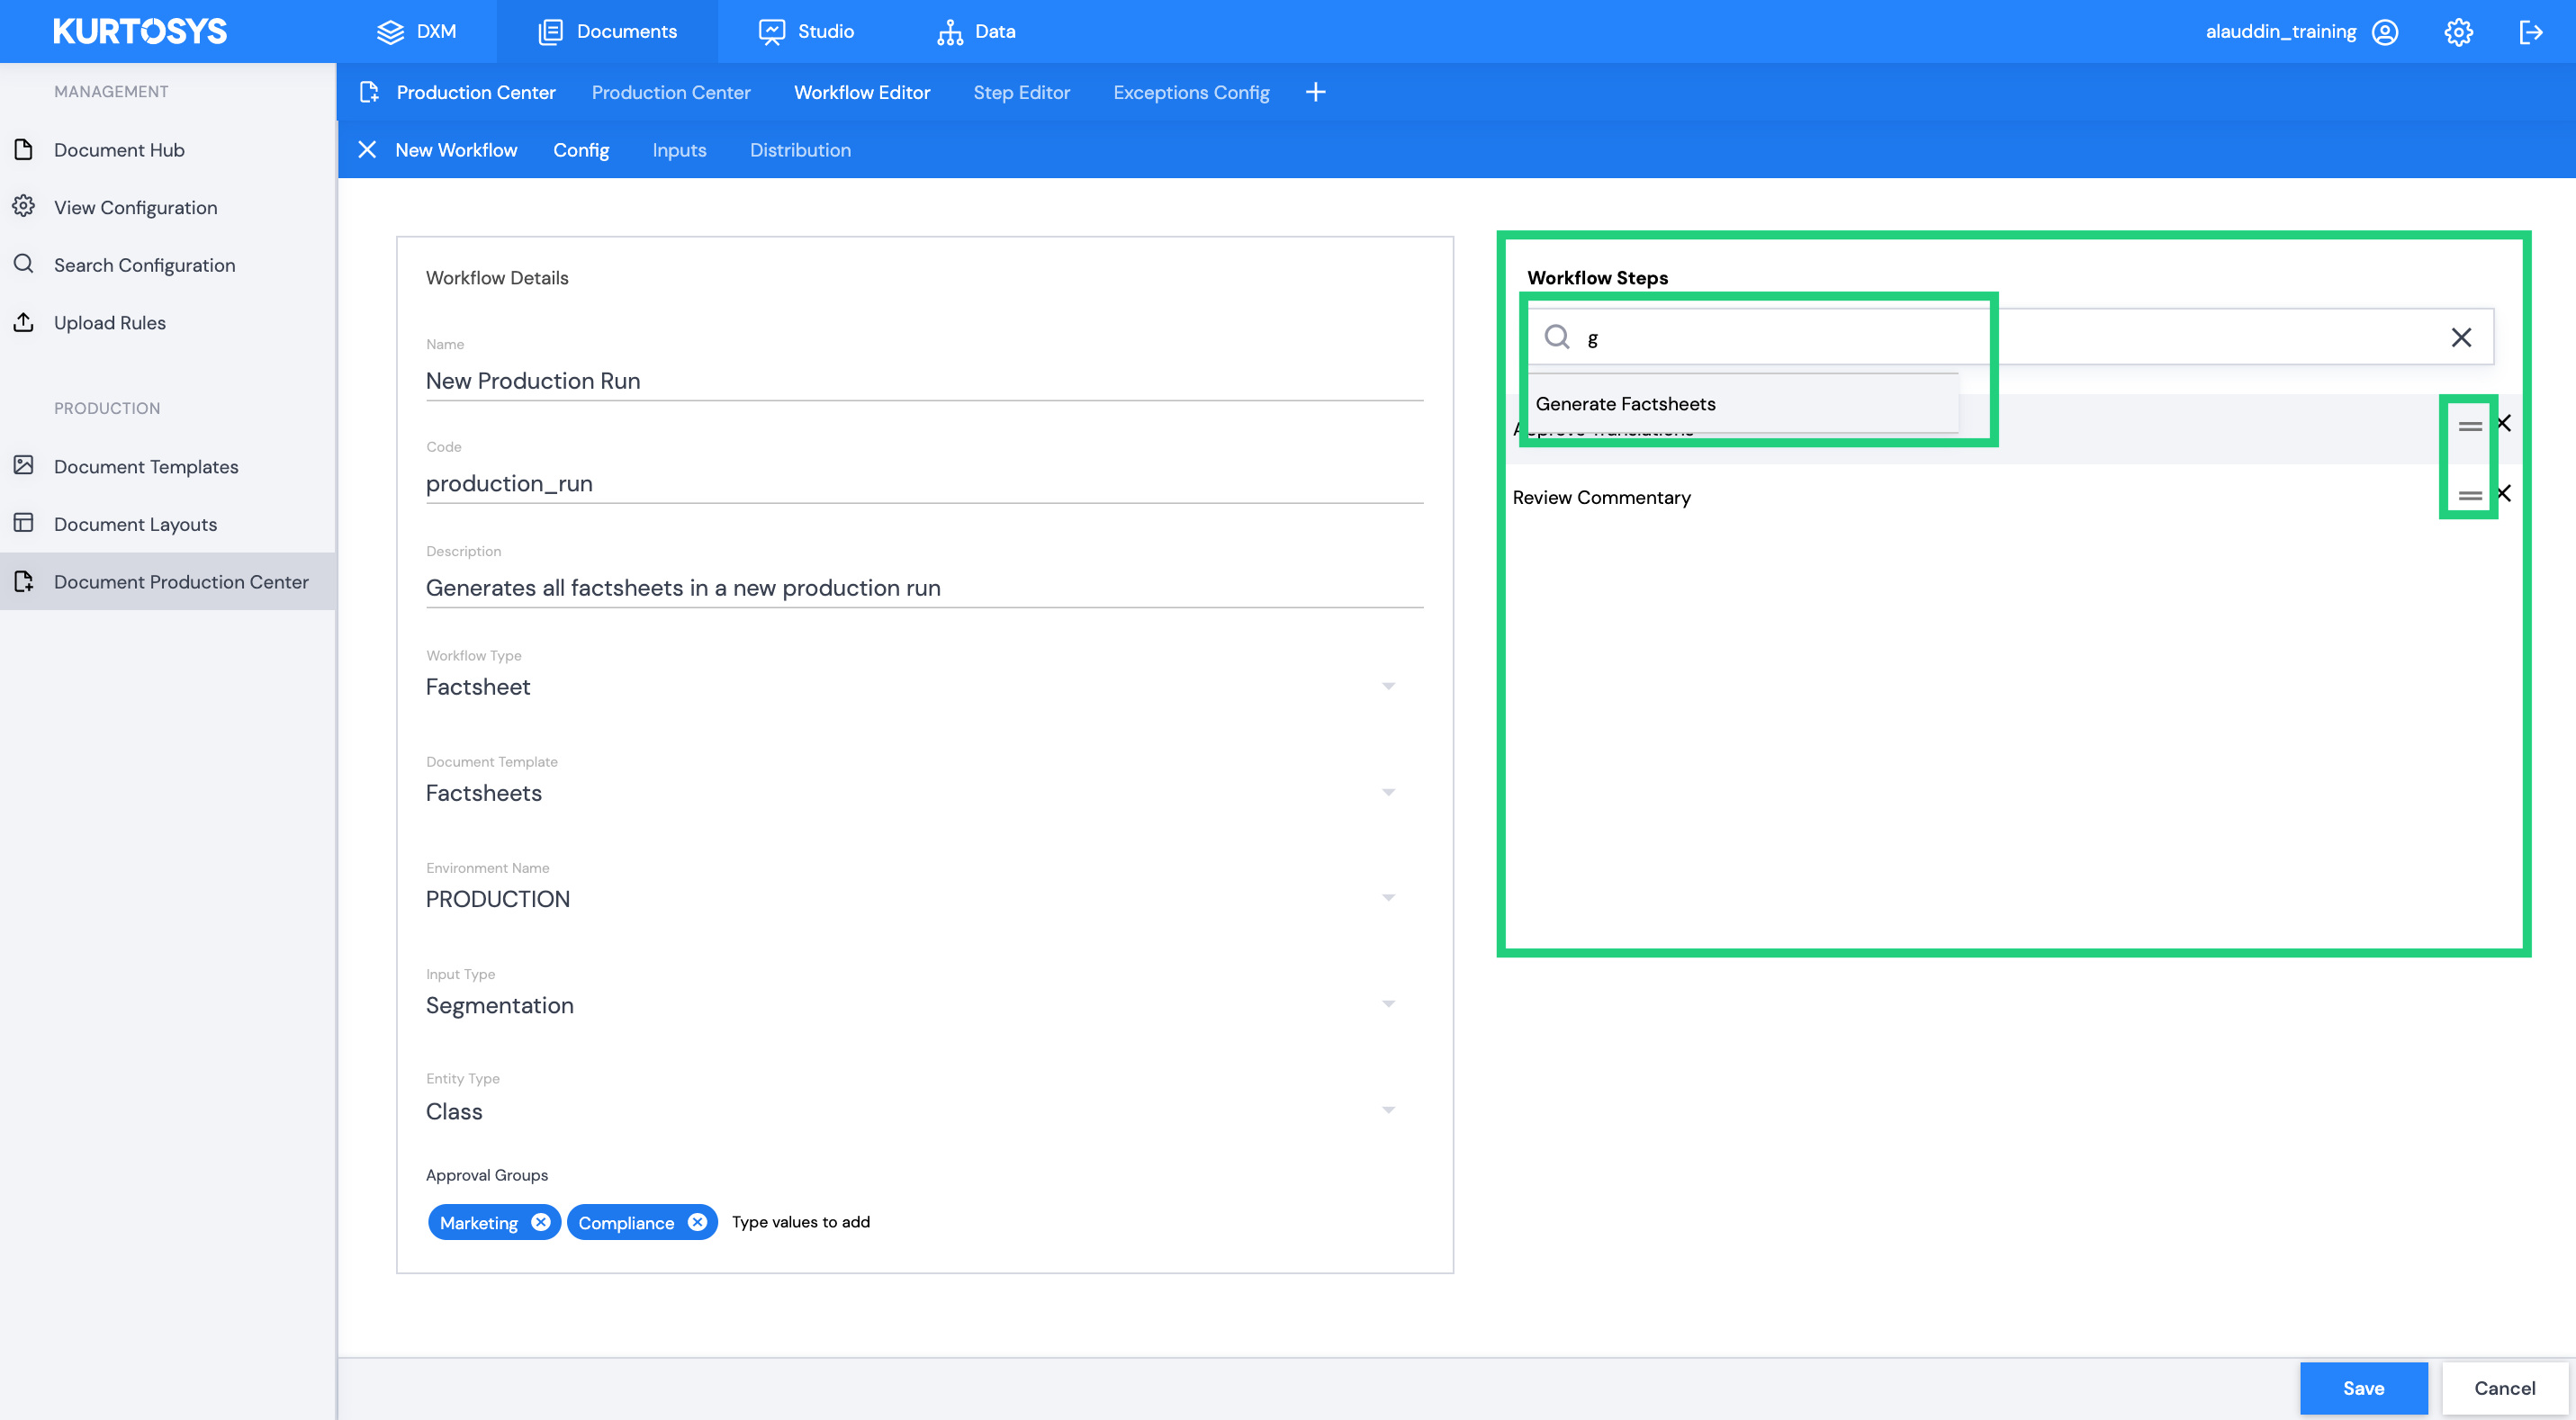
Workflow Steps
Use the type-ahead search field to search for the steps you wish to include in this run. You can choose multiple steps from the list created under Step Editor.
Once you have added all your steps, you can change the order of steps in the workflow using the drag and drop function.
Inputs
Allowed Inputs & Values (Custom Values selected as Input Type)
If your end goal is to create a set of documents that use the same template, but are unique by fund and culture, you will need to use Allowed Inputs to define the properties required to produce this set.
Click + to the right of the Allowed Inputs heading.
This will add three form fields per ALLOWED INPUT: Code, Label and Values.
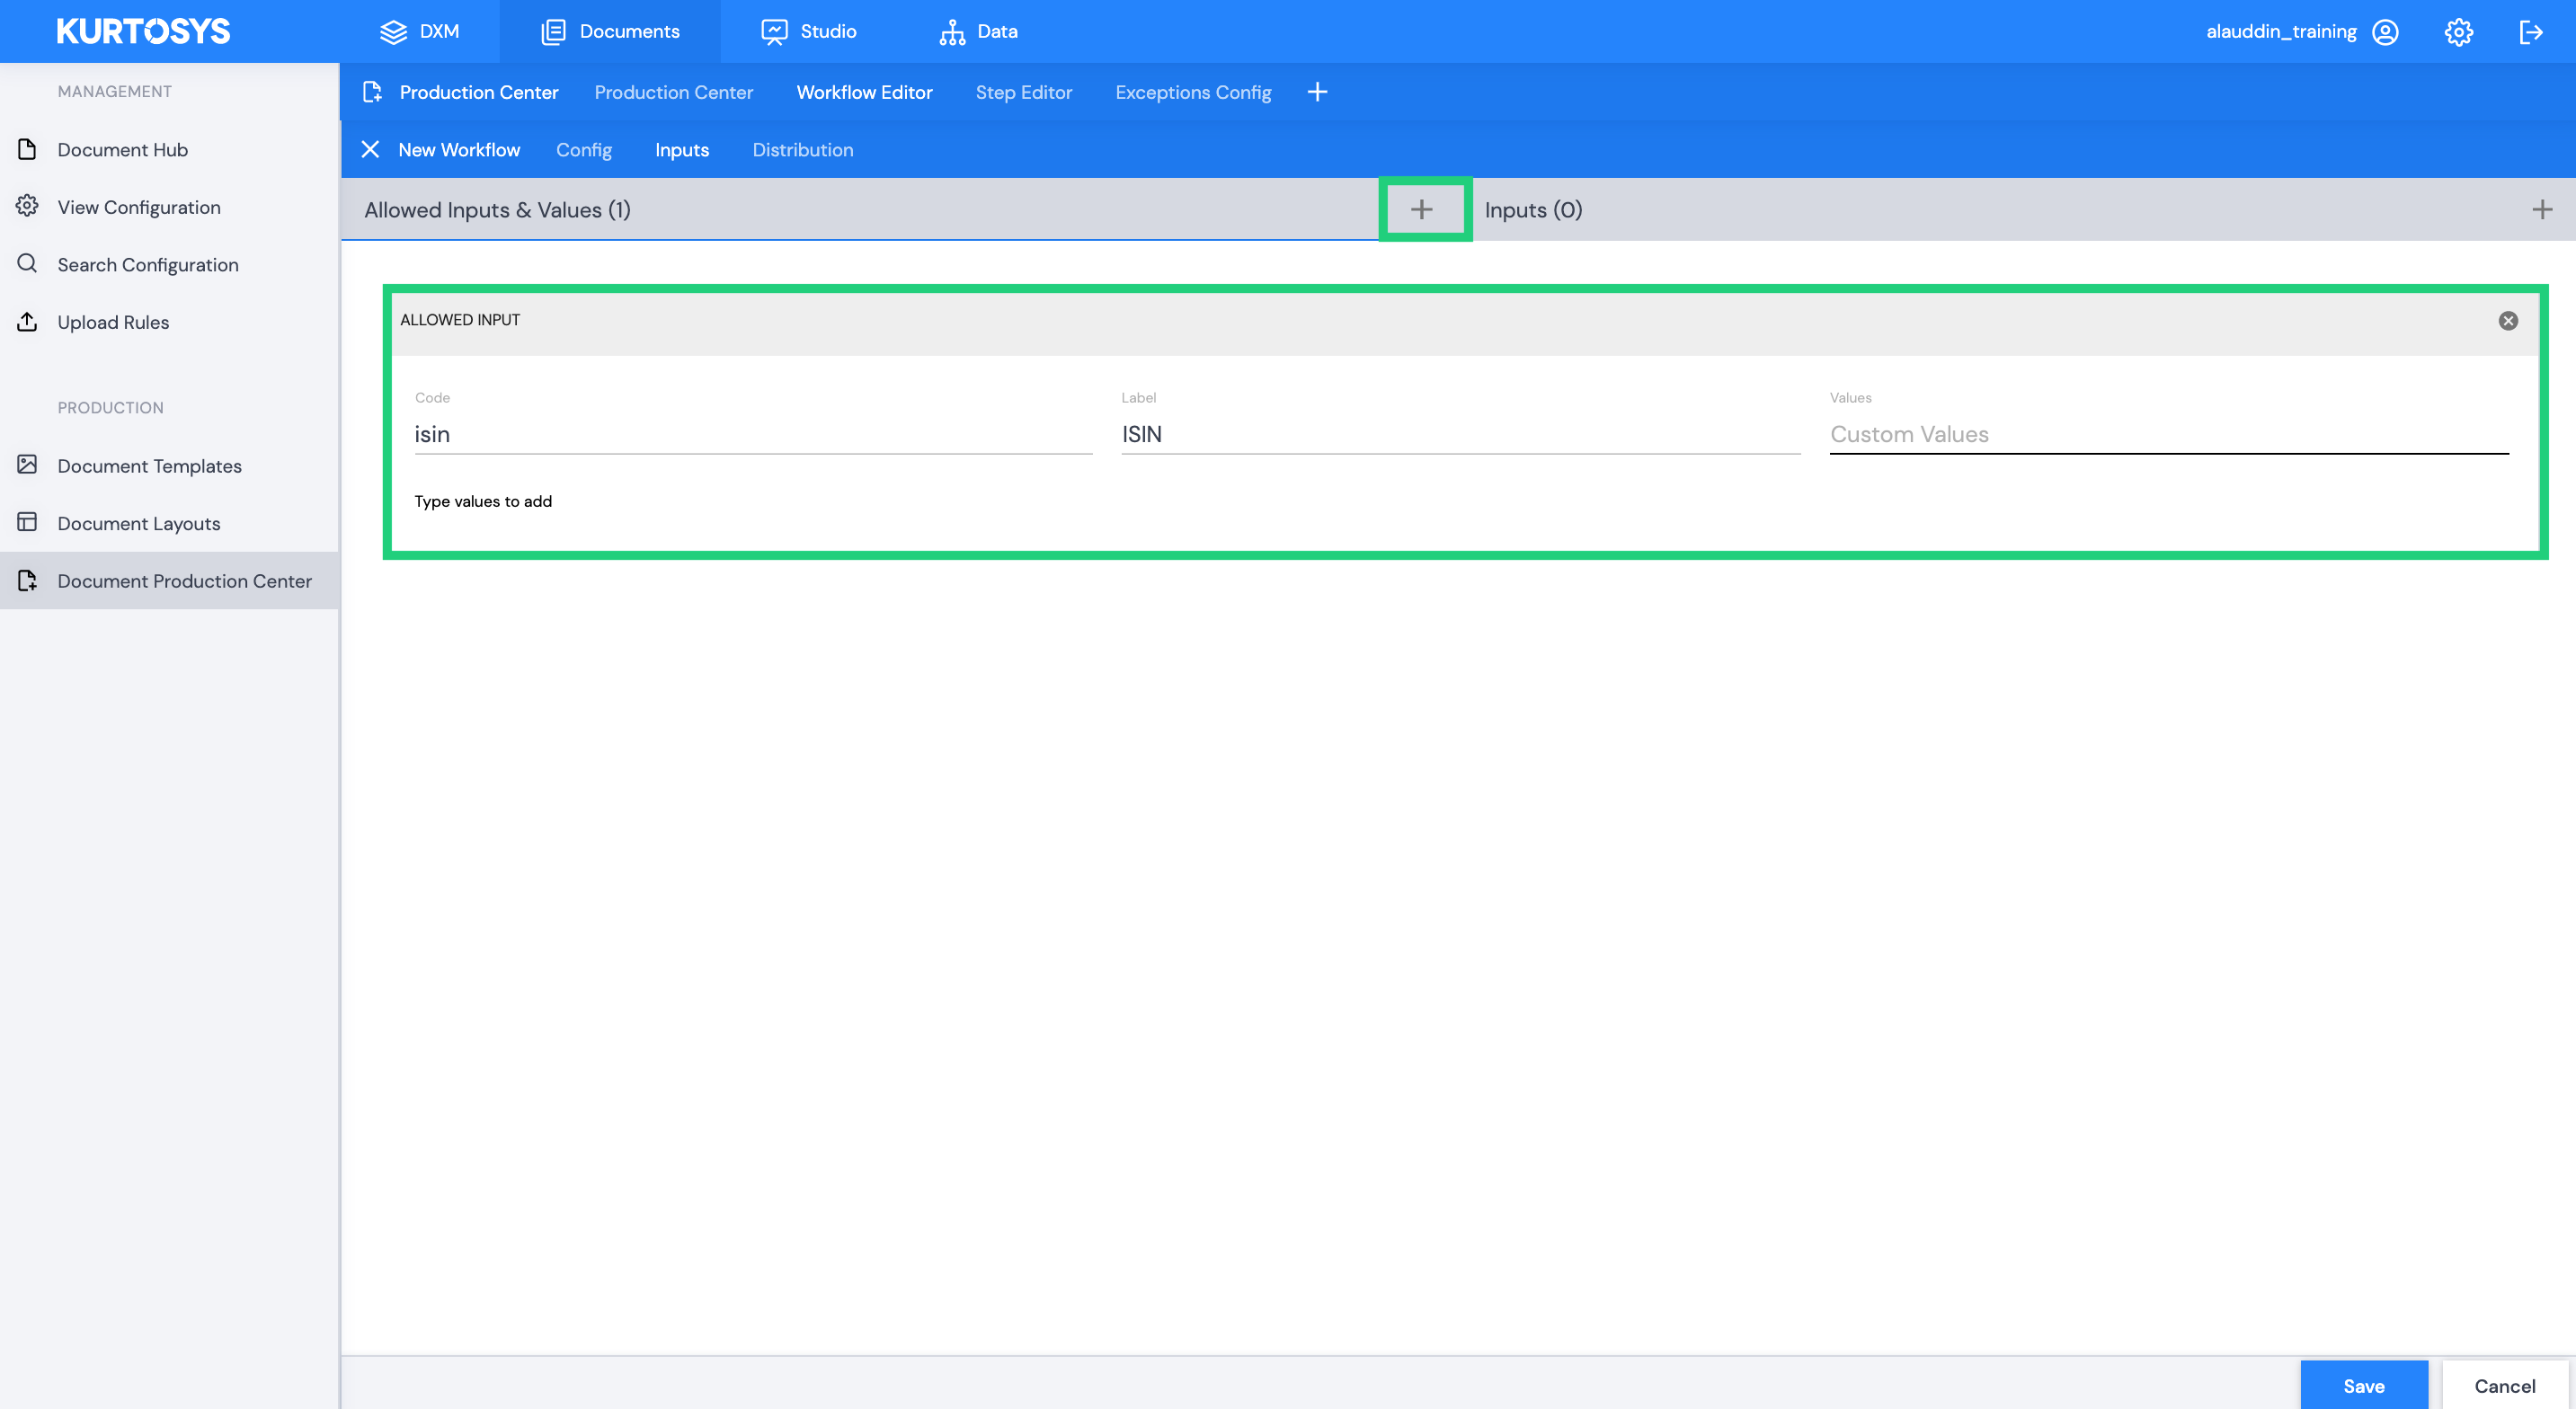
Code – Only properties that have been defined in the Data Dictionary can be used as Allowed Inputs. In this field you will need to use the unique code defined in the Data Dictionary for the property you wish to add. For example, if you want the ISIN of a share class as an Allowed Input, you will need to match the unique code given for ISIN under Properties in the Data Dictionary, which is isin.
Note: Code is always written in lower, snake case.
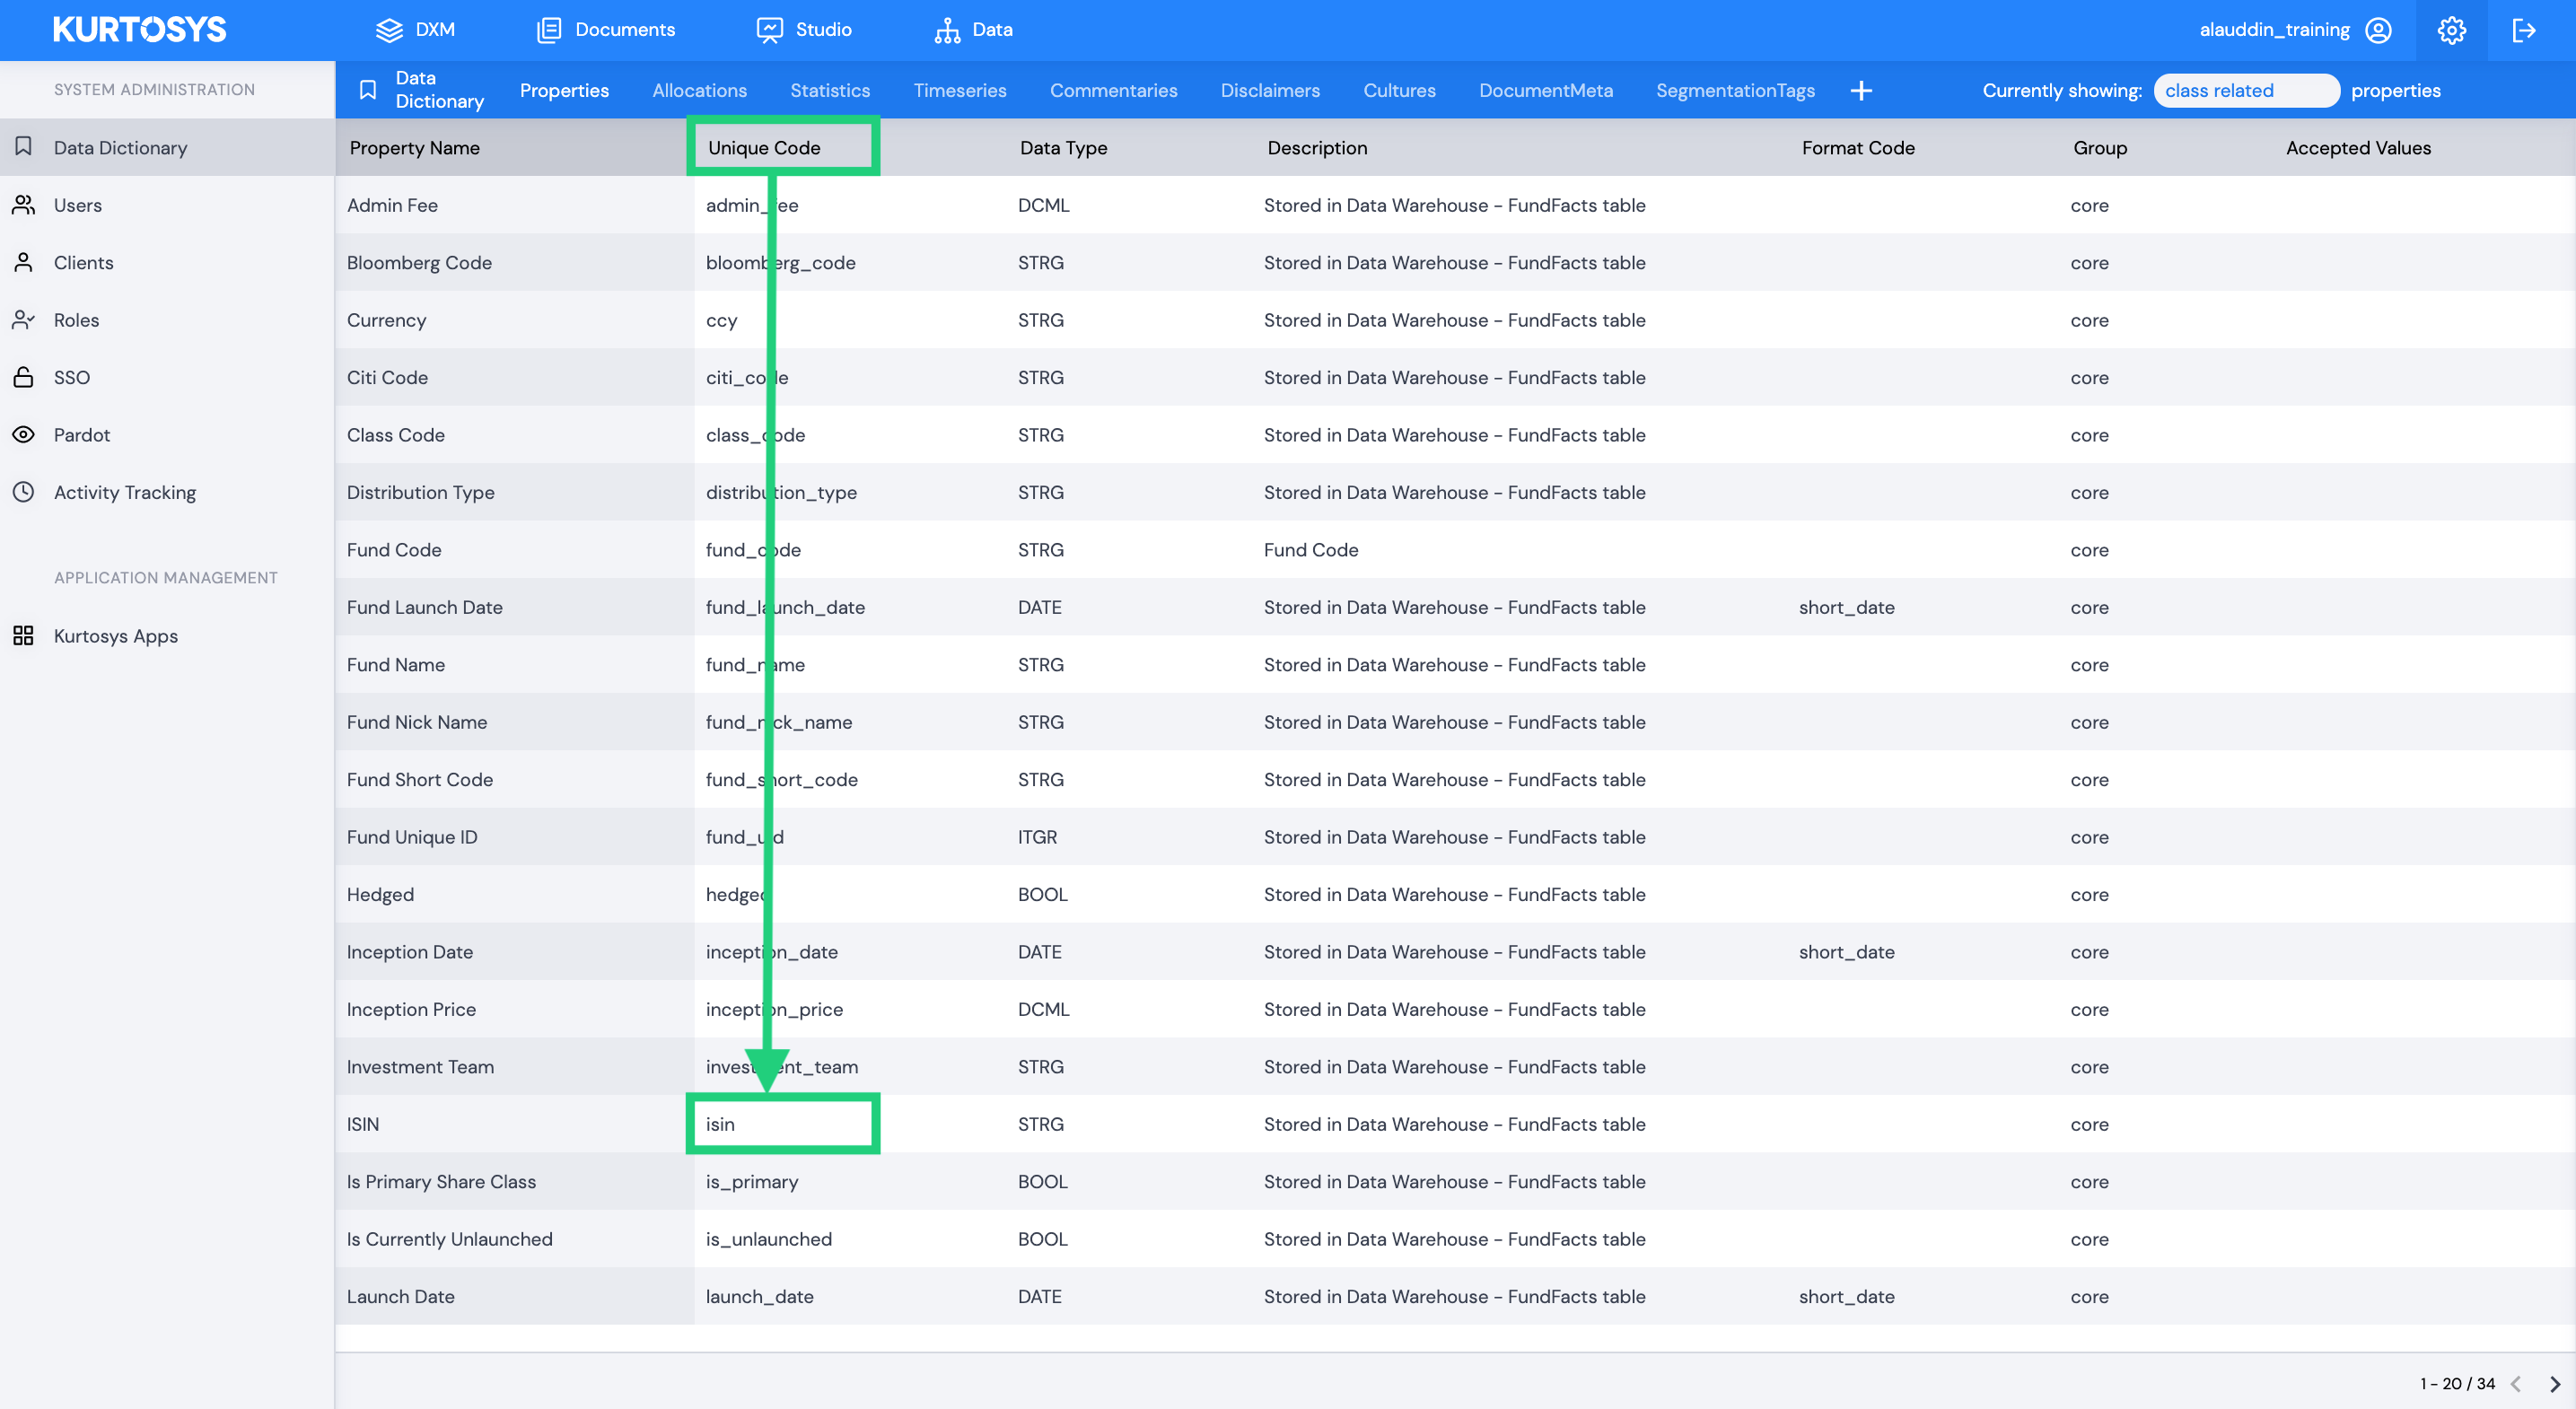
Label – Only properties that have been defined in the Data Dictionary can be used as Allowed Inputs. In this field you will need to use the Property Name defined in the Data Dictionary for the property you wish to add. For example, if you want the ISIN of a share class as an Allowed Input, you will need to match the Property Name for ISIN under Properties in the Data Dictionary. In this case the label for ISIN is ISIN.

Values – Manually type in all the allowed values for the specific input.
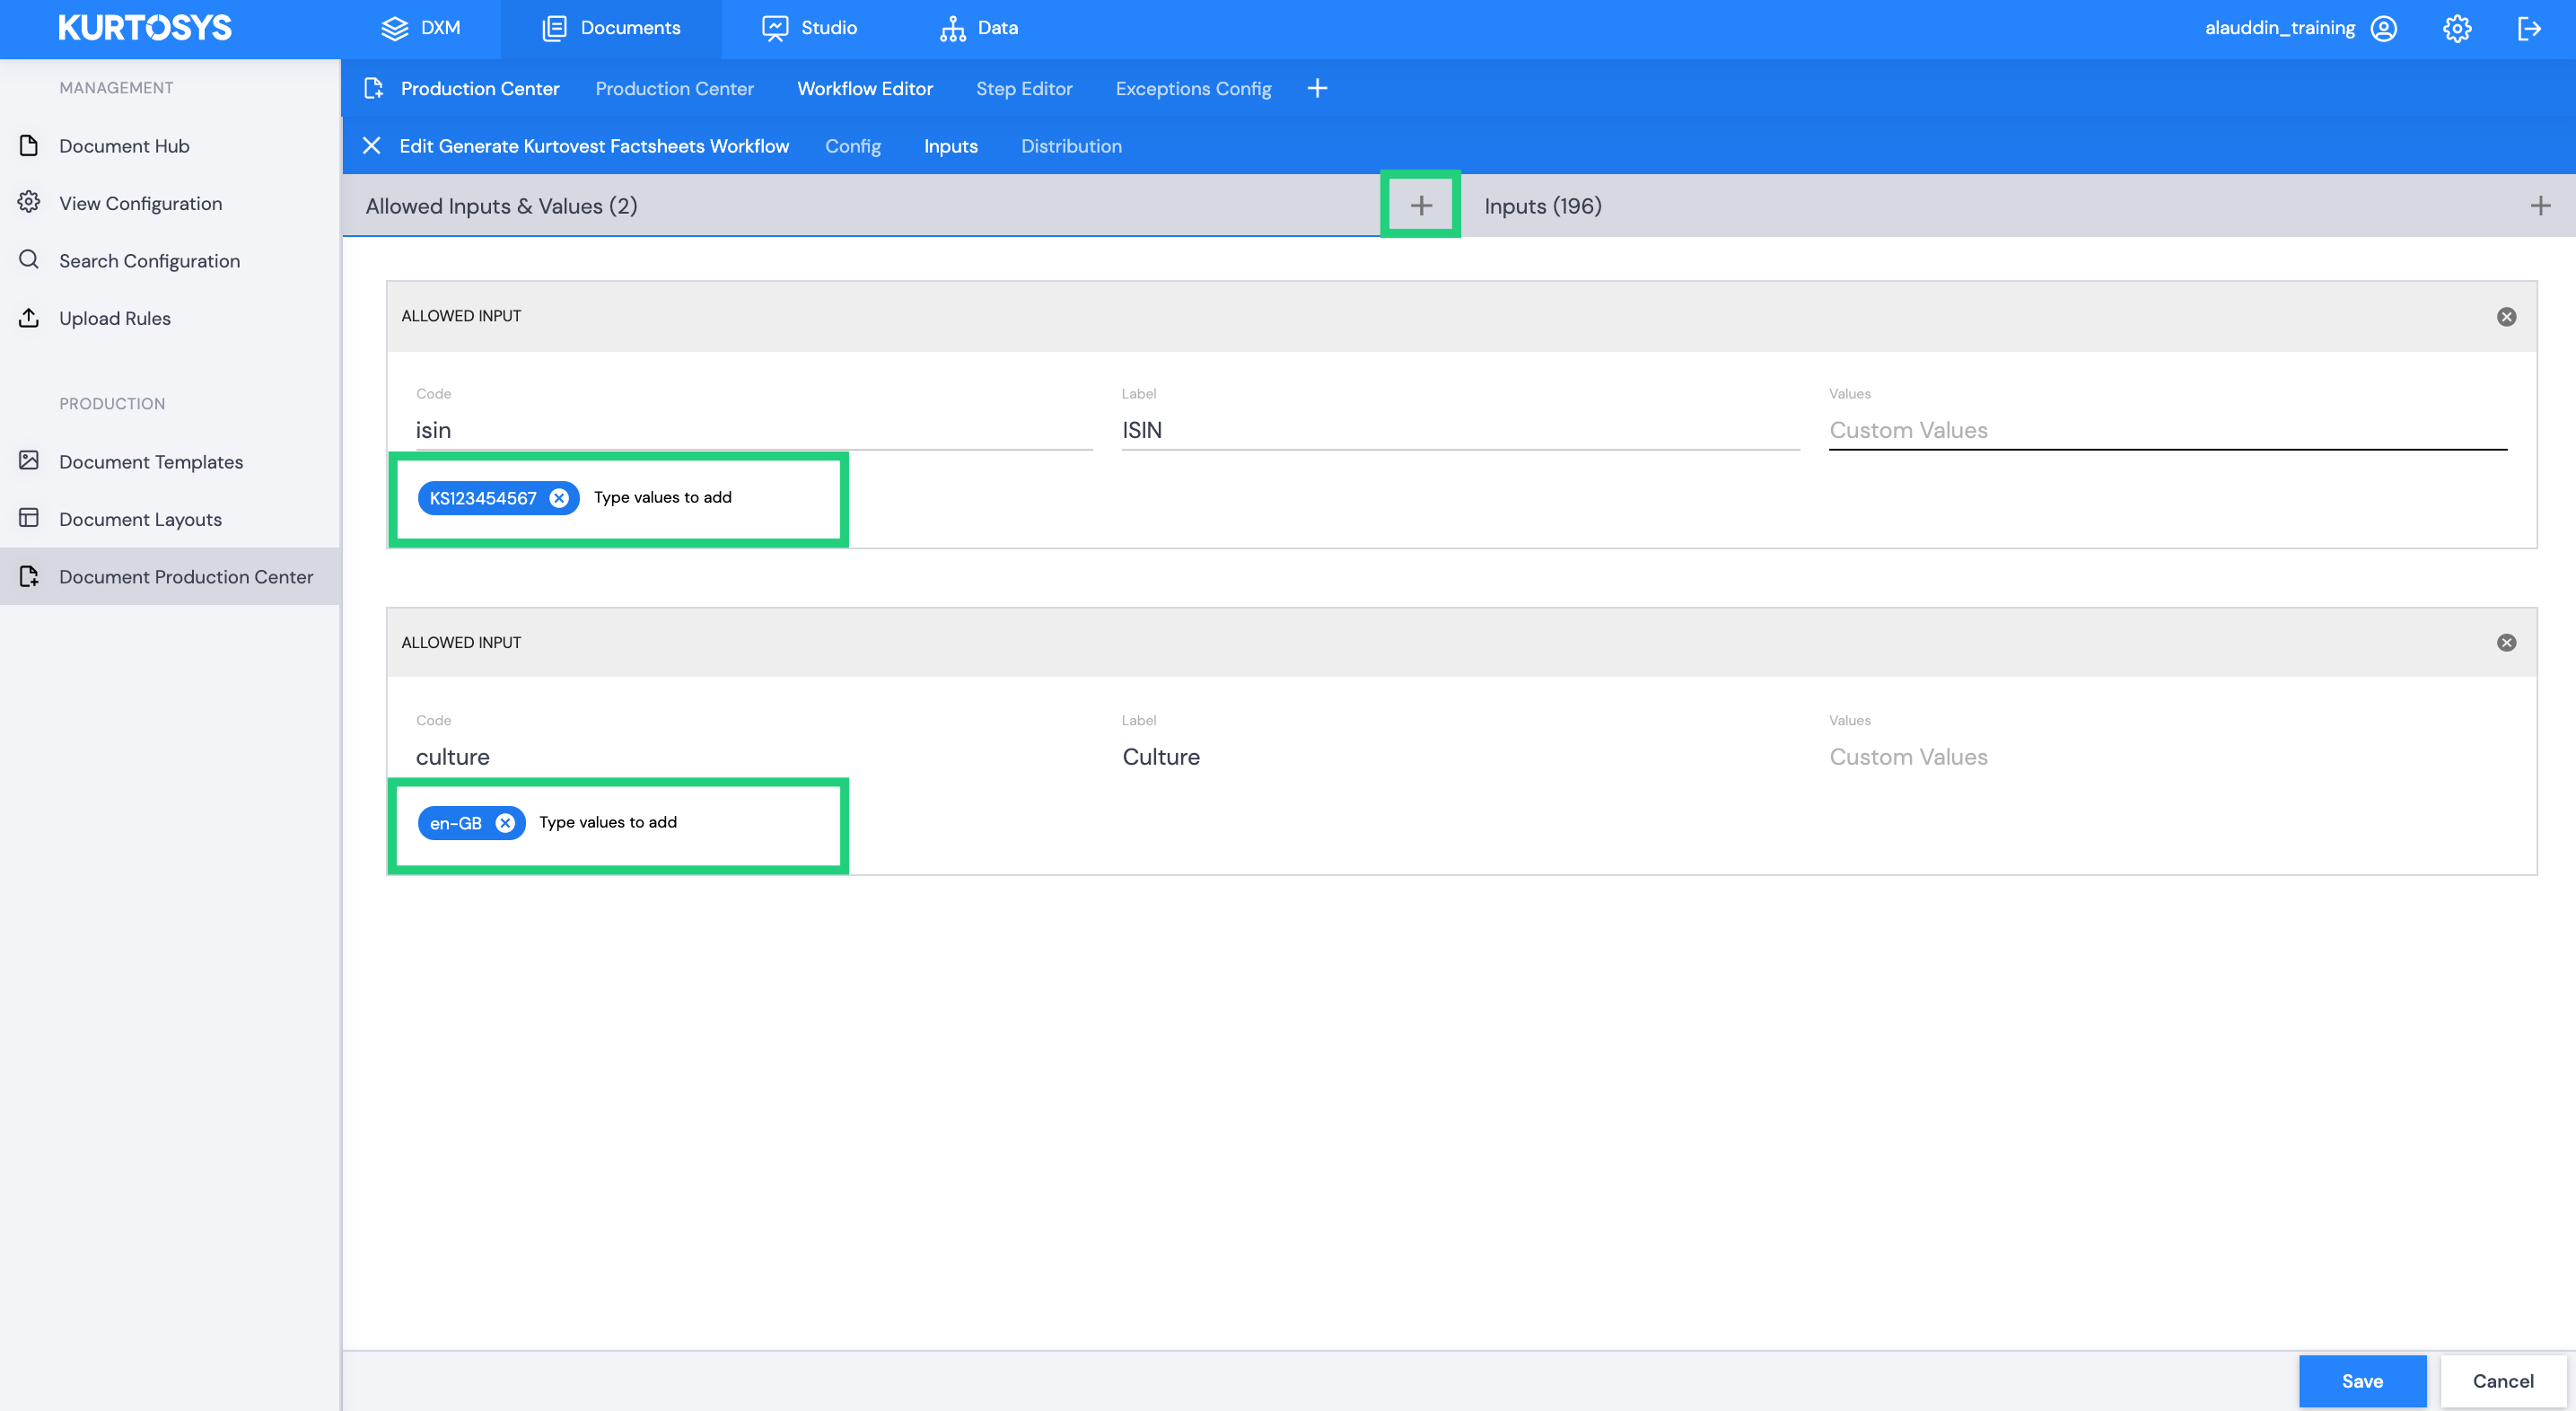
Click + to add more Allowed Inputs.
Inputs (Segmentation selected as Input Type)
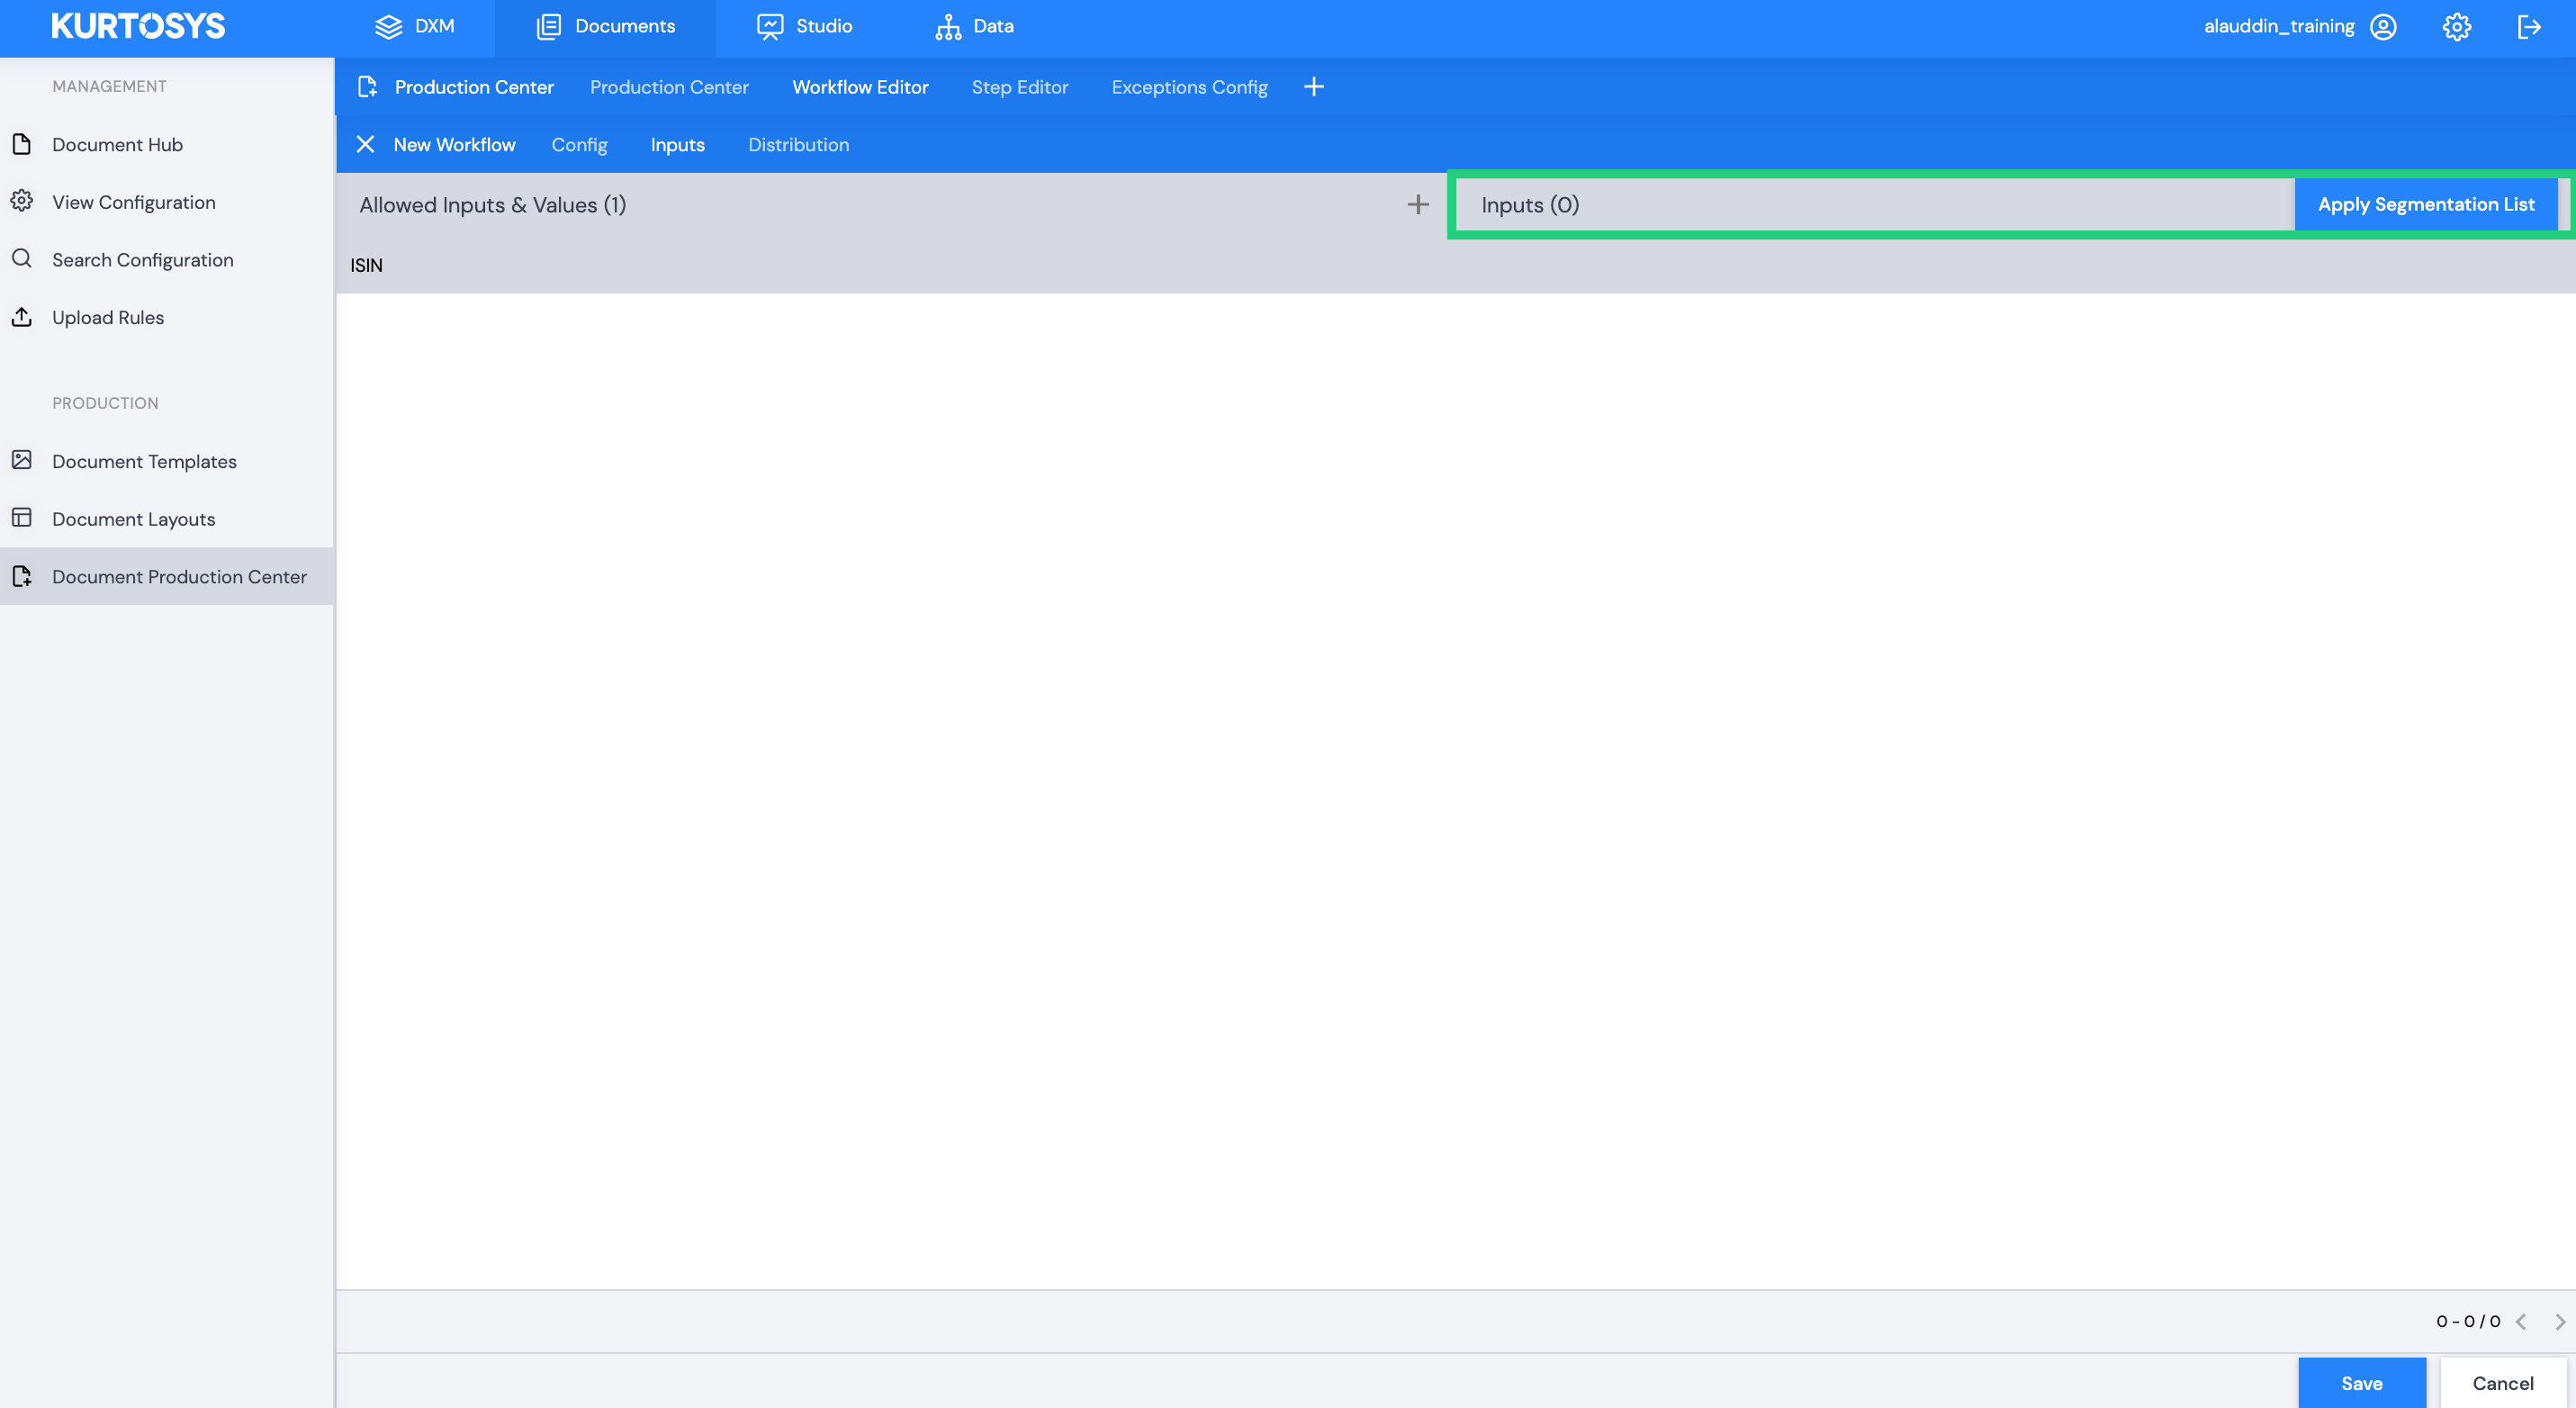
To add a new Input, click + to the right of the Inputs tab.
This will create a new editable row in the table.
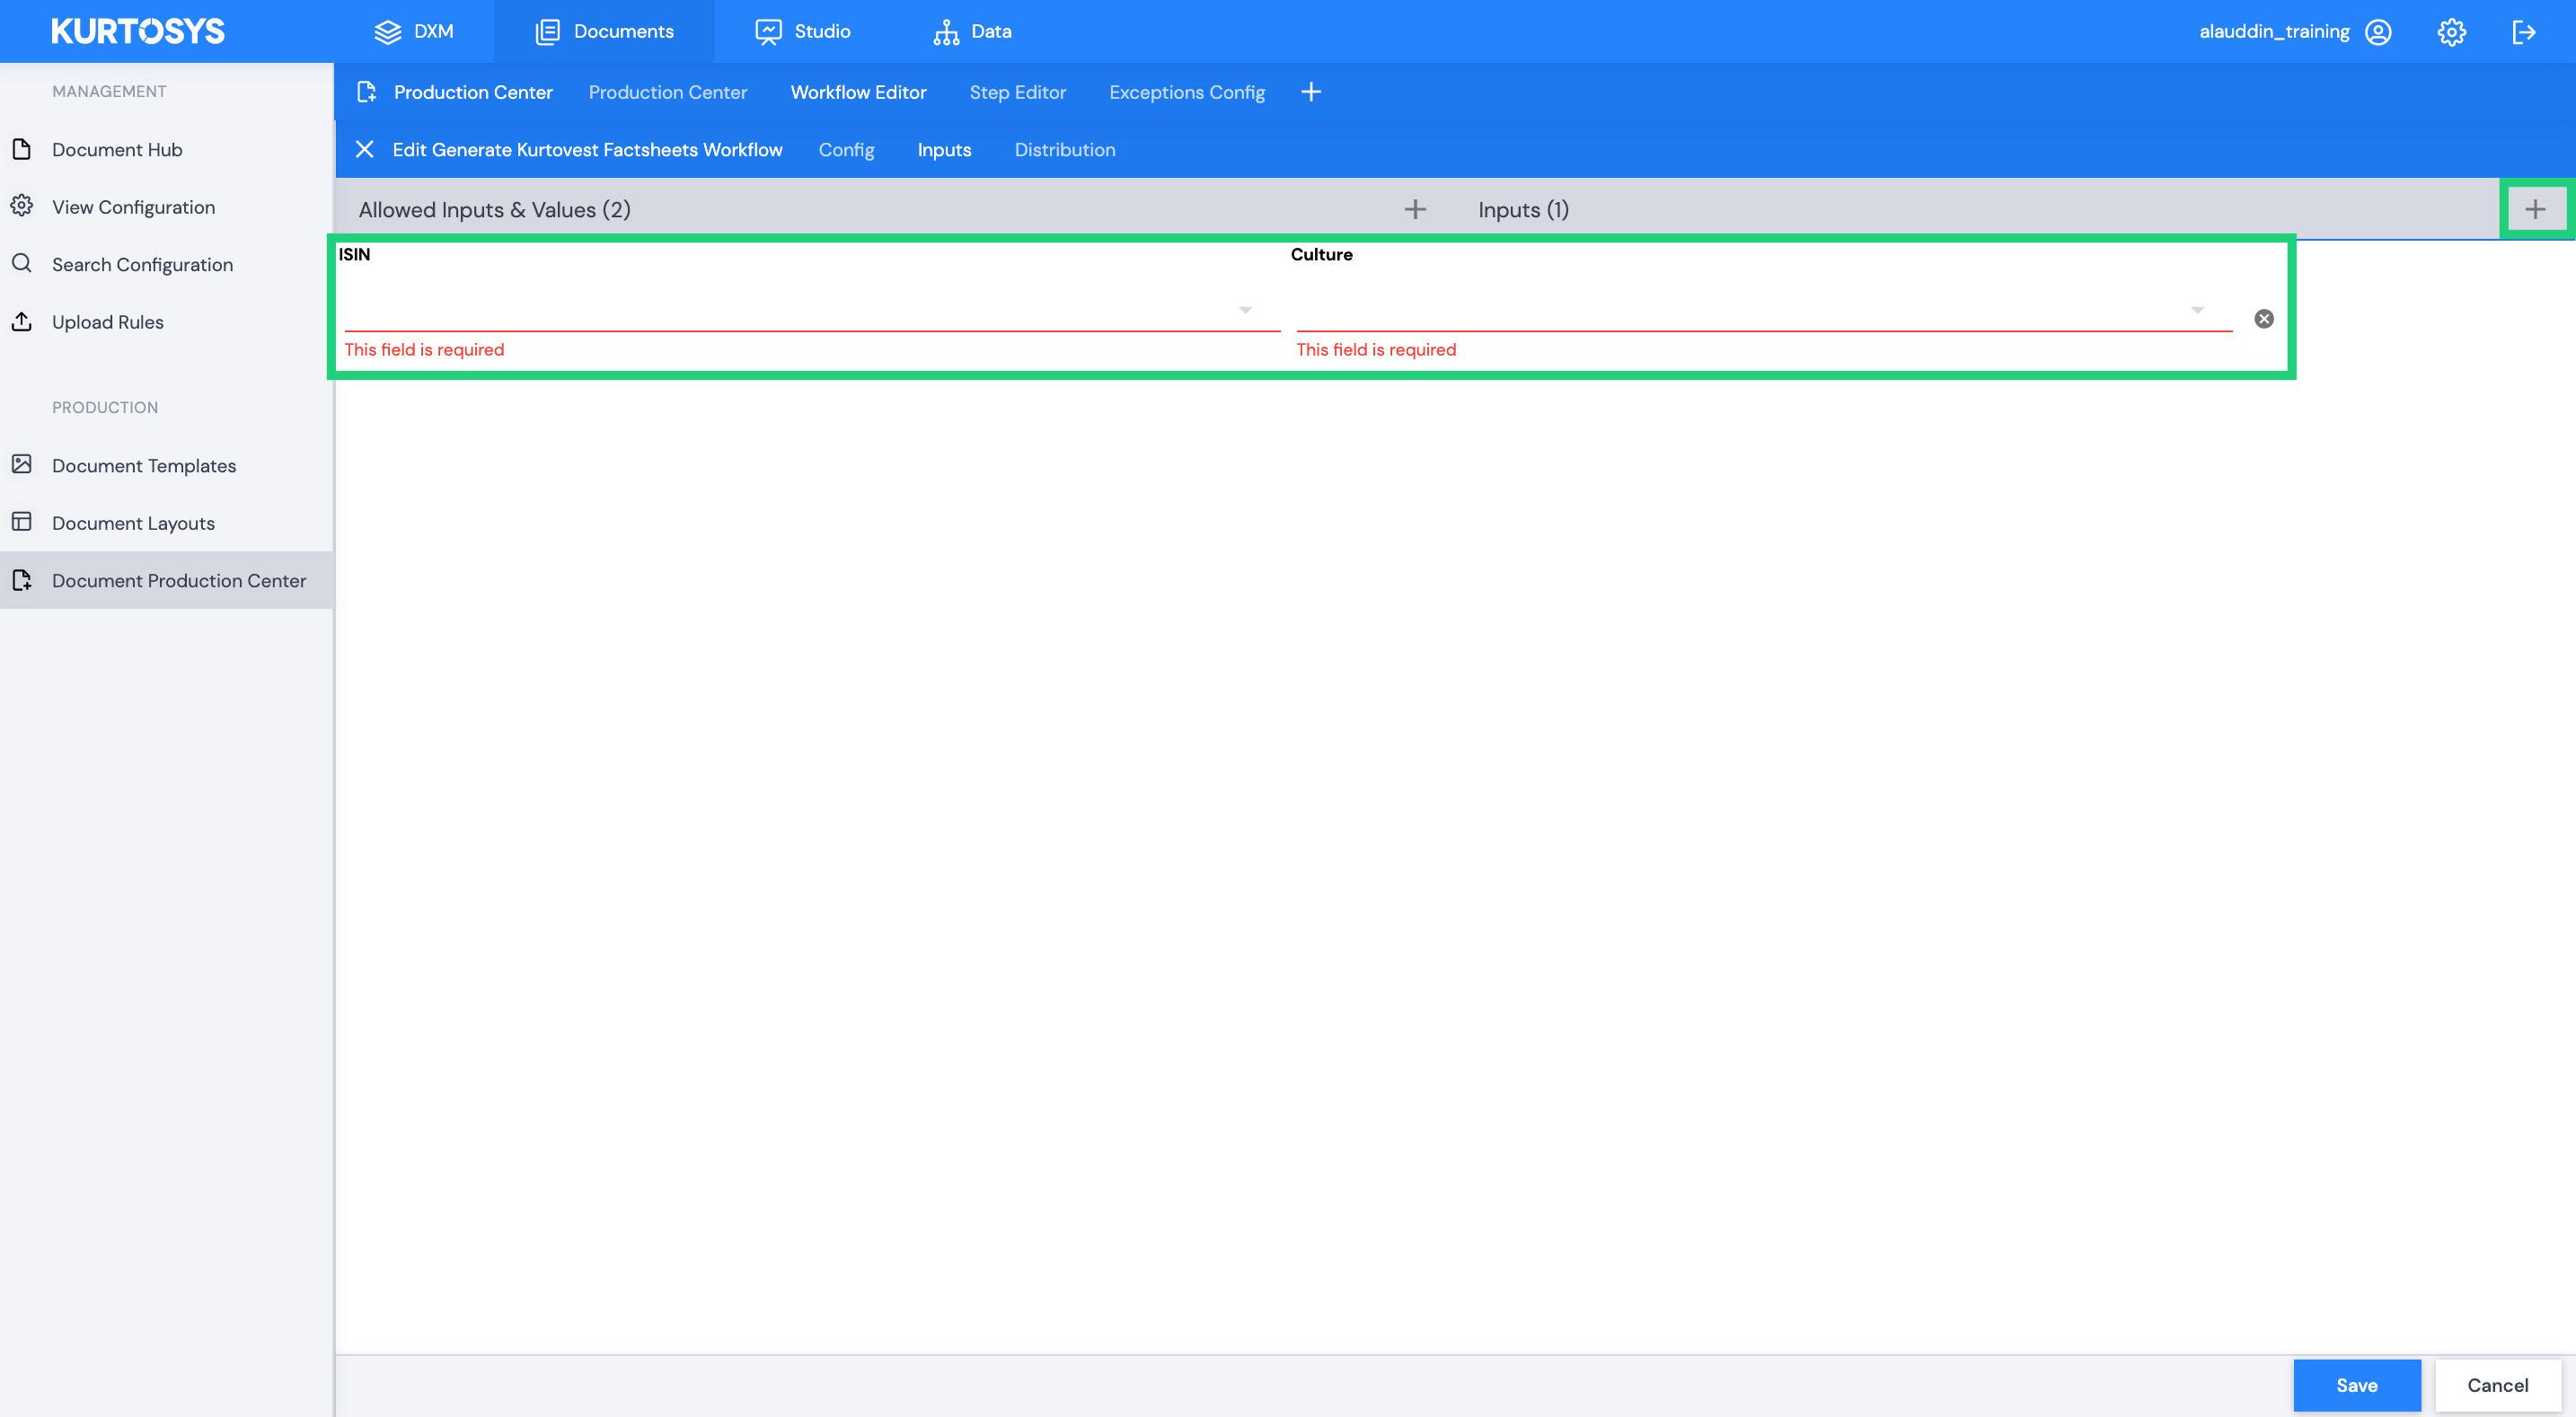
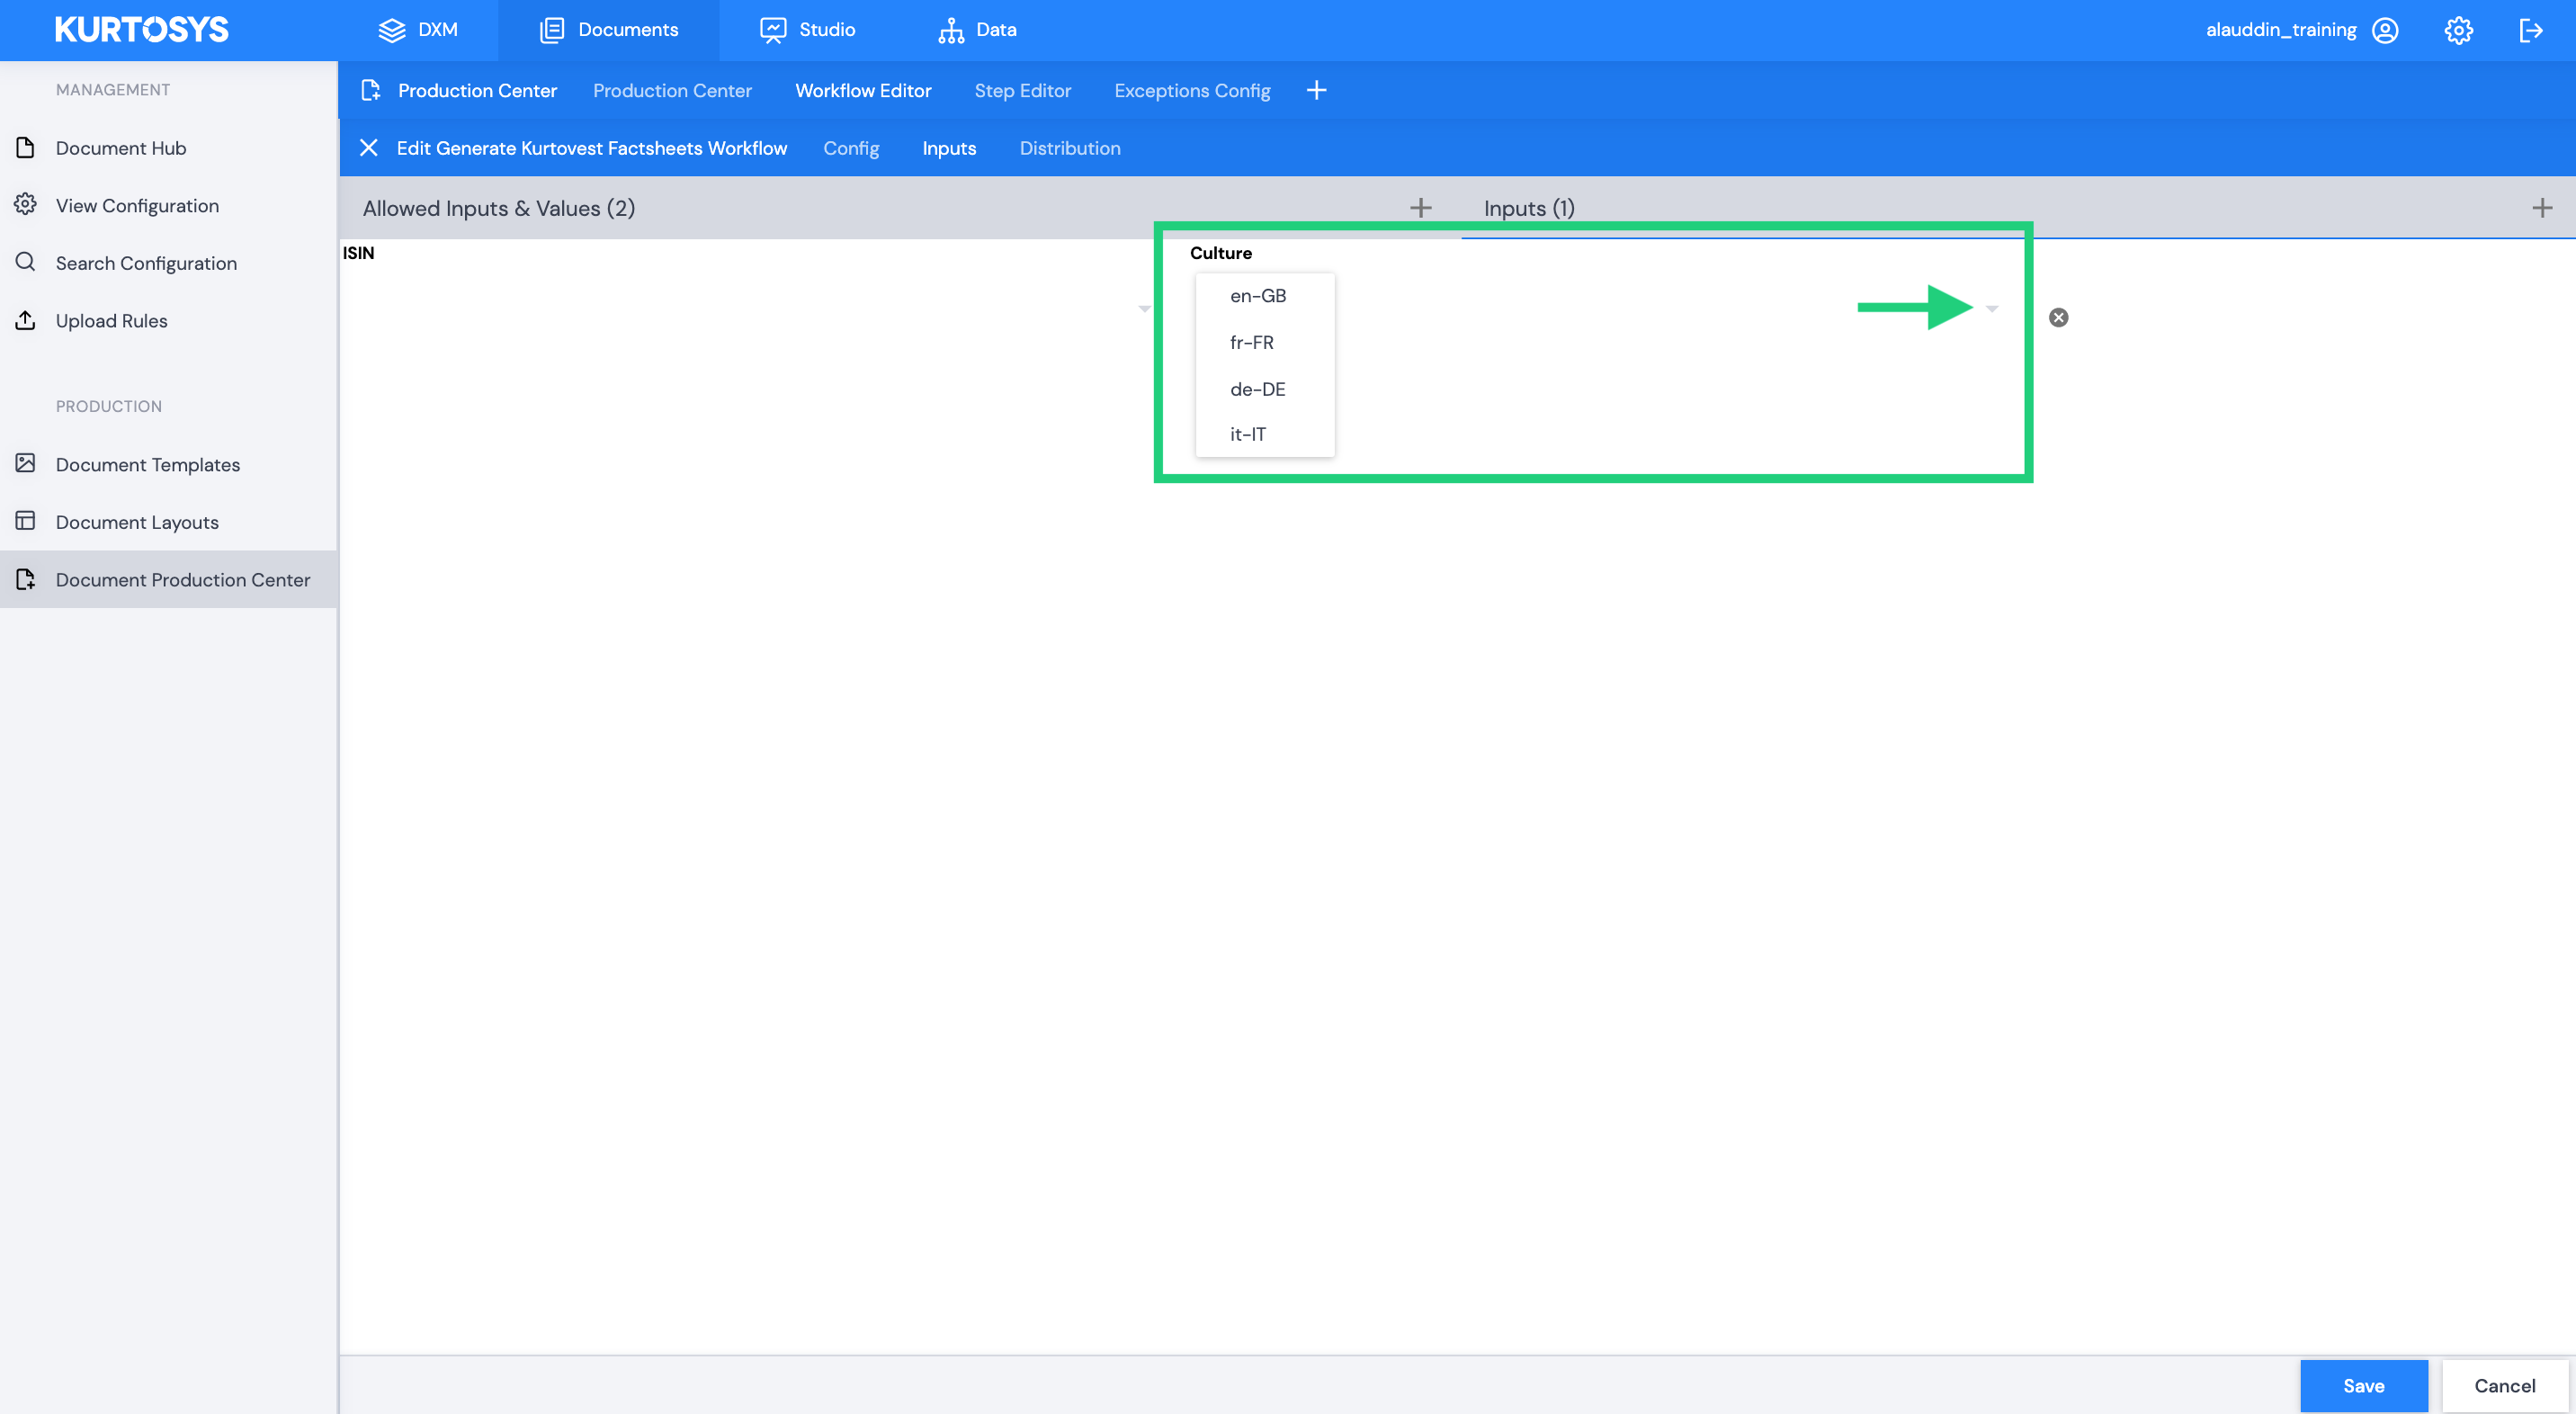
Select the values to be included in this workflow using the dropdown arrow next to the ISIN and Culture fields.
This will provide you with a list of predefined values to choose from.
If you have different versions of a single fund or share class e.g. different languages, you will need to ensure that there is a new input for each version. In other words, each line represents a unique document. If you will be producing factsheets for 100 share classes that each need 3 different language versions, you will need to have 300 input lines.
Click Save and your new Workflow will now be listed on Workflow Editor menu and will be made available on the Production Centre as a new workflow ready to be Run.
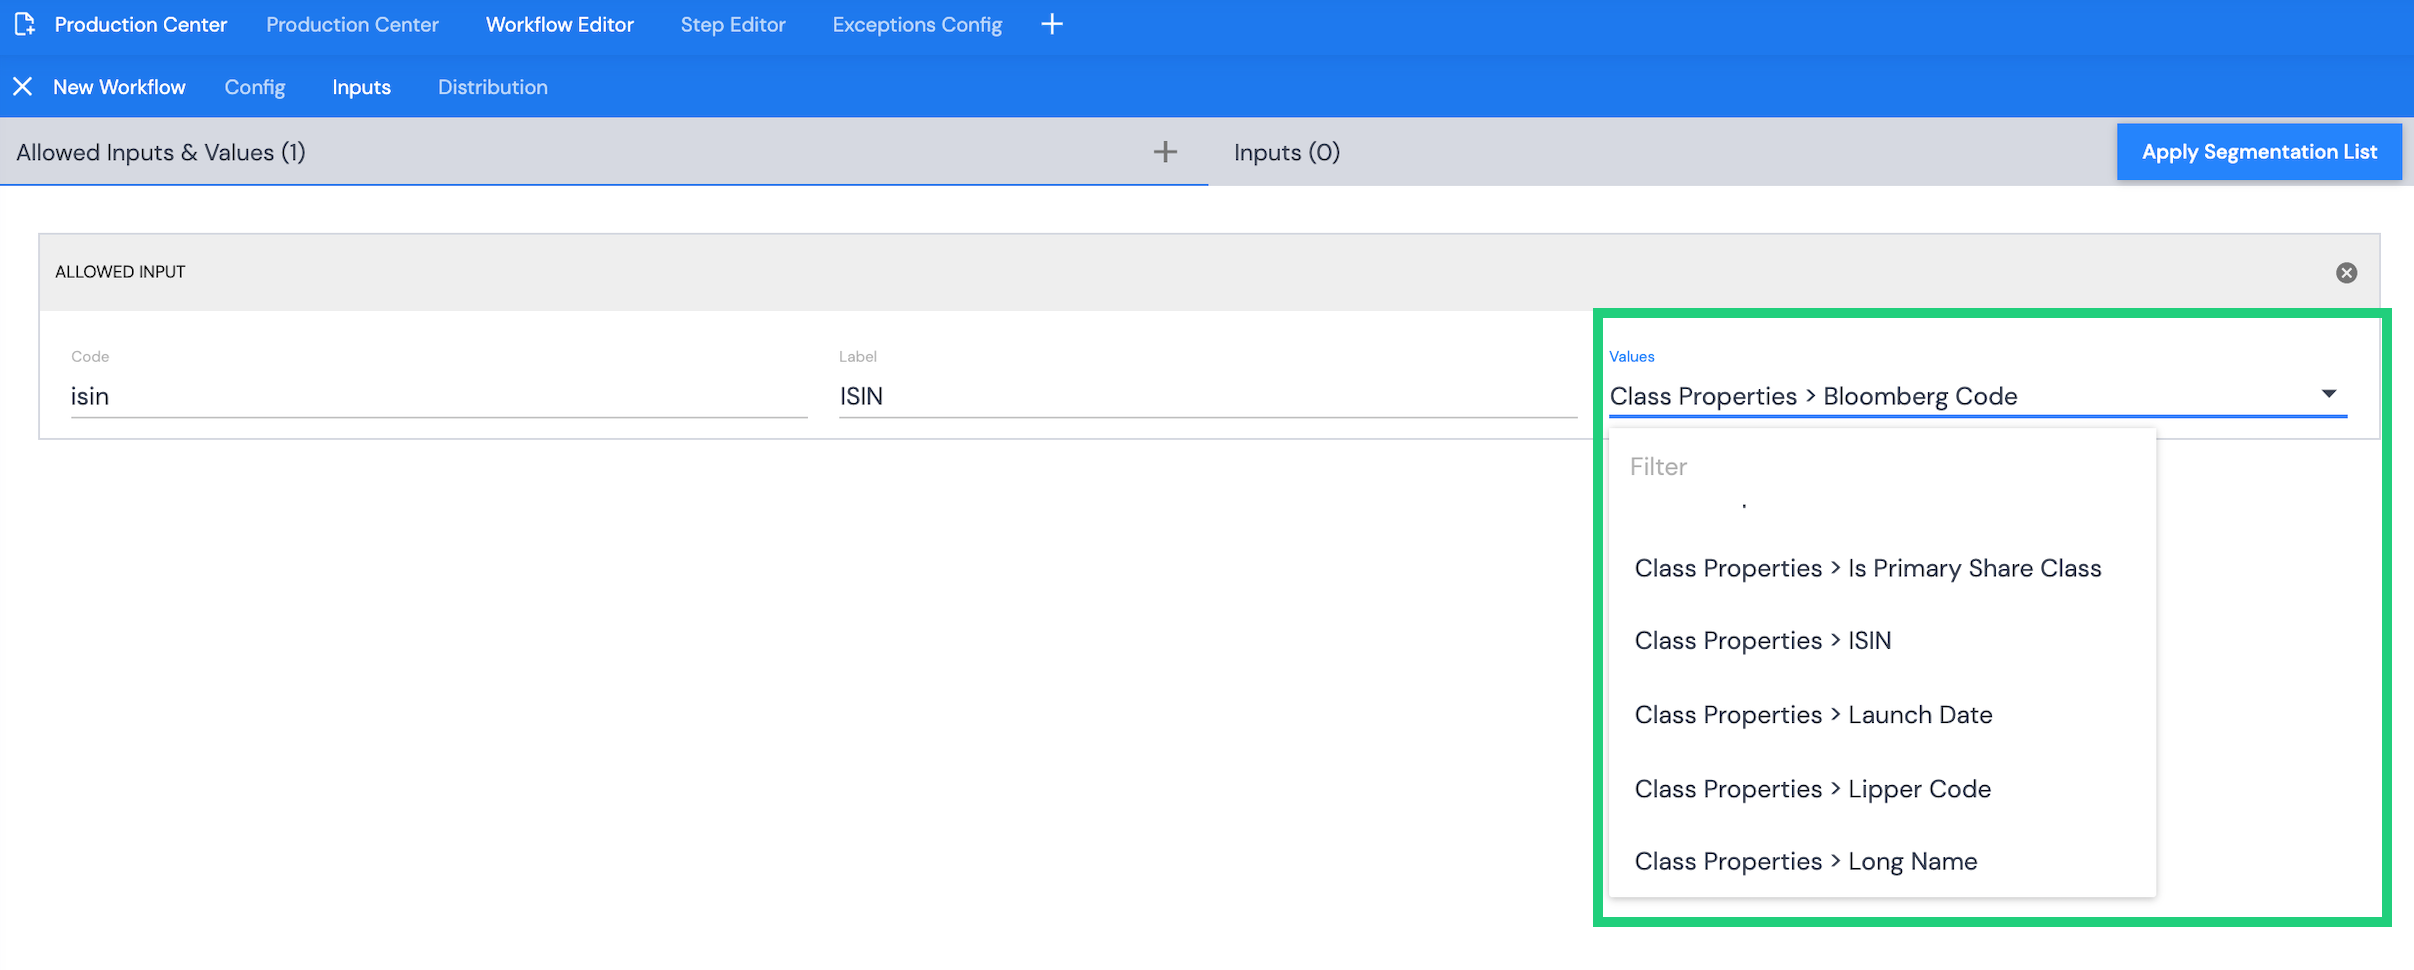
Allowed Inputs & Values (Segmentation Lists)
Code – Only properties that have been defined in the Data Dictionary can be used as Allowed Inputs. In this field you will need to use the unique code defined in the Data Dictionary for the property you wish to add. For example, if you want the ISIN of a share class as an Allowed Input, you will need to match the unique code given for ISIN under Properties in the Data Dictionary, which is isin.
Note: Code is always written in lower, snake case.
Label – Only properties that have been defined in the Data Dictionary can be used as Allowed Inputs. In this field you will need to use the Property Name defined in the Data Dictionary for the property you wish to add. For example, if you want the ISIN of a share class as an Allowed Input, you will need to match the Property Name for ISIN under Properties in the Data Dictionary. In this case the label for ISIN is ISIN.
Values – choose the relevant class property that this input refers to from a predefined list.
Allowed Inputs will need to be defined under Config before you are able to use the Input tool.
Once defined, the Allowed Inputs provided will generate a table under Inputs with the Allowed Input label as a heading to the table columns.

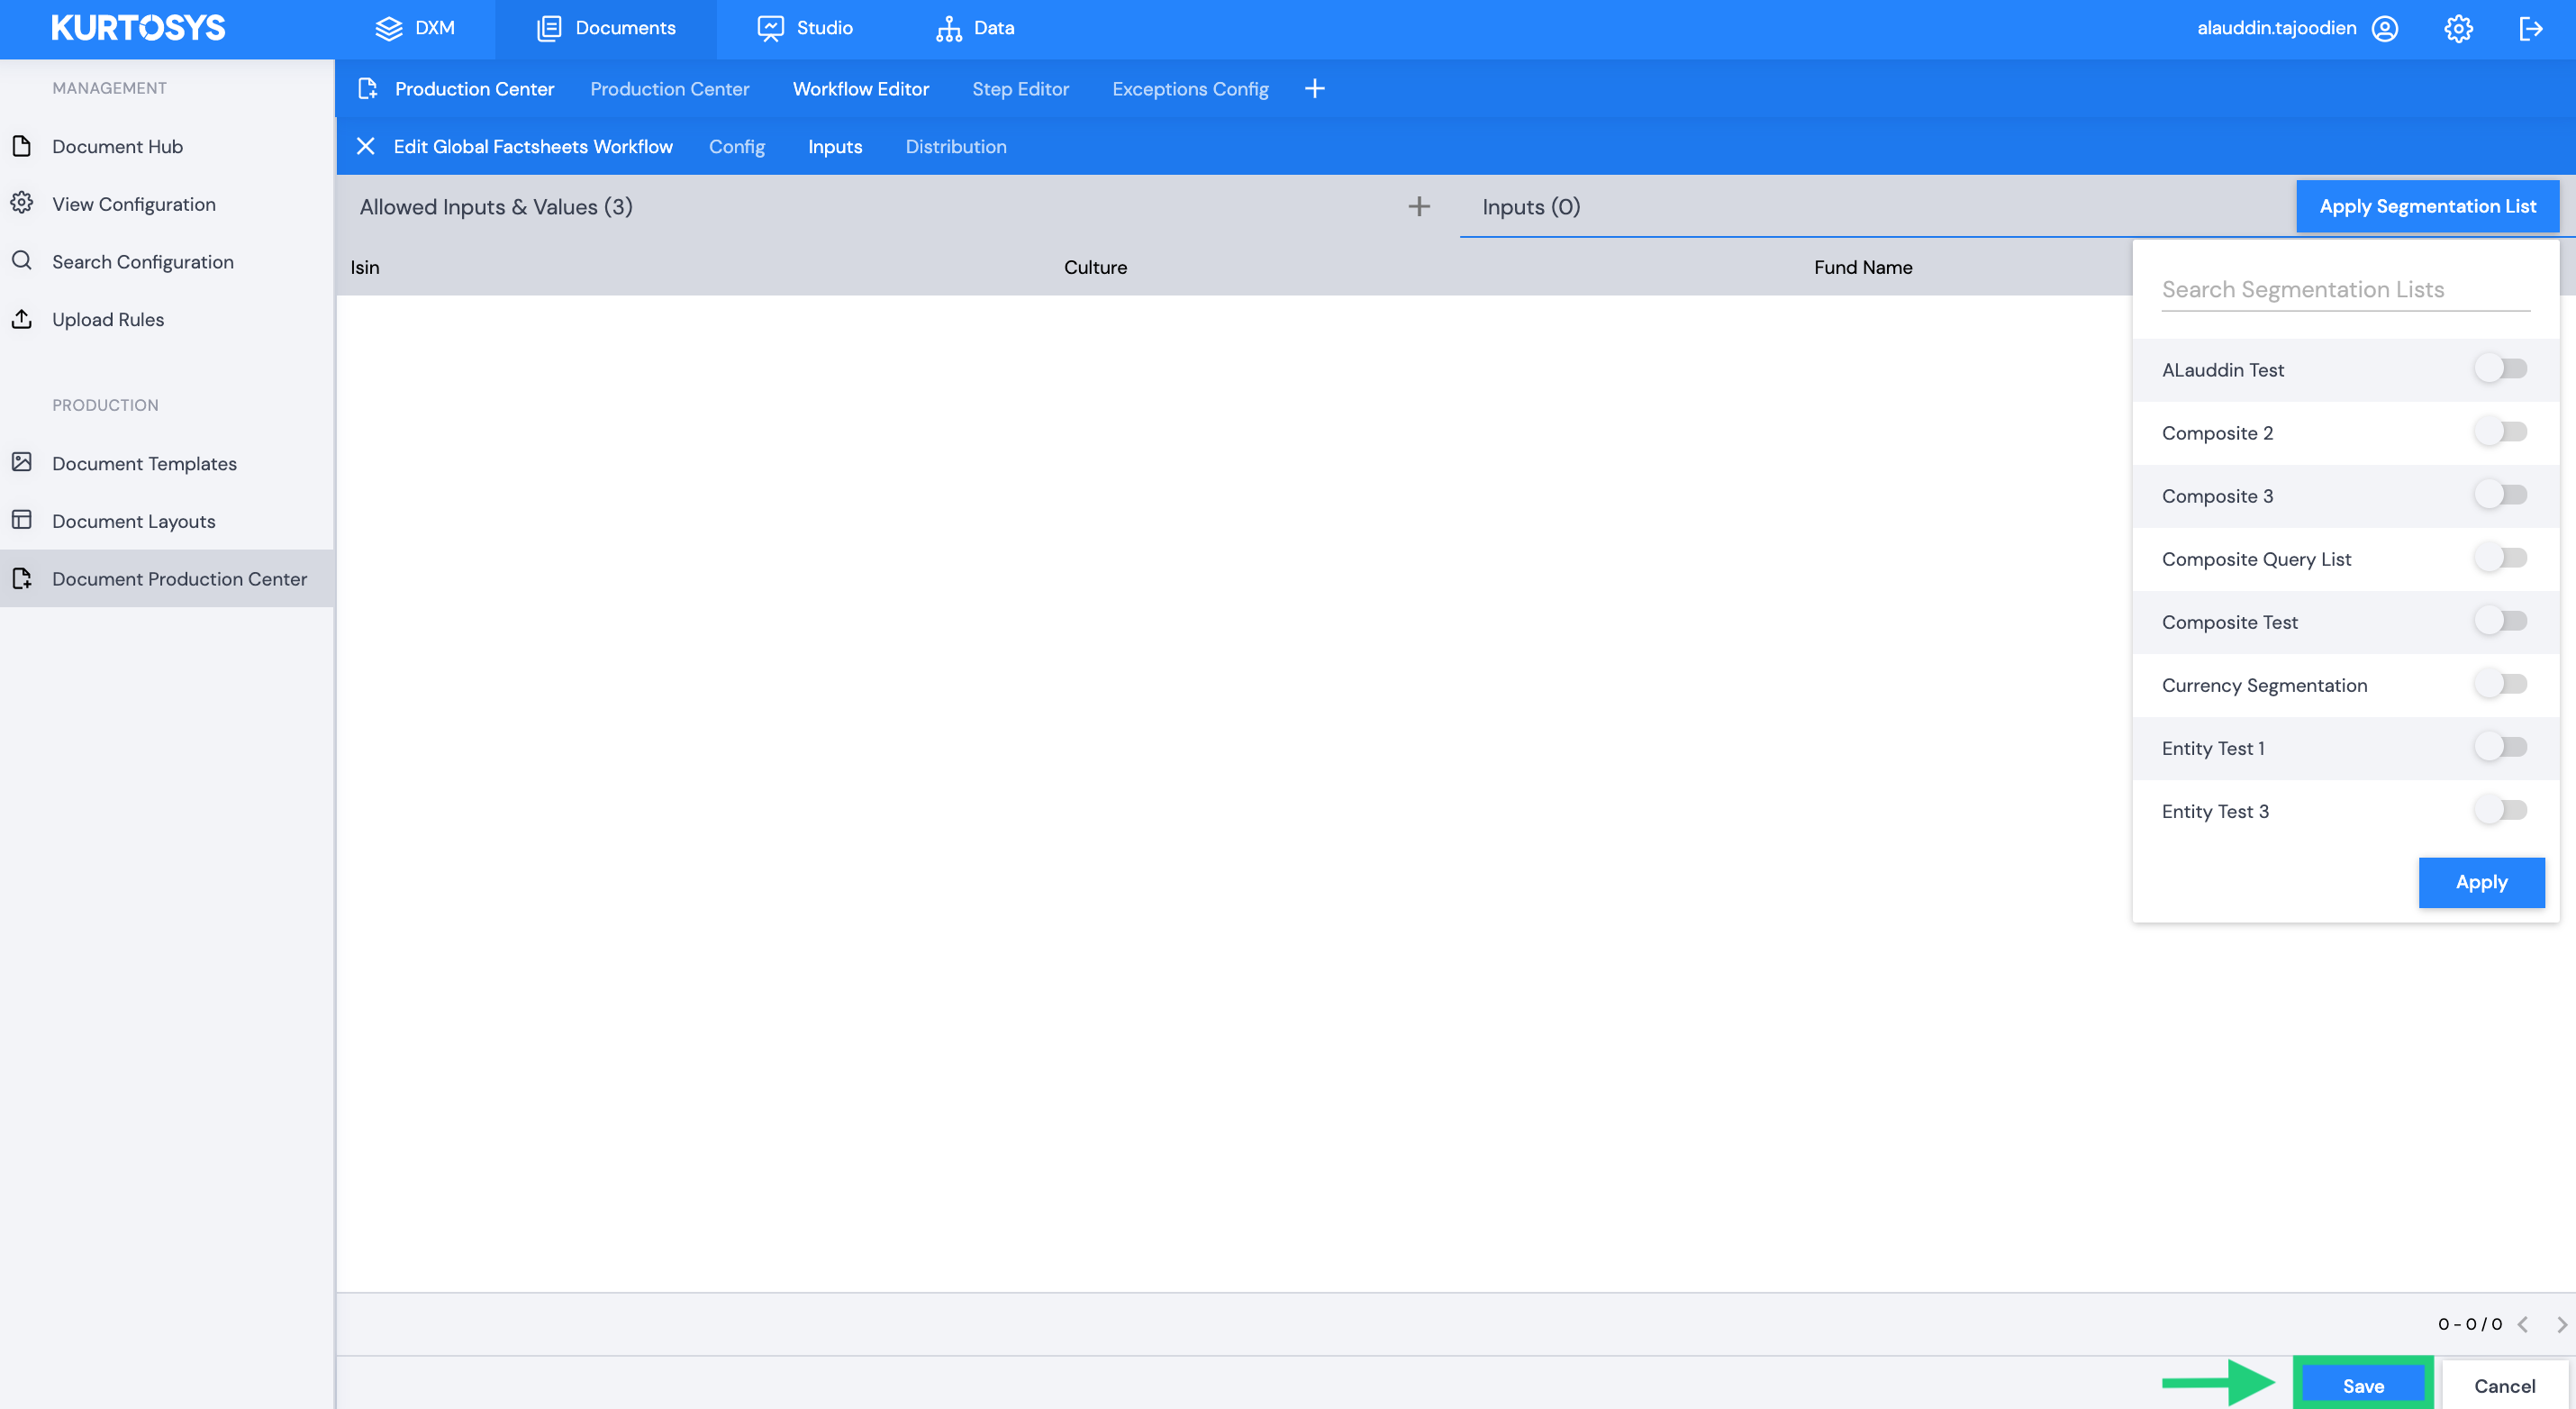
To choose the Segmentation List you would like to apply to your workflow, click Apply Segmentation List, and choose the relevant segmentation list by toggling the switches next to the available Segmentation Lists.
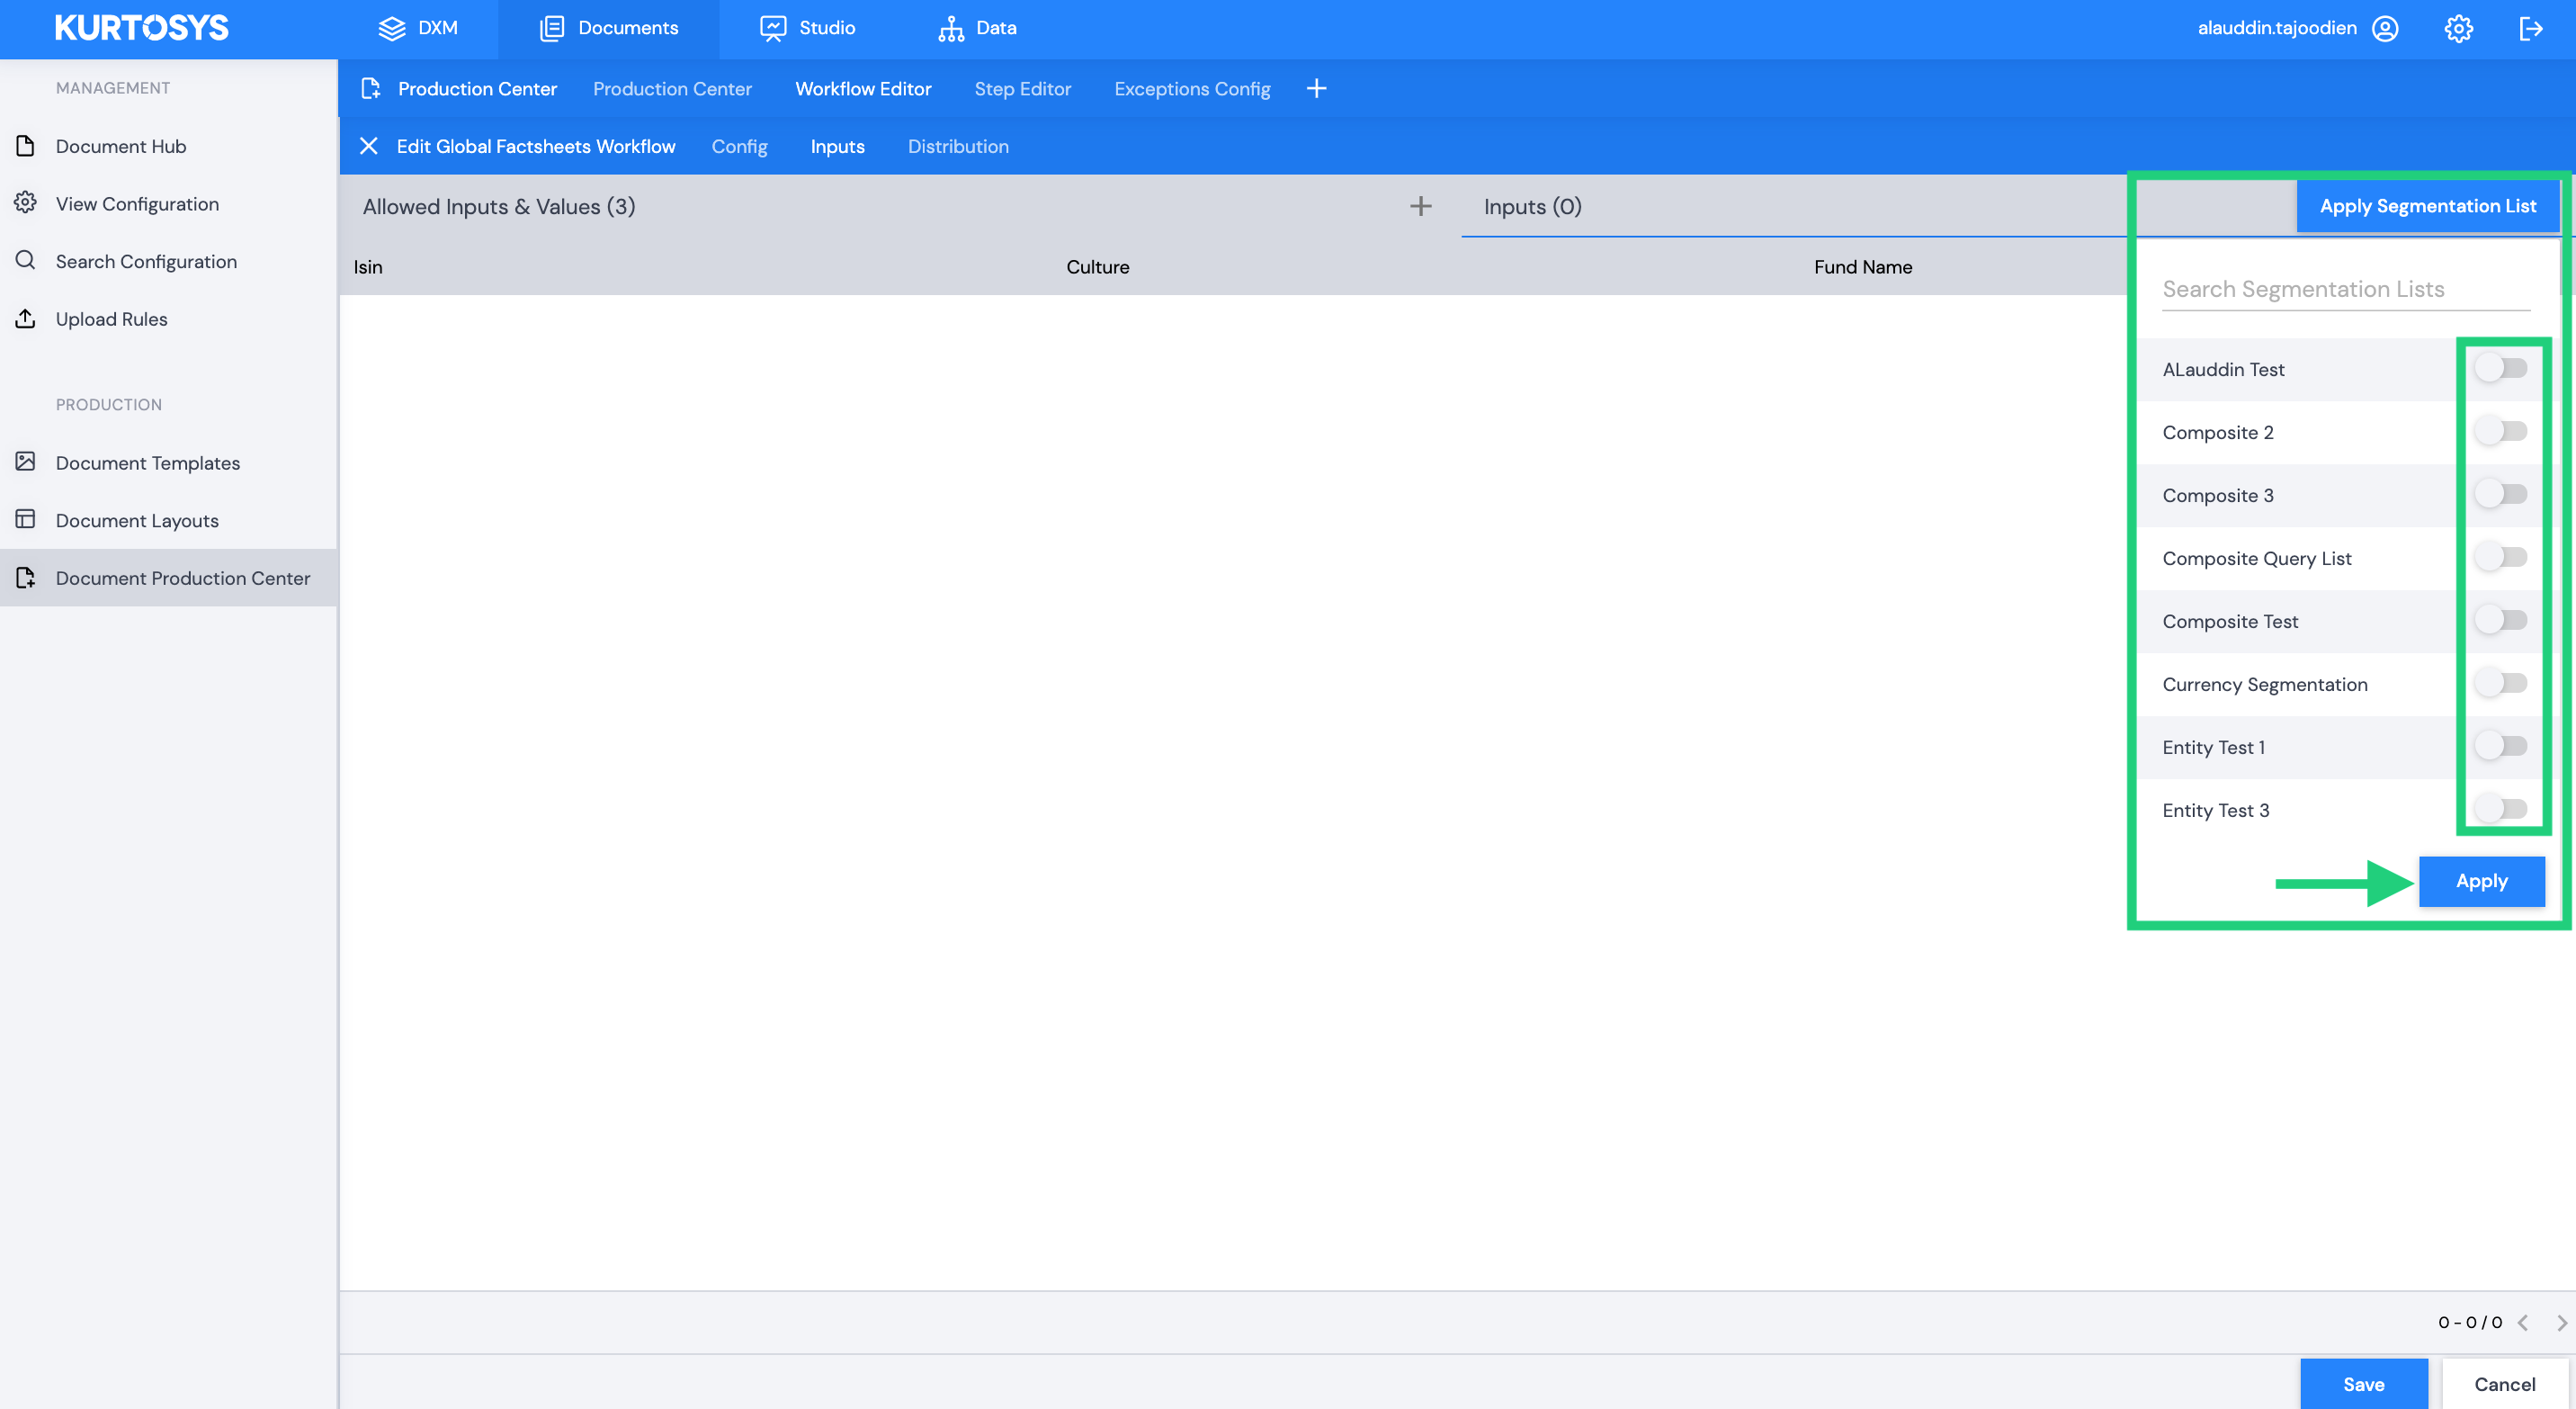
Click Apply to apply the selected Segmentation List to your workflow.
The Documents module will then automatically add all share classes included in that specific Segmentation List to your workflow.
Click Save.
The new Workflow will now be listed on Workflow Editor menu and will be made available on the Production Centre as a new workflow ready to be Run.
