Release Date: 12 November 2020
What’s New?
SYSTEM ADMINISTRATION
Update of Custom Document Entitlements UI
Document Entitlement Scheme UI update
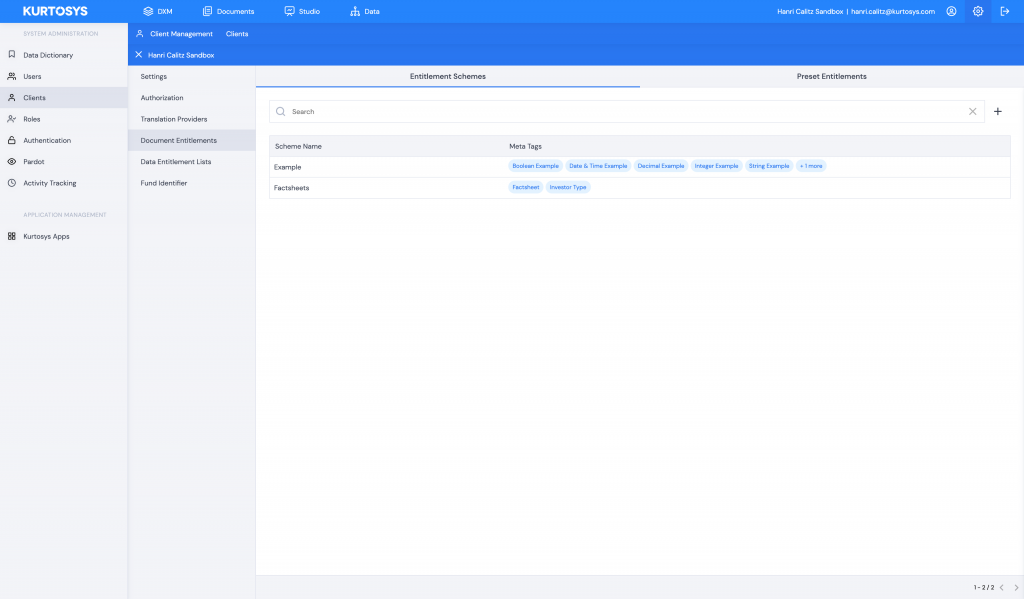
We have made slight updates to the Document Entitlements UI, changing the table and renaming the menu item from Document Entitlement Schemes to Document Entitlements.
There are also two options to choose from now in this section, the first being the existing Entitlements Schemes and the second Preset Document Entitlements (see below).
Update in UX/UI for assigning Document Entitlement Schemes to Users
The UI/UX to assign a Document Entitlement Scheme to a single User, and Users in bulk has been updated.
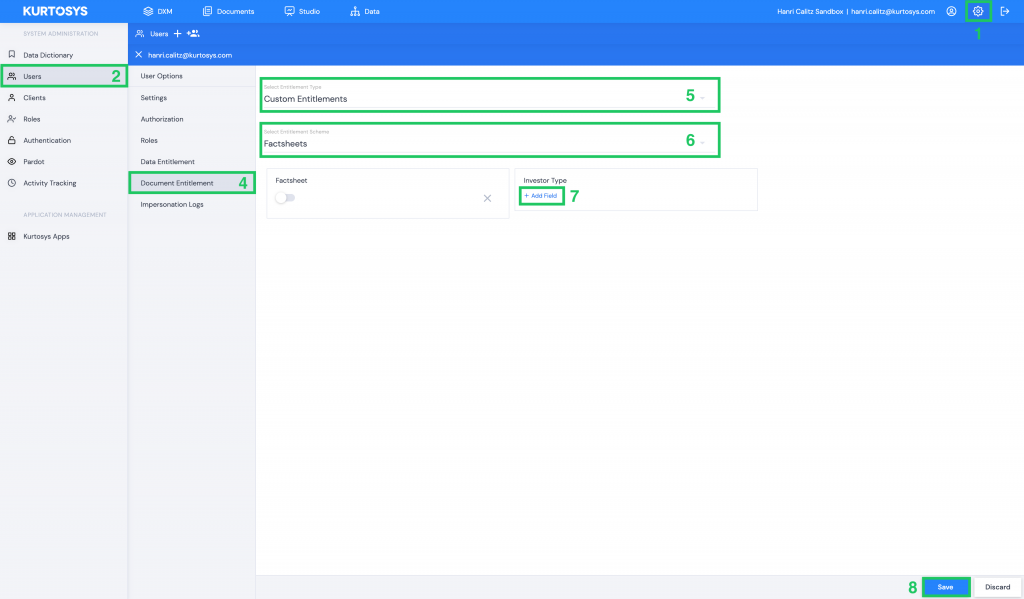
How to assign Custom Document Entitlements to a single User:
- Go to System Administration (⚙️).
- Click Users.
- Select the User to which you want to assign the Entitlement.
- Click Document Entitlement.
- Select the Entitlement Type, in this case select Custom Entitlements
- None: The user will not have any access to entitled documents.
- Custom Entitlements: Set up Custom Entitlements for the User using the Document Meta Tags and Values (current functionality).
- Preset Entitlements: Pick from the list of Preset Entitlements which is configured in the Clients section.
- Select the Document Entitlement Scheme from the dropdown which will then populate the page with all the Document Meta Tags that are configured for that Document Entitlement Scheme.
- Click on + Add Field under the Document Meta Tag to add values.
- Once you have configured the User’s Custom Entitlements click Save.
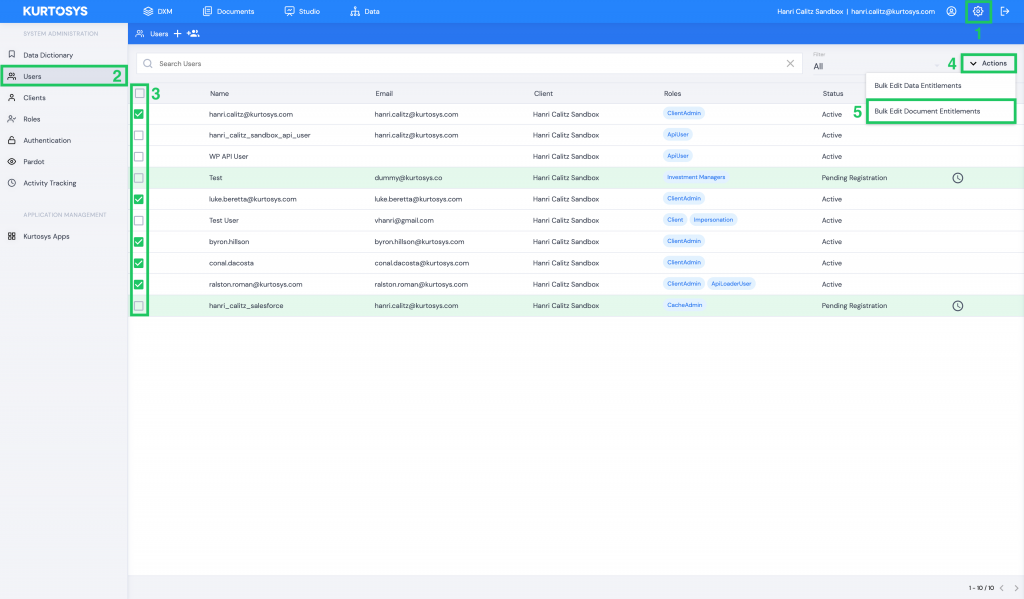
How to assign Custom Entitlements to Users in bulk:
- Go to System Administration (⚙️).
- Click Users.
- Check the boxes for the Users that you want to assign the Custom Entitlements (they all need to be on the same screen, you won’t be able to paginate and select users across multiple pages of Users).
- Click on the Actions button that appears once you start selecting Users in bulk.
- Select Bulk Edit Document Entitlements.
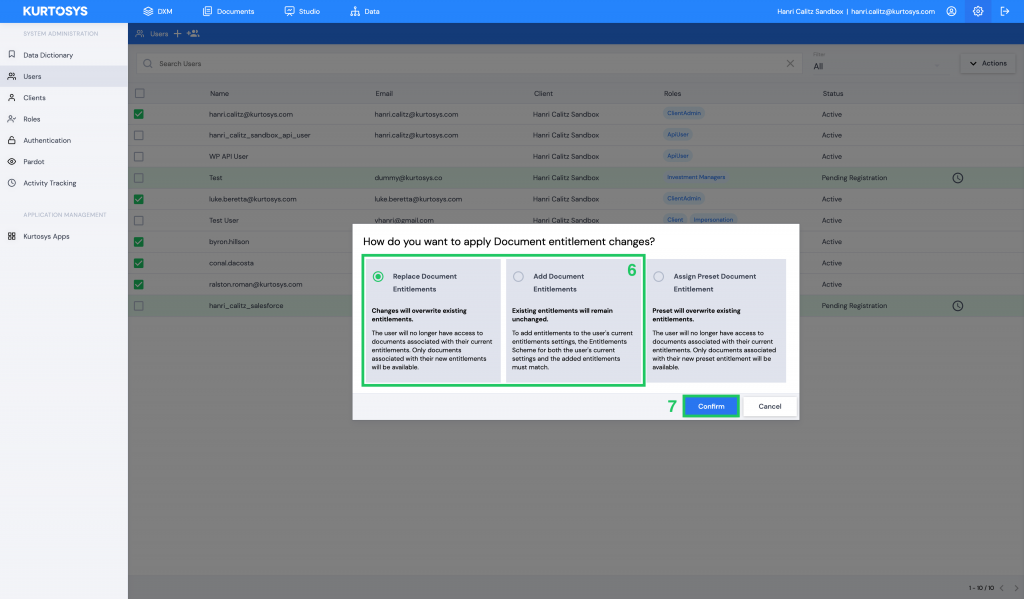
- Select either Replace Document Entitlements or Add Document Entitlements.
- Click Confirm.
- Select the Document Entitlement Scheme from the drop down, which will then populate the page with all the Document Meta Tags that are configured for that Document Entitlement Scheme.
- Click on + Add Field under the Document Meta Tag to add values.
- Once you have configured the Users’ Custom Entitlements click Confirm.

Preset Document Entitlements
With Preset Document Entitlements you can configure a list of document entitlements based on a Document Entitlement Scheme. Once the Preset Document Entitlement is configured it can be assigned to multiple users. This makes it easier than the current Document Entitlements feature, where you have to configure the entitlements each time you want to apply it to a new user.
If a user is assigned a Preset Document Entitlement and the Preset is updated, the User’s Document Entitlements will also be updated.
Note 1: A User can only be assigned one Preset Document Entitlement at a time. If there is a need for slight variations in Document Entitlements across users, multiple Presets can be configured and assigned. This is because one Entitlement Scheme can be used to configure multiple Presets.
Note 2: The change to Preset Document Entitlements functionality is an enhancement, there is no requirement to change your existing setup.
How to configure your Preset Document Entitlements:
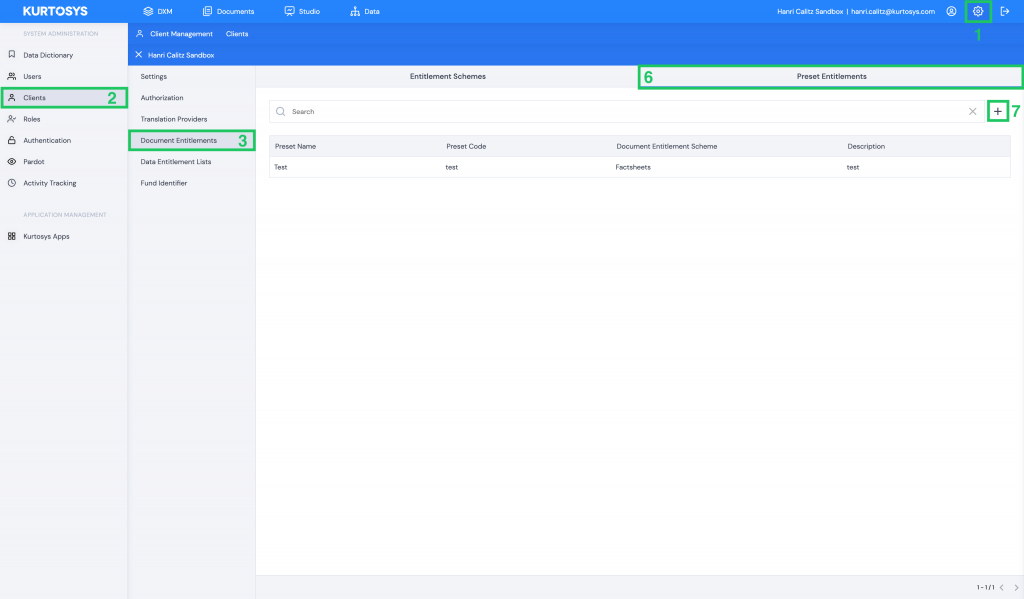
- Go to System Administration (⚙️).
- Click Clients.
- Select your client.
- Select Document Entitlements.
- Configure your Entitlement Scheme as you would have previously.
- Go to Preset Entitlements.
- Click the + icon next to the search bar.
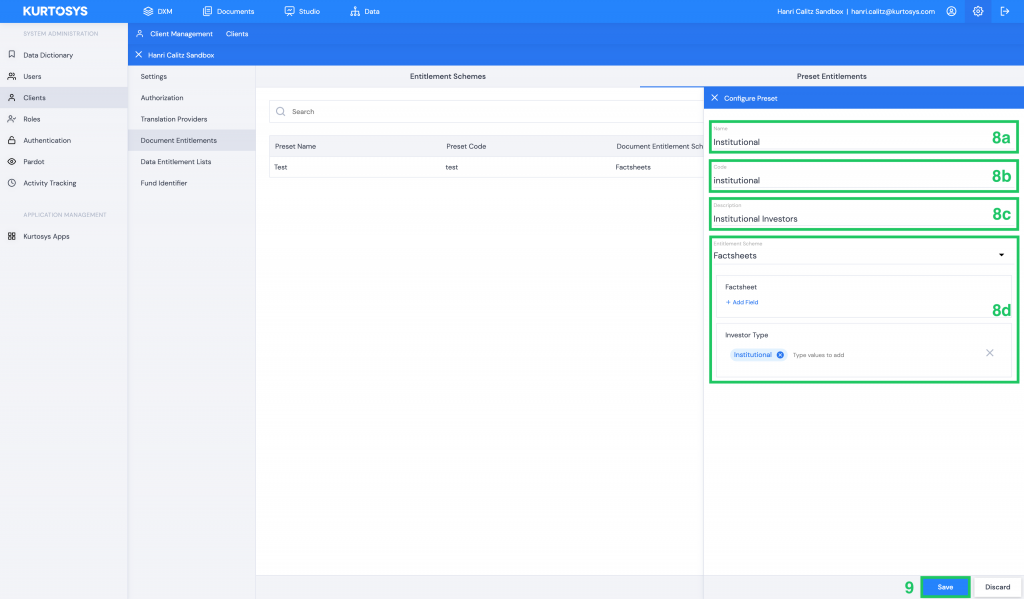
- In the Configure Preset side panel that opens, fill out the fields:
a. Name: Name the Preset, this will be used throughout the UI where the Preset is referenced
b. Code: Give the Preset Entitlement a code that will be used to reference it in the database. This can’t be changed once you’ve saved the Preset Entitlement for the first time (if Preset Document Entitlements are used in a SAML assertion then this code needs to match the assertion attribute value from the SAML Identity Provider exactly)
c. Description: Give the Preset Entitlement a description so that other users can understand the use of the Preset Entitlement.
d. Entitlement Scheme: Pick which Entitlement Scheme to use for this Preset Entitlement (only one Entitlement Scheme can be used per Preset Entitlement). Once you have picked your Entitlement Scheme the Document Meta Tags that forms part of the scheme will populate the side panel and by clicking + Add Field you can add values to the Document Tags, which will determine which types of documents will be visible with the specific Preset Entitlement.
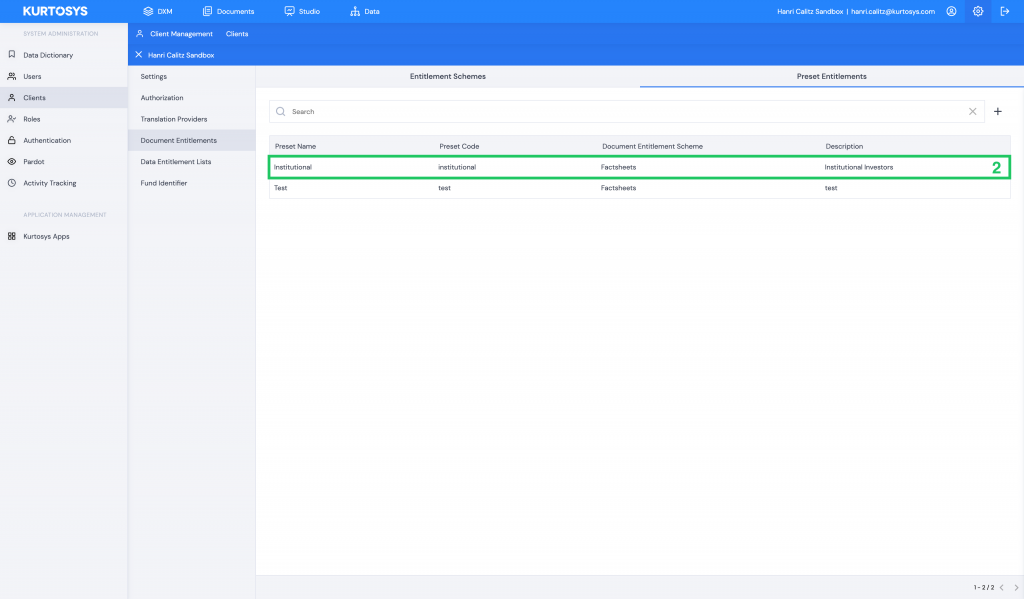
- Once you’re happy with your Preset Entitlement, click Save.
How to edit your Preset Document Entitlements:
- Follow above steps 1-6.
- Click on the existing Preset Entitlement you want to edit.
- In the Configure Preset side panel that opens fill out the fields:
a. Name: You can change the name of the Preset Entitlement.
b. Code: This can’t be changed.
c. Description: You can change the Description for the Preset Entitlement.
d. Entitlement Scheme: You can change the Entitlement Scheme linked to the Preset to have a different list of Document Meta Tags list for which you can assign new values.
- Once you’re happy with your Preset Entitlement click Save.

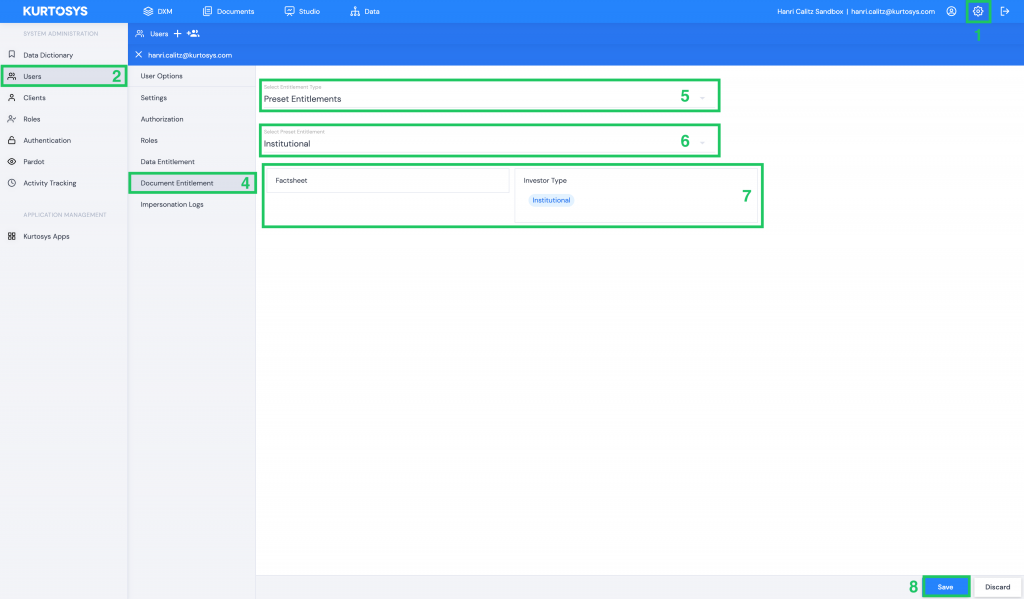
How to assign Preset Document Entitlements to a single User:
- Go to System Administration (⚙️).
- Click Users.
- Select the User to which you want to assign the Entitlement.
- Select Document Entitlement.
- Select the Entitlement Type, in this case select Preset Entitlements:
- None: The user will not have any access to entitled documents.
- Custom Entitlements: Set up Custom Entitlements for the User using the Document Meta Tags and Values (current functionality)
- Preset Entitlements: Pick from the list of Preset Entitlements which is configured in the Clients section.
- Select the Preset Entitlement from the dropdown. This list will contain all the Preset Entitlements that are set up in the Clients section.
- Once you have selected the Preset Entitlement it will show which values are assigned to the Document Meta Tags (keep in mind you can not edit the values here for Preset Entitlements, it has to be in the Clients section).
- Click Save.
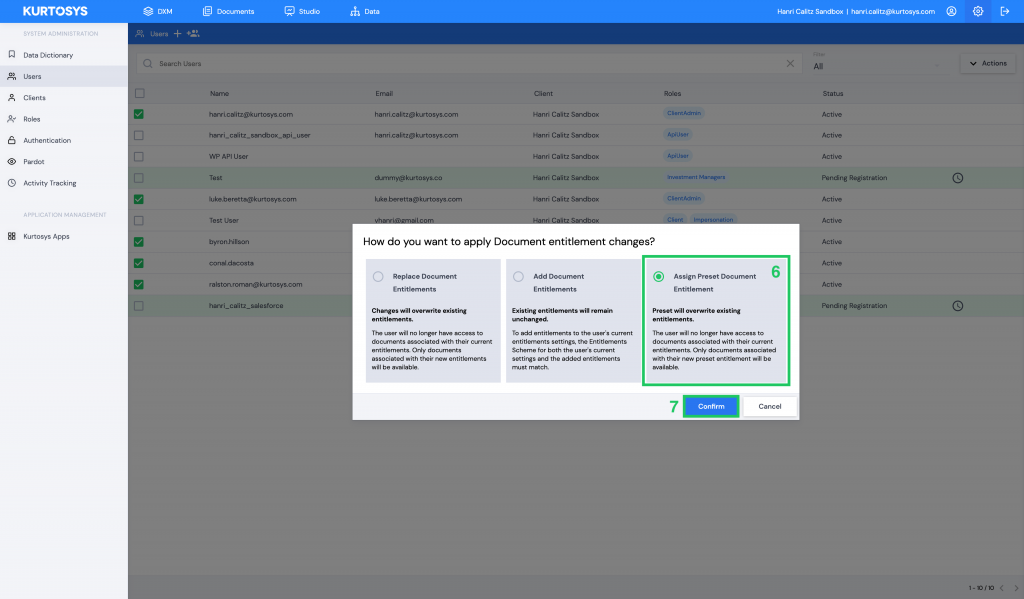
How to assign Preset Document Entitlements to Users in bulk:
- Go to System Administration (⚙️).
- Click Users.
- Check the boxes for the Users that you want to assign the Preset Entitlements (they all need to be on the same screen, you won’t be able to paginate and select users across multiple pages of Users).
- Click on the Actions button that appears once you start selecting Users in bulk.
- Select Bulk Edit Document Entitlements.
- Select Assign Preset Document Entitlement.
- Click Confirm.
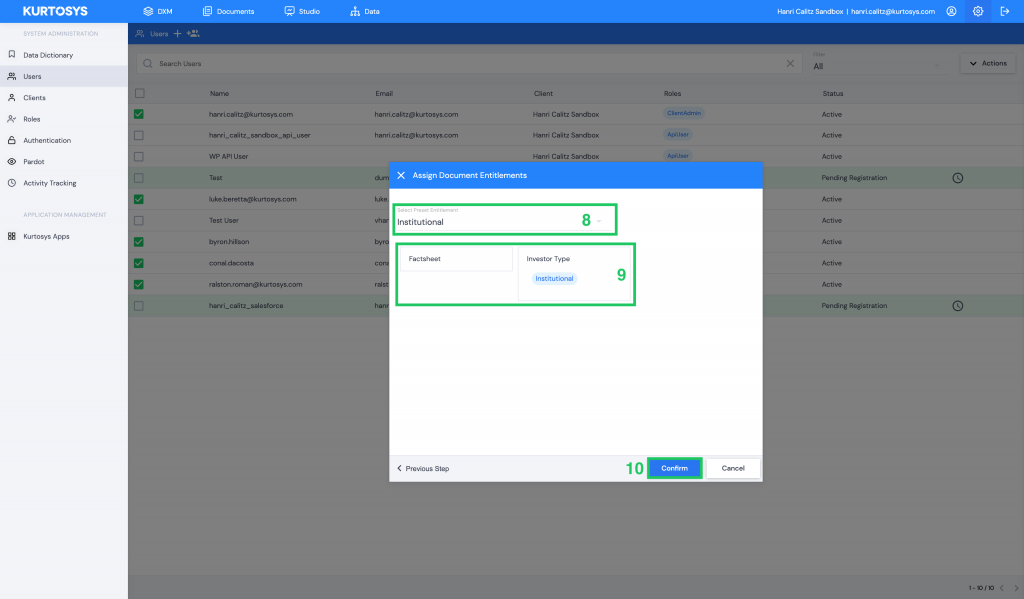
- Select the Preset Entitlement from the dropdown. This list will contain all the Preset Entitlements that are set up in the Clients section.
- Once you have selected the Preset Entitlement it will show which values are assigned to the Document Meta Tags (keep in mind you can not edit the values here for Preset Entitlements, it has to be in the Client section).
- Click Confirm.

MISC
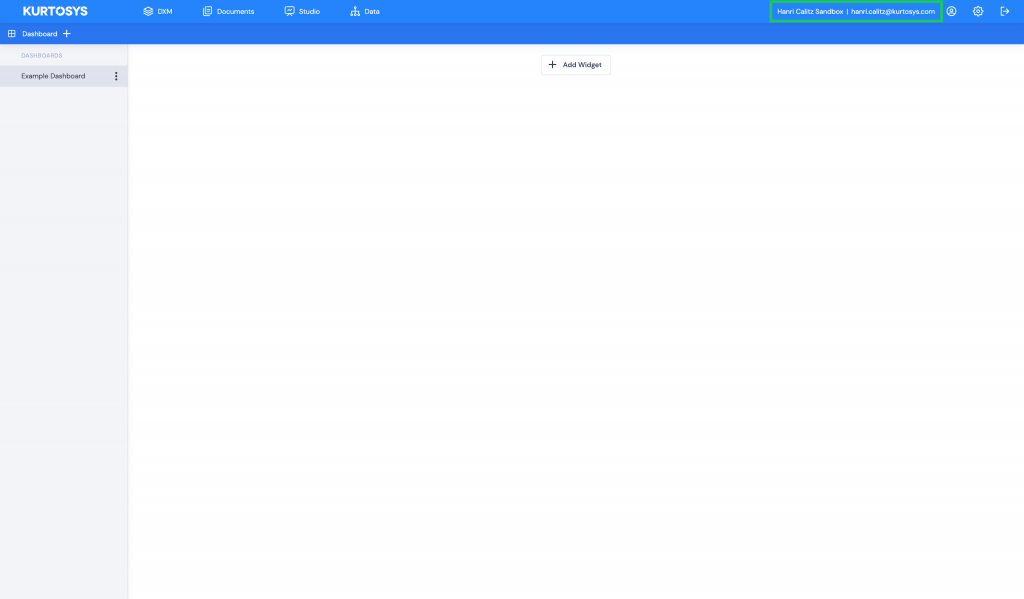
Display Client Name in Navigation Bar
The Client name will now display in the navigation bar at the top of the page next to the username, making it easy to spot where you’re signed in.