Table of Contents
Description
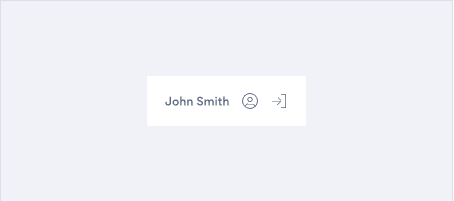
The User Context app displays the information about the logged in User, links to their profile and allows a user access to the Logout button.
They can be customized to use bespoke colors and images.
Add a new App
Click on the Studio tab, then click + to add a new application.

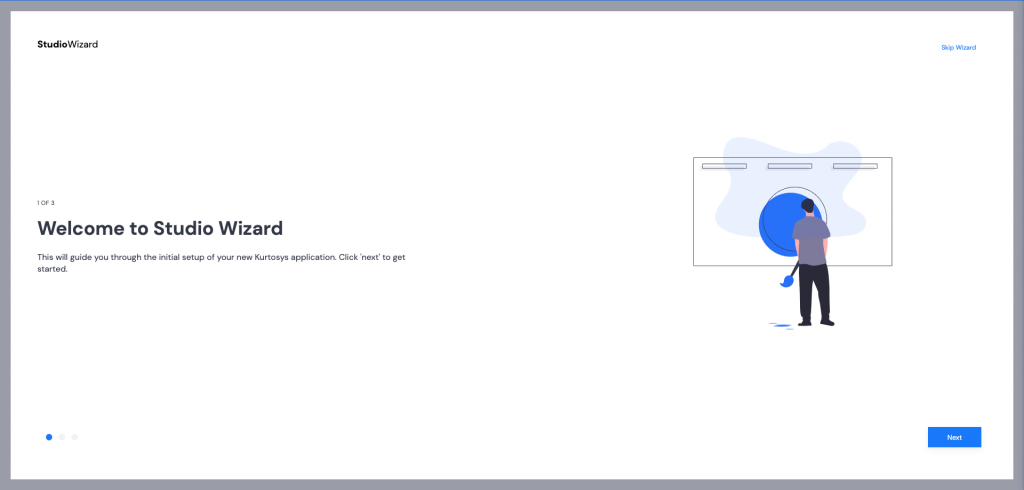
Studio Wizard

- Click Next to start the Studio Wizard.
- Provide a name and description for your app. Once these items have been filled, the Next button will become active. Click Next.
- Use the dropdown arrow to select a template to base your application on. Enter a few letters of the application name to make the search easier.
- Select Kurtosys App User Context, then click Next.
- There is no preset for the User Context App, click Next.
- A Parent Client Configuration is not required for the User Context App, click Next.
- The token (each client instance has a unique identifier) will be added automatically, click Next.
- On the Summary page, click Finish.
Configuration
The User Profile app will need some configuration changes made. It is easiest to start with a JSON structure already added.
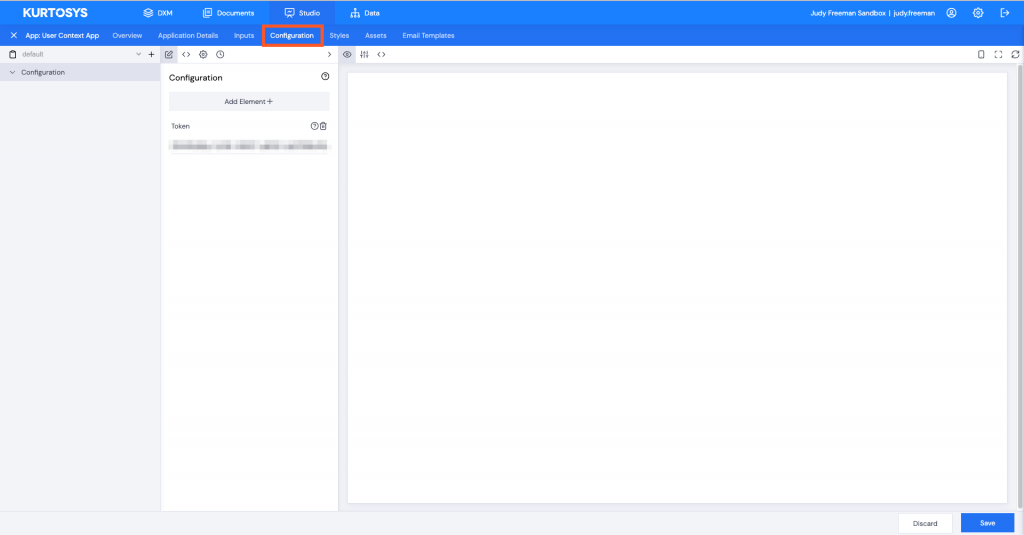
Click the Configuration tab in your newly created app to begin.

The app currently has not been configured or had any styling applied, and is not functional.
Elements need to be added to create the app configuration, the easiest way of doing this is by copying and pasting a base configuration into the app.
{
  "assetOverrides": {},
  "components": {
    "app": {
      "displayType": "buttons",
      "redirects": {
        "home": {
          "defaultUrl": "/kapital/"
        },
        "logout": {
          "defaultUrl": "/kapital/login/"
        },
        "profile": {
          "defaultUrl": "/kapital/user-profile/"
        }
      }
    },
    "logoutButton": {
      "tooltipProps": {
        "content": "Sign out",
        "preserveClickAction": true,
        "trigger": "hover"
      }
    },
    "userProfileButton": {
      "tooltipProps": {
        "content": "Go to user profile",
        "preserveClickAction": true,
        "trigger": "hover"
      },
      "tooltipPropsStopImpersonating": {
        "content": "Stop impersonating user",
        "preserveClickAction": true,
        "trigger": "hover"
      }
    },
    "userProfileLabel": {
      "icon": {
        "position": "right",
        "type": "icon"
      },
      "label": "name"
    }
  },
  "core": {
    "serviceUrl": "/services",
    "skeletonLoaders": {
      "loaders": [
        {
          "breakpoints": [
            {
              "children": [
                {
                  "fill": "{fillColor}",
                  "height": "18px",
                  "width": "100px",
                  "x": "0px",
                  "y": "0px"
                },
                {
                  "fill": "{fillColor}",
                  "height": "18px",
                  "width": "18px",
                  "x": "110px",
                  "y": "0px"
                },
                {
                  "fill": "{fillColor}",
                  "height": "18px",
                  "width": "18px",
                  "x": "138px",
                  "y": "0px"
                }
              ],
              "minWidthInPixels": 0,
              "style": {
                "height": "33px"
              }
            }
          ],
          "id": "ksys-app-user-context"
        }
      ],
      "variables": [
        {
          "key": "fillColor",
          "value": "#dddddd"
        }
      ]
    }
  },
  "culture": {
    "base": "Default",
    "default": "en-GB"
  },
  "data": {
    "context": {
      "entityByType": {
        "CLSS": {
          "clientCodeProperty": "isin",
          "include": {
            "commentaries": {}
          },
          "inputKey": "isin"
        },
        "FUND": {
          "clientCodeProperty": "fund_code",
          "include": {
            "commentaries": {}
          },
          "inputKey": "fundId"
        }
      }
    }
  },
  "token": " "USE YOUR OWN TOKEN HERE" "
}
- Click on the <> (JSON) icon to open the editing pane.
- Then click the > (right arrow) to open the pane full-screen.
The token visible in the Configuration JSON pane must be used with the base configuration JSON above where the token is required at the end.
- Copy the JSON above then paste it into the JSON pane in the app.
- Copy the token in the JSON pane into the last row so it replaces the “USE YOUR OWN TOKEN HERE ” text.
- Then delete the original JSON including the token between the last 2 curly brackets {} as well as the curly brackets.
- Click Save
- Add a comment e.g. “config added”.
- Click Confirm.
A green successful task bar will display across the bottom of the screen.
App components will appear in the configuration pane.
Styles
The same way configuration JSON needs to be added to make the app work, a JSON styling object needs to be added too.
This will allow the user to start with a basic app which can then be amended or configured according to specific requirements.
Styling doesn’t affect the functionality of the app but it makes it look more user-friendly and more accessible.
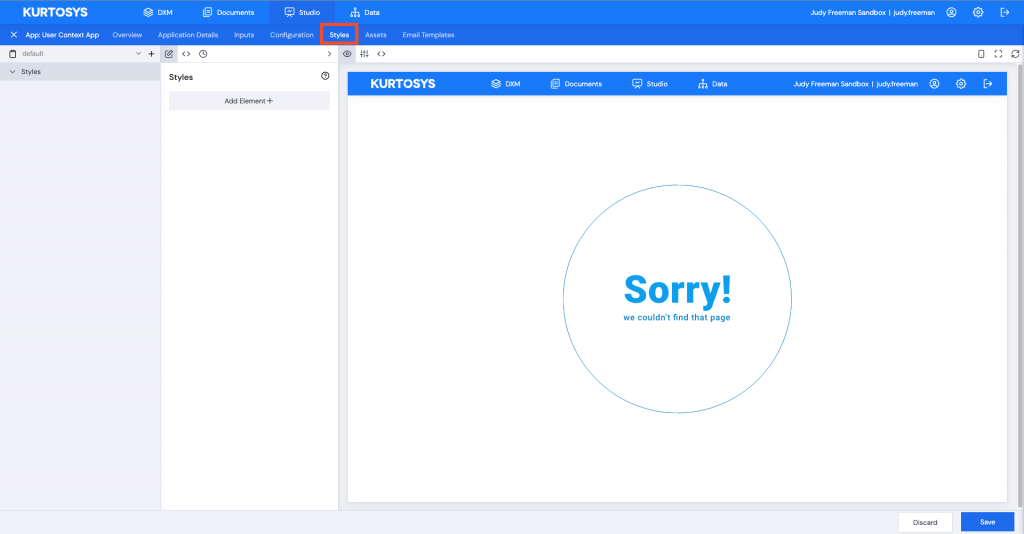
Click the Styles tab at the top of the screen to begin.

The easiest way of adding styling to the app is by copying and pasting base styling into the app.
{
  "components": {
    "app": {
      "children": {
        "buttonWrapper": {
          "display": "flex",
          "margin": {
            "left": "auto"
          }
        },
        "wrapper": {
          "display": "flex",
          "overrides": [
            {
              "selector": "section",
              "style": {
                "display": "flex"
              }
            }
          ]
        }
      }
    },
    "dropdownMenu": {
      "children": {
        "wrapper": {
          "display": "flex",
          "margin": {
            "left": "auto"
          },
          "padding": {
            "bottom": "6px"
          },
          "text": {
            "decoration": "underline"
          }
        }
      }
    },
    "logoutButton": {
      "children": {
        "icon": {
          "height": "18px",
          "margin": {
            "_value": "0 4px"
          },
          "width": "18px"
        },
        "wrapper": {
          "align": {
            "items": "center"
          },
          "cursor": "pointer",
          "display": "flex"
        }
      },
      "margin": {
        "_value": "auto"
      }
    },
    "userProfileButton": {
      "children": {
        "stopImpersonatingButton": {
          "overrides": [
            {
              "selector": "[data-selector=\"base-icon-wrapper\"] [data-selector=\"base-image\"]",
              "style": {
                "height": "18px",
                "width": "18px"
              }
            }
          ]
        },
        "wrapper": {
          "align": {
            "items": "center"
          },
          "cursor": "pointer",
          "display": "flex"
        }
      }
    },
    "userProfileLabel": {
      "children": {
        "icon": {
          "height": "18px",
          "margin": {
            "_value": "0 4px"
          },
          "width": "18px"
        },
        "iconWrapper": {
          "height": "100%",
          "margin": {
            "_value": "auto"
          }
        },
        "impersonatedUserLabel": {
          "font": {
            "weight": "bold"
          }
        },
        "impersonatorUserLabel": {
          "font": {
            "size": "10px"
          }
        },
        "label": {
          "lineHeight": "20px"
        },
        "wrapper": {
          "children": {},
          "display": "flex"
        }
      }
    }
  },
  "theme": {
    "base": {
      "application": {
        "font": {
          "family": "\"Source Sans Pro\", sans-serif",
          "size": "14px"
        },
        "lineHeight": "18px"
      },
      "tooltip": {
        "children": {
          "arrowIcon": {
            "fill": "white",
            "stroke": "#cccccc"
          },
          "clickLayer": {
            "background": {
              "color": "transparent"
            },
            "bottom": "0",
            "left": "0",
            "position": "fixed",
            "right": "0",
            "top": "0"
          },
          "tooltipCharacter": {
            "background": {
              "color": "#1EA7FD"
            },
            "border": {
              "radius": "1.5em"
            },
            "color": "white",
            "font": {
              "size": "9px"
            },
            "margin": {
              "_value": "0 0.5em"
            },
            "min": {
              "width": "1.5em"
            },
            "padding": {
              "bottom": "0.2em",
              "left": "0.5em",
              "right": "0.5em",
              "top": "0.2em"
            },
            "text": {
              "align": "center"
            }
          },
          "tooltipContent": {
            "background": {
              "color": "white"
            },
            "border": {
              "color": "#cccccc",
              "radius": "3px",
              "style": "solid",
              "width": "1px"
            },
            "box": {
              "shadow": "2px 2px 0 rgba(0,0,0,0.1)",
              "sizing": "border-box"
            },
            "color": "black",
            "font": {
              "size": "smaller"
            },
            "margin": {
              "_value": "3px",
              "bottom": "2px"
            },
            "max": {
              "width": "250px"
            },
            "padding": {
              "_value": "4px"
            },
            "text": {
              "align": "center"
            }
          },
          "tooltipIcon": {
            "height": "16px",
            "width": "16px"
          },
          "tooltipIconButton": {
            "cursor": "pointer",
            "position": "sticky"
          },
          "wrapper": {
            "display": "inline-block",
            "overrides": [
              {
                "selector": "[data-selector=\"base-tooltip-arrowIconWrapper\"]",
                "style": {
                  "position": "absolute"
                }
              },
              {
                "selector": "div[data-placement=\"top\"] [data-selector=\"base-tooltip-arrowIconWrapper\"]",
                "style": {
                  "bottom": "-14px"
                }
              },
              {
                "selector": "div[data-placement=\"bottom\"] [data-selector=\"base-tooltip-arrowIconWrapper\"]",
                "style": {
                  "top": "-13px",
                  "transform": "rotate(180deg)"
                }
              },
              {
                "selector": "div[data-placement=\"left\"] [data-selector=\"base-tooltip-arrowIconWrapper\"]",
                "style": {
                  "right": "-10px",
                  "transform": "rotate(-90deg)"
                }
              },
              {
                "selector": "div[data-placement=\"right\"] [data-selector=\"base-tooltip-arrowIconWrapper\"]",
                "style": {
                  "left": "-11px",
                  "transform": "rotate(90deg)"
                }
              }
            ],
            "verticalAlign": "text-bottom"
          }
        }
      }
    }
  }
}
- Click on the <> (JSON) icon to open the editing pane.
- Then click the > (right arrow) to open the pane full-screen.
- Copy the JSON above and paste it into the JSON pane. Make sure to delete the extra pair of curly brackets or paste the JSON over them.
No token is needed for styling configuration.
- Click Save.
- Enter a comment for config changes e.g. “none”.
- Enter a comment for style changes e.g. “style config added”.
- Click Confirm.
