
Siteimprove is a plugin added to DXM WordPress. It aids clients in ensuring their content is optimised for SEO, digital Accessibility and marketing campaigns.
There are a few pointers to ensure your Siteimprove account and DXM works in harmony:
- Ensure you have a Siteimprove account. Each client is required to have their own commercial agreement with Siteimprove. Kurtosys provides access to the plugin, but the client will need to have their own account with Siteimprove.
- Ensure you are logged in to your Siteimprove account on the same browser as you are using for your WordPress editing (within DXM).
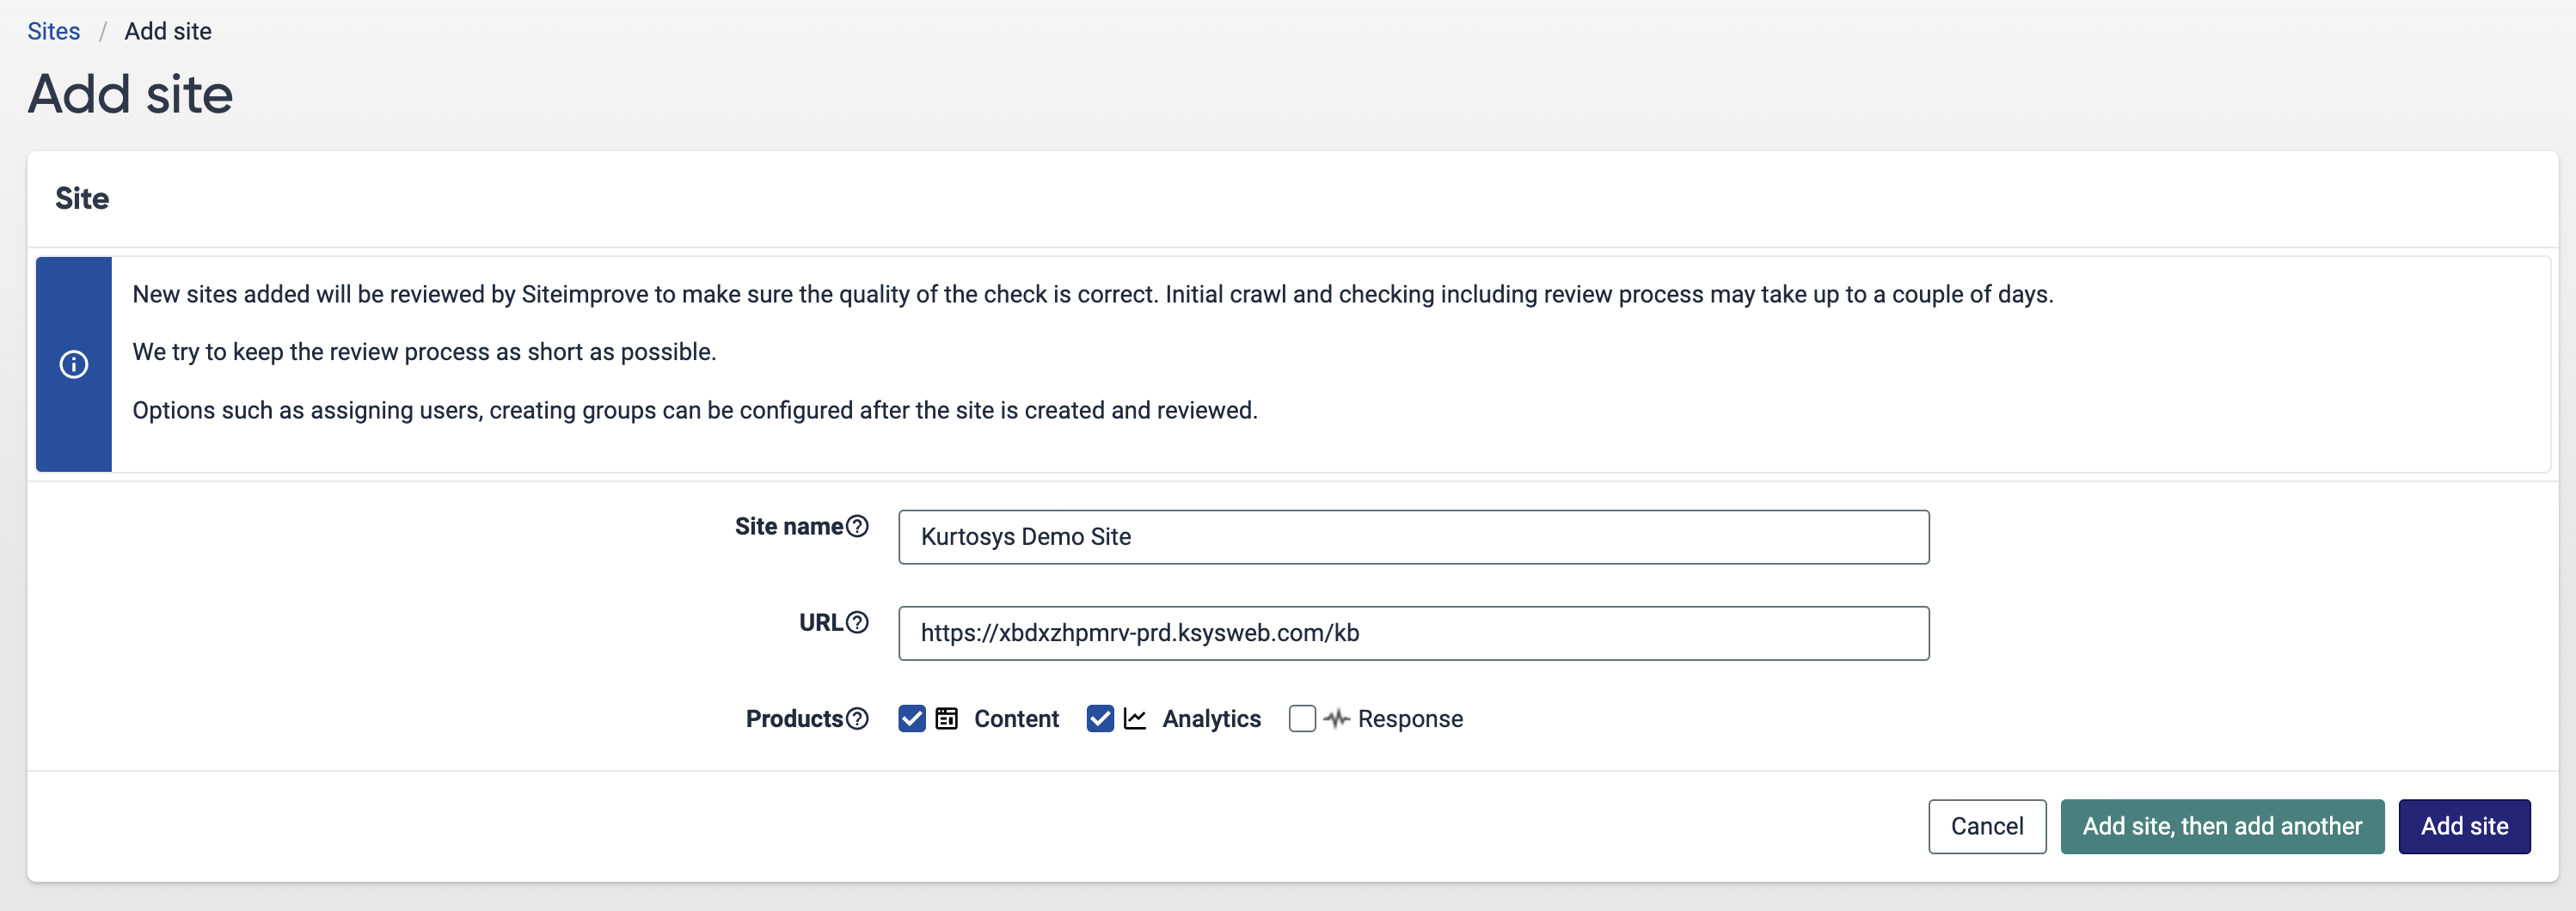
- Ensure the site(s) you want to add to Siteimprove “Sites” contain the full internal URL used within DXM. Copy the section just before “/wp-admin”. An example is provided below.
- Add your Site to Siteimprove using the URL from the previous step. The screen should look like below.
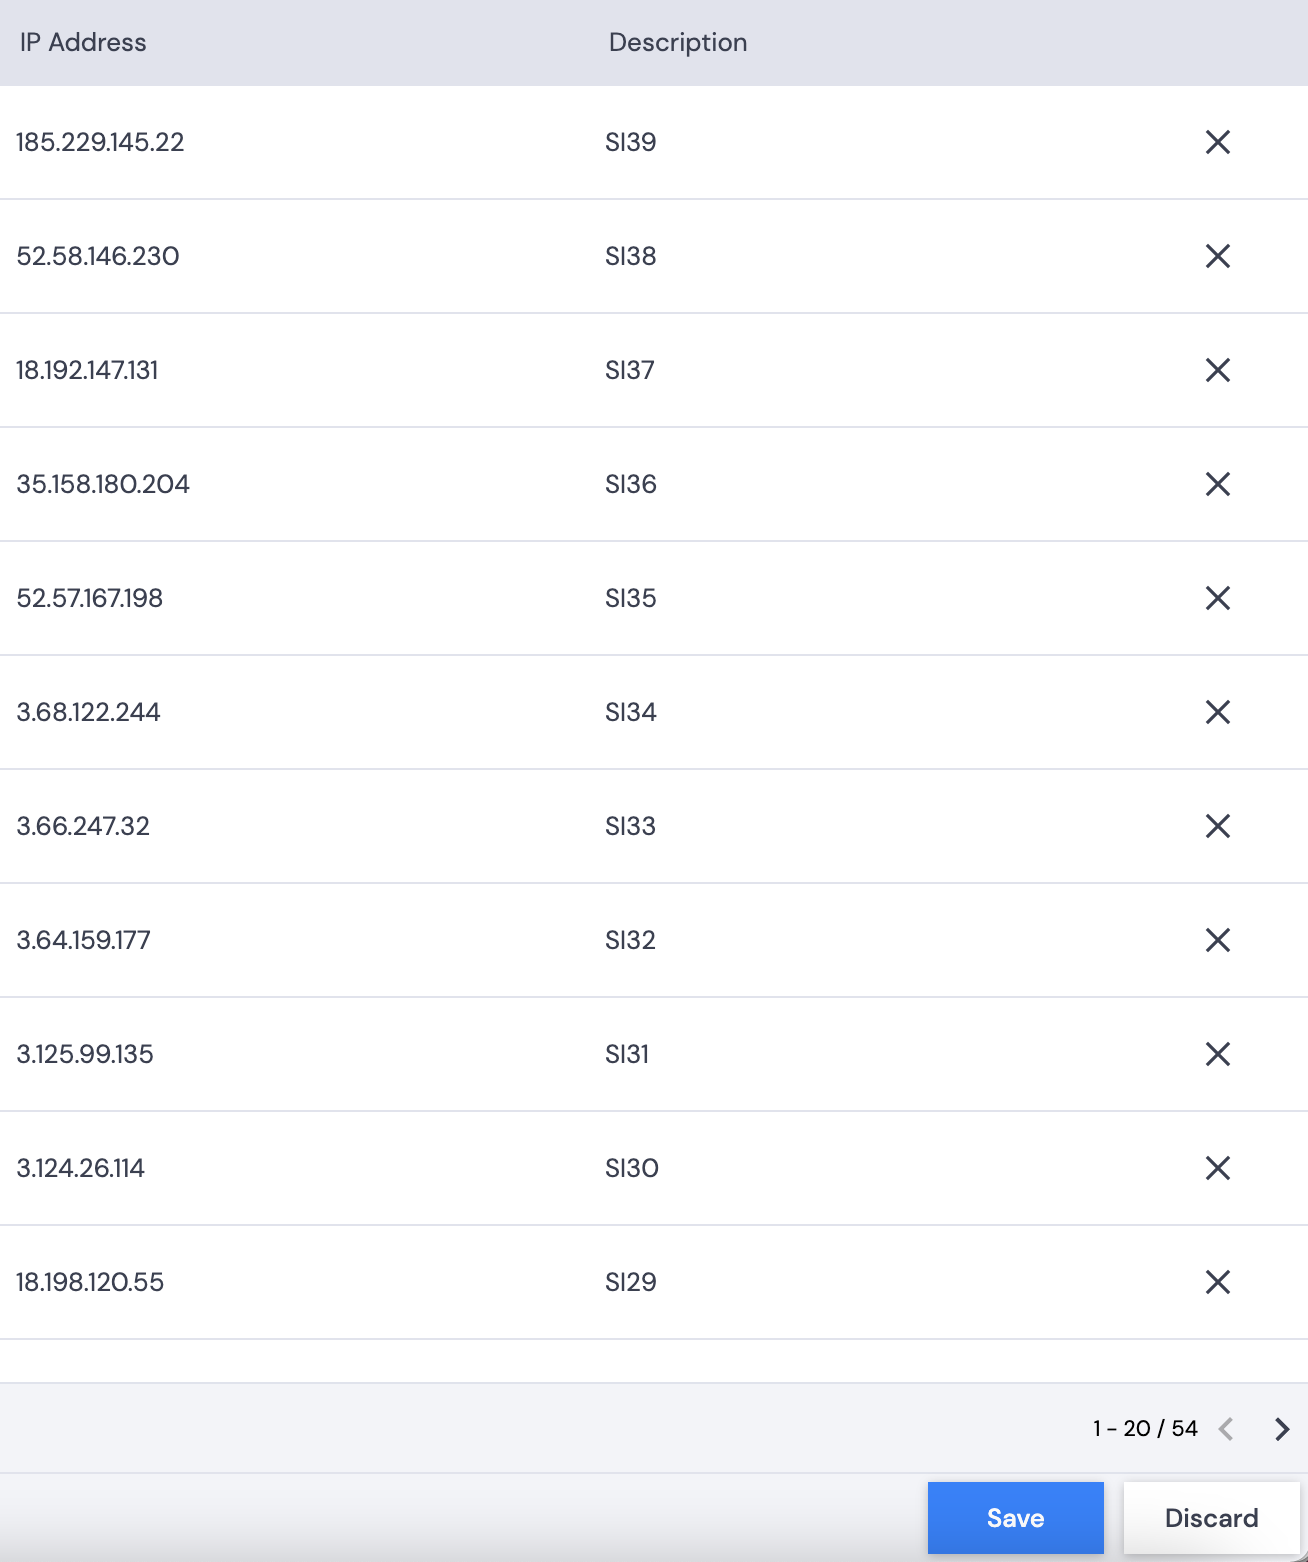
- Allow Siteimprove to crawl the internal DXM URL. This is done using IP Restrictions in DXM.
- Add all the Siteimprove IP addresses (they use various servers all over the world to conduct their services to crawl your site and check the content and updates). The list of Siteimprove IP addresses (39 at the time of writing this article) is added on the Instance Domain in DXM where your site is built.
- Add these in one-by-one. This may some time.
- After adding the Siteimprove IP addresses and giving access to Siteimprove, your DXM site is ready to be crawled by Siteimprove. Siteimprove can now crawl the internal domain where you will be making edits to Posts and Pages in WordPress.
- Siteimprove needs a few days (3-5 days) to crawl your DXM site before you can extract information from it.
- Once the site is in the correct status on Siteimprove (you can see pages crawled against the new site you created in step 4), you will be able to use the Siteimprove features in DXM.
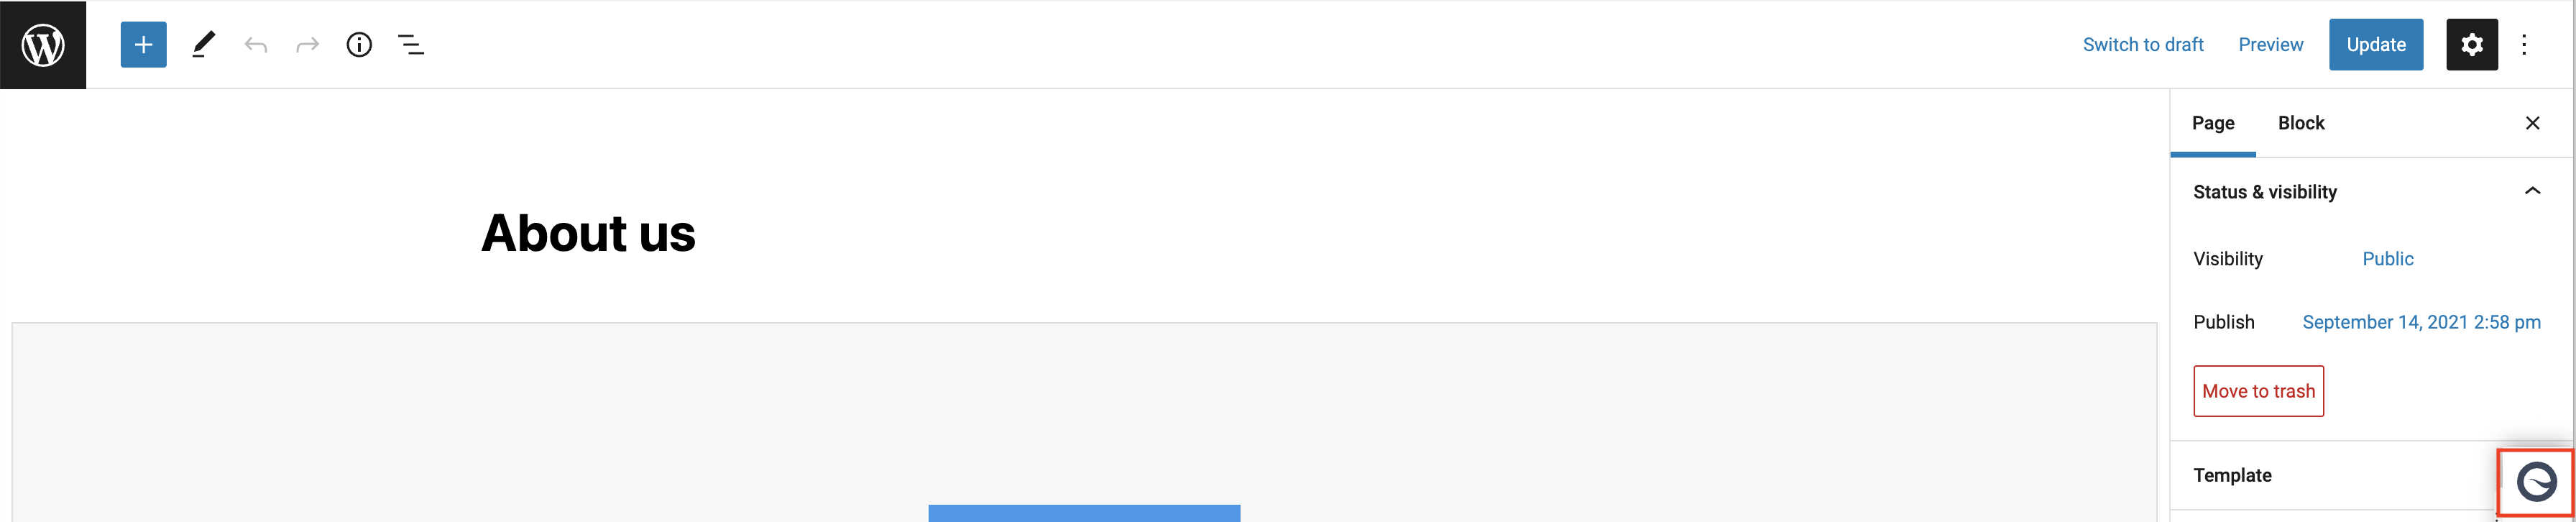
- Go to your WordPress subsite in DXM, to a specific Page or Post and click on the Siteimprove icon.
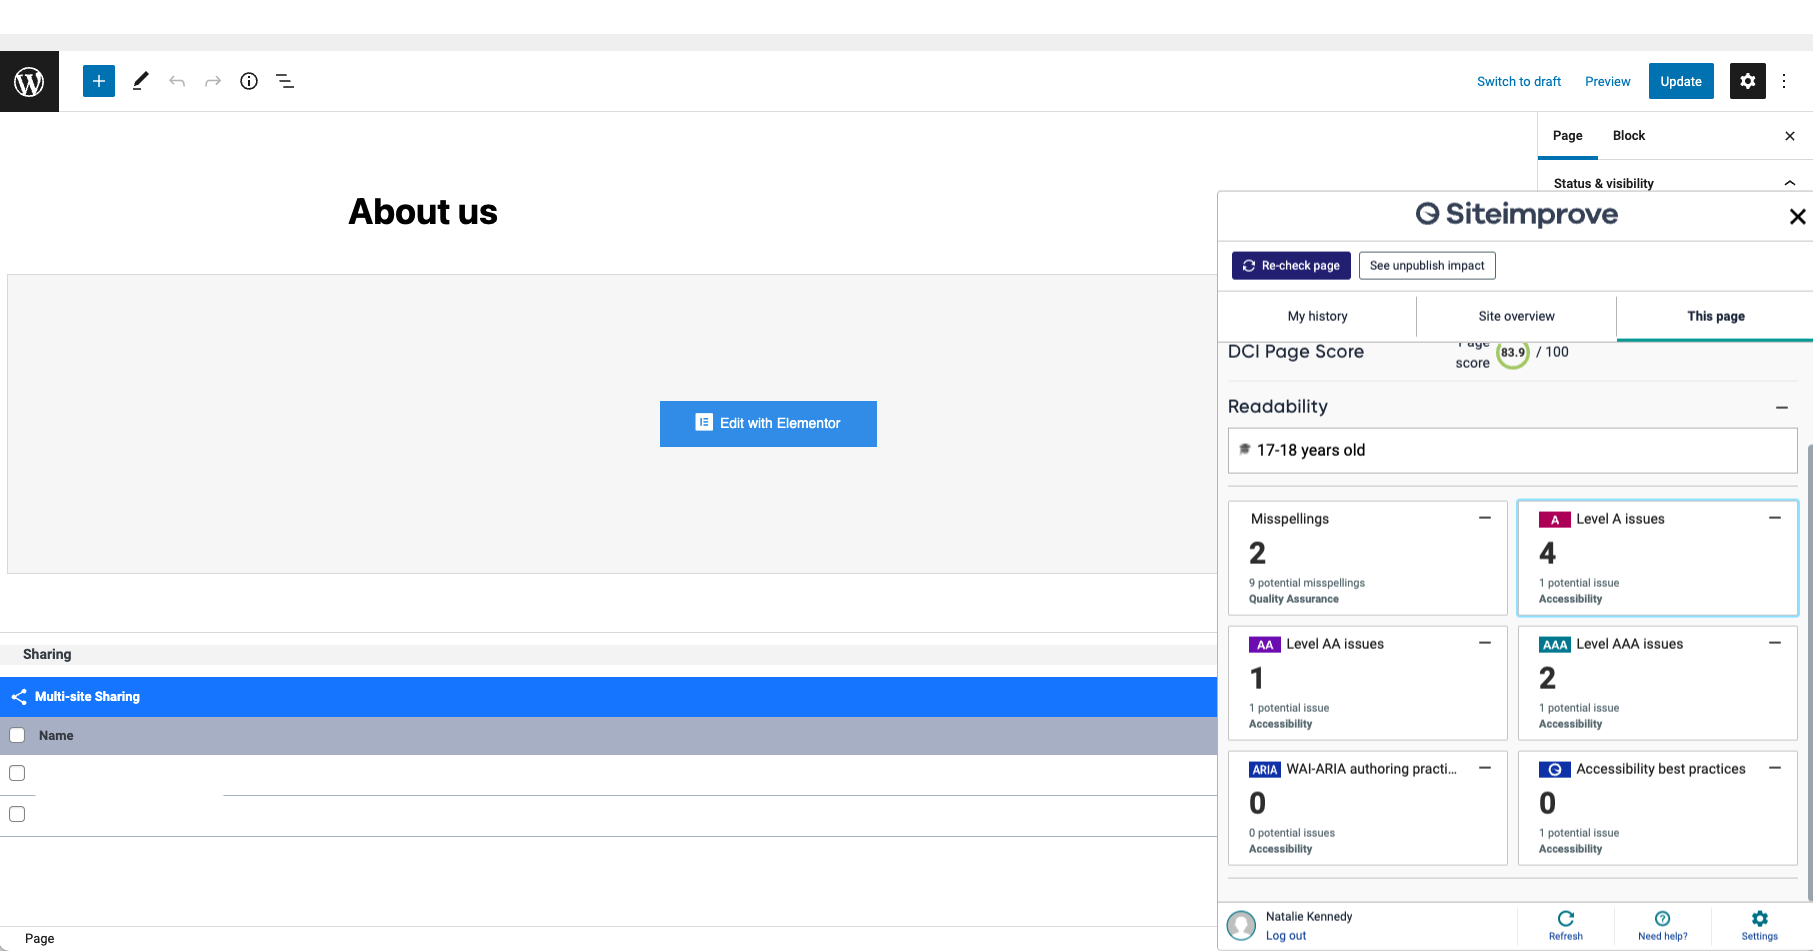
- You will now be able to see all details gathered by Siteimprove, about that Page or Post, on the sidebar that opens.
- To view more information, follow the various links provided by the Siteimprove plugin.