
As per Google support, Google Tag Manager is a tag management system (TMS) that allows you to quickly and easily update measurement codes and related code fragments collectively known as tags on your website or mobile app. Once the small segment of Tag Manager code has been added to your project, you can safely and easily deploy analytics and measurement tag configurations from a web-based user interface.
When Tag Manager is installed, your website or app will be able to communicate with the Tag Manager servers. You can then use Tag Manager’s web-based user interface to set up tags, establish triggers that cause your tag to fire when certain events occur, and create variables that can be used to simplify and automate your tag configurations.
A collection of tags, triggers, variables, and related configurations installed on a given website or mobile app is called a container. A Tag Manager container can replace all other manually-coded tags on a site or app, including tags from Google Ads, Google Analytics, Floodlight, and 3rd party tags.
Kurtosys has a simple way of adding GTM functionality to all sites, or specific sites on DXM.
Setting up GTM on your site
Container ID for all Sites
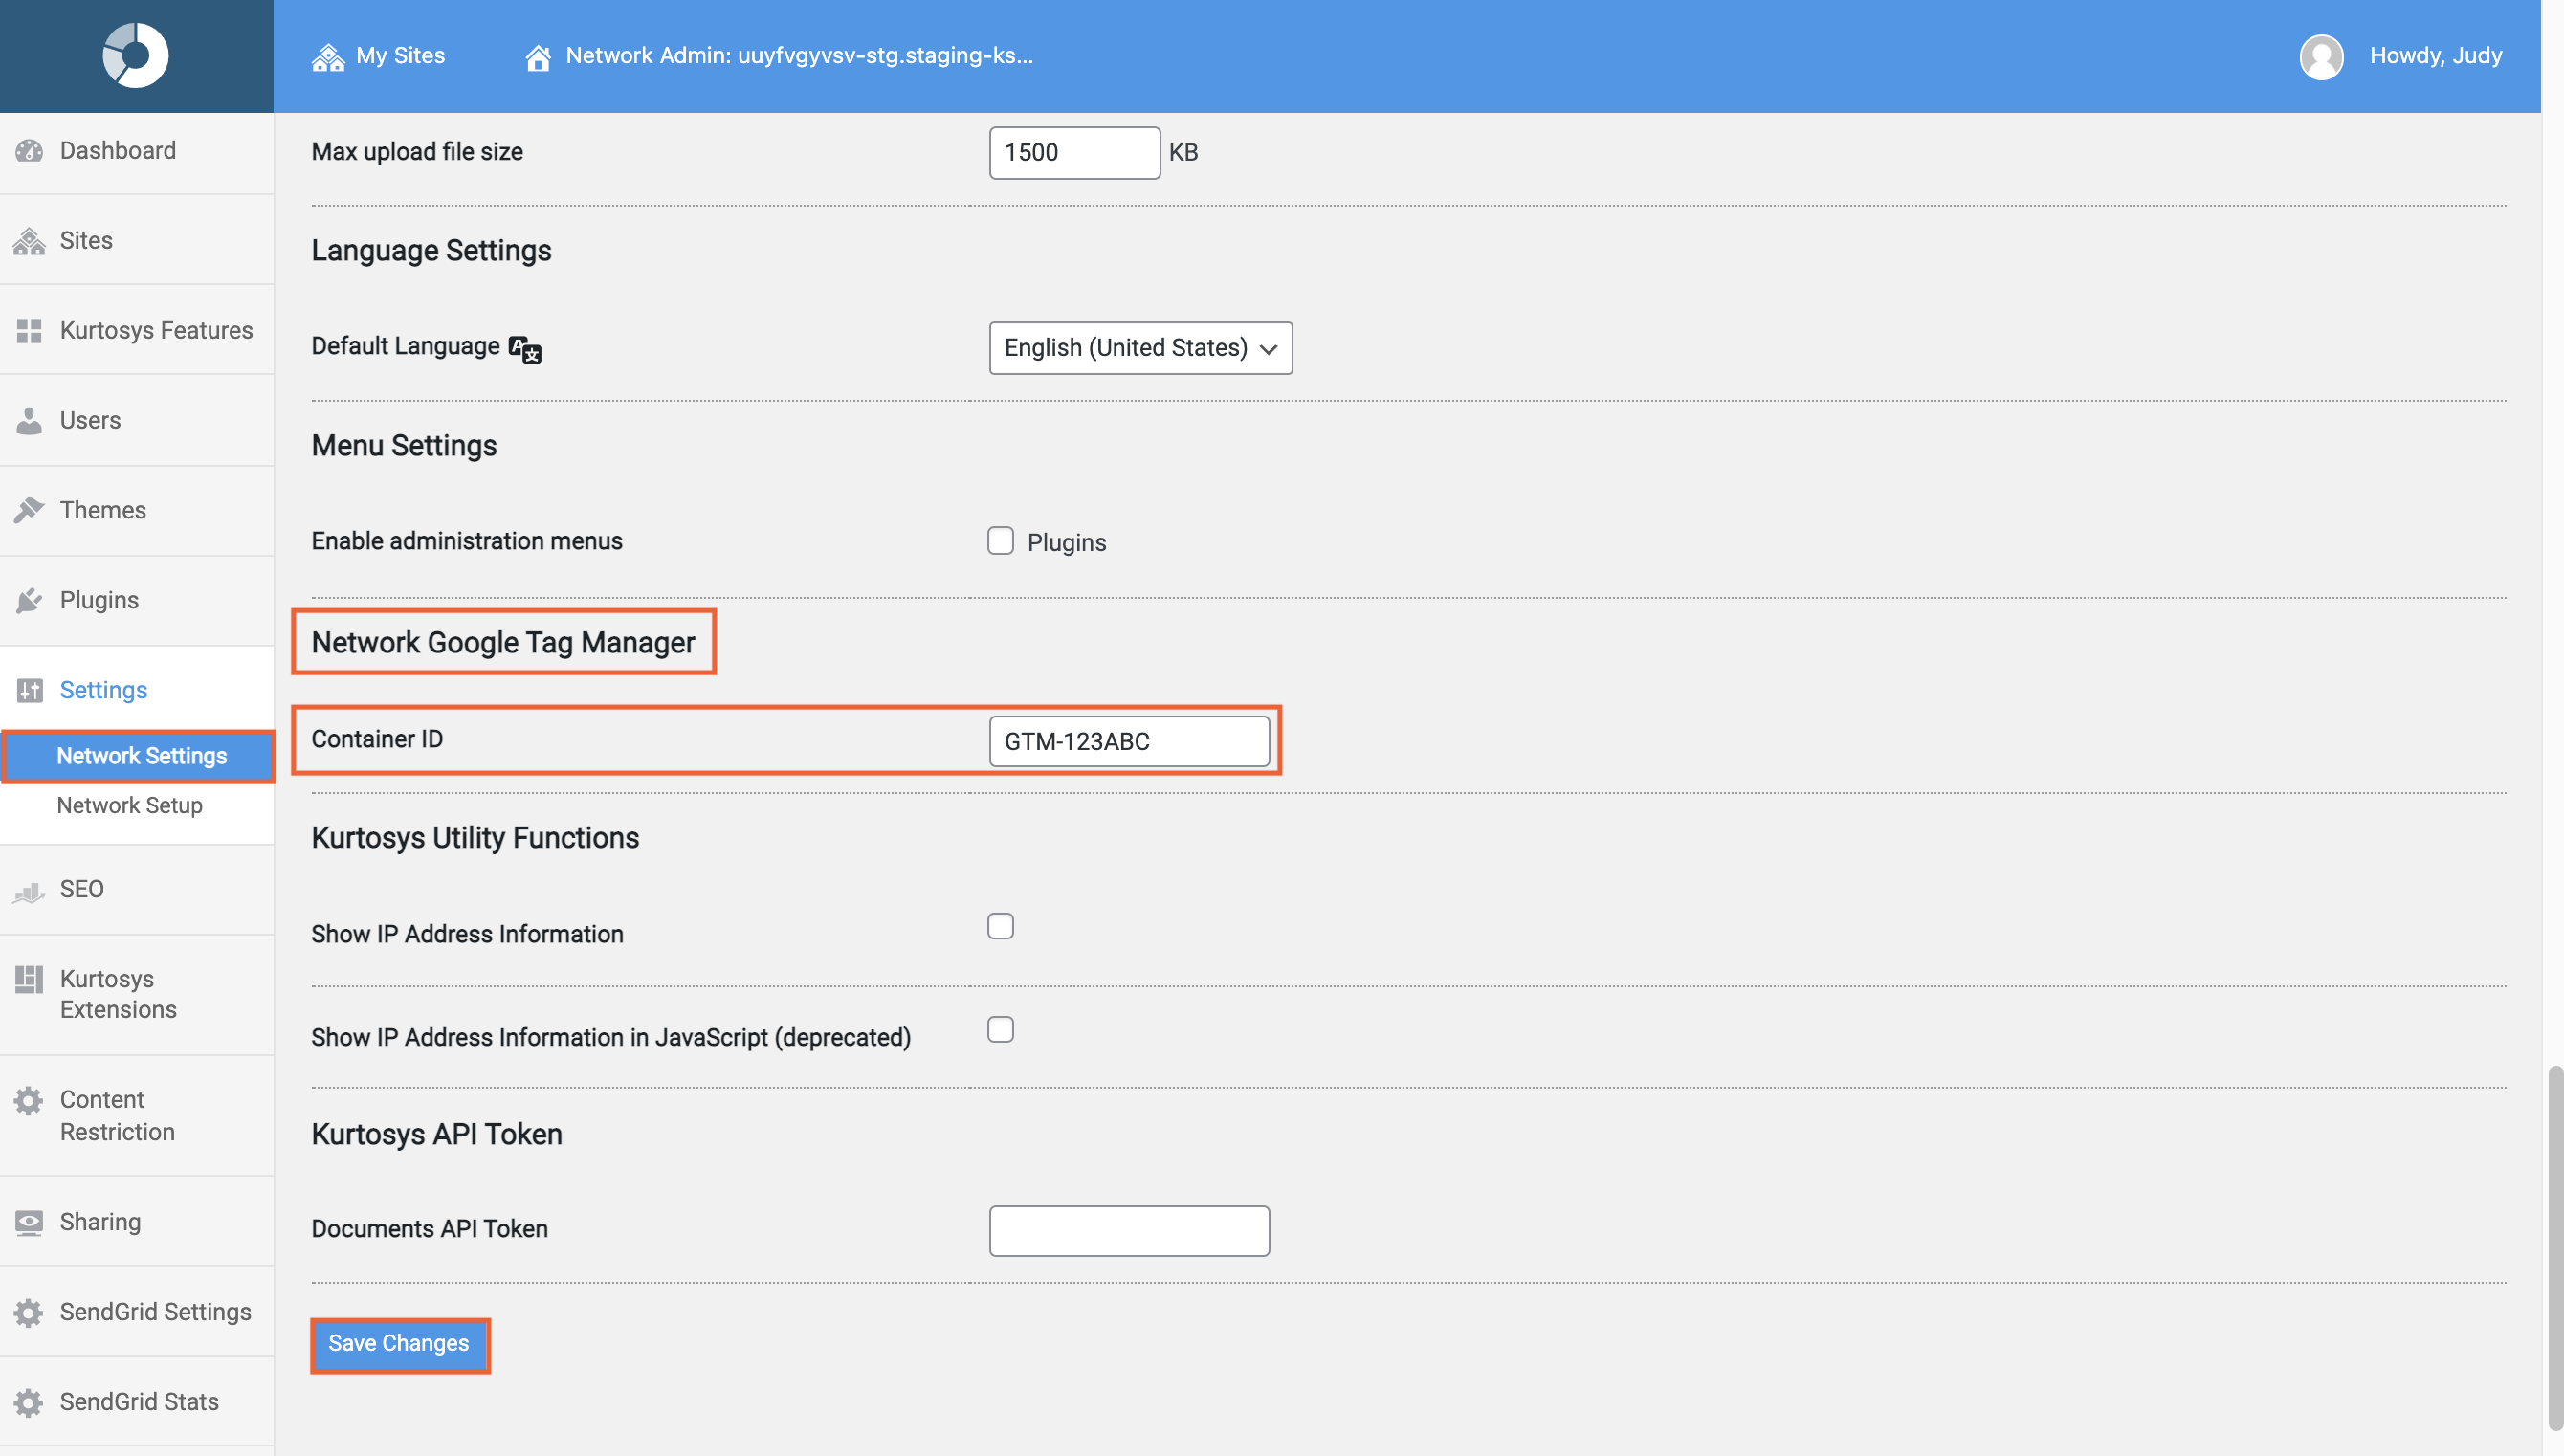
- In WordPress, hover over My Sites | Network Admin, then click Settings.
- In the Network Settings menu, scroll down to Network Google Tag Manager.
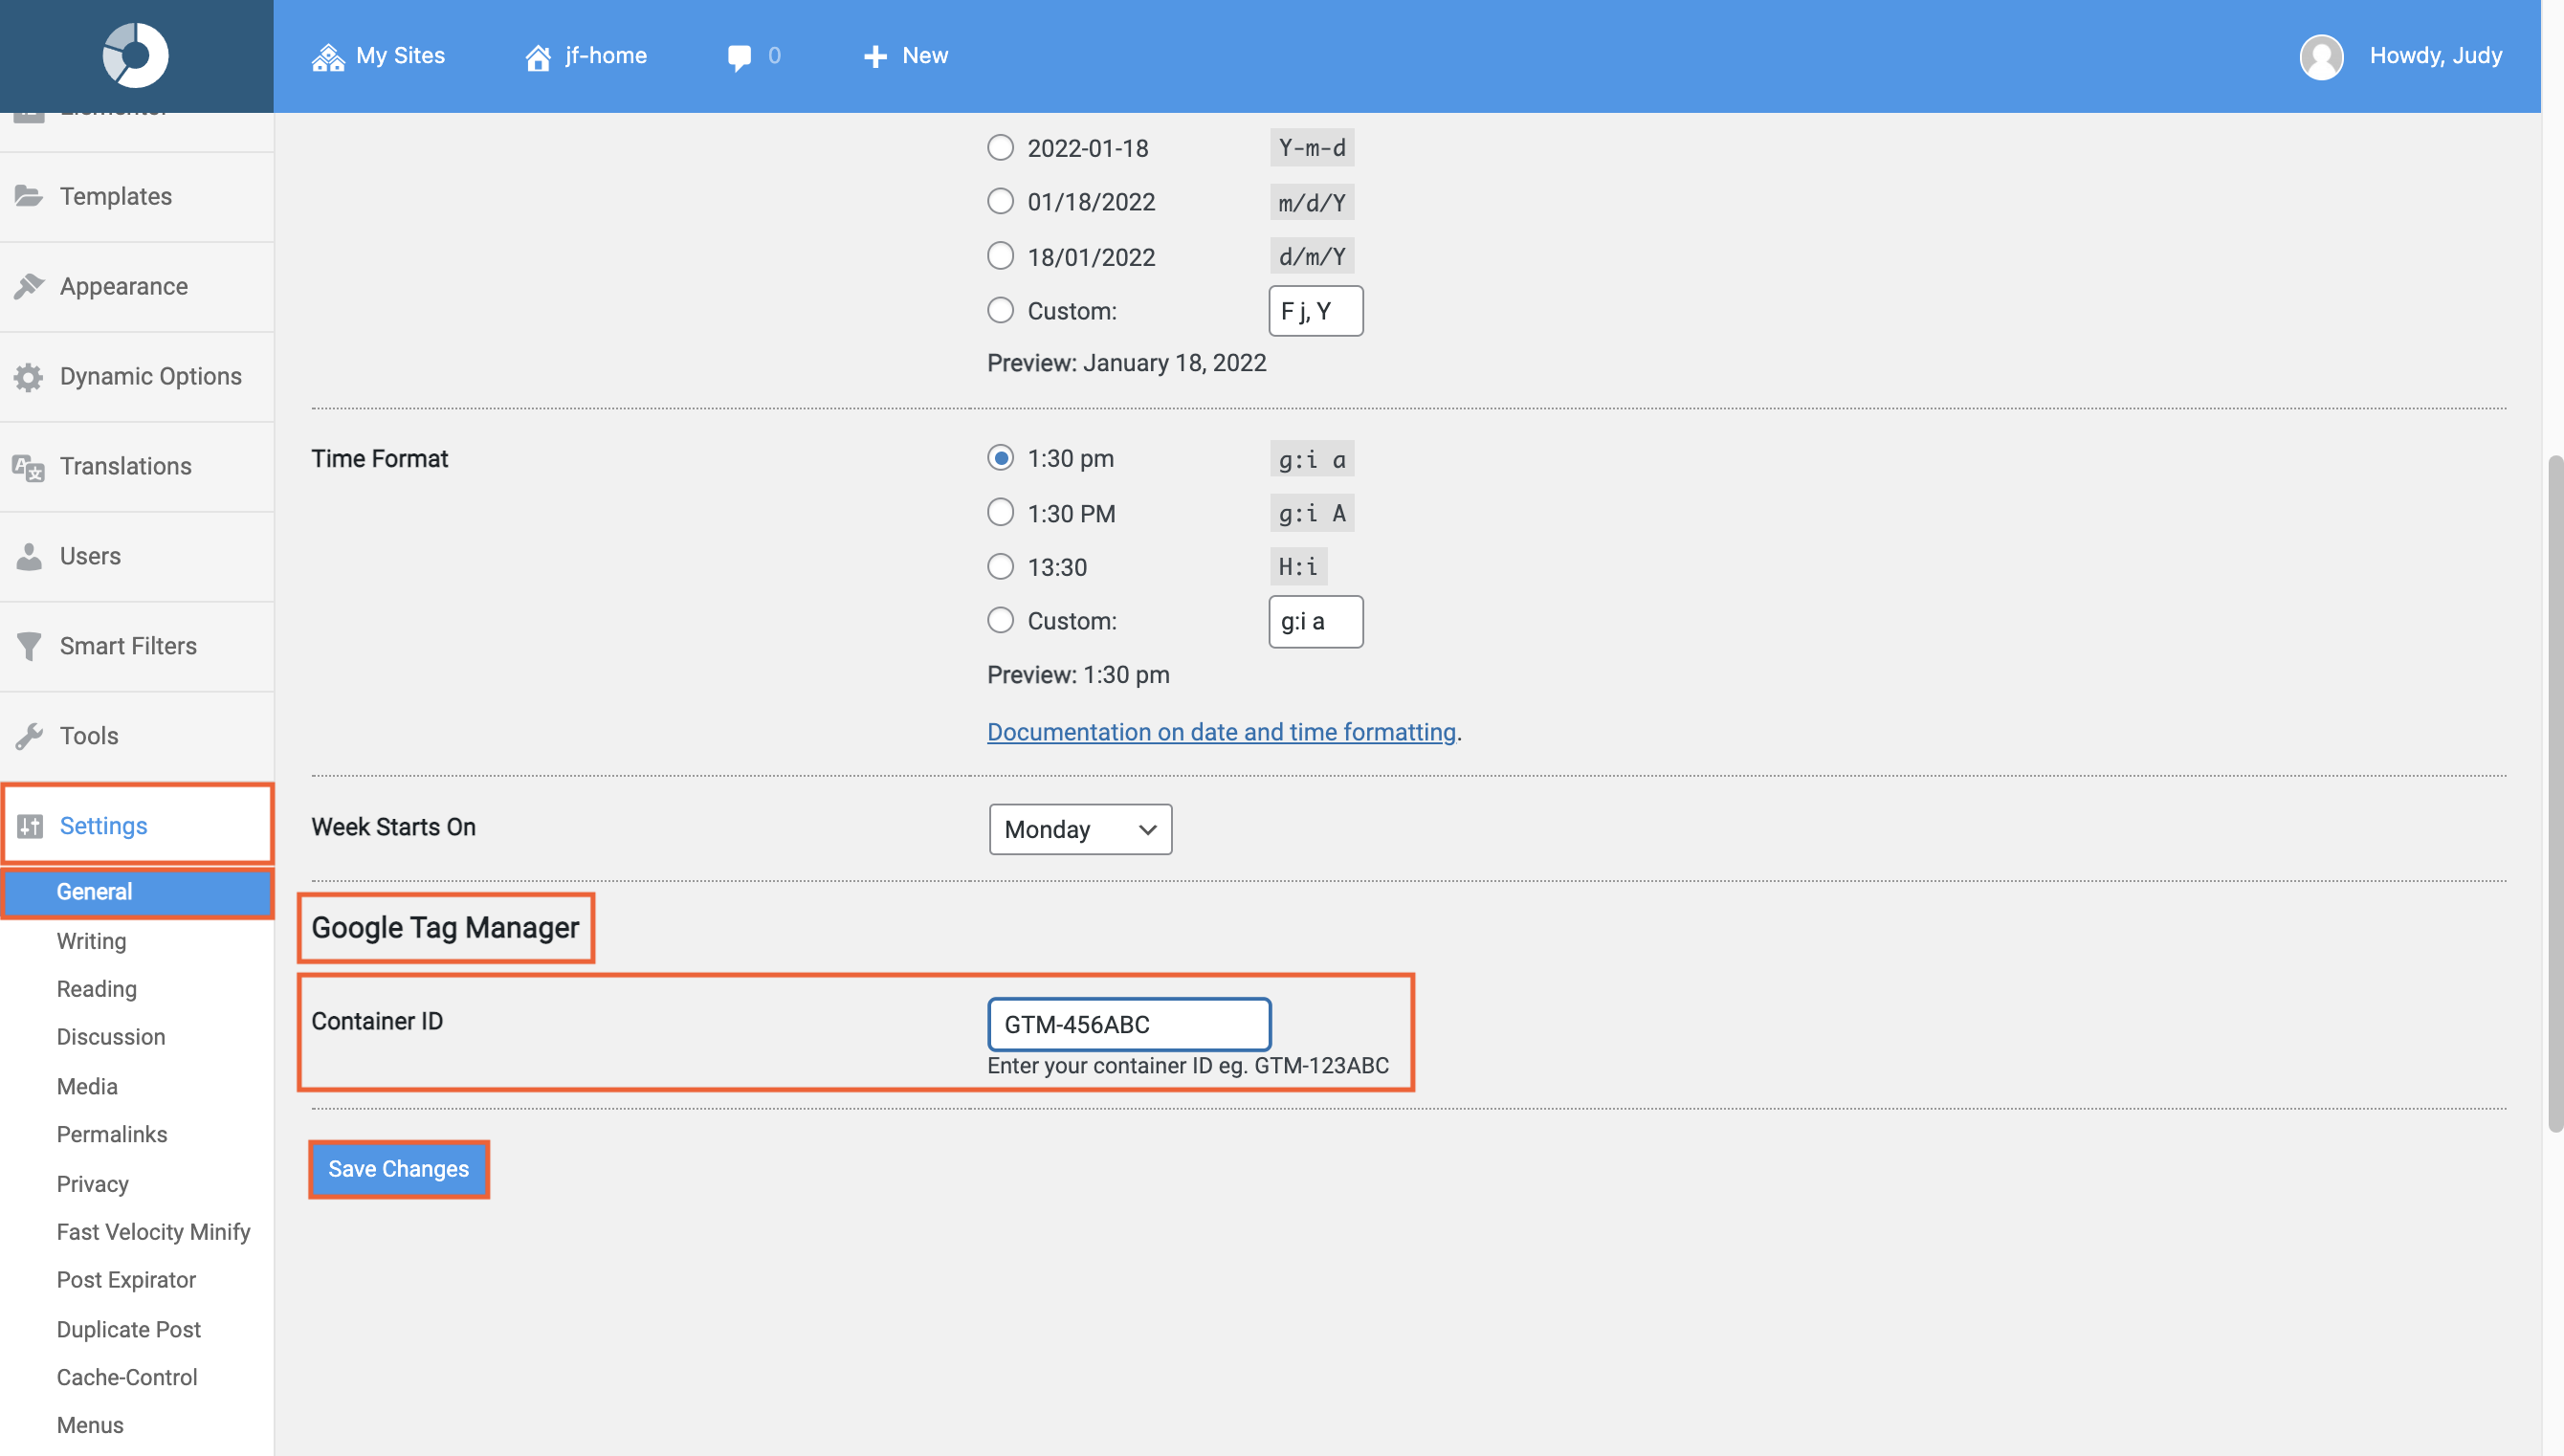
- Enter the Container ID. The Container ID should be available from your GTM console or an administrator.
- For more information on setting up your Google account to use GTM, follow this guide
- Click Save Changes.