Data Dictionary
The Data Dictionary is the space in which you build the structure for the database that will hold all your data properties, Entity related properties, Statistics, Commentaries, Disclaimers, Cultures, etc. It provides a framework for your data architecture. This makes it easier for data to be correctly stored when it is uploaded and to be accurately retrieved when it is called. The Data Dictionary is fully customizable meaning that it can be configured for any type of data as per a business’s needs. Data Dictionary items cannot be deleted, or removed from the system, data therefore must always match the correct structure, and adding new data types is easily achieved.
Access the Data Dictionary by clicking the System Administration cog.
![]()
Statistics
Statistics properties are usually used for displaying a series of data like Daily Price Stats or Financial Ratios in charts, graphs or tables. Statistics data tables always have 2 columns: a Label column and a corresponding Value column.

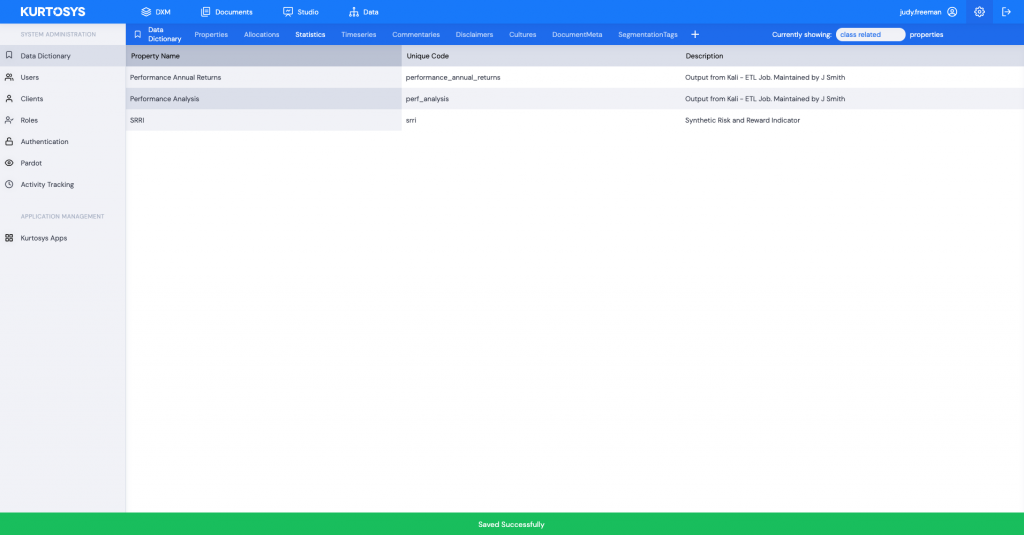
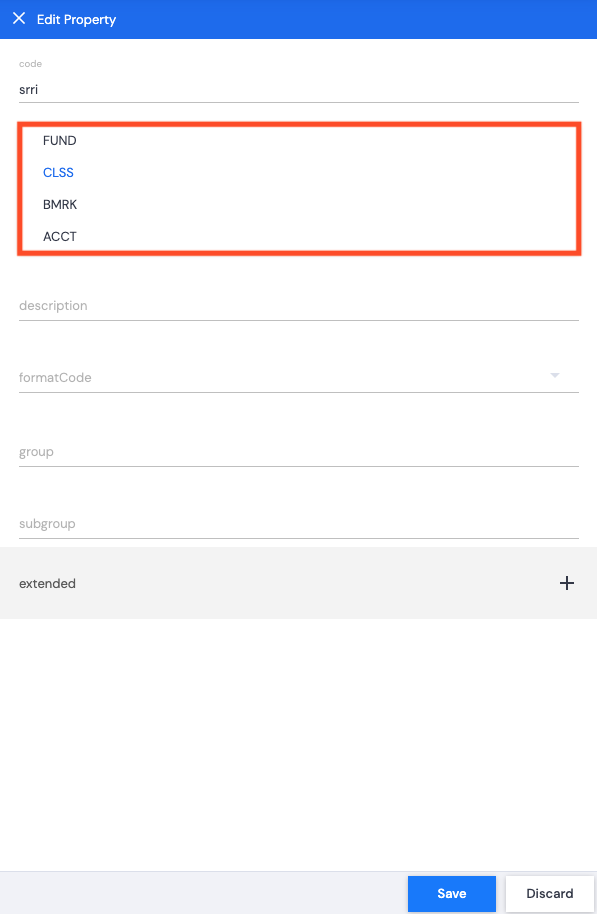
Statistics data items are associated with entity types: Class, Fund, Account or Benchmark and each one has a Property Name, Unique Code and Description attached. Not all fields are mandatory. Only Property Name, Unique Code and Description are displayed for Statistics.
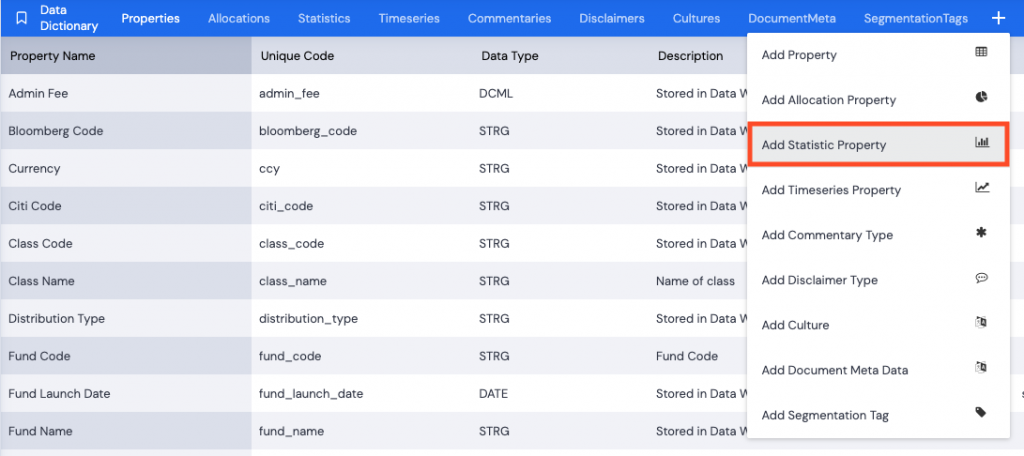
Adding Statistics to the Data Dictionary
- Click + to add a new statistic property.
- Select the data type to add. Click Add Statistic Property.
Items in red are mandatory and must be populated, code and label.
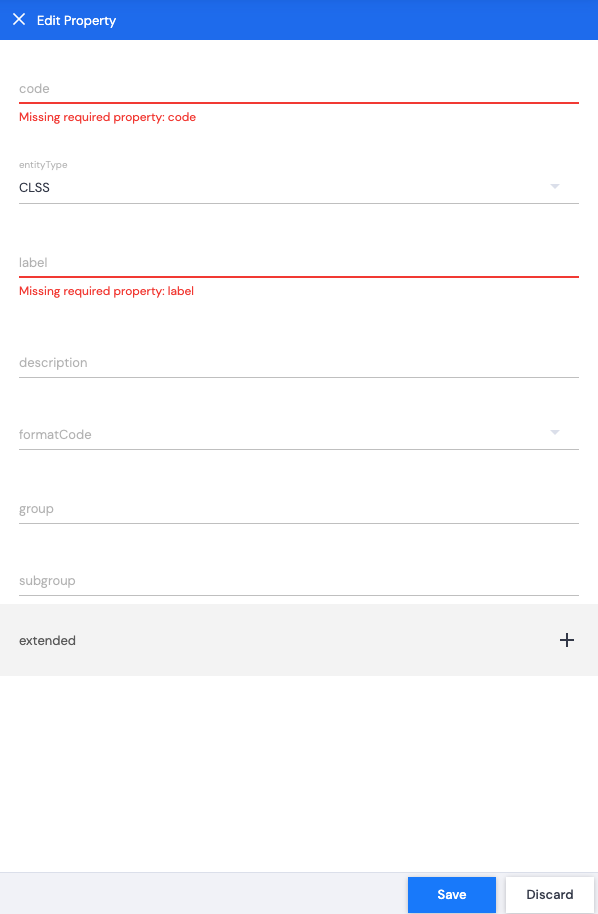
- Type in the code – snake case (lowercase with underscores instead of spaces).
- Type in the label – the label can match the code but as semantic English in Title Case.
- Use the dropdown arrow to select the entityType. (Fund, Class, Benchmark or Account)
- Type in core for group. This is no longer used but still needs to be populated.
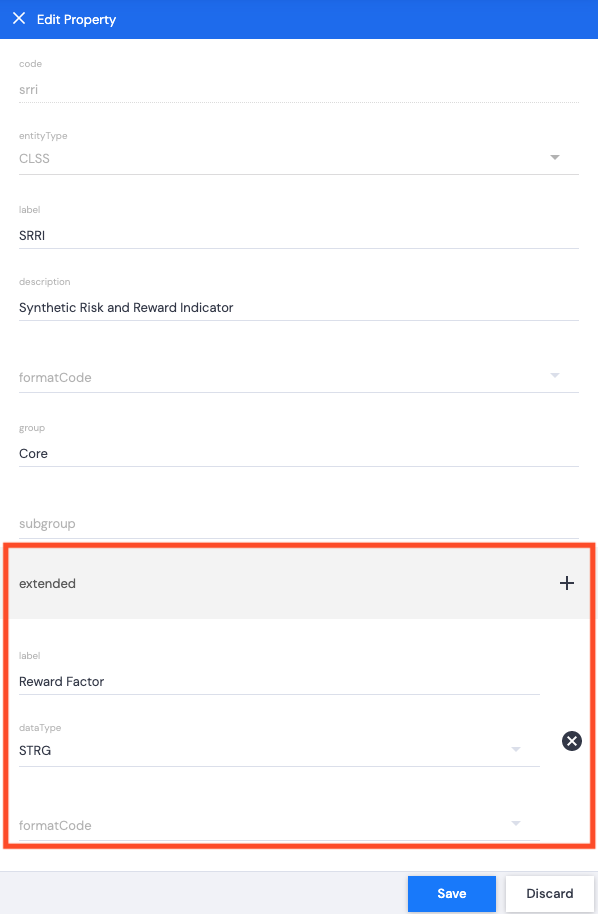
- Click + next to extended to add additional columns to your Statistics table if needed.
- Add a label – what the column header will be.
- Add a datatype – string, number, decimal, etc.
- Add a formatCode if needed.
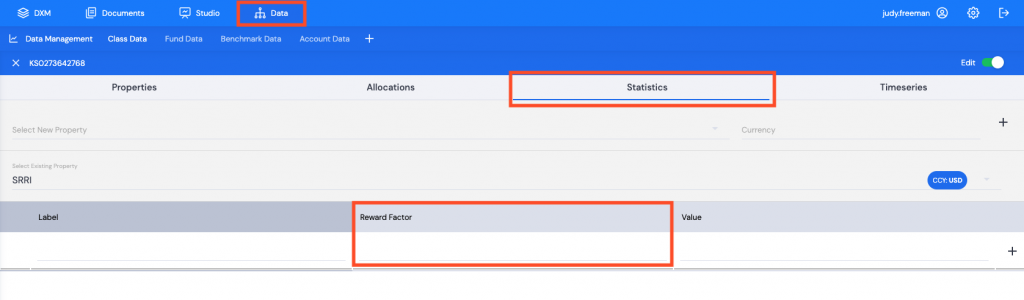
This translates to an additional column header in the statistics table in Data.
- Click Save. A green successful task pop up bar will display across the bottom of the screen.