Categories

System Admin
DXM
Documents
Data

Links

User Profile App – Email Templates

Email Templates

Unless you are using the Kurtosys App as your default application, email templates need to be set for a specific app, for example, when the User Profile App is used, it includes an option for the User to access their Profile to reset their password; emails for this user communication must be set up in the User Profile App.

Customizable Email Templates are accessible from any Studio App, the emails which are applicable to this particular app include:

  • Password Reset
  • Account Impersonation

Click the Email Templates tab.

  1. Select the Password Reset template. The wording and layout of the email can be changed, images can be added if required.
  2. To see a sample of this email template without any customizations, enter your email address in the Email field below, and click Send Test Email.
  3. A green pop up Email Sent bar will display across the bottom of the screen.
  4. You will receive a sample email in your inbox.

You can:

  • Customize the wording and/or layout of the email
  • Add a logo or other images – these will also need to be added under the Assets tab, or called from a DataURL
  • Change the Sender email address
 
After making any email template changes, click Save Template.

Customize the wording

Everything inside the “body” of the email can be customized. It currently has a table layout with minimal wording.

The pane to the left of the editing pane shows which placeholders (variables) may be used in the email. Any wording in the email body can be changed except these placeholders as they must match exactly to the Data Dictionary codes.

  1. Add some wording to your email, for example, add “Dear” in front of {{userName}} or change some wording, e.g. “You have requested a {{applicationName}} reset.” instead of the standard wording. To add text in new rows, add additional tags to the HTML.
  2. Click Save Template to save your changes.

A green pop up Email Saved bar will display across the bottom of your screen.

  1. Add your email address then click Send Test Email to send yourself the email template with your changes implemented.

A green Email Sent pop up bar will display across the bottom of the screen.

  1. Check your email to see the new template with your changes.

Add a logo or other images

Any images used in the email can be called using one of the following options:

  • Via a Data URI/URL – the image would be base64 encoded and the string referenced
  • Added as an asset under the Assets tab – the image would then reference the app asset URL e.g. https://api-uk.kurtosys.app/applicationManager/apps/'<GUID>’/Image.png
  • Via the website’s WordPress site where the image’s URL can be found
 
  1. In the body of the email, add new tags.
You will need an img tag and a src (source) which will depend on where you are sourcing your image from.
 
You can use a handy tool like the one found at https://websemantics.uk/tools/image-to-data-uri-converter/ to convert your image to a Data URL
  1. Copy the URI and paste it into the HTML in the email body. The Data URL conveniently includes the img and src tags as well as an alt tag for alternate text and dimension tags for width and height.
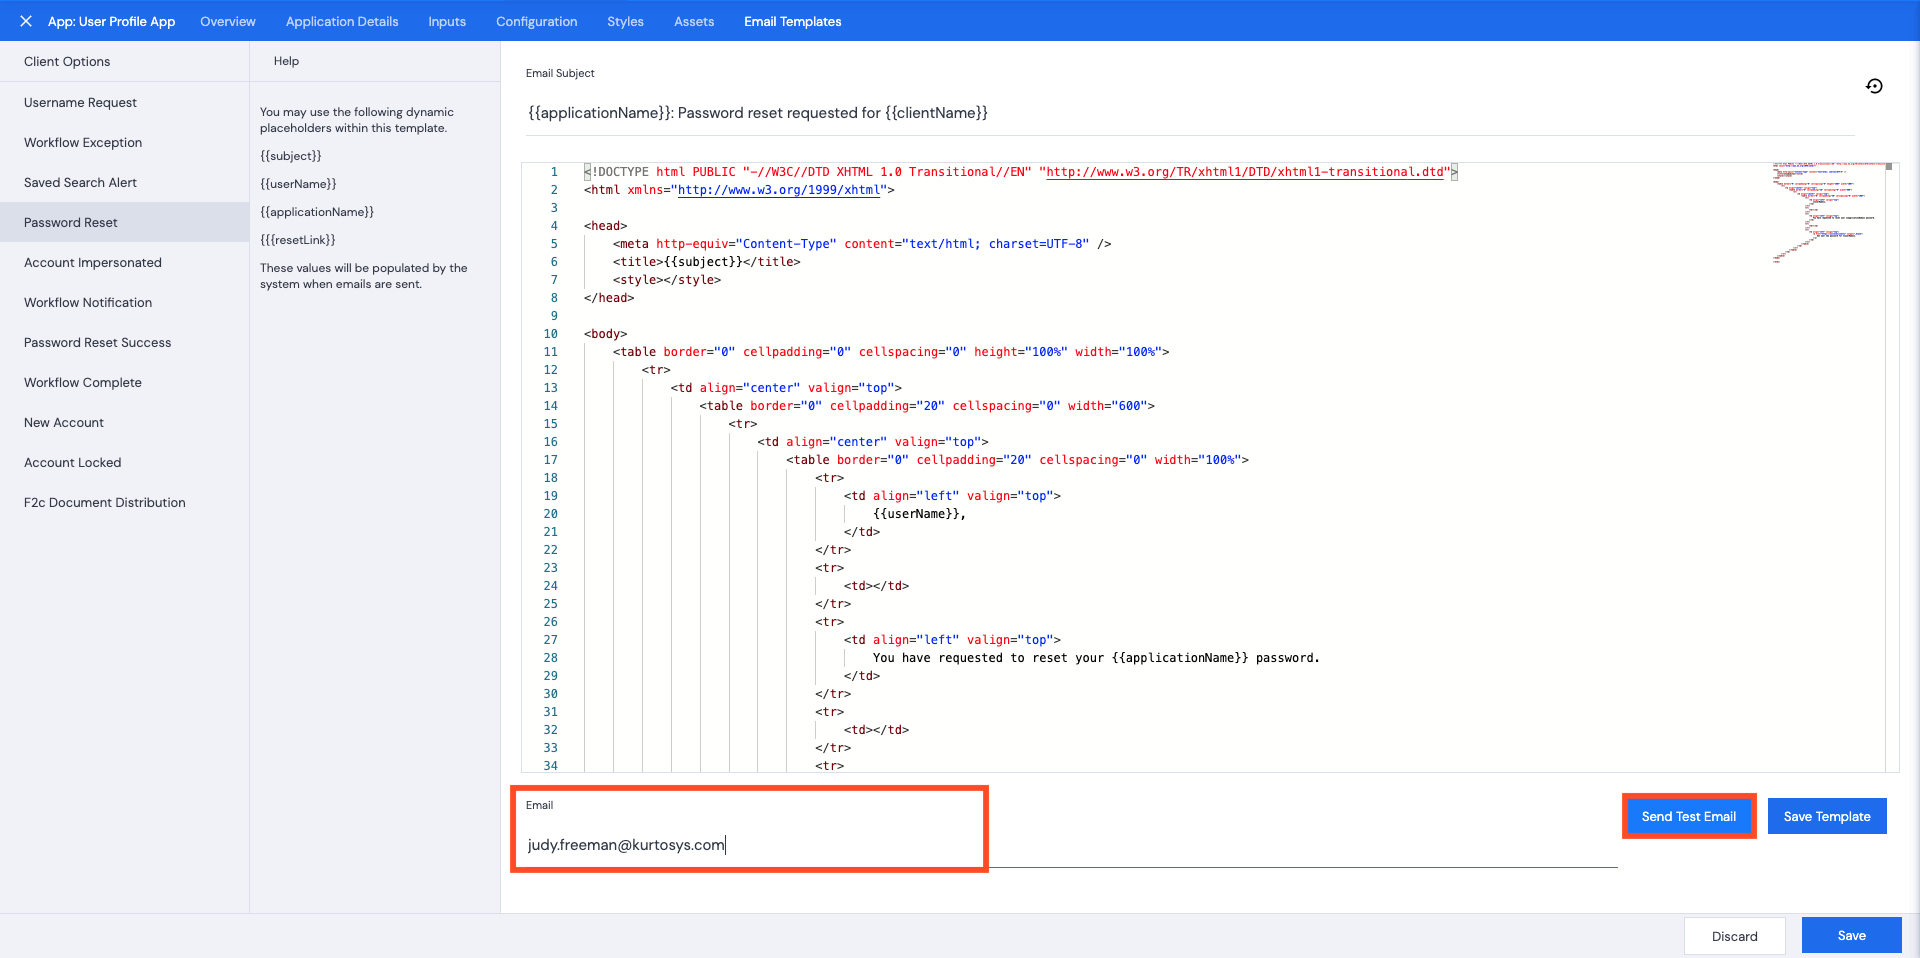
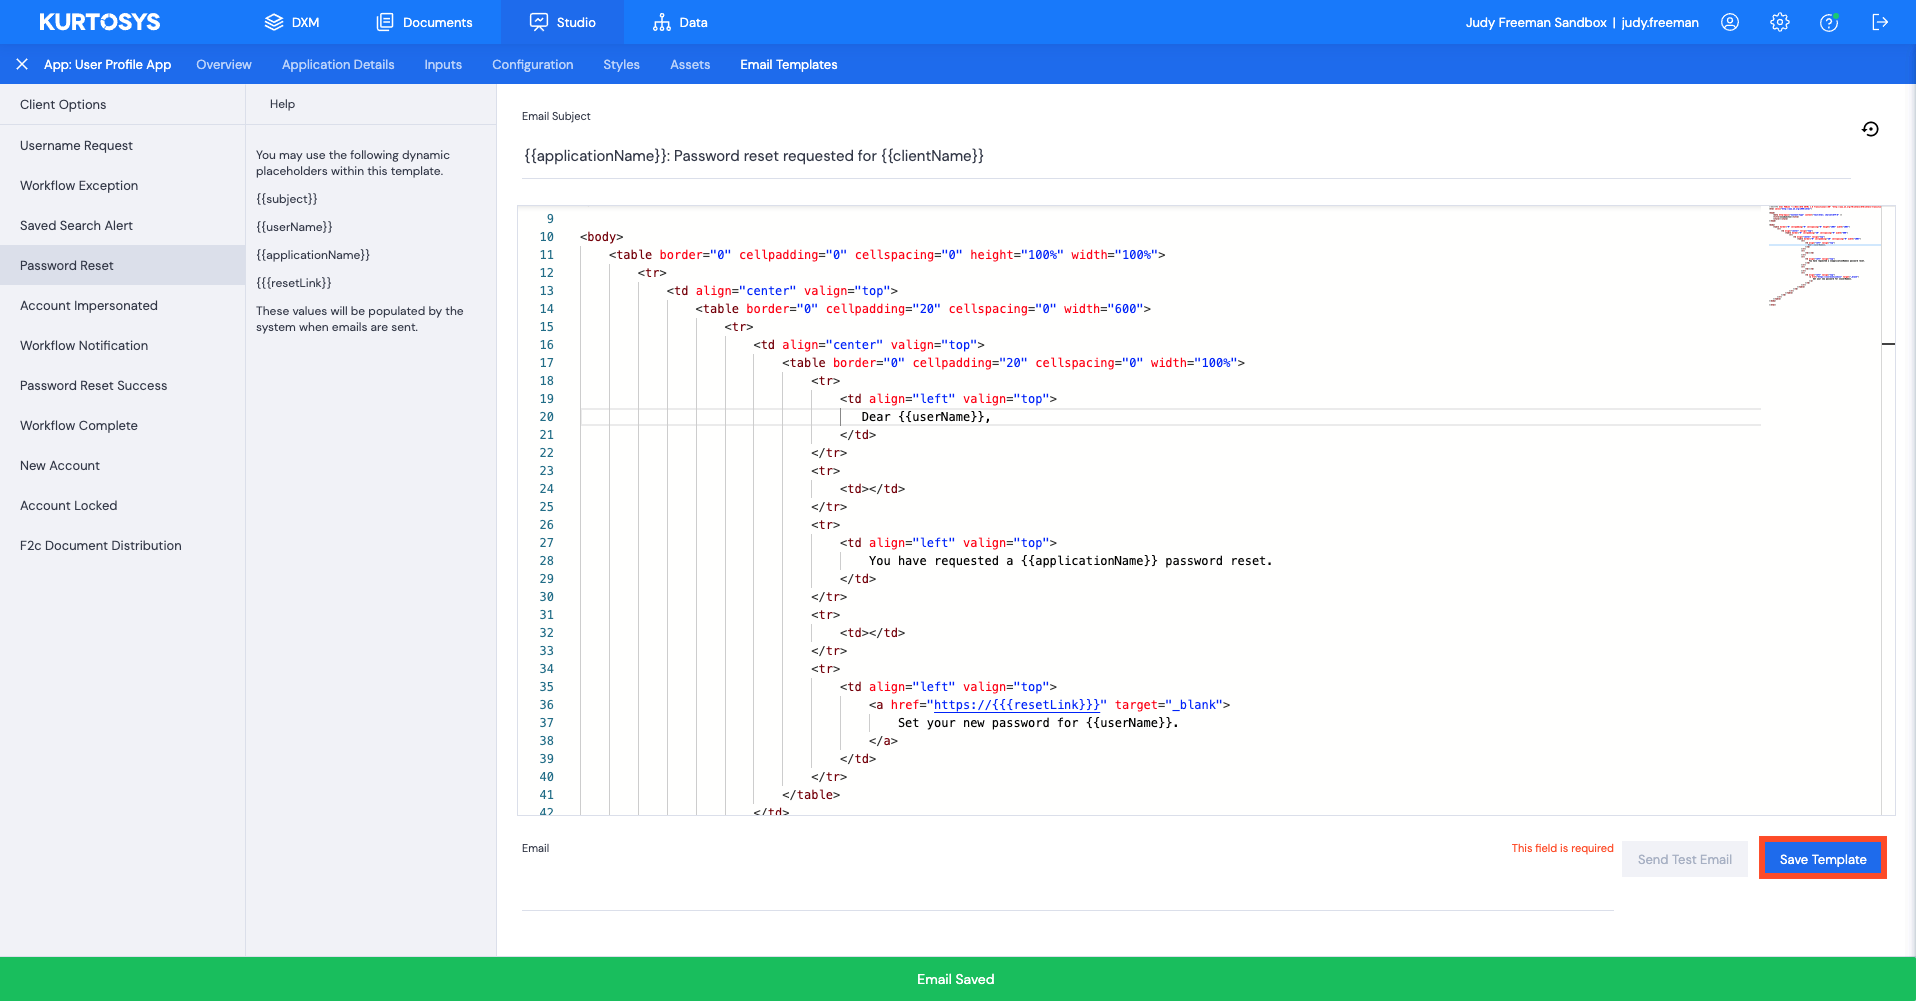
  1. Click Save Template. A green pop up bar will display across the bottom of your screen.
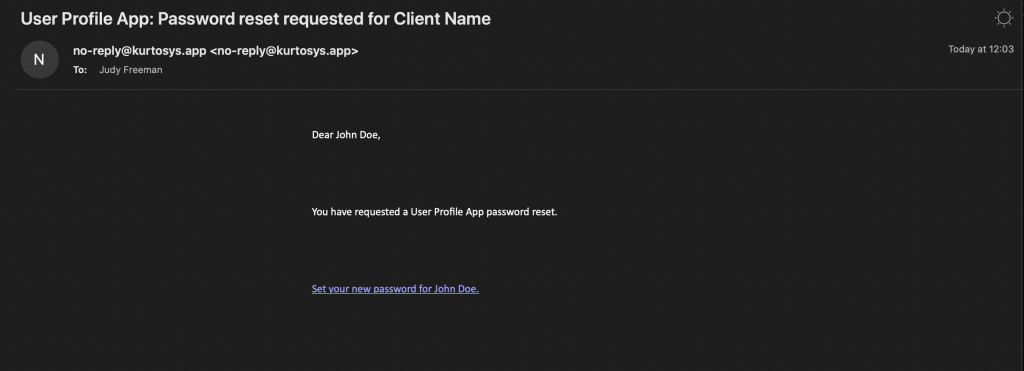
  2. Add in your email address, then click Send Test Email. A green pop up bar will display across the bottom of your screen.
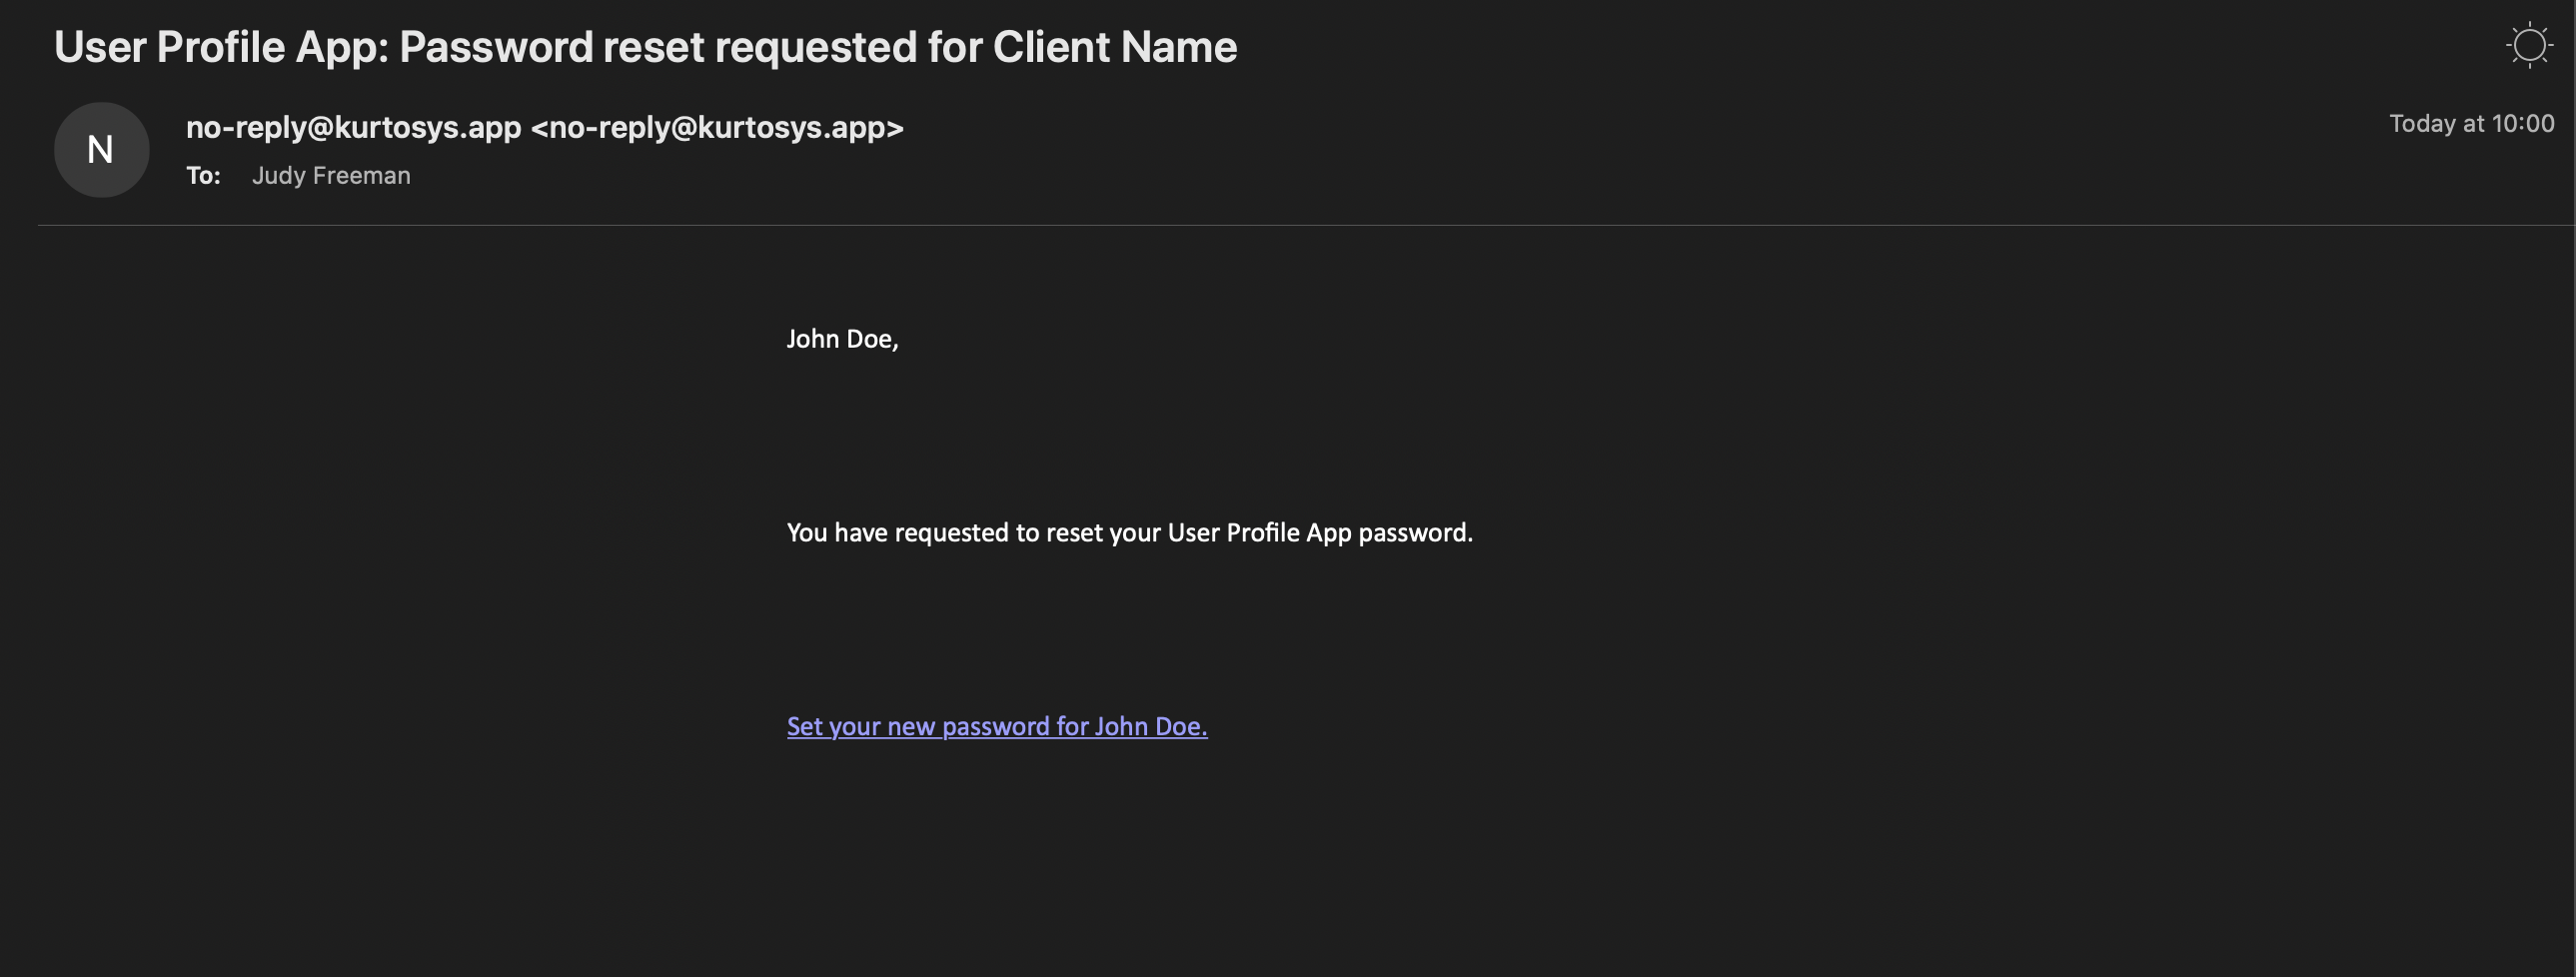
  3. Check your email inbox for your new sample email.

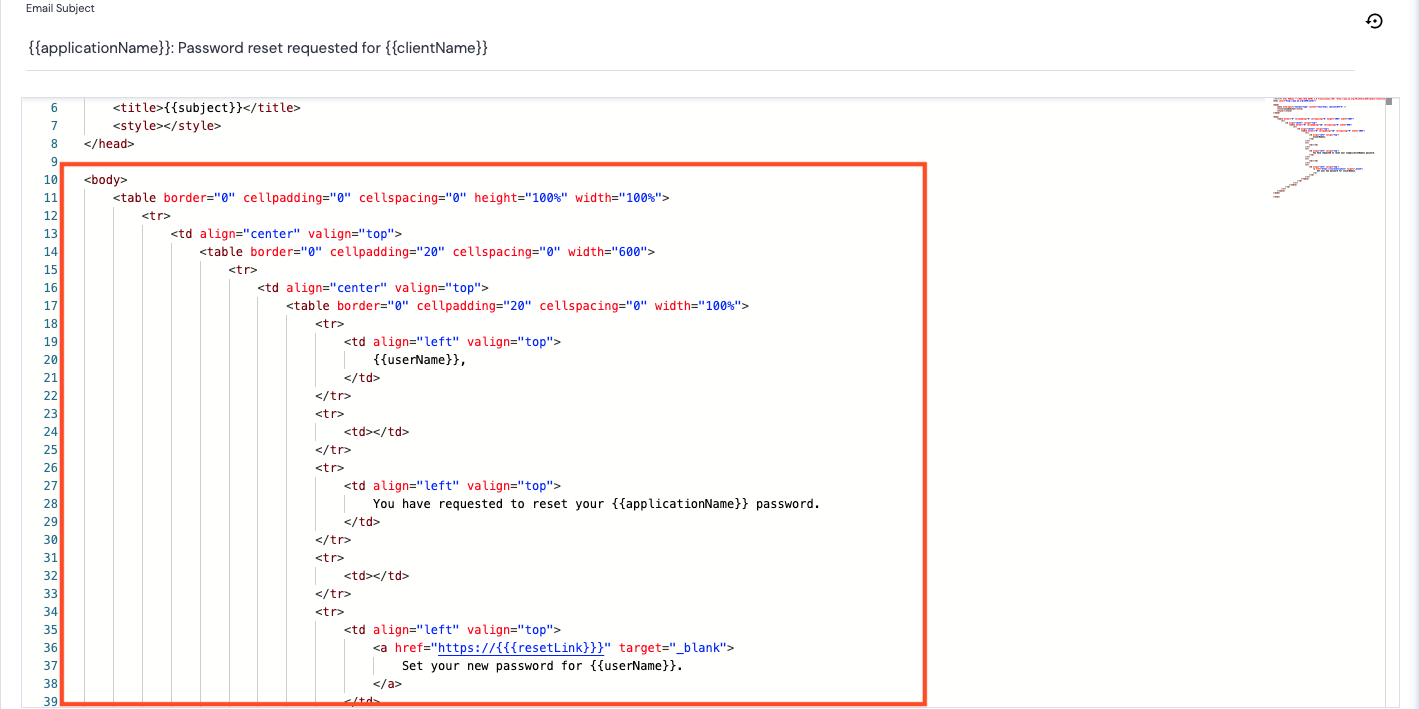
The logo will be displayed in the email with the dimensions specified in the HTML.

Change the “from” email address

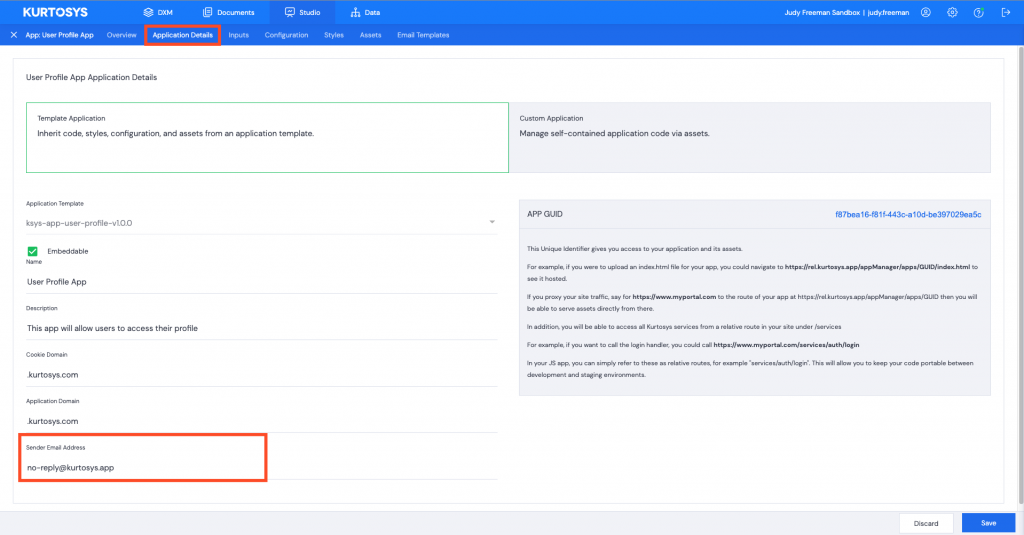
  1. Click the Application Details tab.
  2. Change the email address in the Sender Email Address field.
  3. Click Save.