
When a client generates and hosts their Documents with Kurtosys, the URL on which these documents are presented (when the Document URL has been activated), includes various technical parts that clients may not want to include in marketing material or have indexed by Search Engines. Custom document URLs have been designed to give customers a simpler, easy-to-read URL for their documents. Instead of seeing a long and complex URL complete with KurtosysApp info and Client Tokens, the URL can be custom-designed by the client to follow a specific format.
Document URLs are long and unwieldy, and difficult to copy if you want to quickly send someone a link. With Custom Document URLs, this potential problem is easily solved.
Note: DXM must be enabled, and domains must be available on the client instance in order to use this feature.
Setting up Custom Document URLs
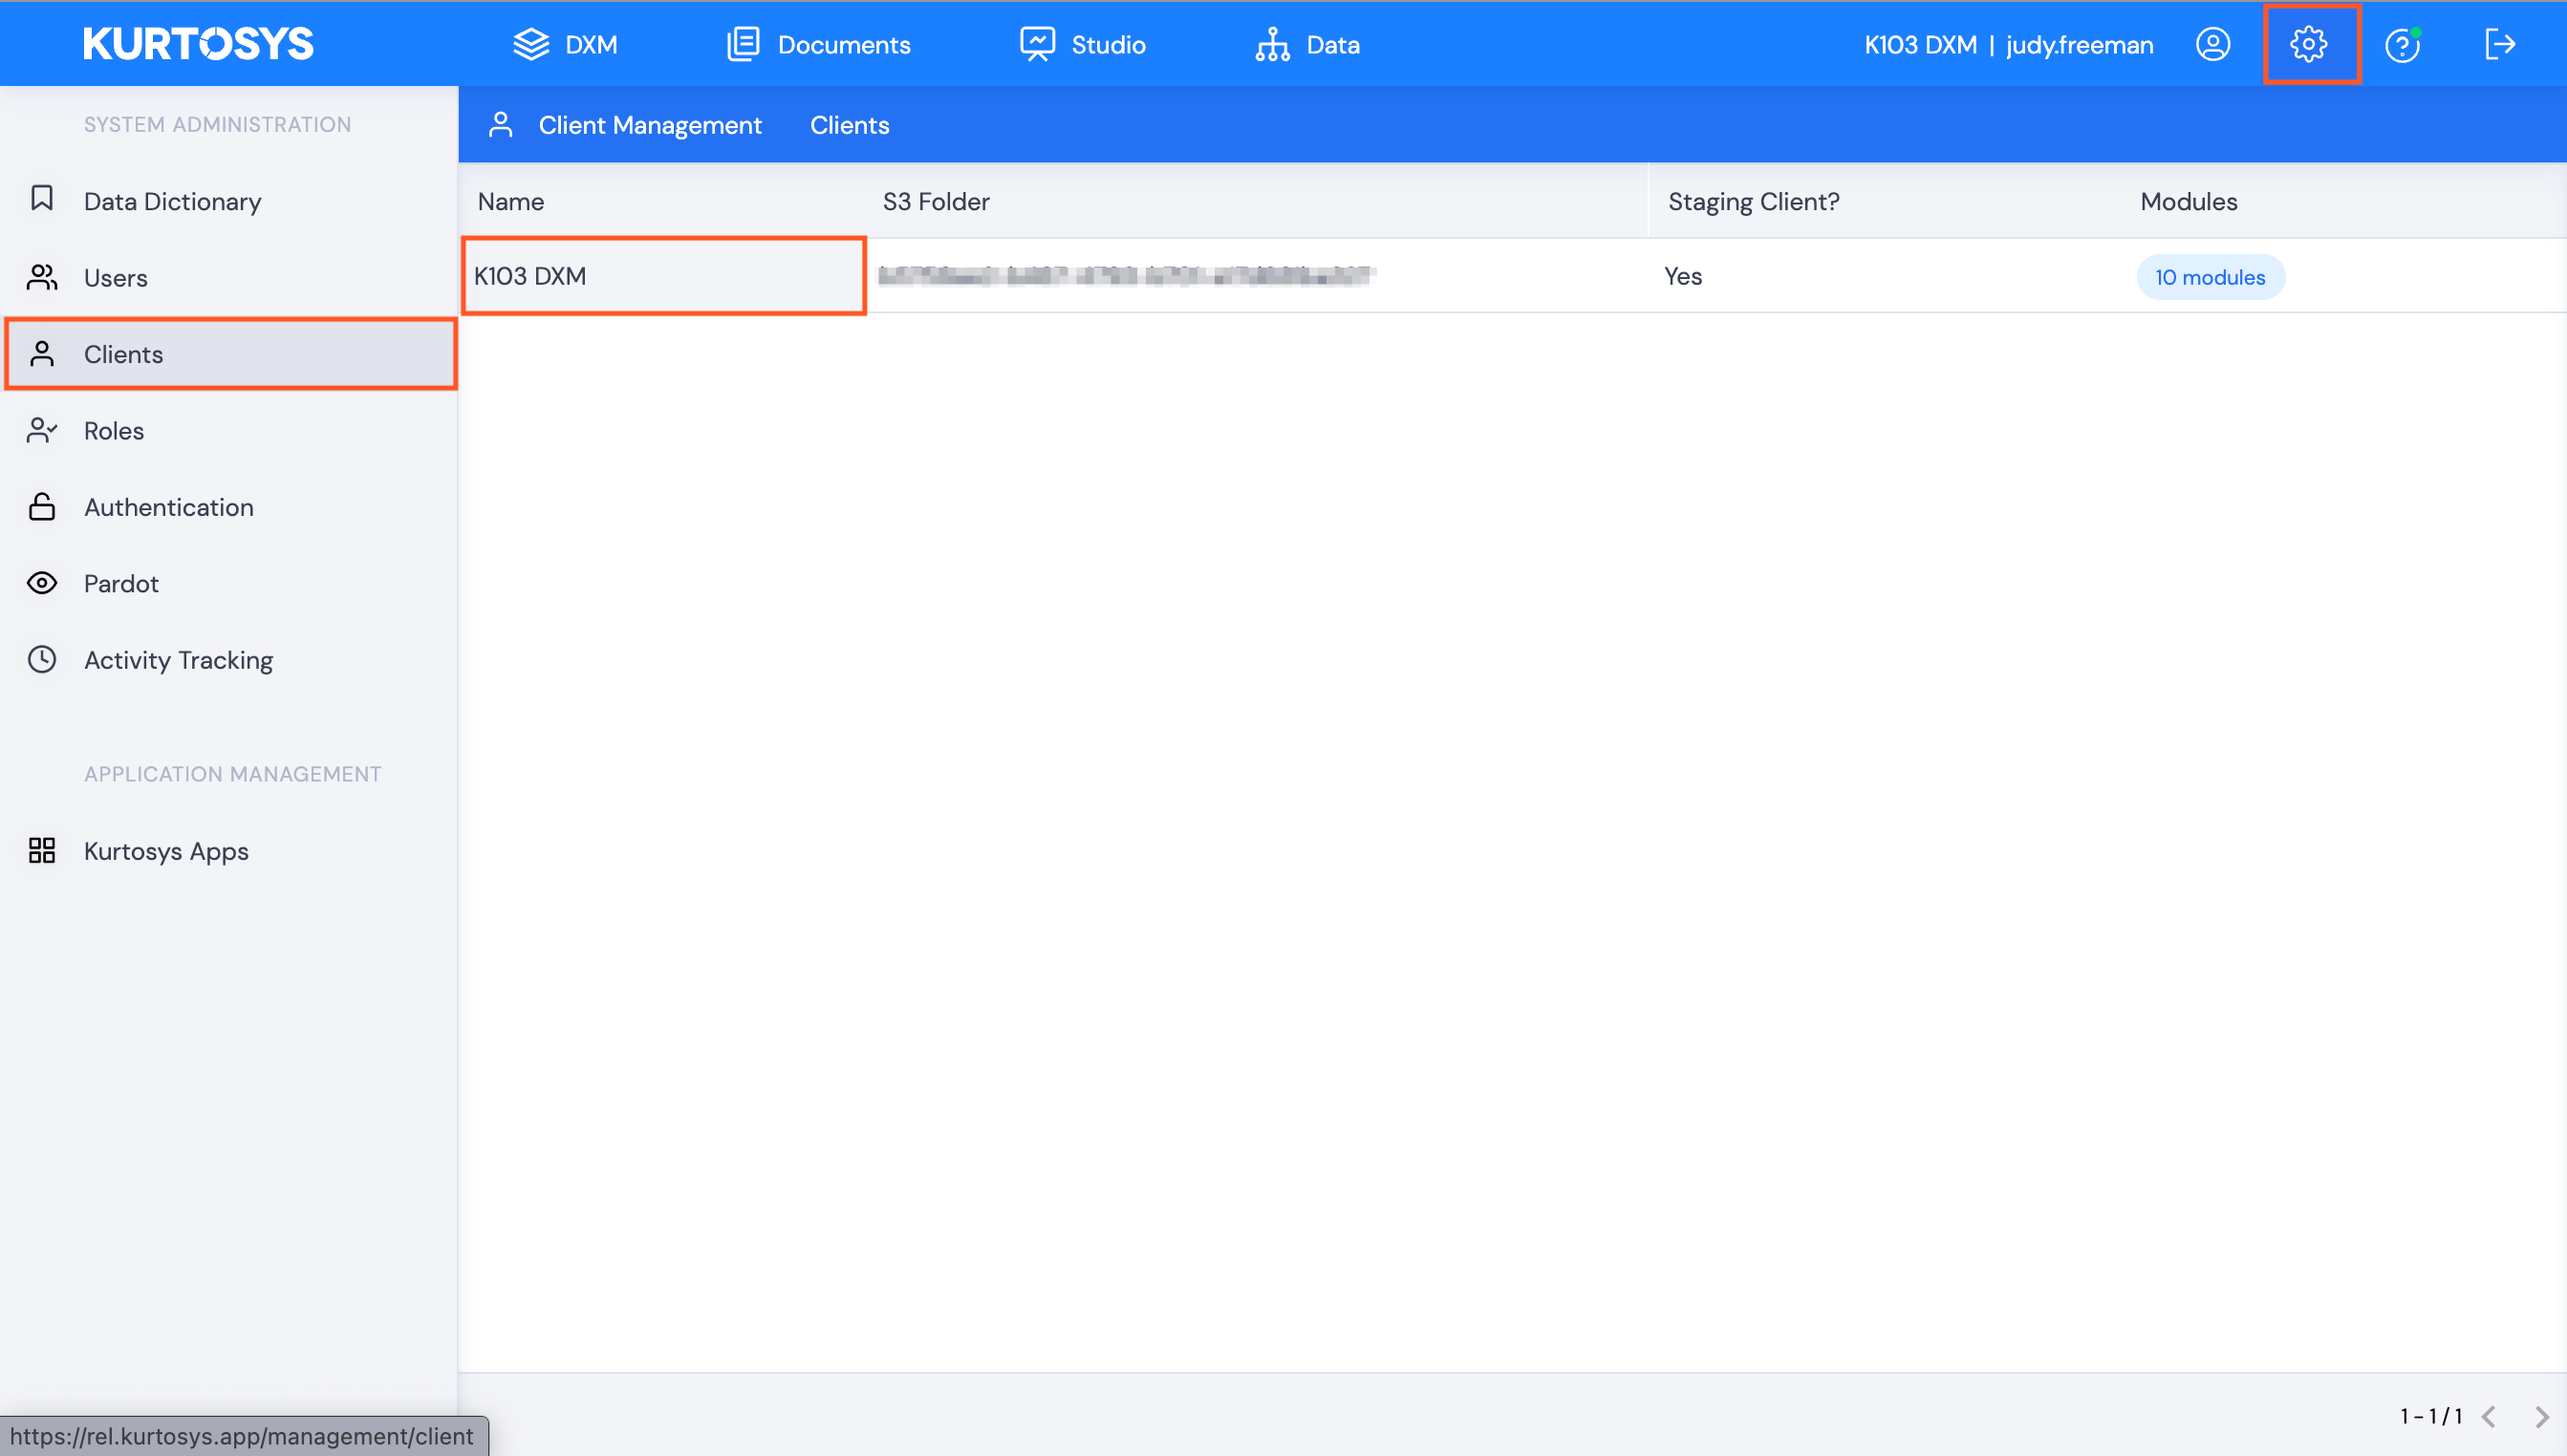
- Click the System Administration cog.
- Click Clients.
- Click the client Name.
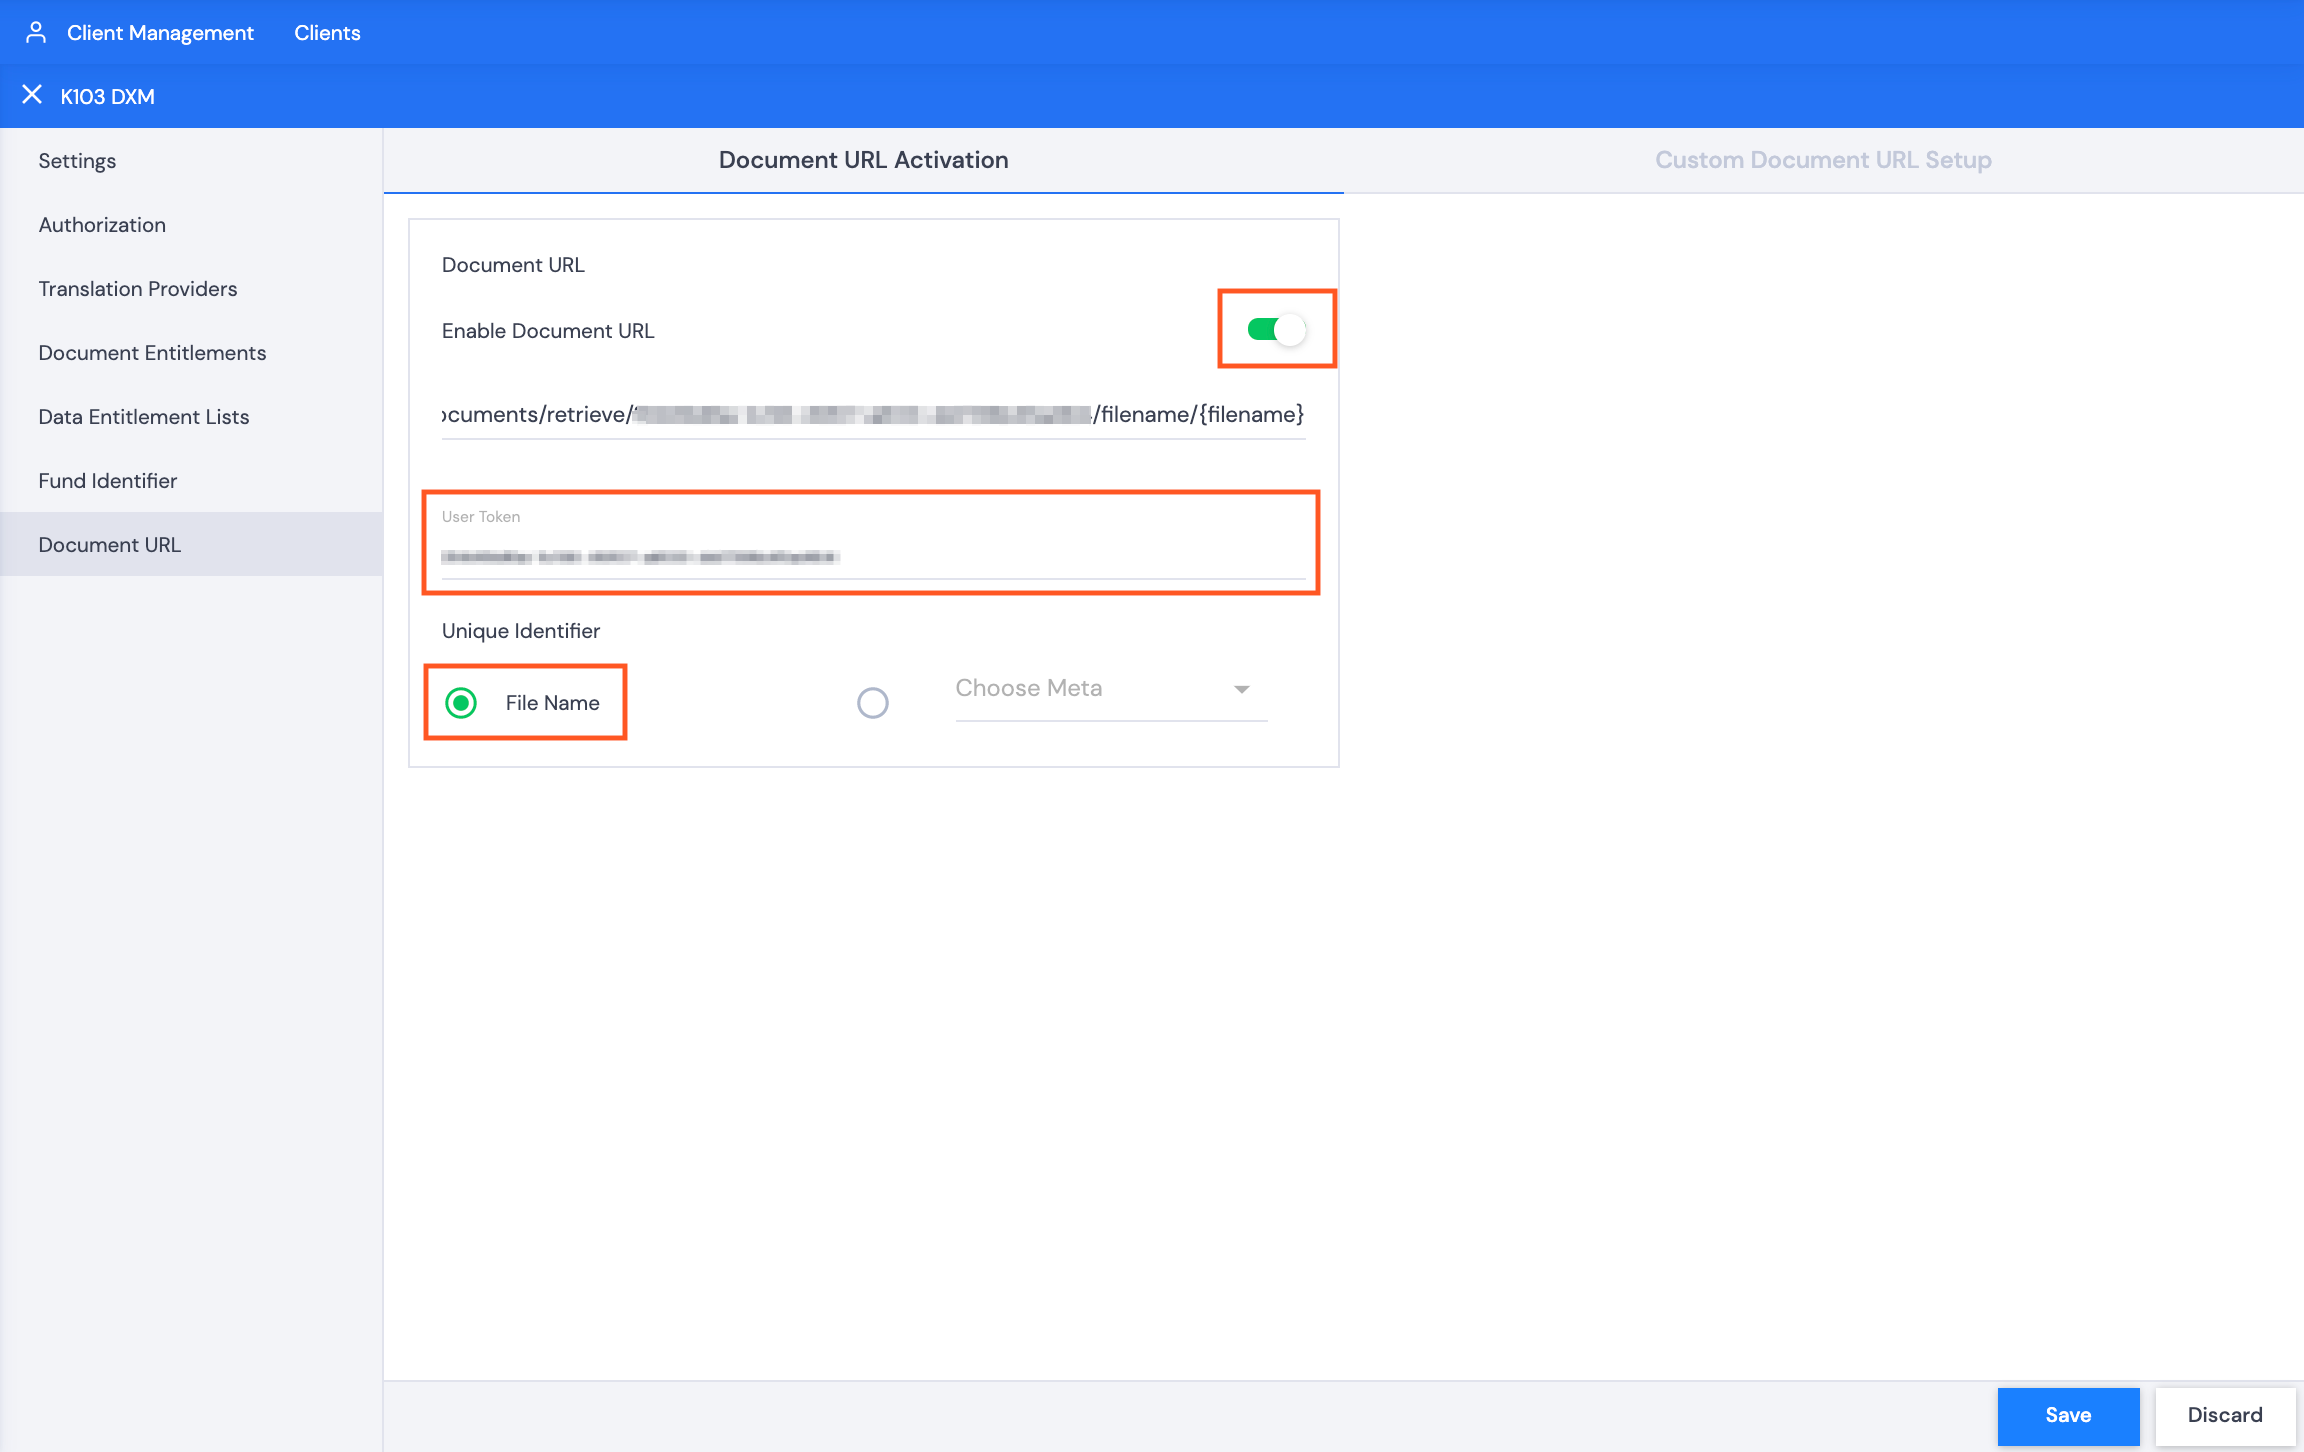
- Click Document URL in the Client Management menu.
- Toggle on Enable Document URL.
- Add in your API User Token.
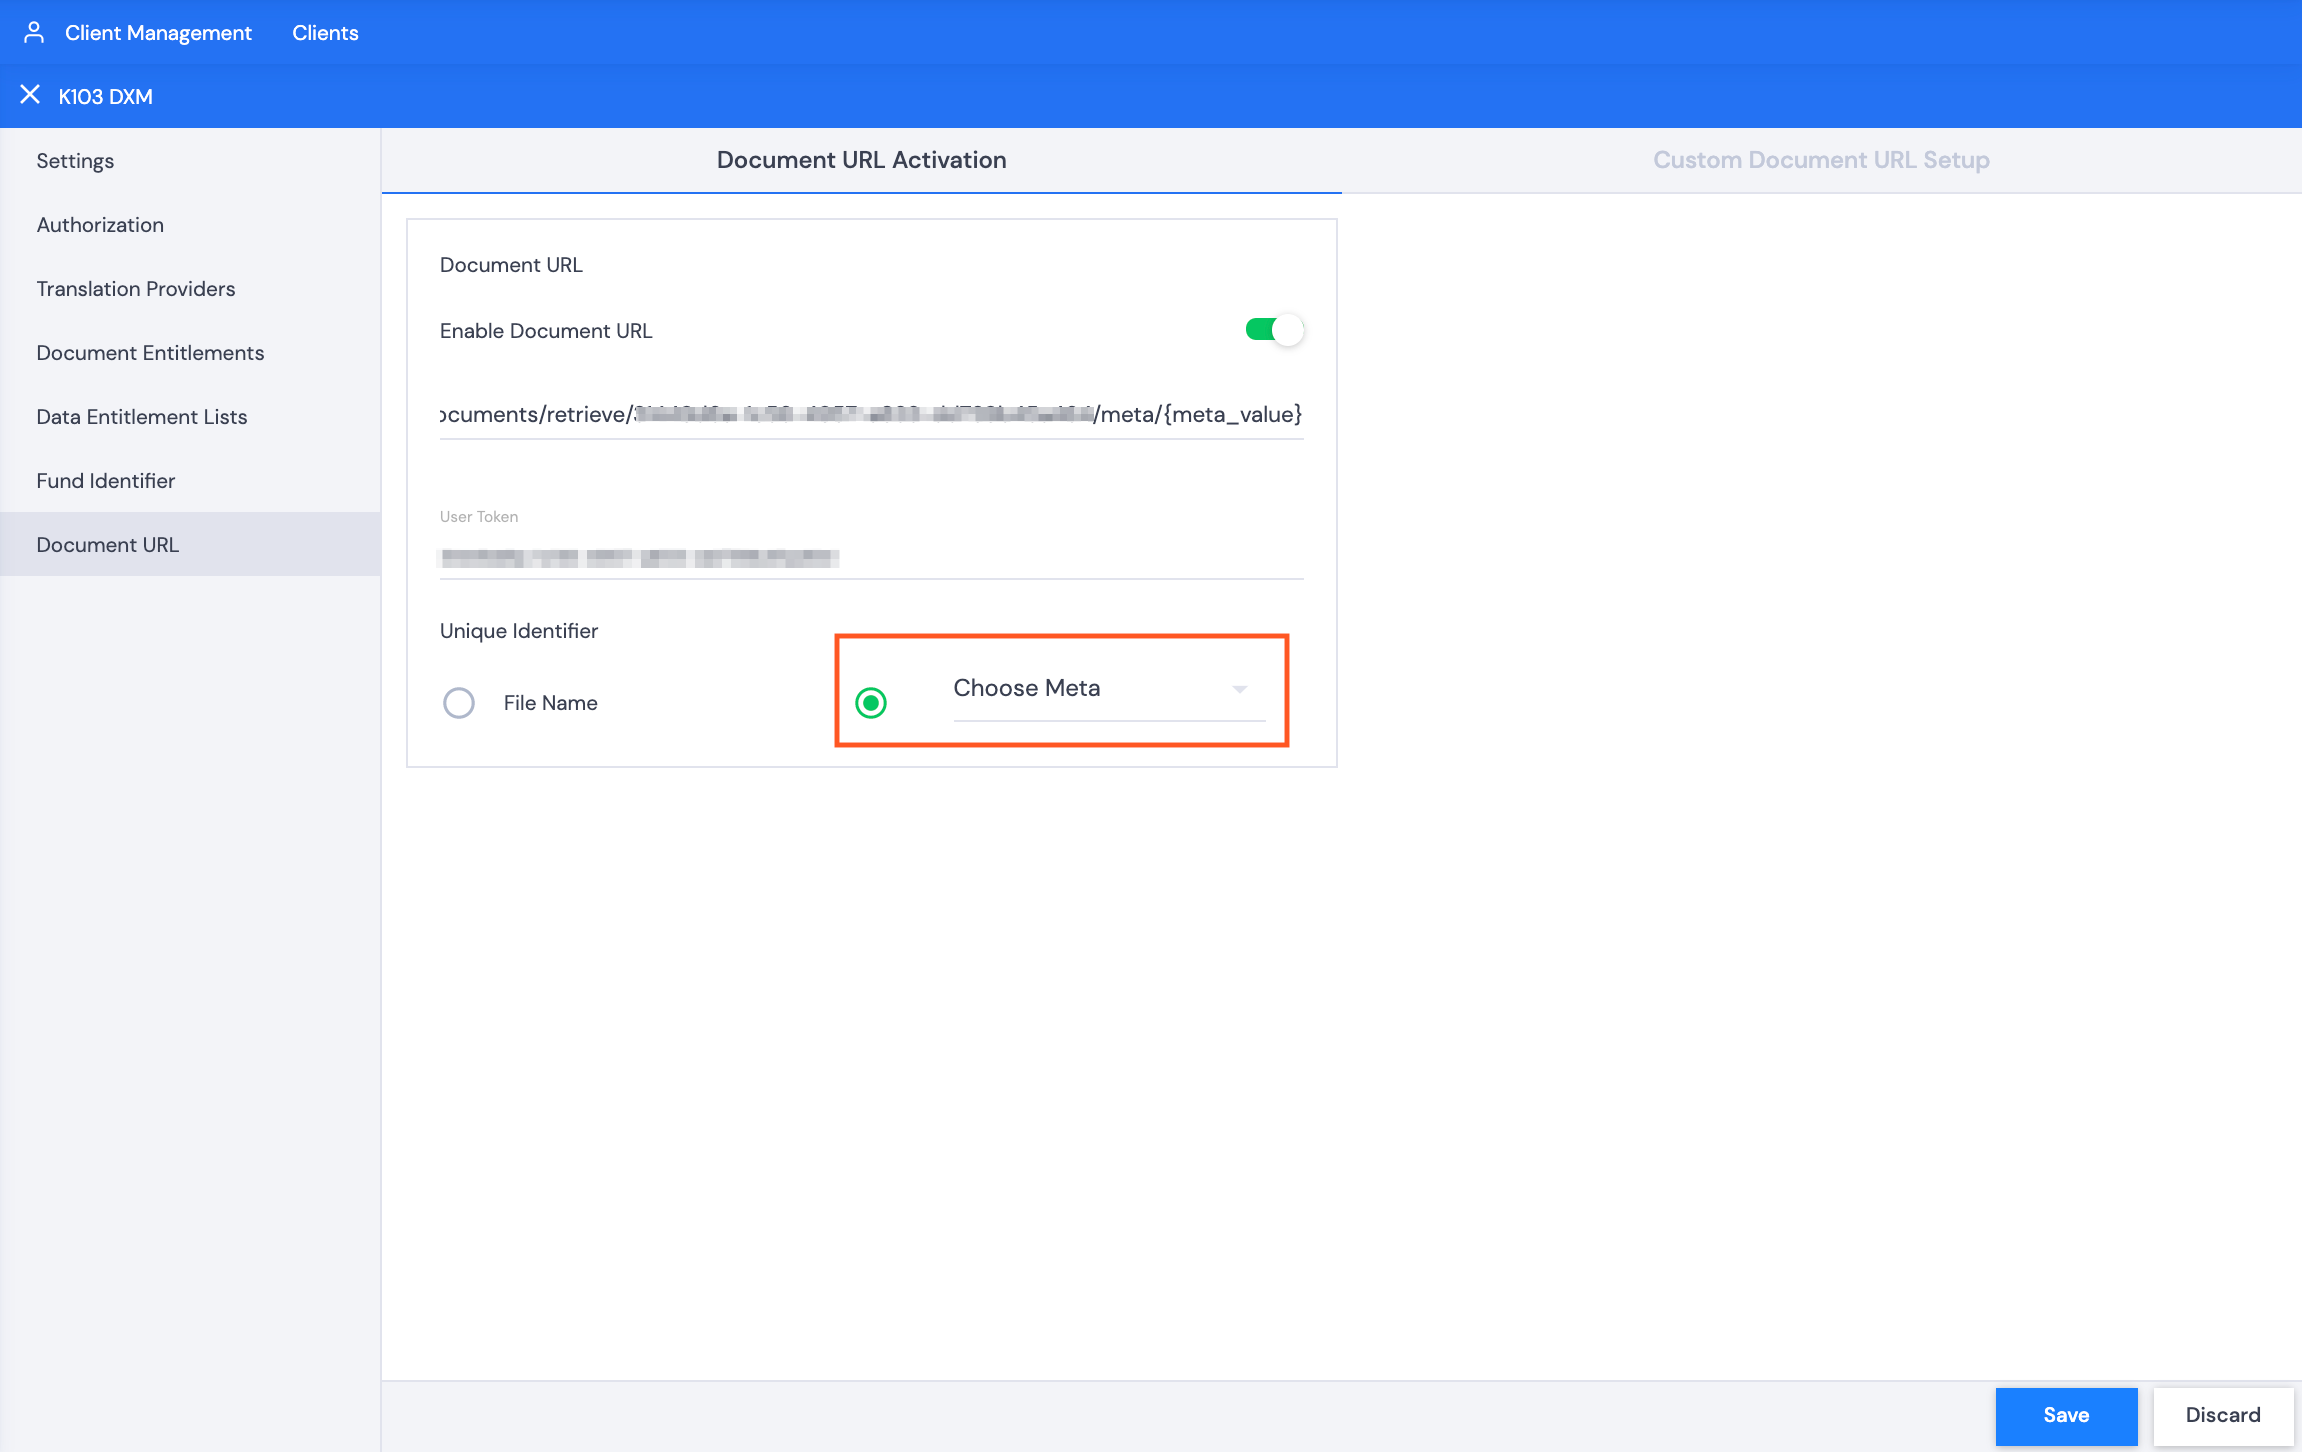
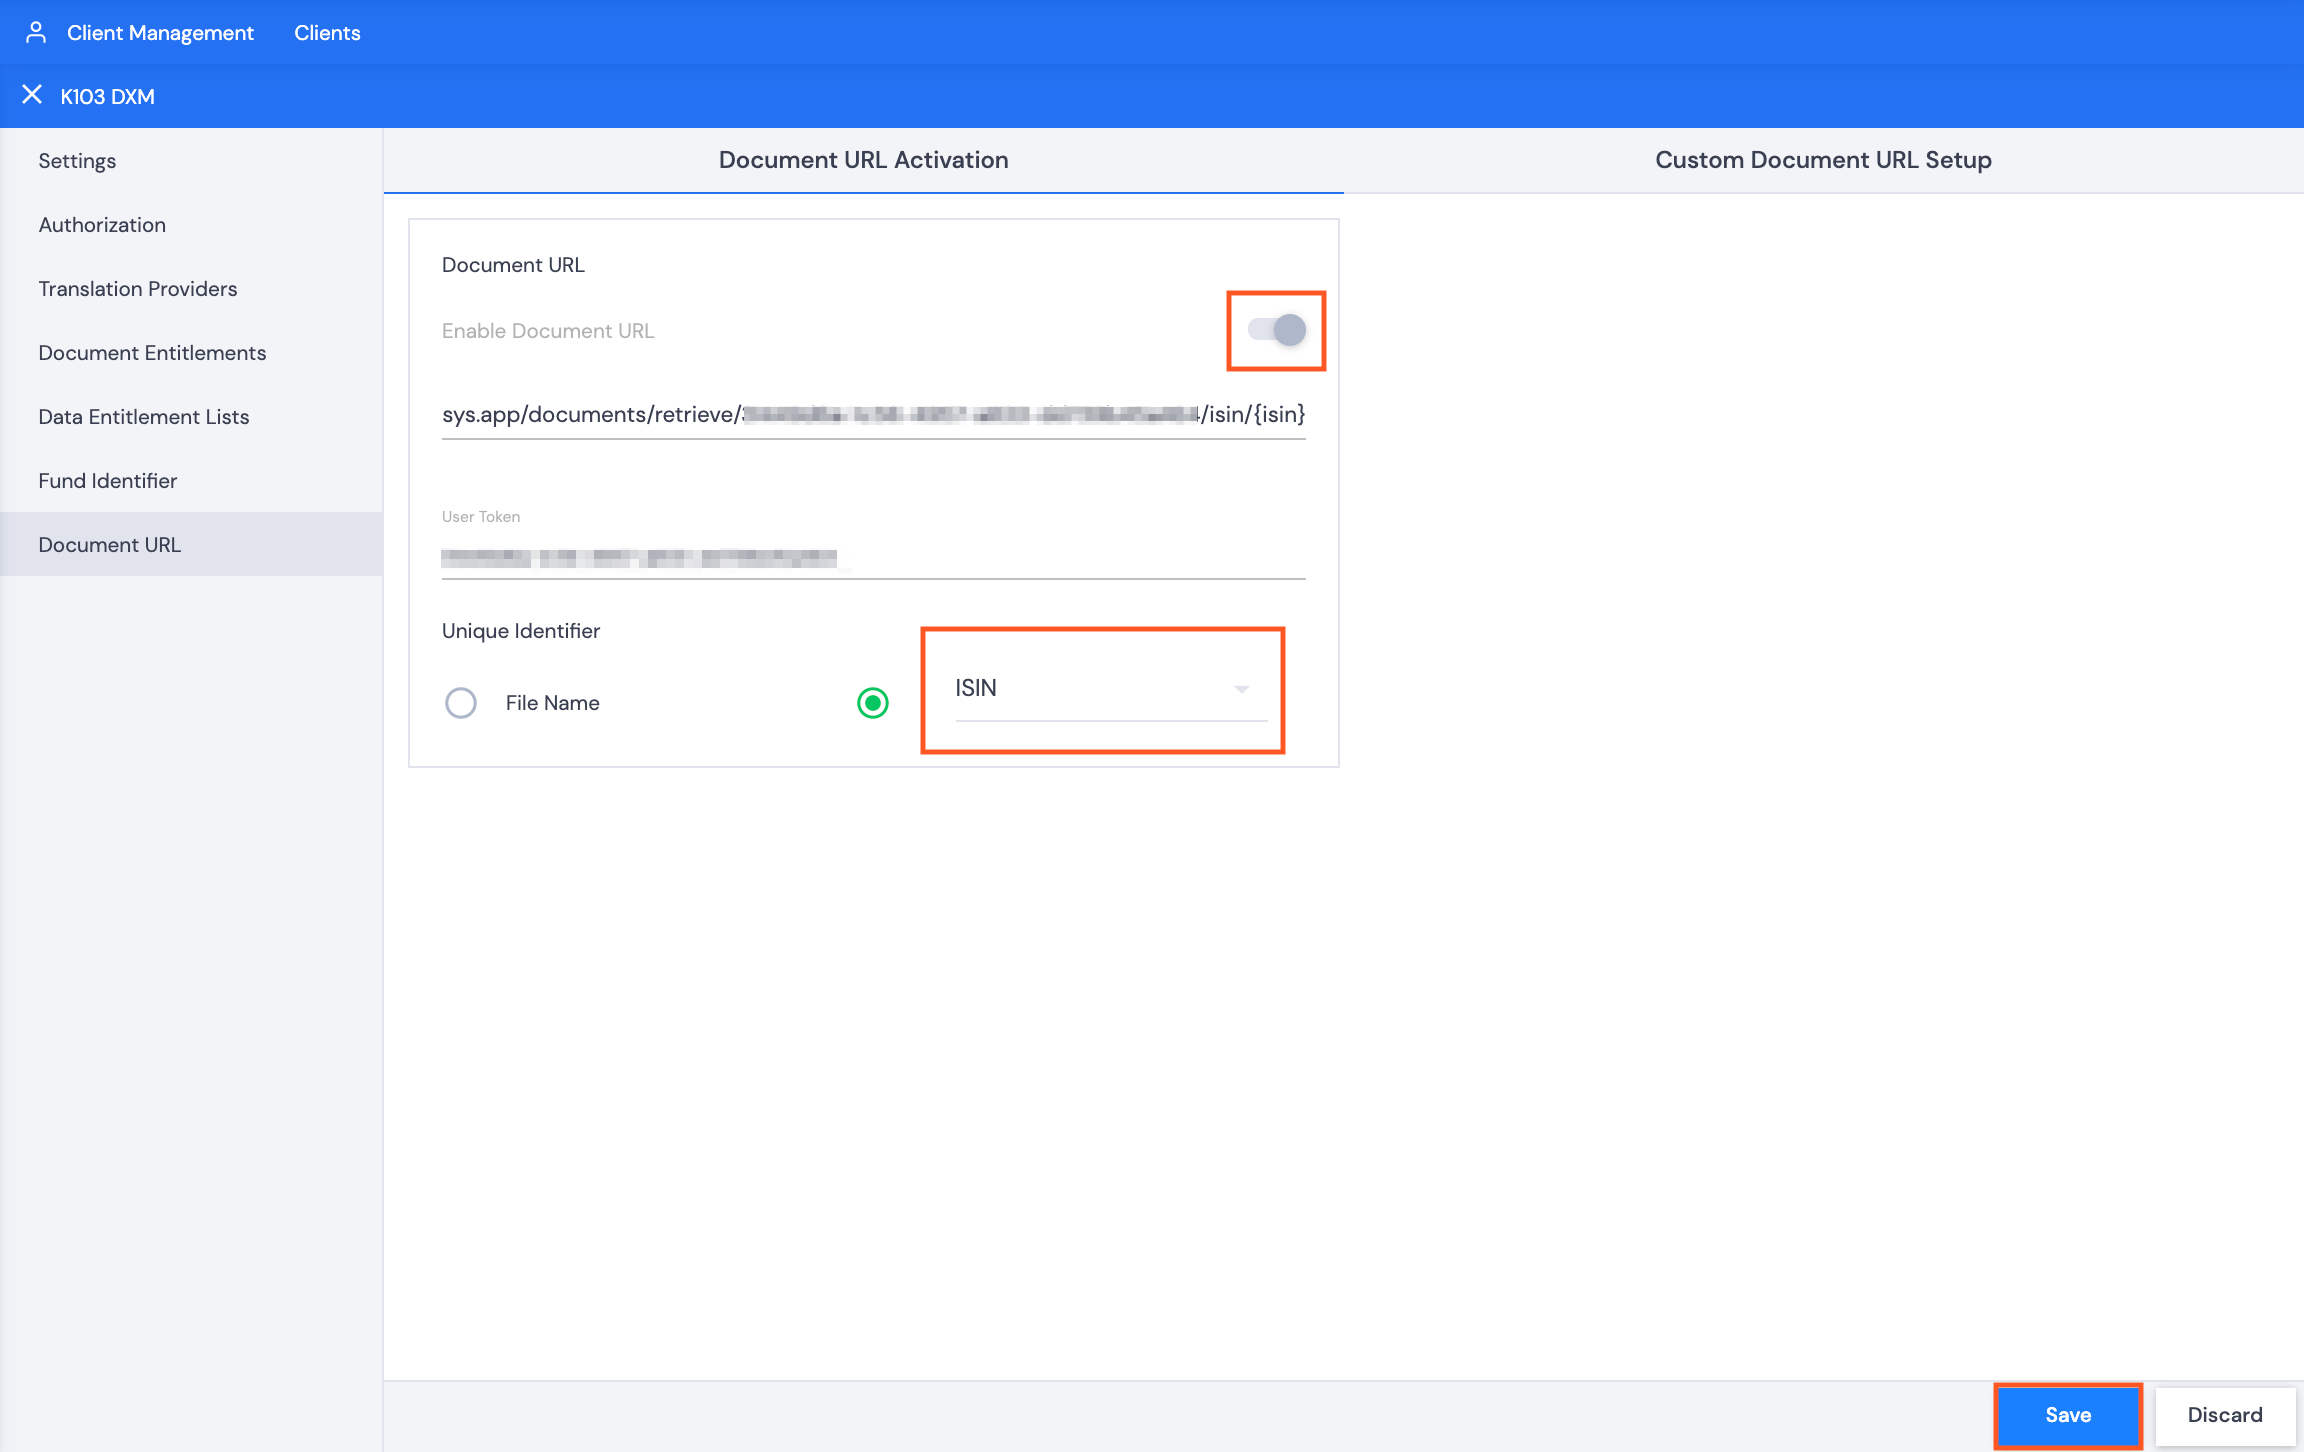
- Select either File Name or Choose Meta for your Unique Identifier.
- If you have selected Choose Meta, use the dropdown arrow to make a selection of meta to include in your document URL.
- Click Save.
- The Enable Document URL toggle will become disabled after it has been toggled on and Saved.
- Click the Custom Document URL Setup tab which will now be enabled.
- Click +.
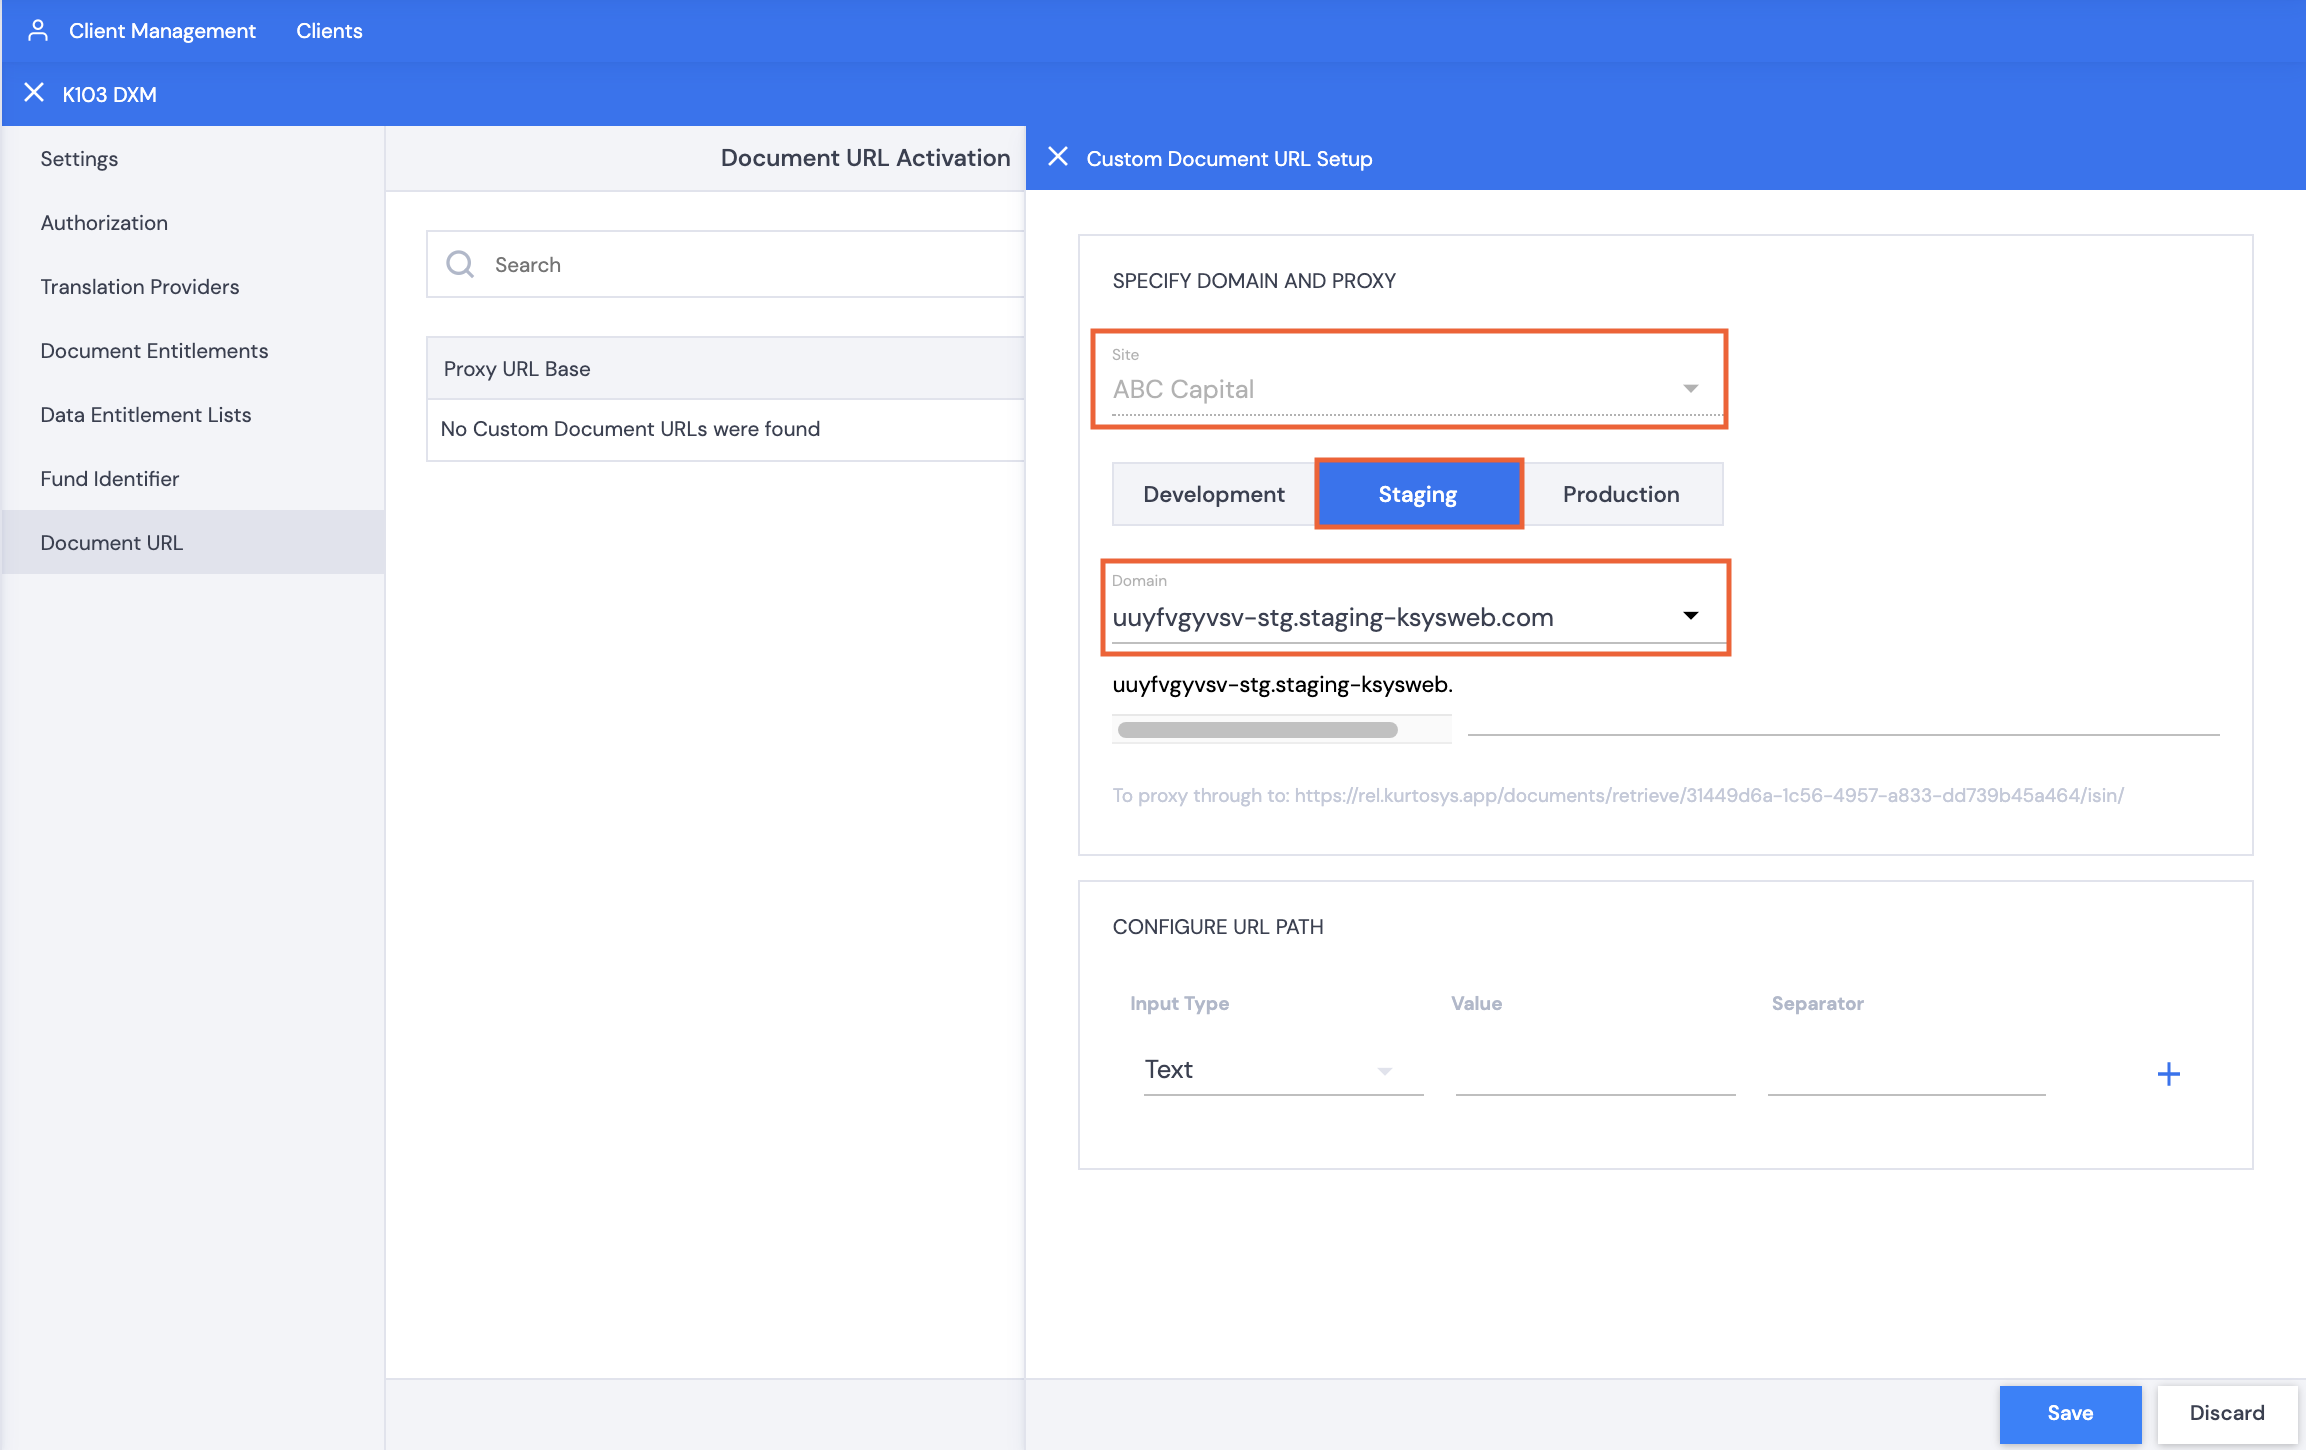
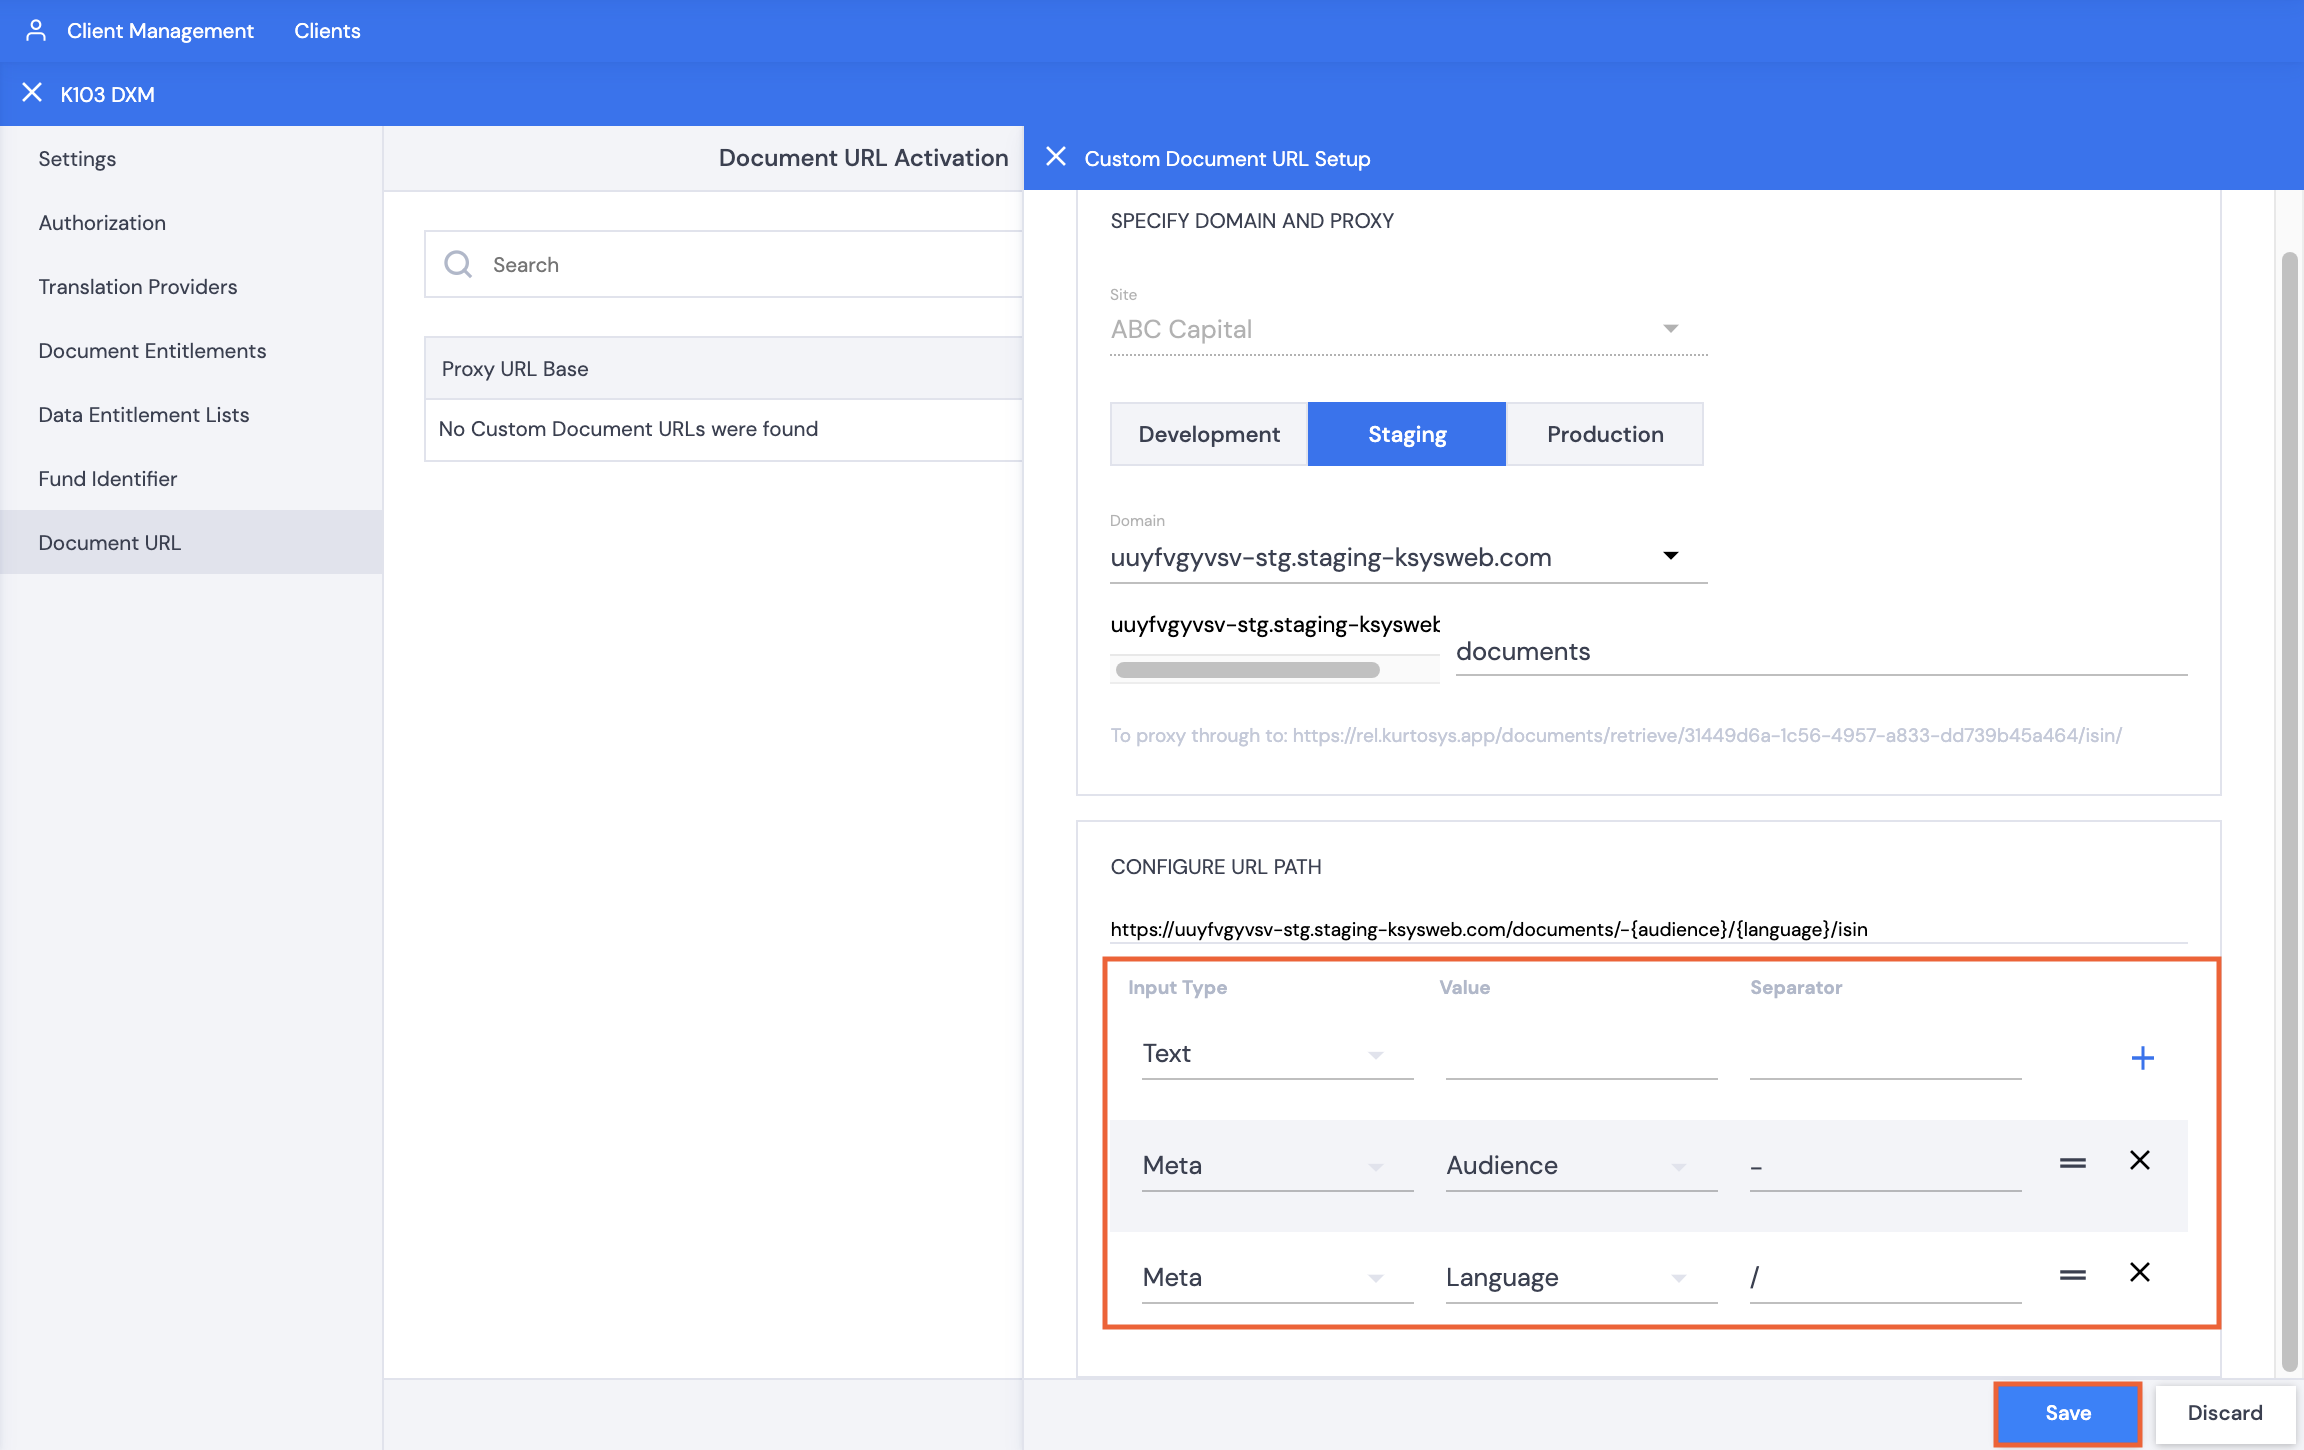
SPECIFY DOMAIN AND PROXY
- Use the dropdown arrow to select the appropriate Site. If you have one site only, this is automatically selected.
- Click either the Development, Staging or Production environment where the domain is loaded to be used for your Custom Document URL.
- Use the dropdown arrow to select the applicable Domain based on the selected environment.
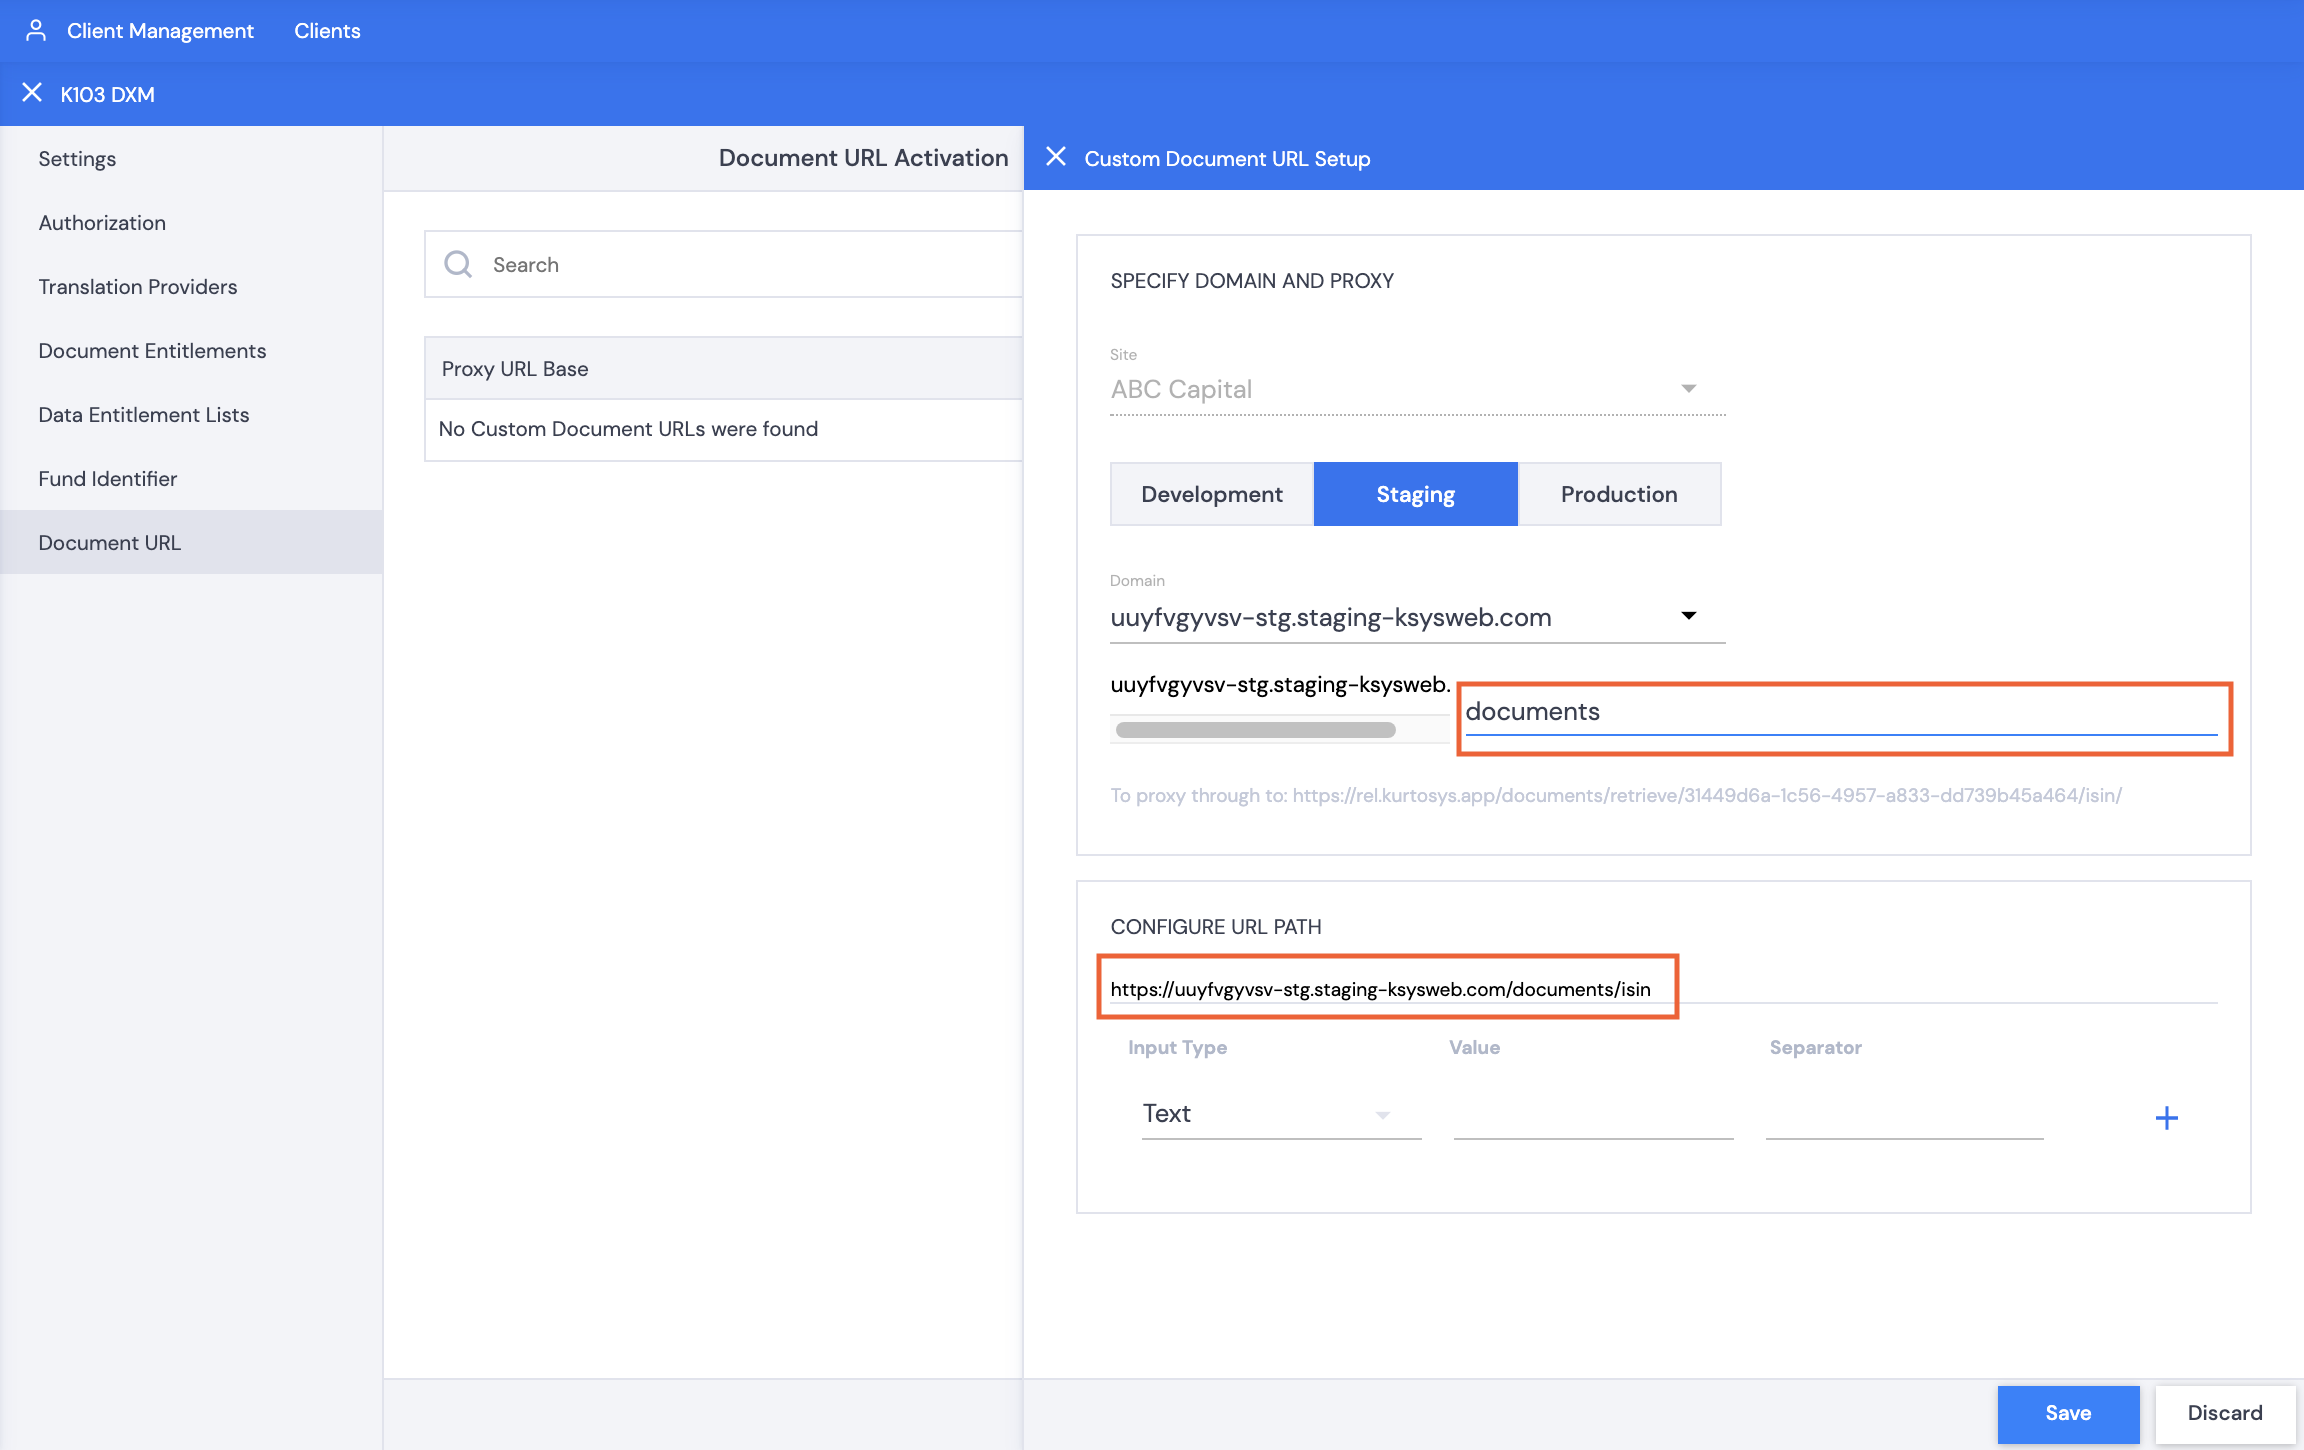
- Type in a URL subdirectory name, e.g. documents.
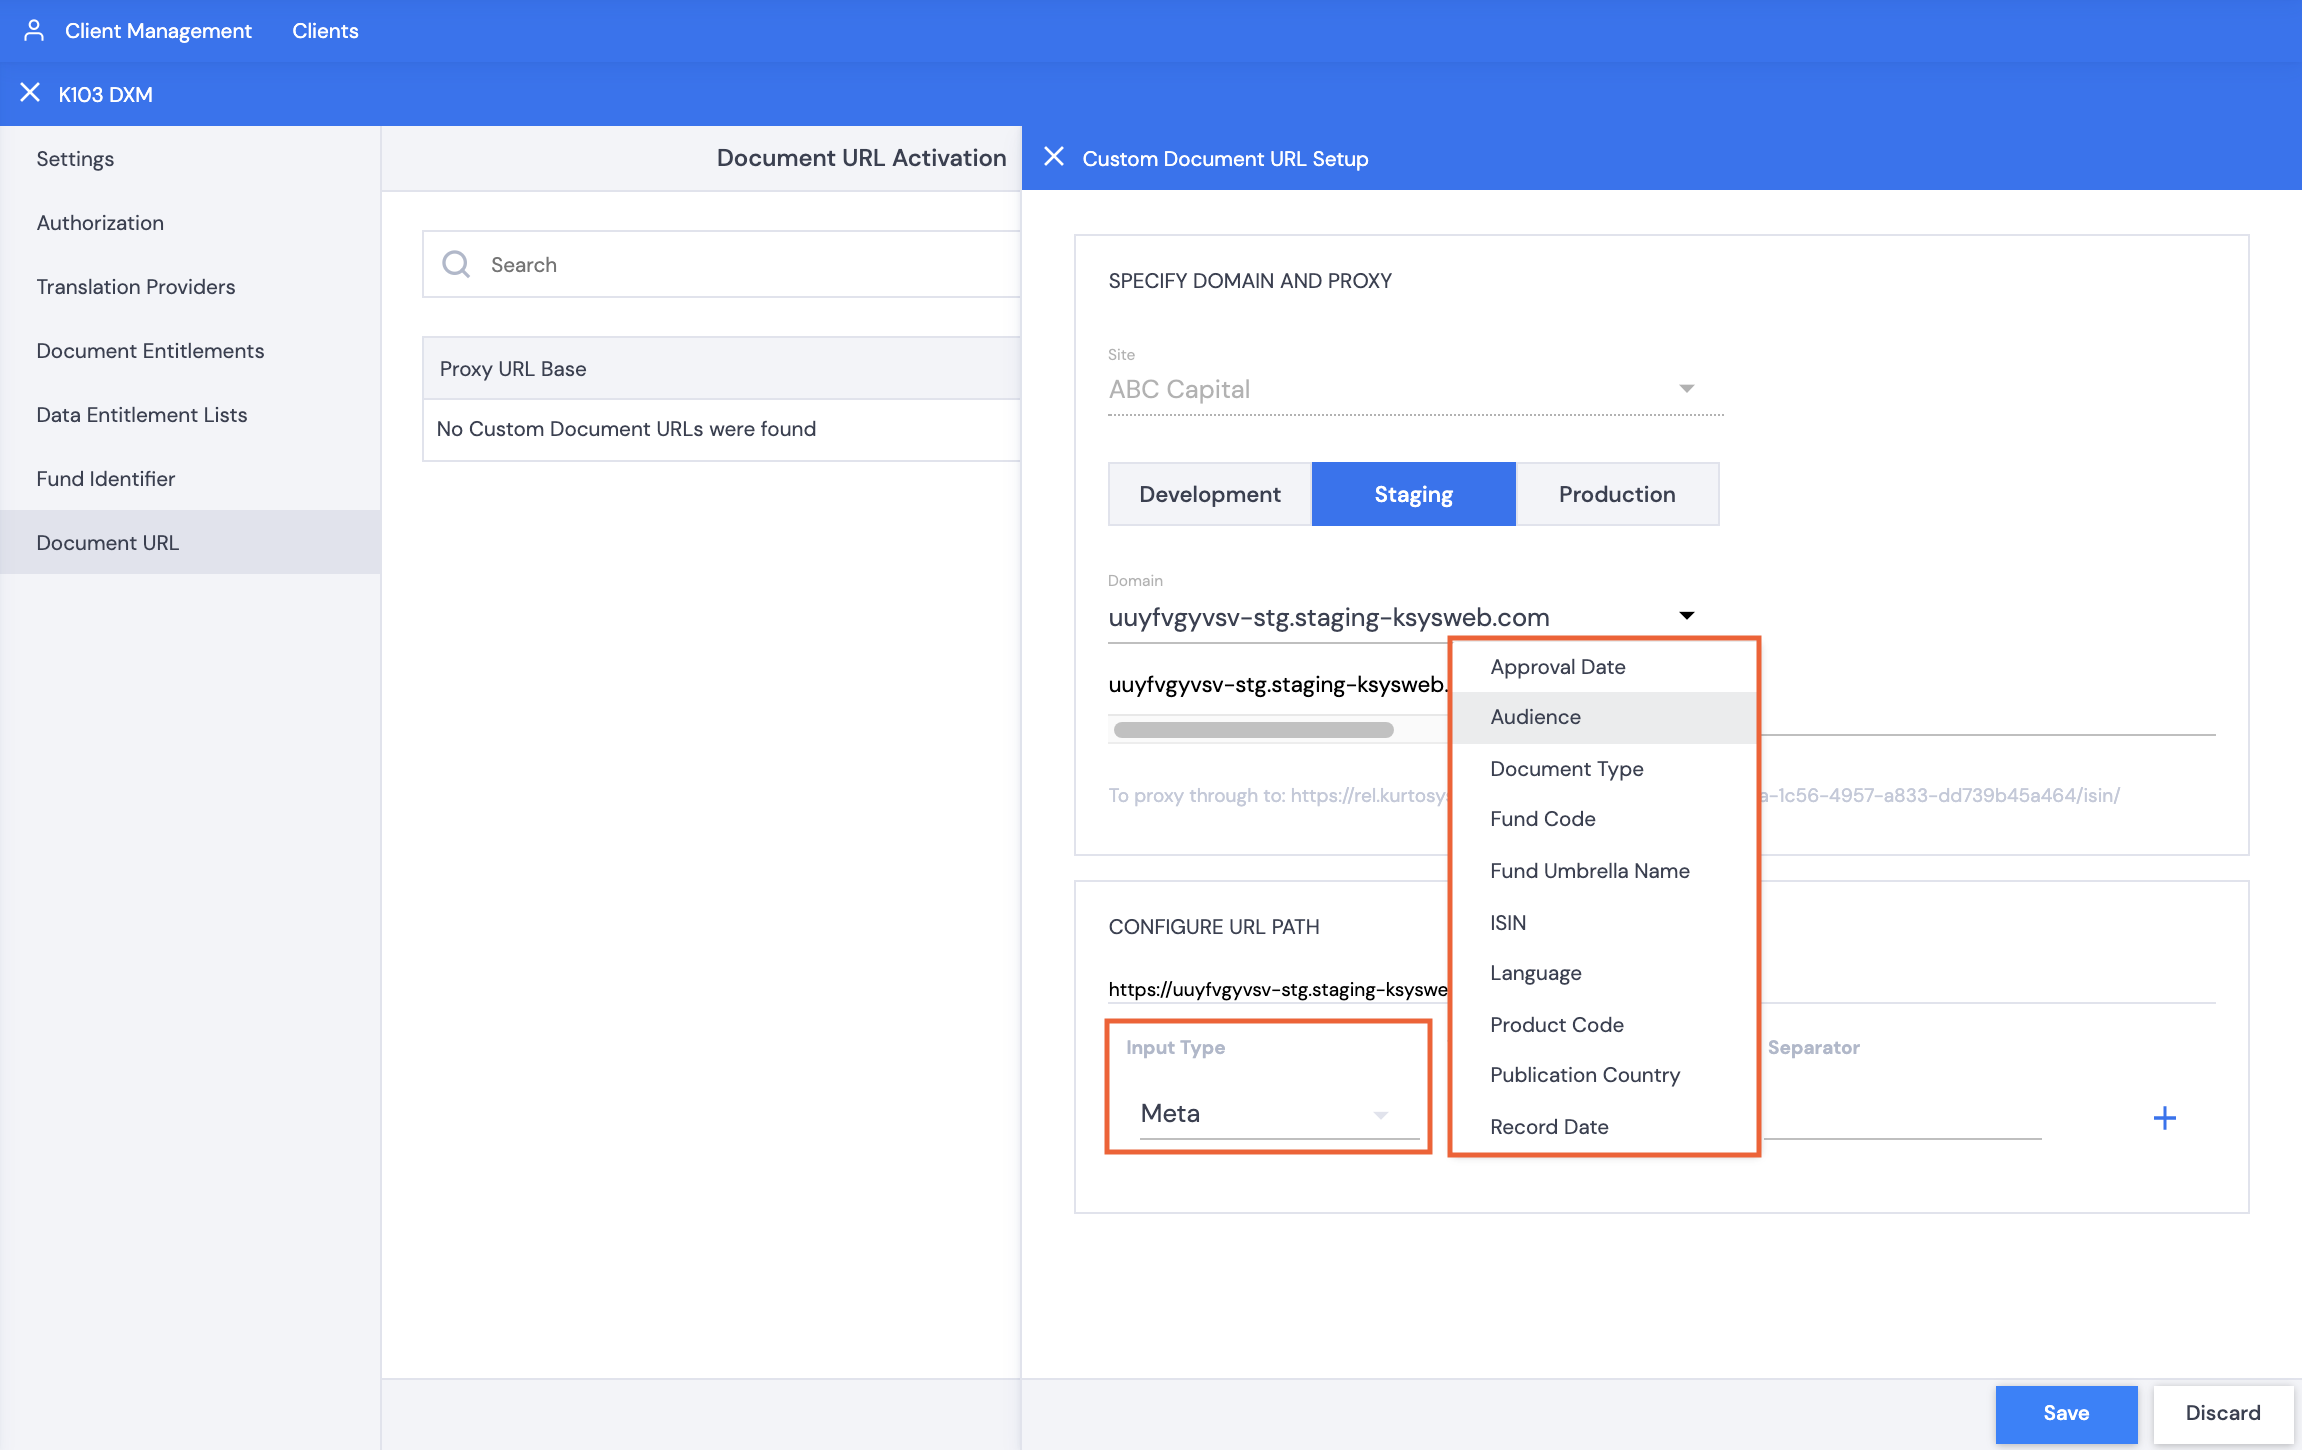
CONFIGURE URL PATH
(This section is optional based on what you would like to add to your URL path instead of having a single subdirectory)
The newly configured URL path is displayed here as per your selections above, ending with the initial Unique Identifier chosen under the Document URL Activation tab.
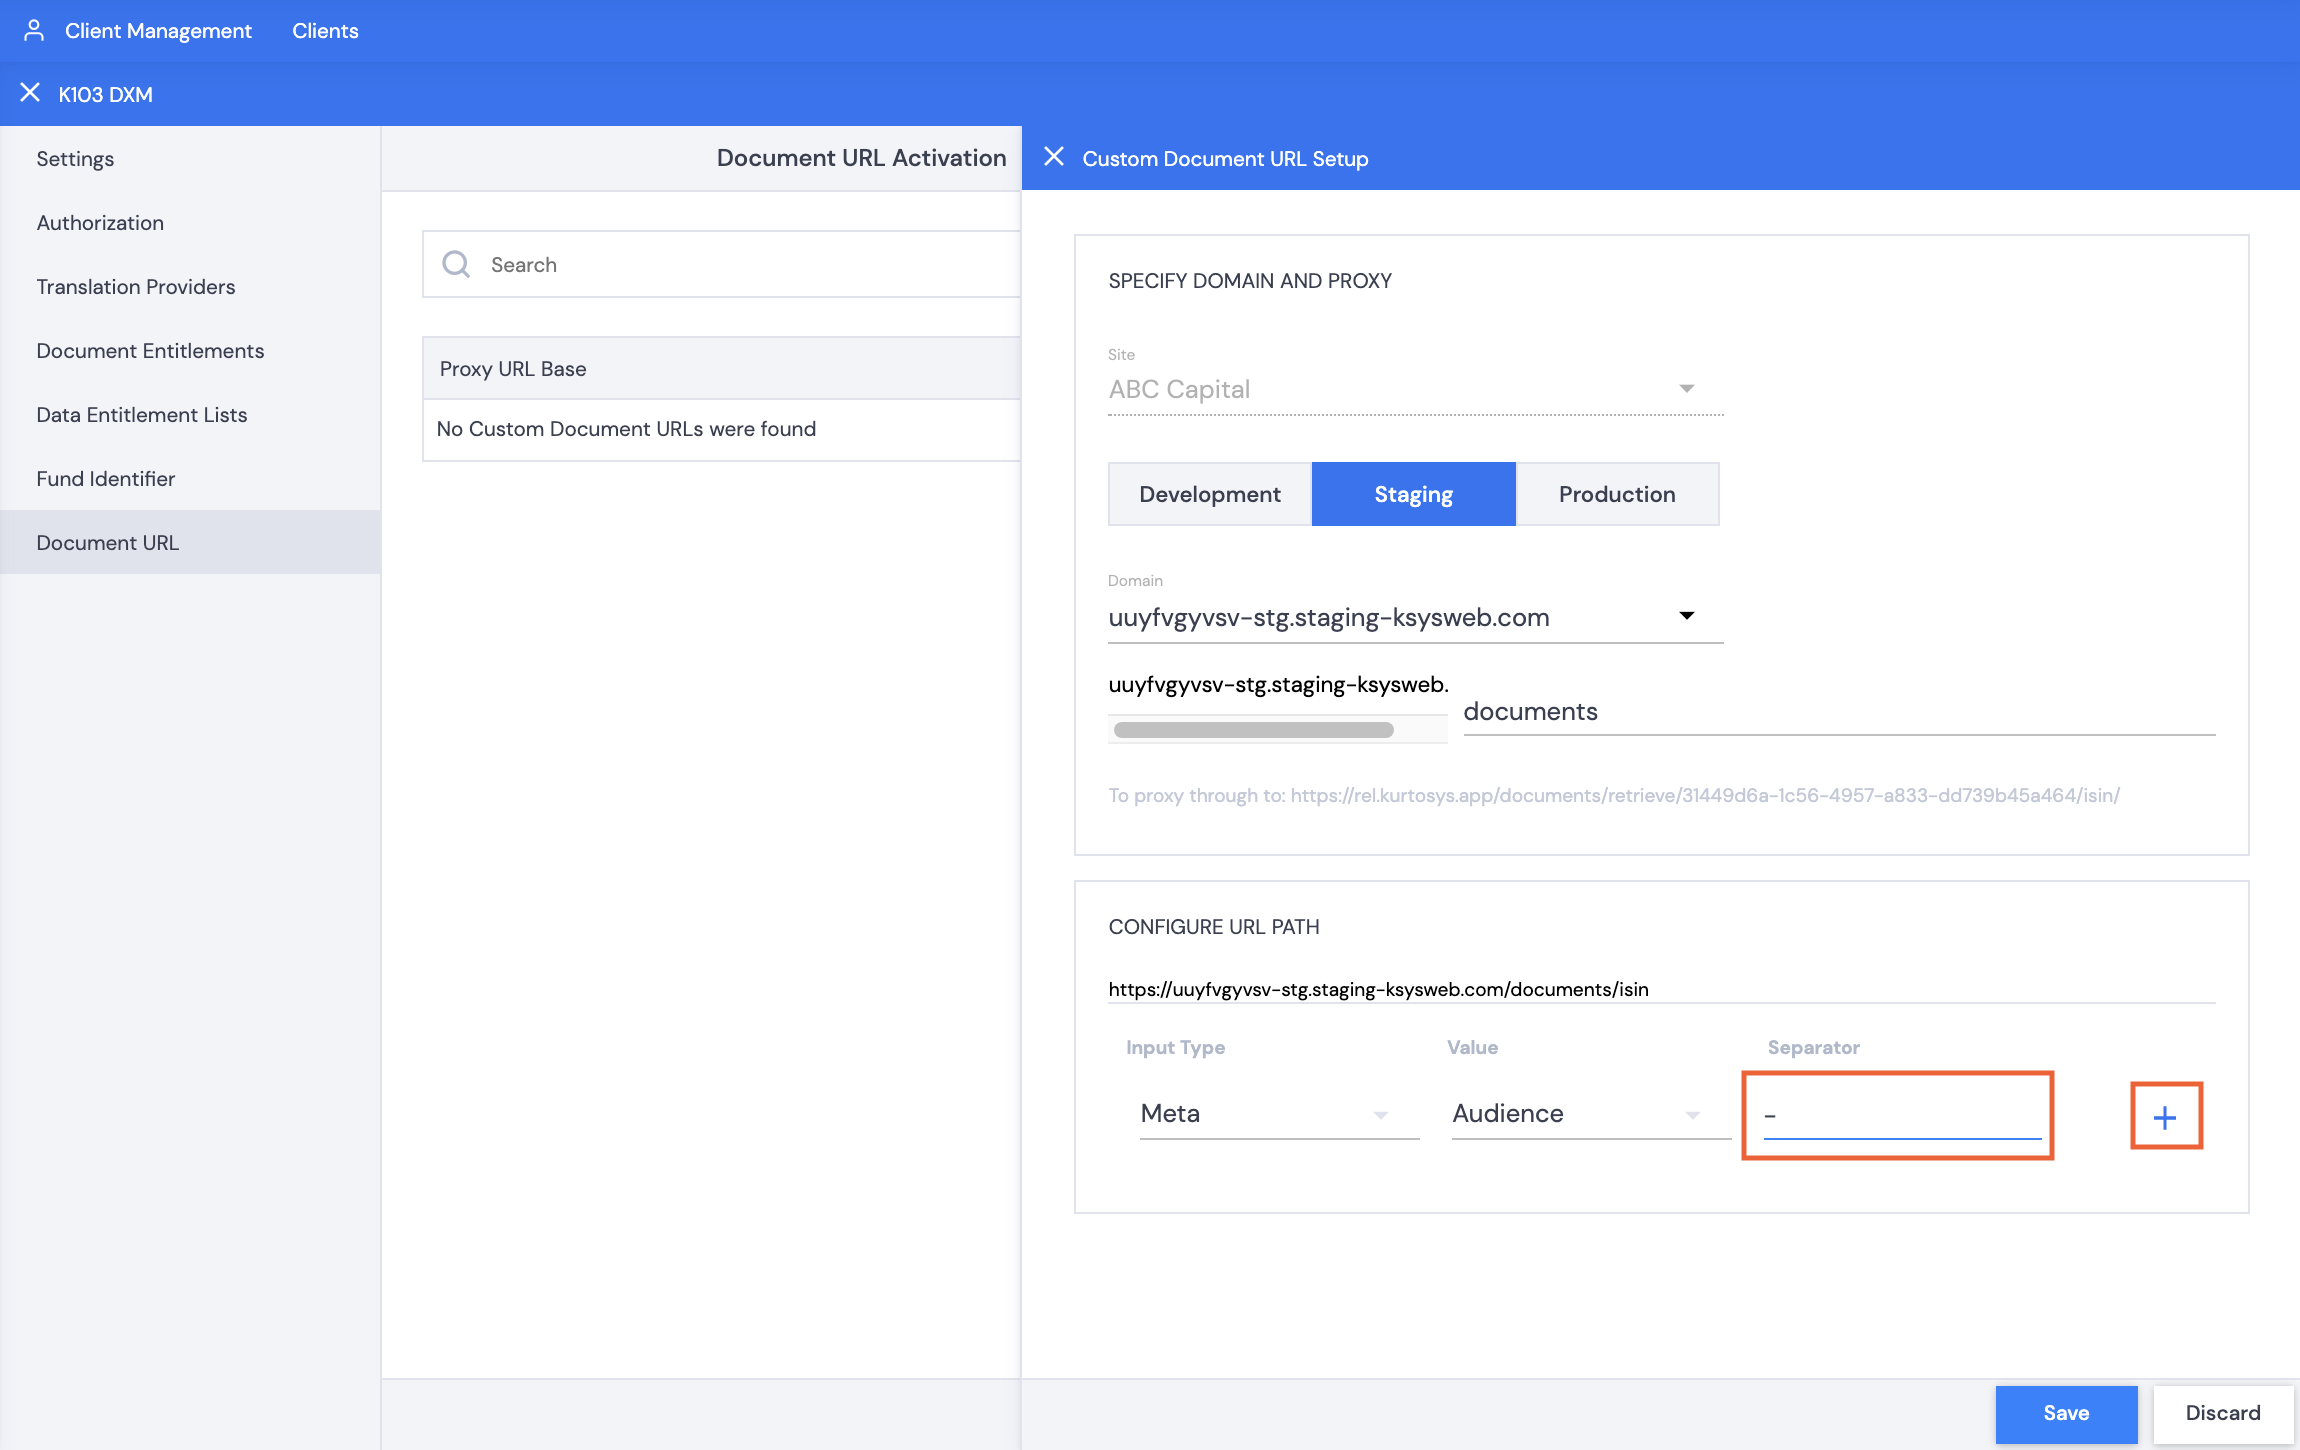
- Use the dropdown arrow to select an Input Type, Text or Meta.
- If you selected Meta for the Input Type, use the dropdown arrow to select a Value. If you selected Text, type in a Value.
- Type in a character to be used as a Separator, e.g. –.
- Click +.
- Repeat the above steps to add any additional subdirectory paths to your URL.
- The additional paths can be reordered, if needed, by dragging the items listed using the = icon.
- Click Save.
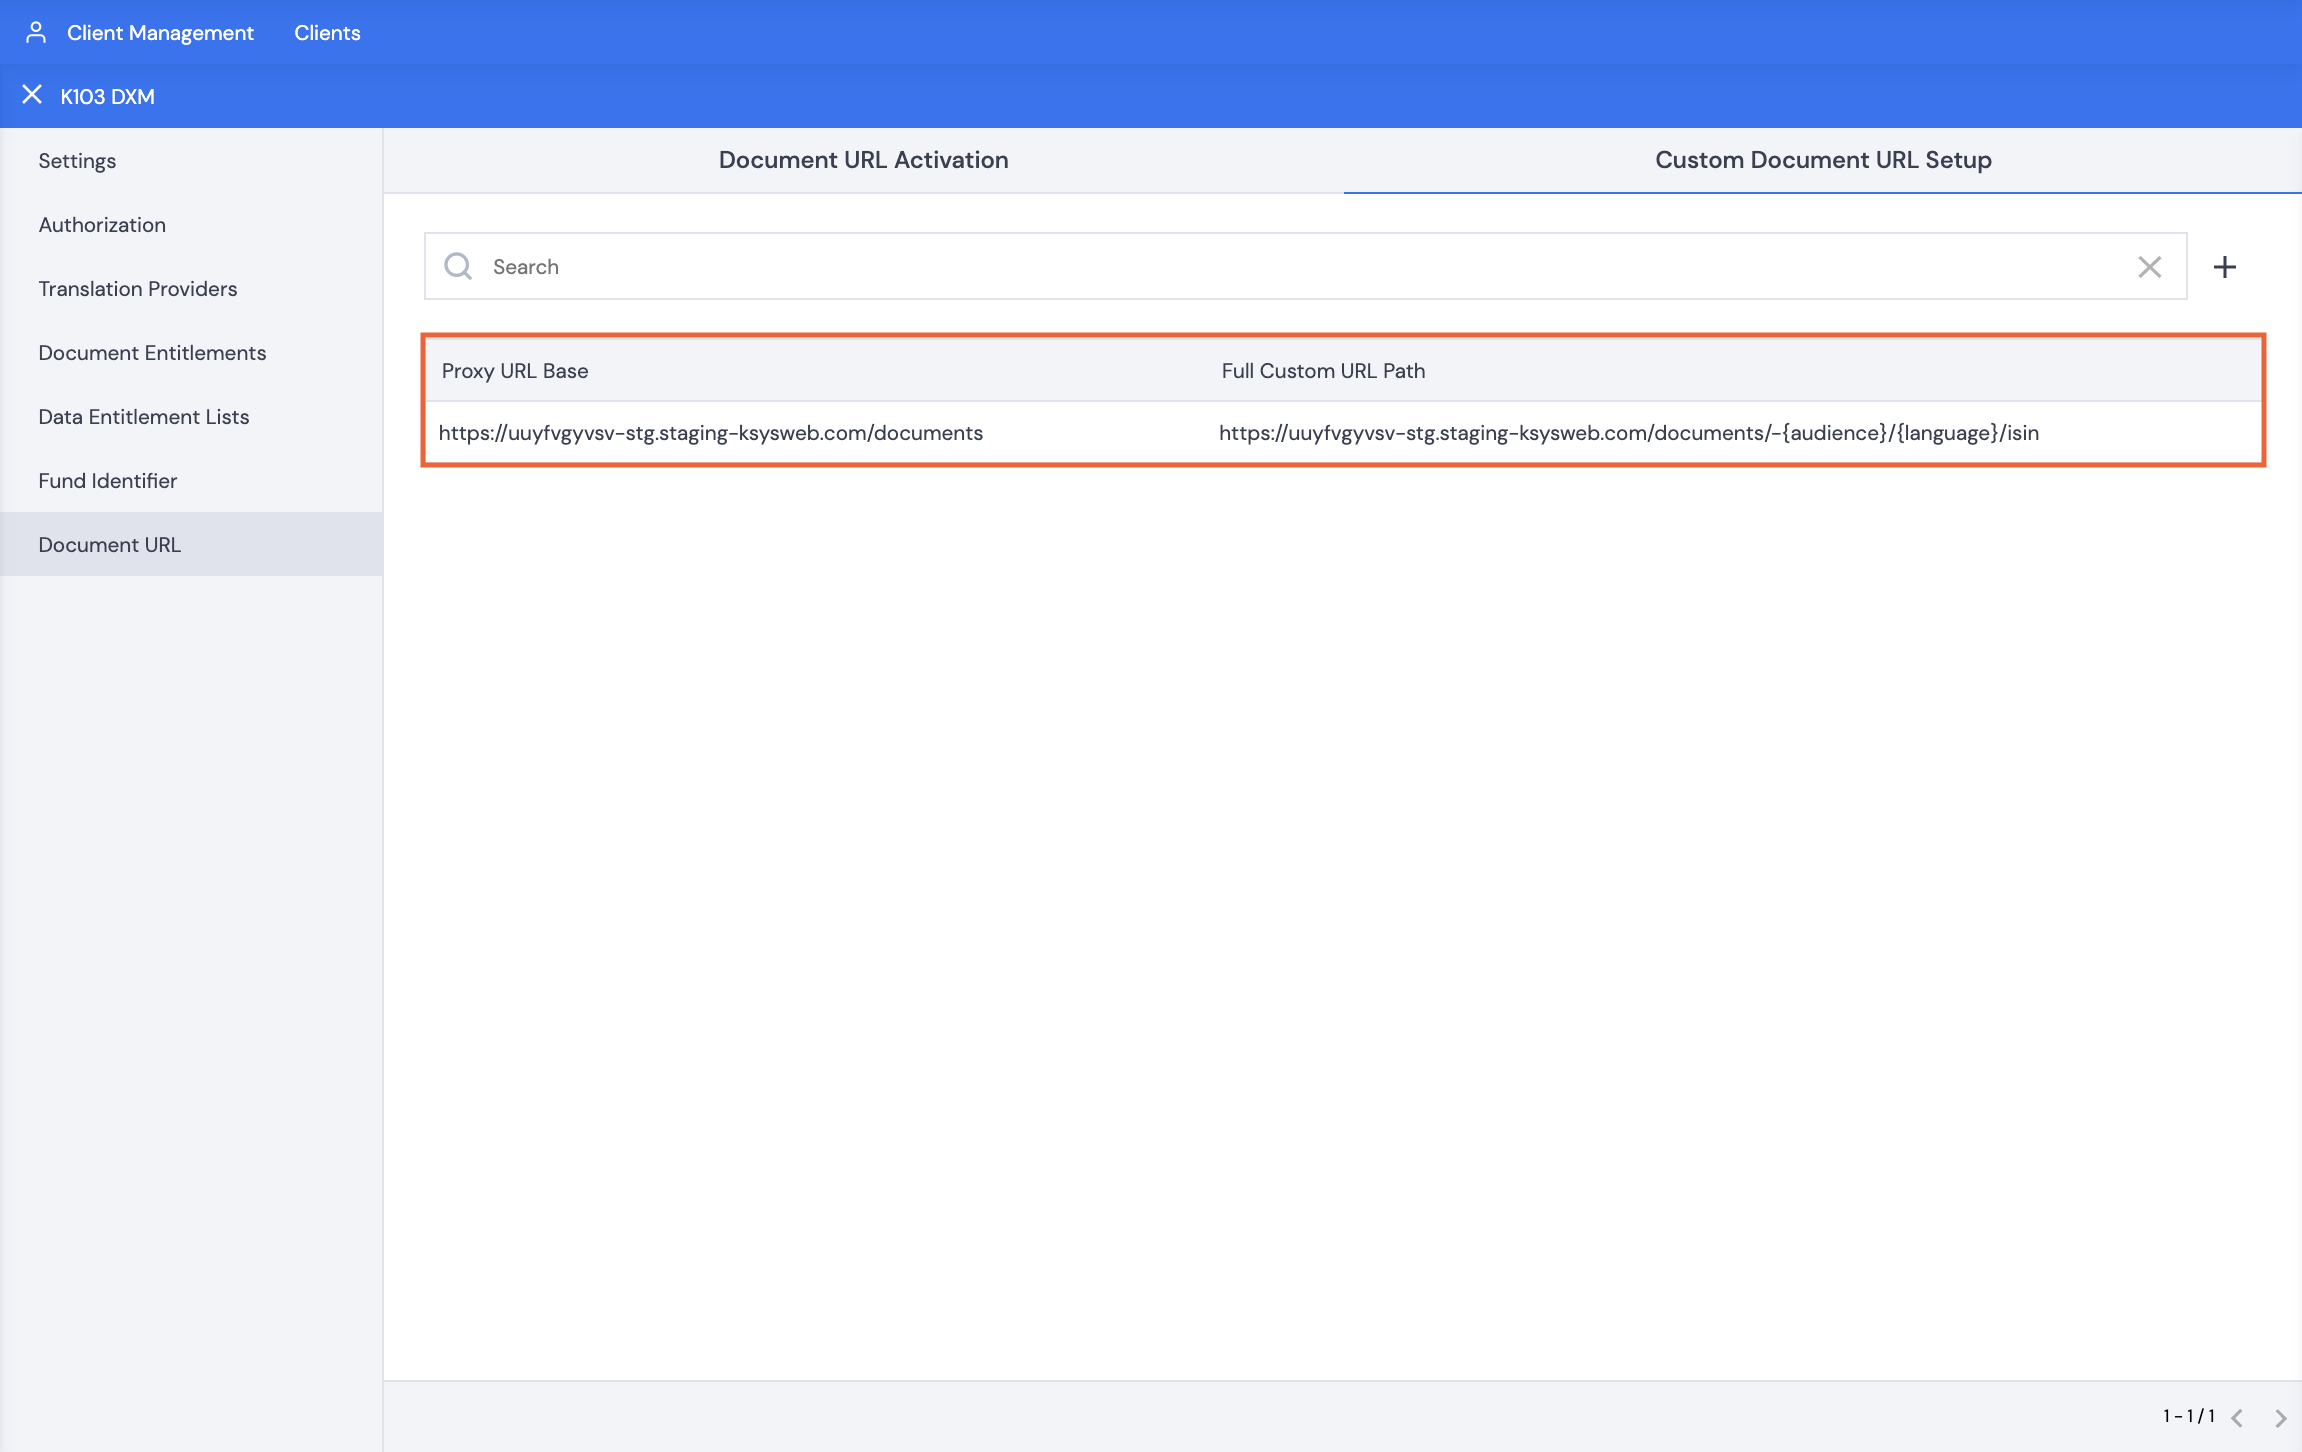
The Custom URL path will be listed alongside the Proxy URL path.
You can create additional Custom Document URLs by repeating steps 12 to 22 as needed.
Copying Document URLs
In the Document Hub
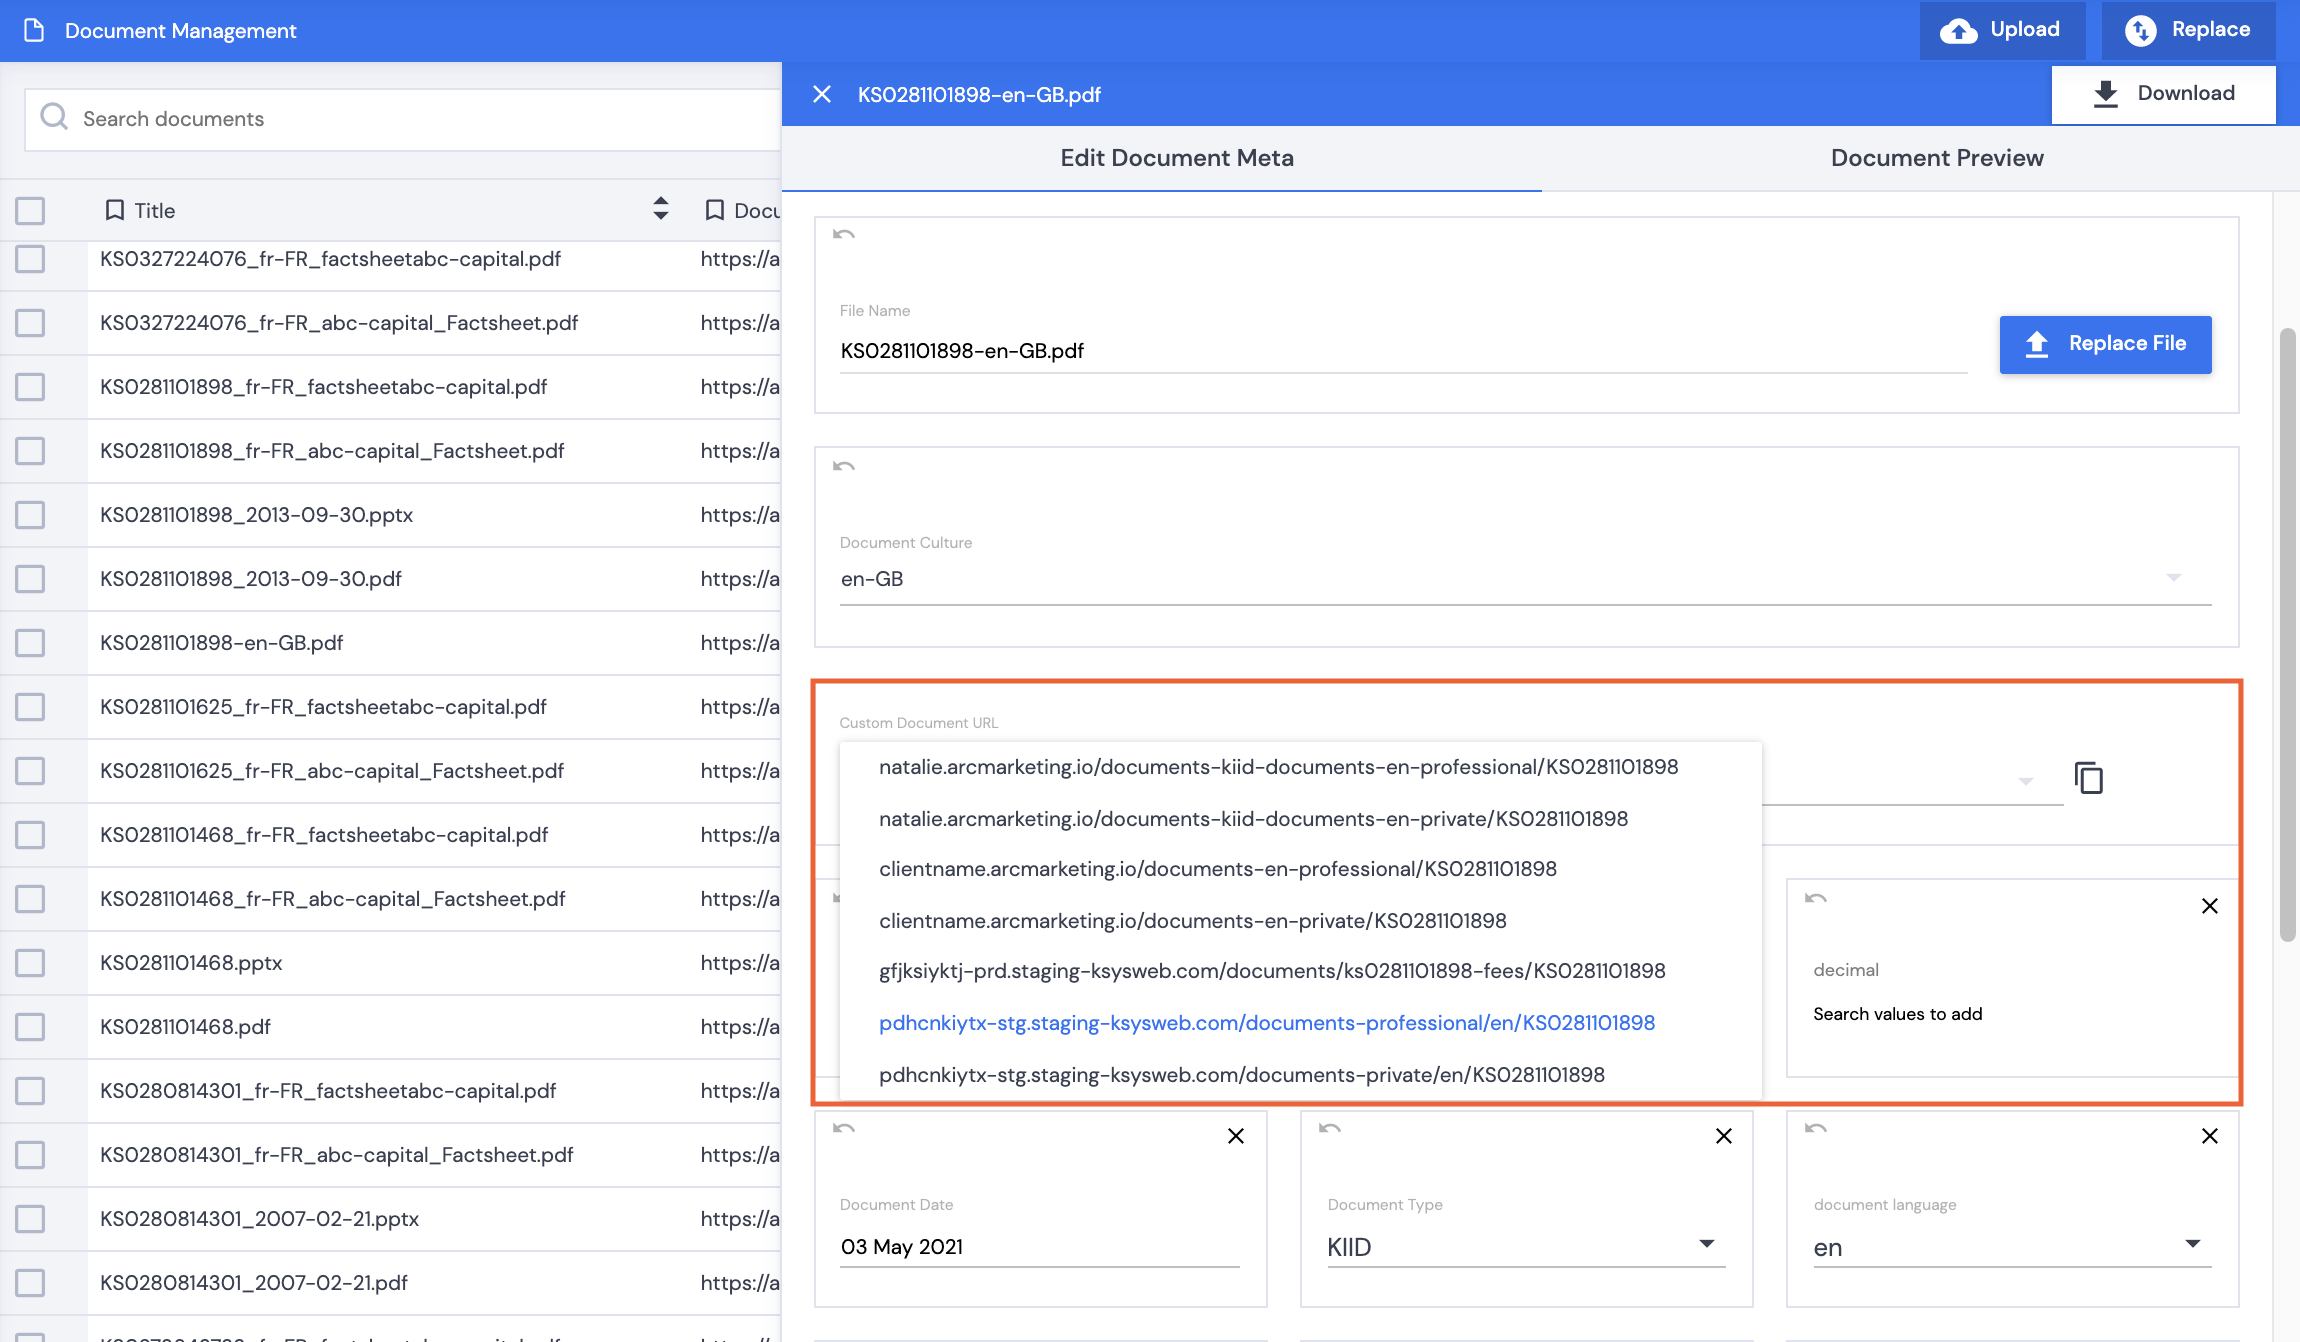
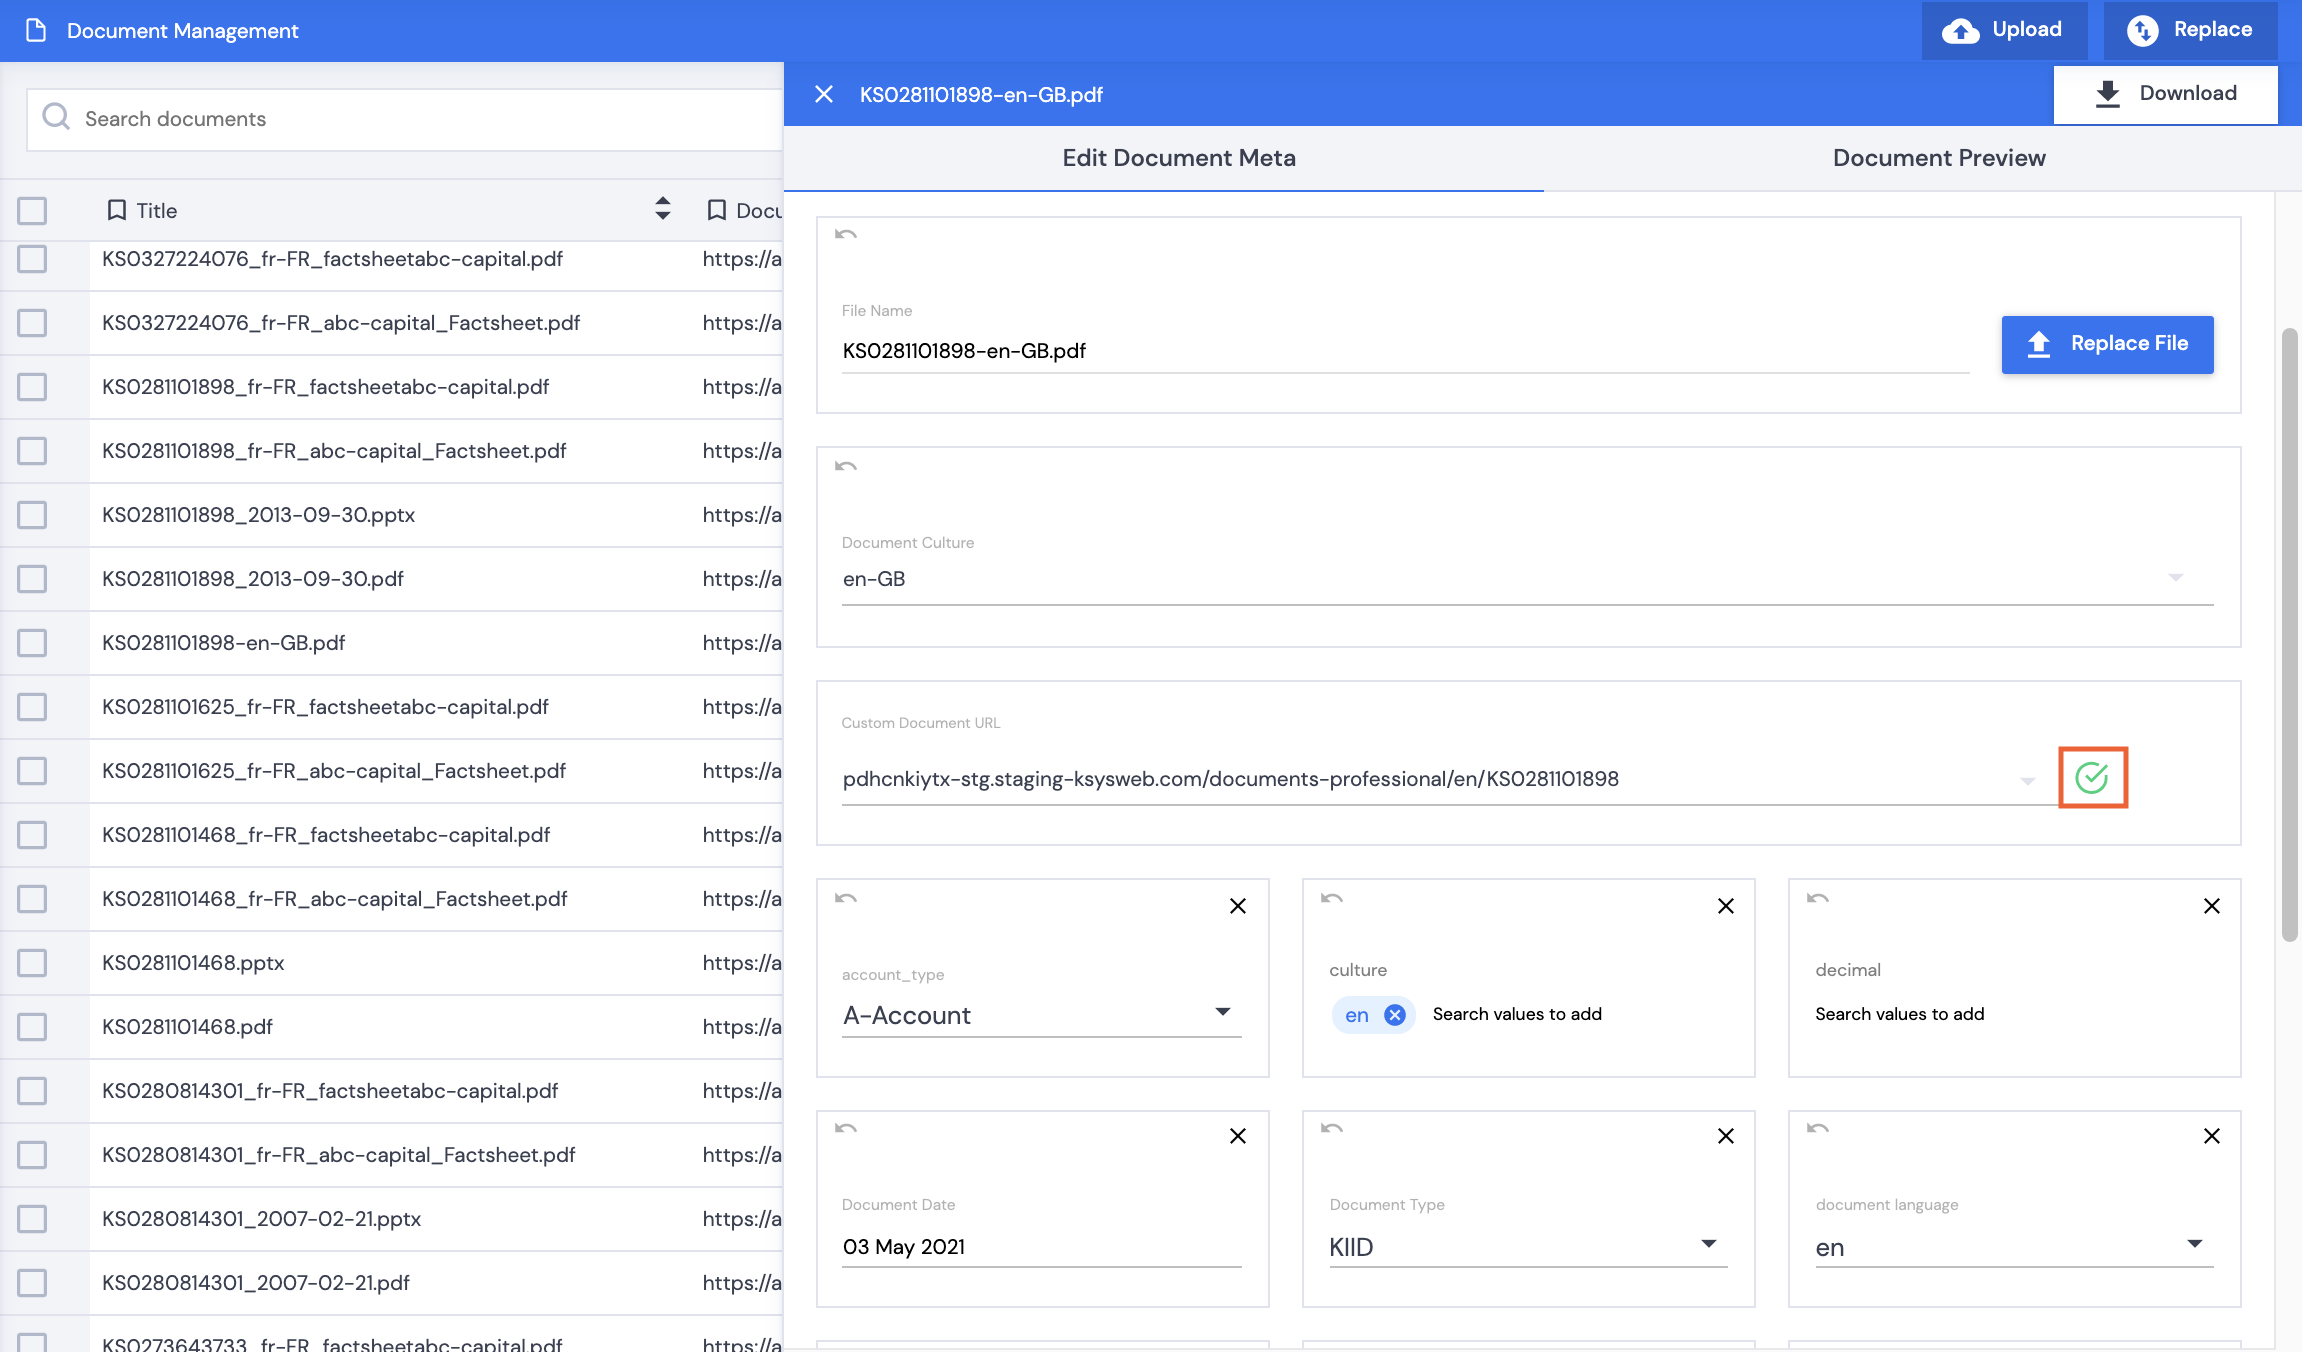
- Click on a document to open the document Meta Data pane.
- Use the dropdown arrow to select the applicable Custom Document URL.
Note: Only Custom Document URLs where the documents have populated meta in sync with the Custom Document URL meta requirements will be displayed in the dropdown list. In this example, the Custom Document URL uses meta Investor Type and meta document language so the Custom Document URL created in steps 12-22 will be listed.
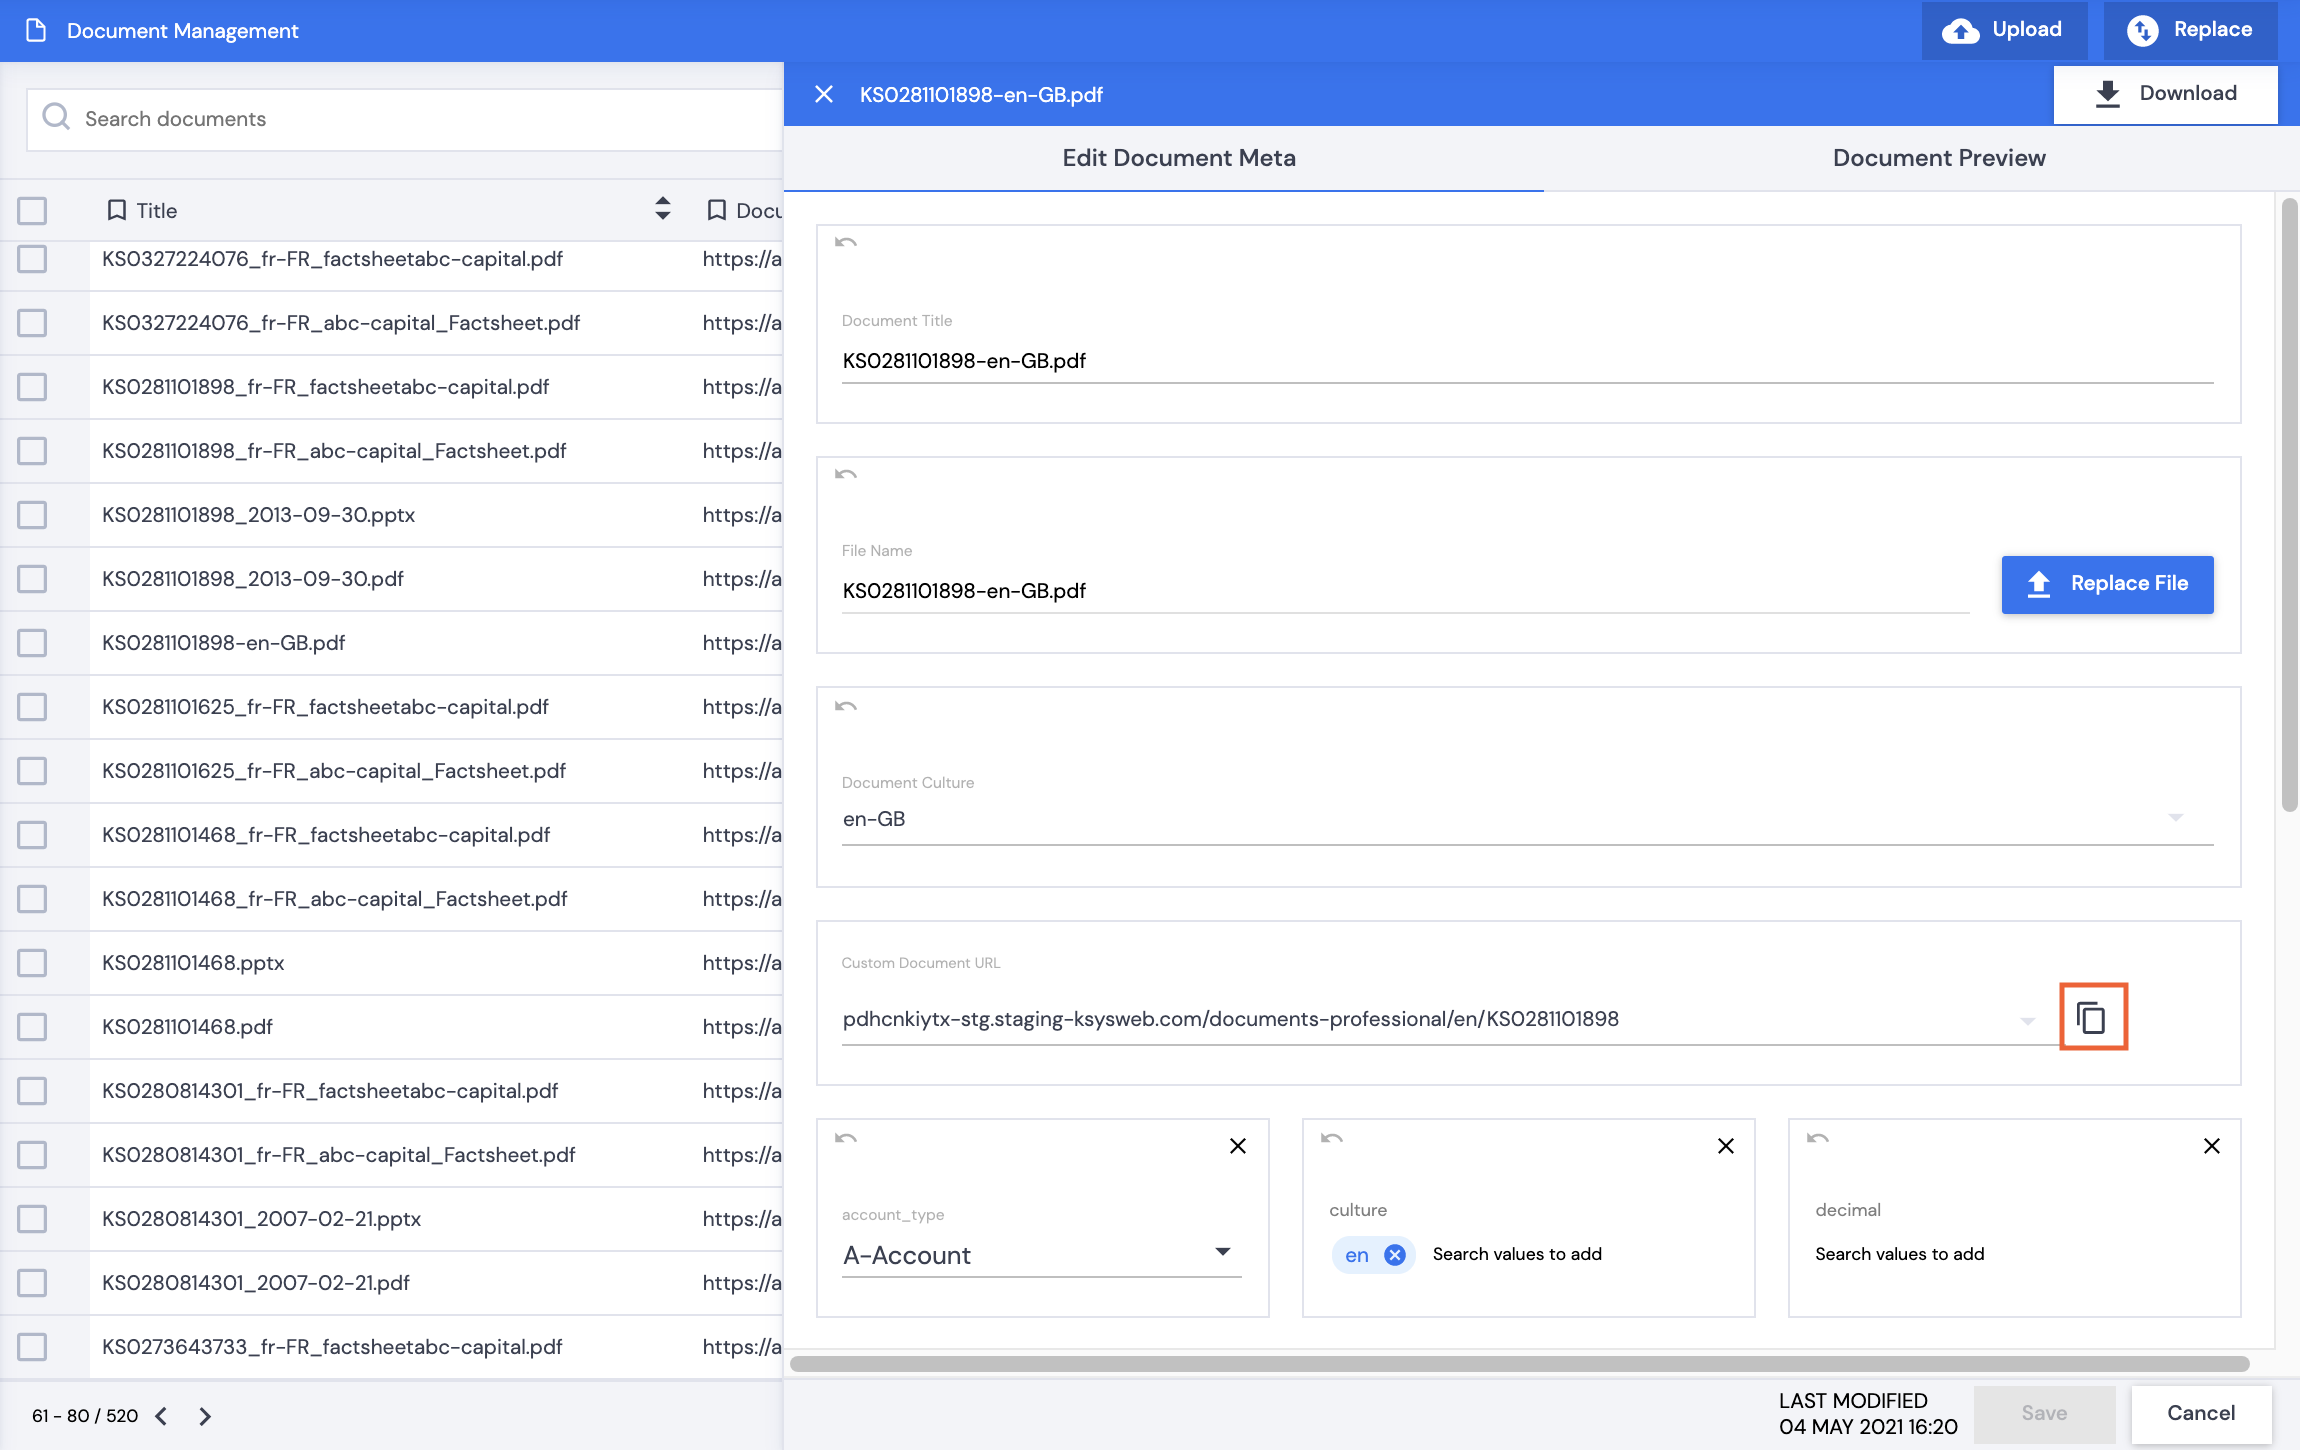
- Click the Copy icon to copy the URL.
- A green checkmark will display indicating that the URL has been copied successfully.