
The Site Grouping feature allows WordPress admin users to group their various subsites into logical groups so that they can more easily administer them. Before grouping, the list of subsites is shown in one long list and a user needs to manually go through each item to find the specific site they are looking for.
This long list is also used in other areas of WordPress such as the Sharing feature; using logical Site Groupings will make site sharing easier and more efficient.
Setting up Site Groupings
Only a WordPress SuperAdmin User will have the necessary permissions to access this feature.
- Hover over My Sites (all sites will be listed), then browse to Network Admin | Dashboard.
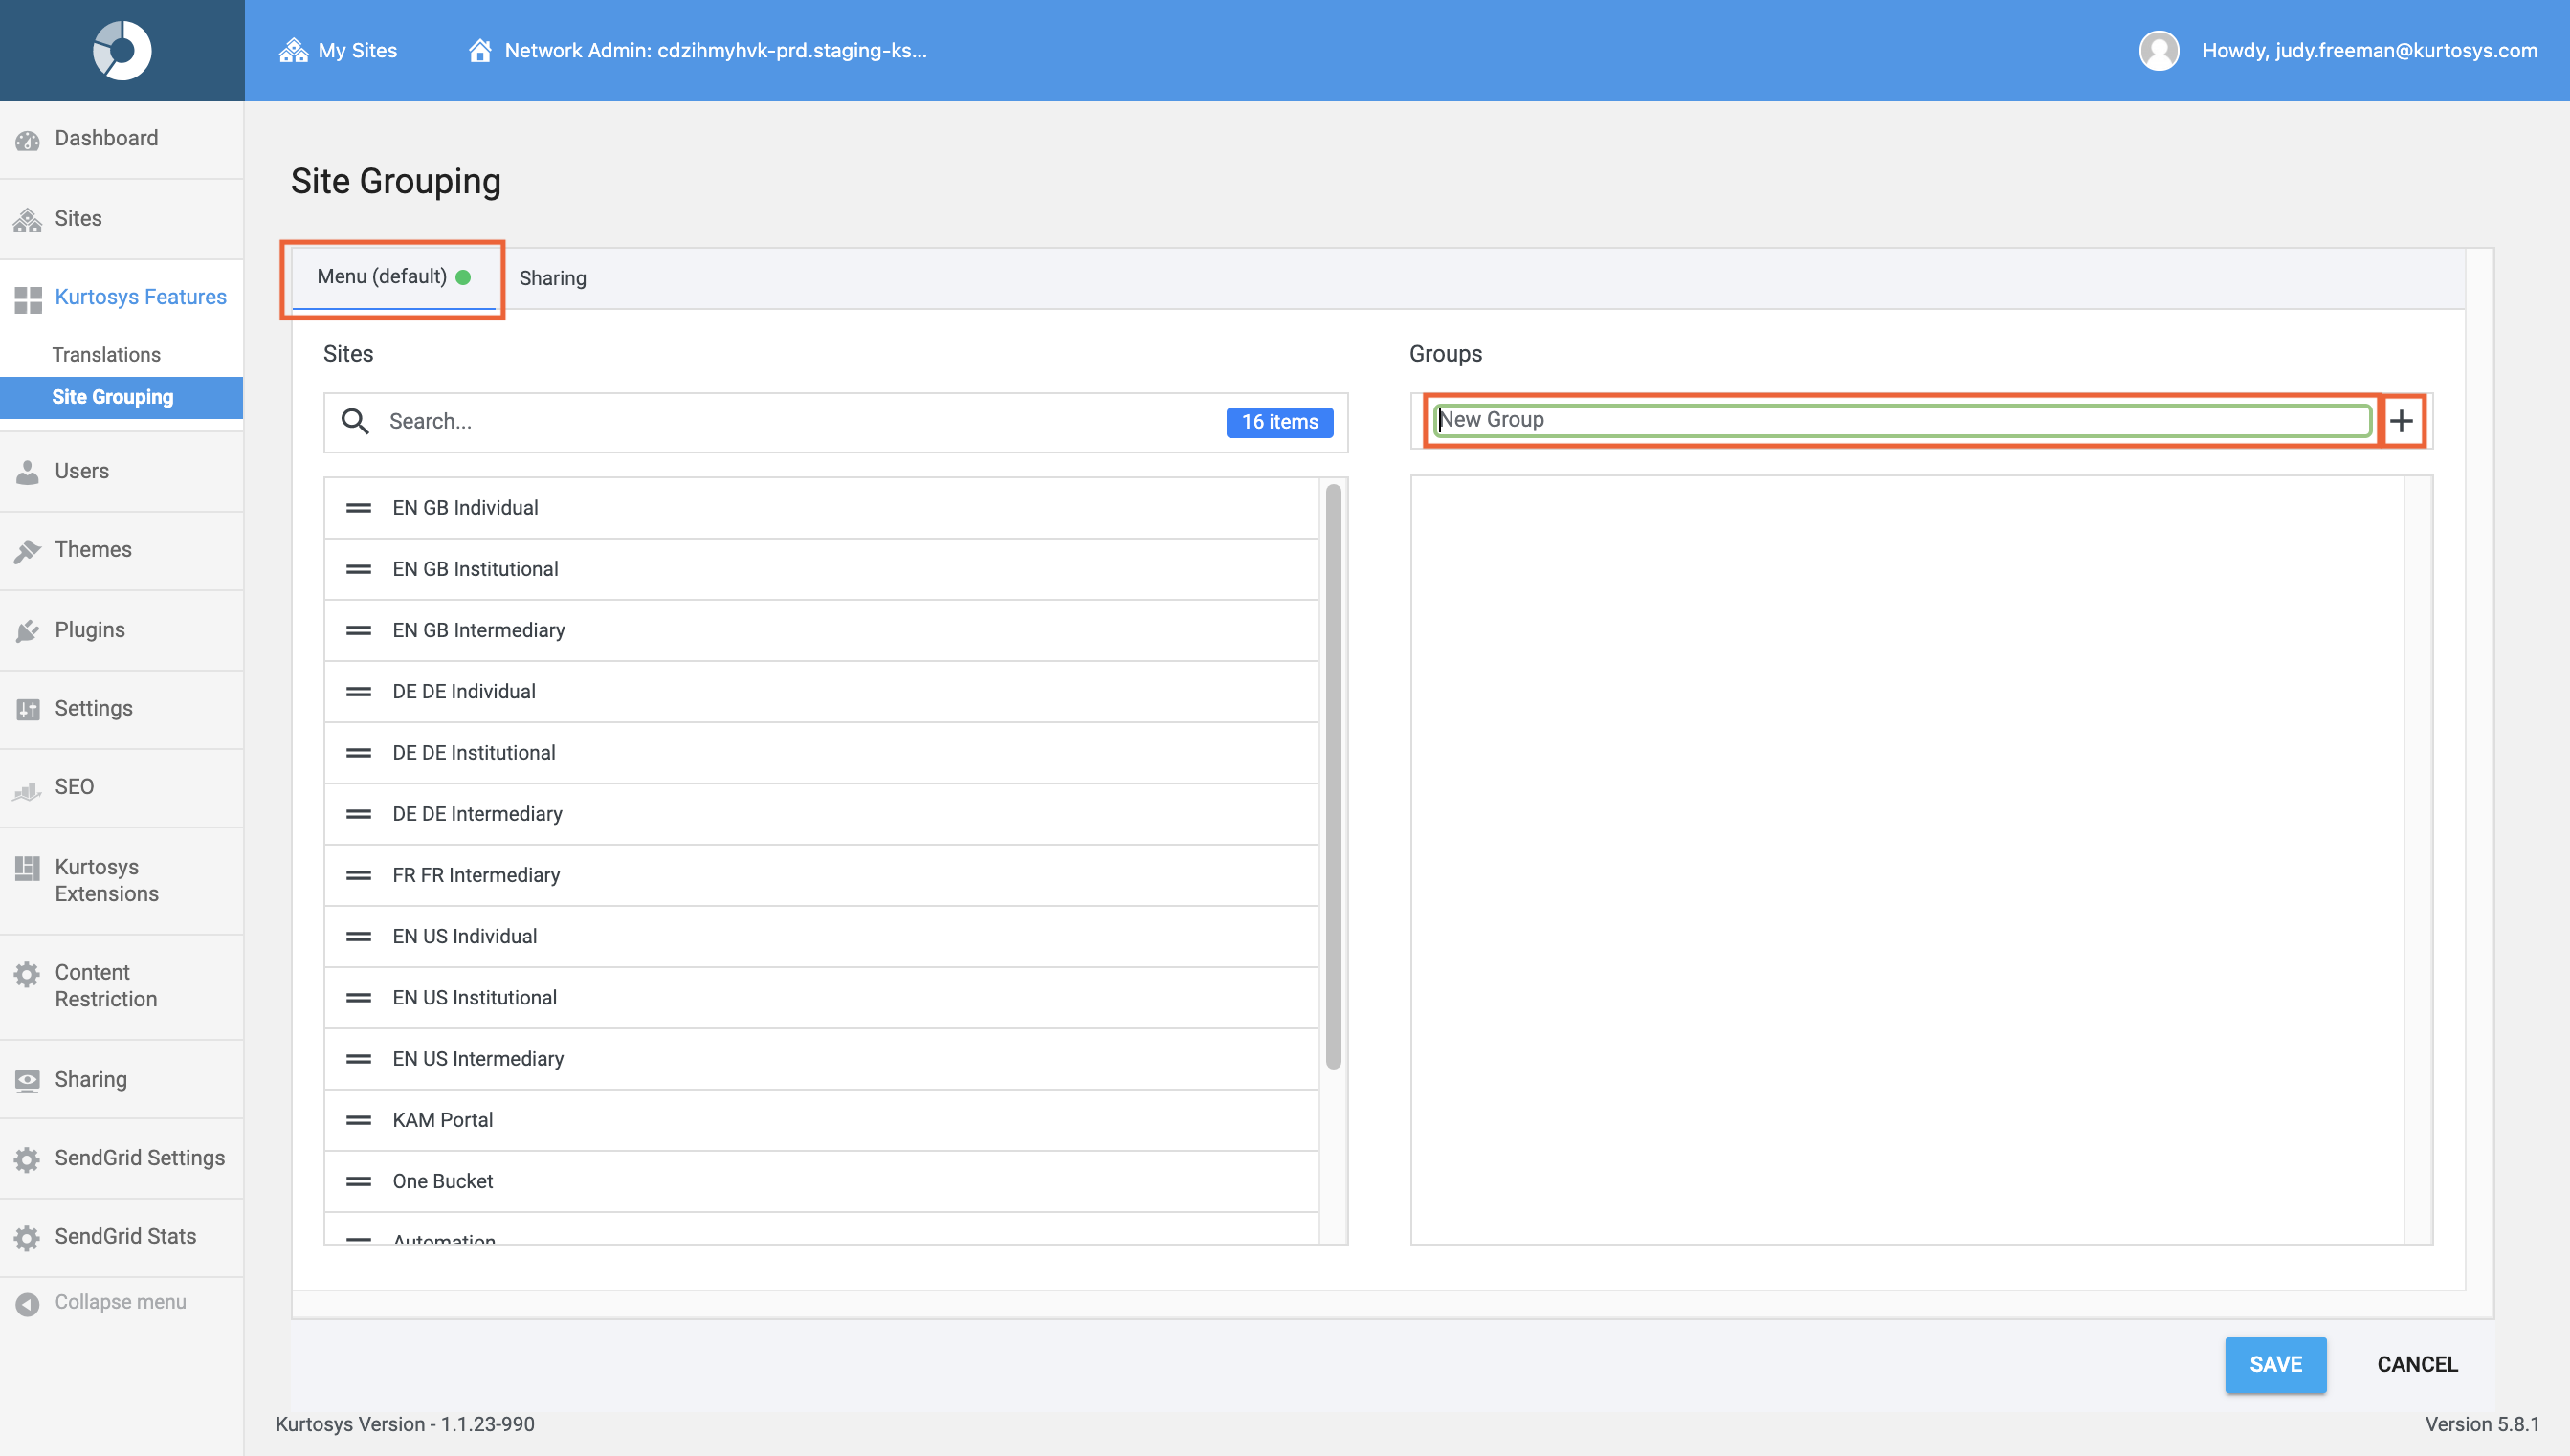
- Hover over Kurtosys Features then click Site Grouping.
There are 2 tabs for which groupings can be created, Menu (default), and Sharing.
Menu
This grouping will be used when hovering over the My Sites tab, and for Sharing if no custom grouping has been set up for Sharing.
- Under Groups, type in a name for the group in the New Group field, then click + or press Enter.
- Groups may be re-ordered
- Sub-groups can be added by creating groups and dragging them below and to the right of a higher level group
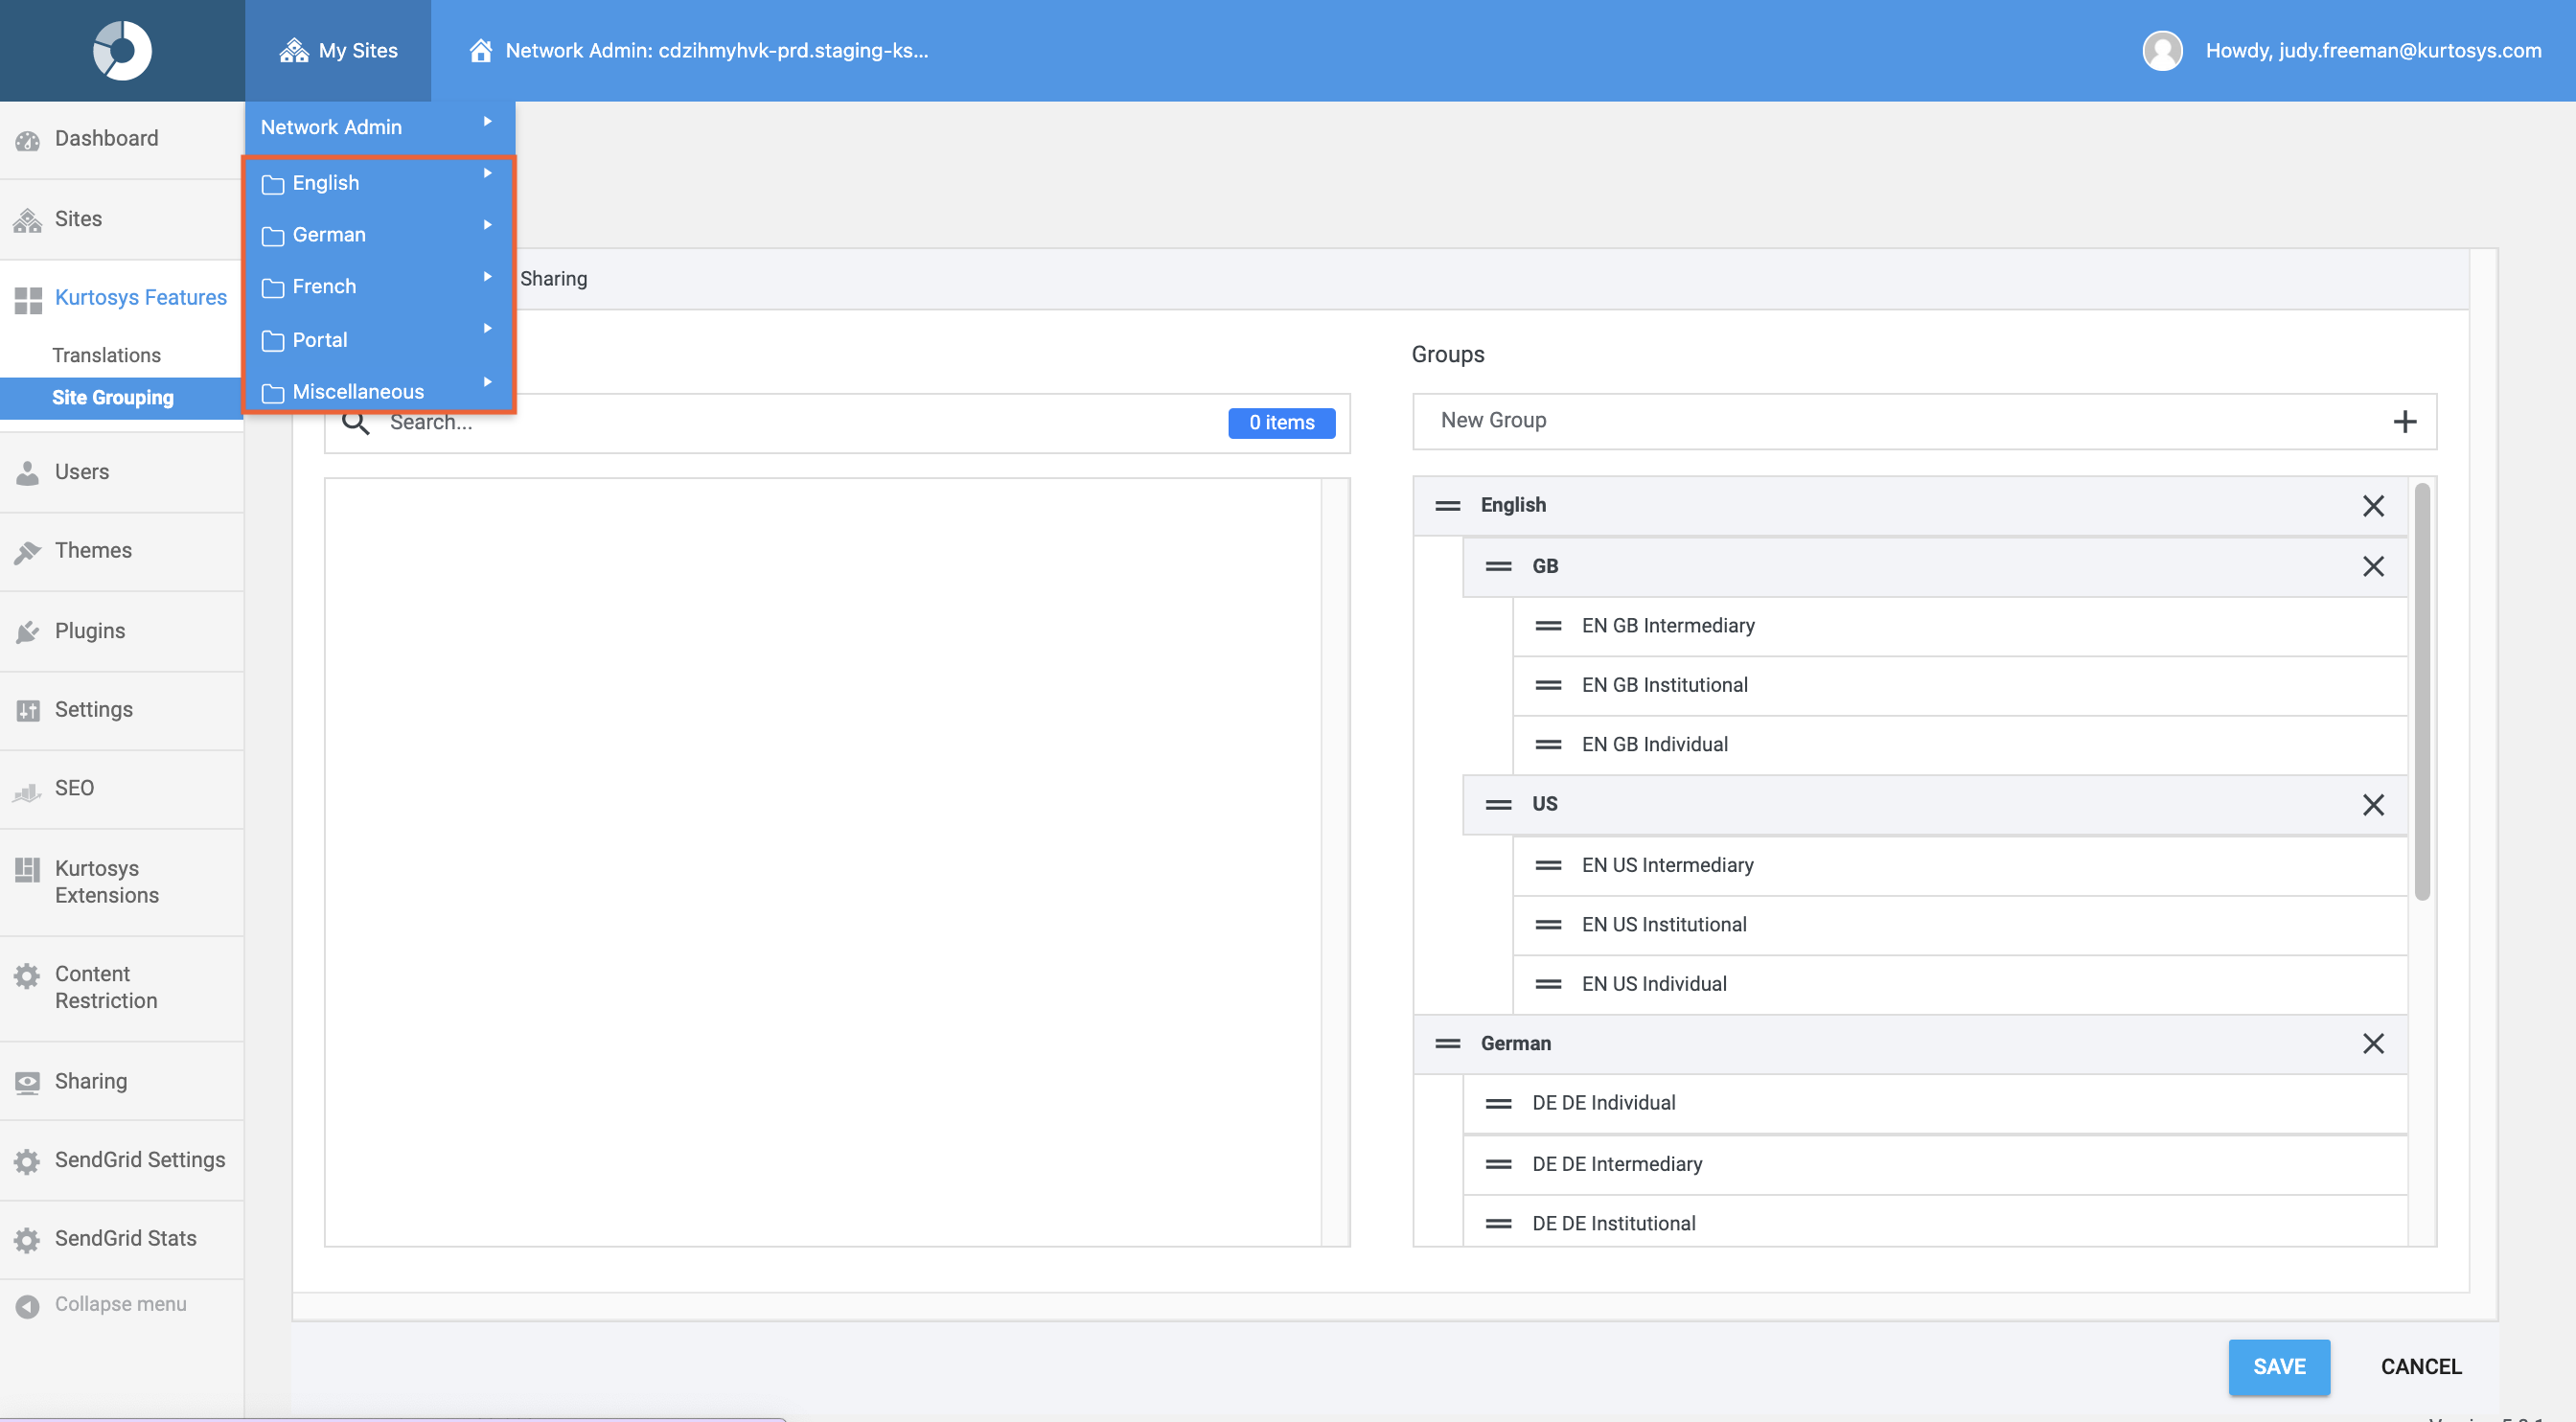
- Drag and drop the sites from the list (it works best if you use the middle of the sitename when you drag them over) on the left to the appropriate group on the right.
Note: Sites within a group need to be indented under the Group name in order to be "in" the group.
- Click SAVE.
Hover over My Sites, the grouped sites will now be displayed.
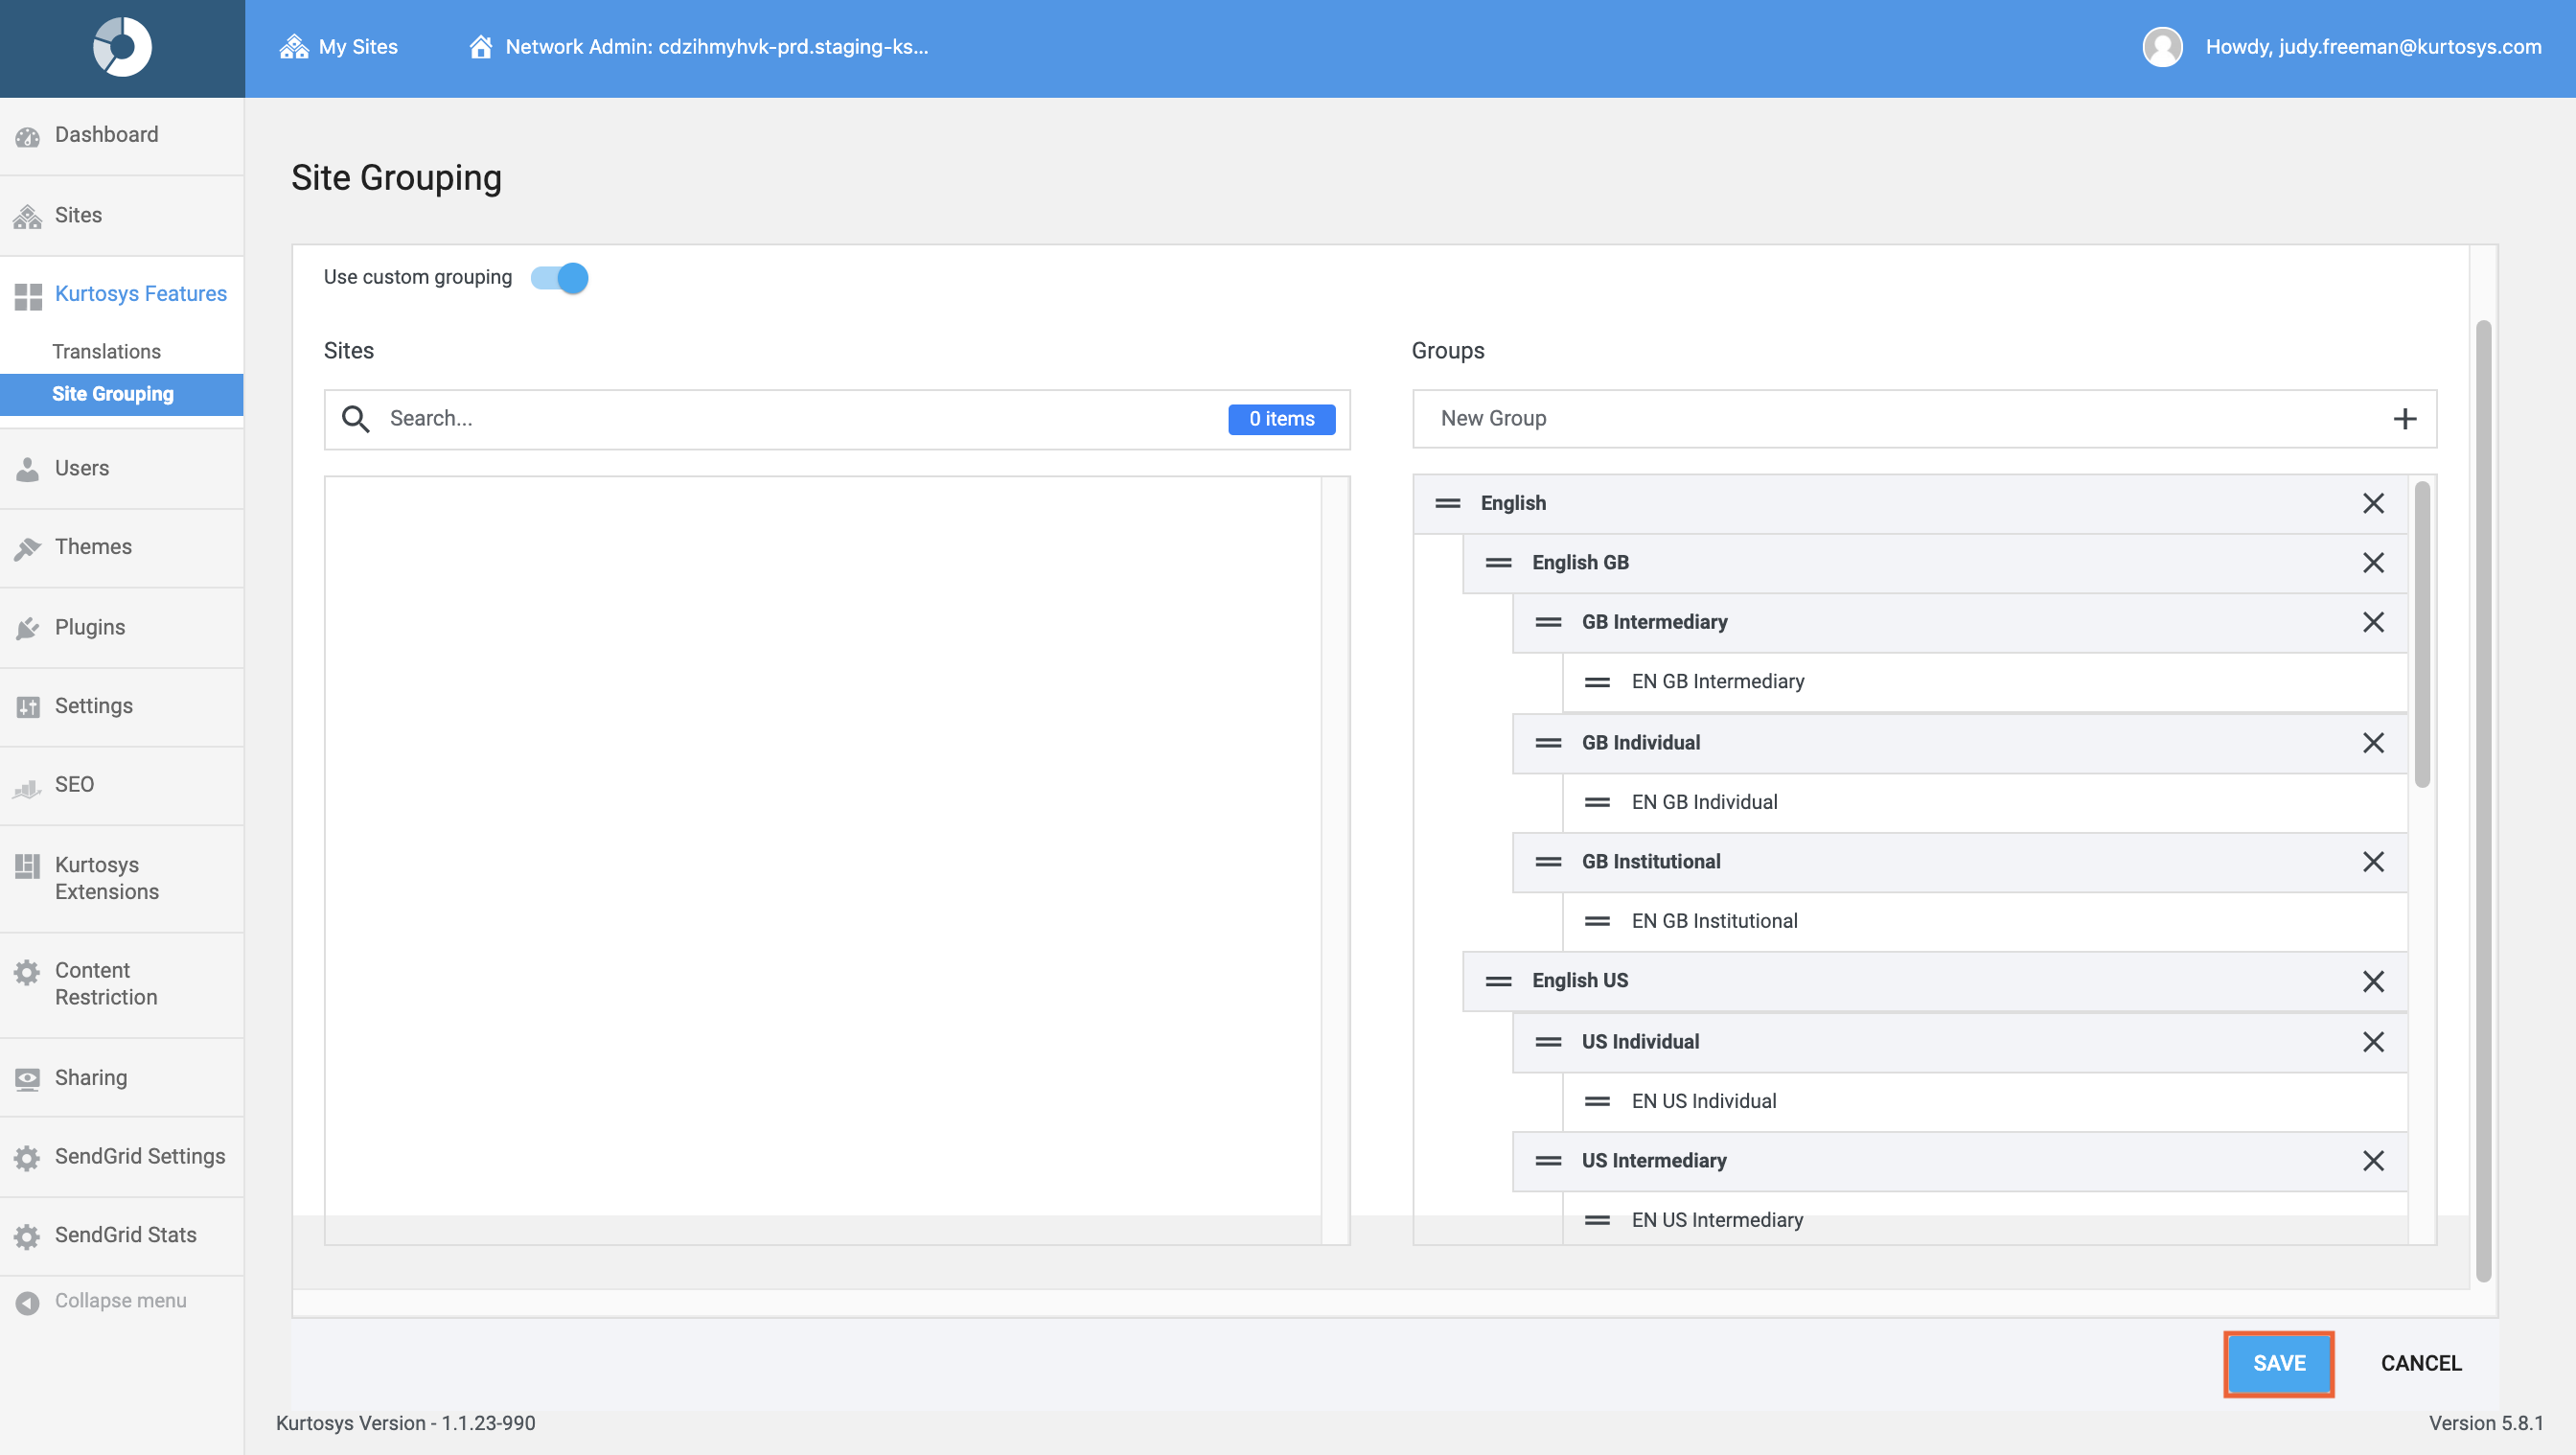
Sharing
The Sharing tab, with Use custom grouping toggled on, allows you to create a different set of groups to use for Sharing purposes. If no custom grouping has been set up, Sharing will use the same setup as you have applied for Menu.
Follow the same procedure as with the Menu tab.
- Type in names for the groups and click + or press Enter after each one.
- Drag and drop the sites listed on the left into the appropriate group on the right.
Note: Sites within a group need to be indented under the Group name in order to be "in" the group.
- Click SAVE.
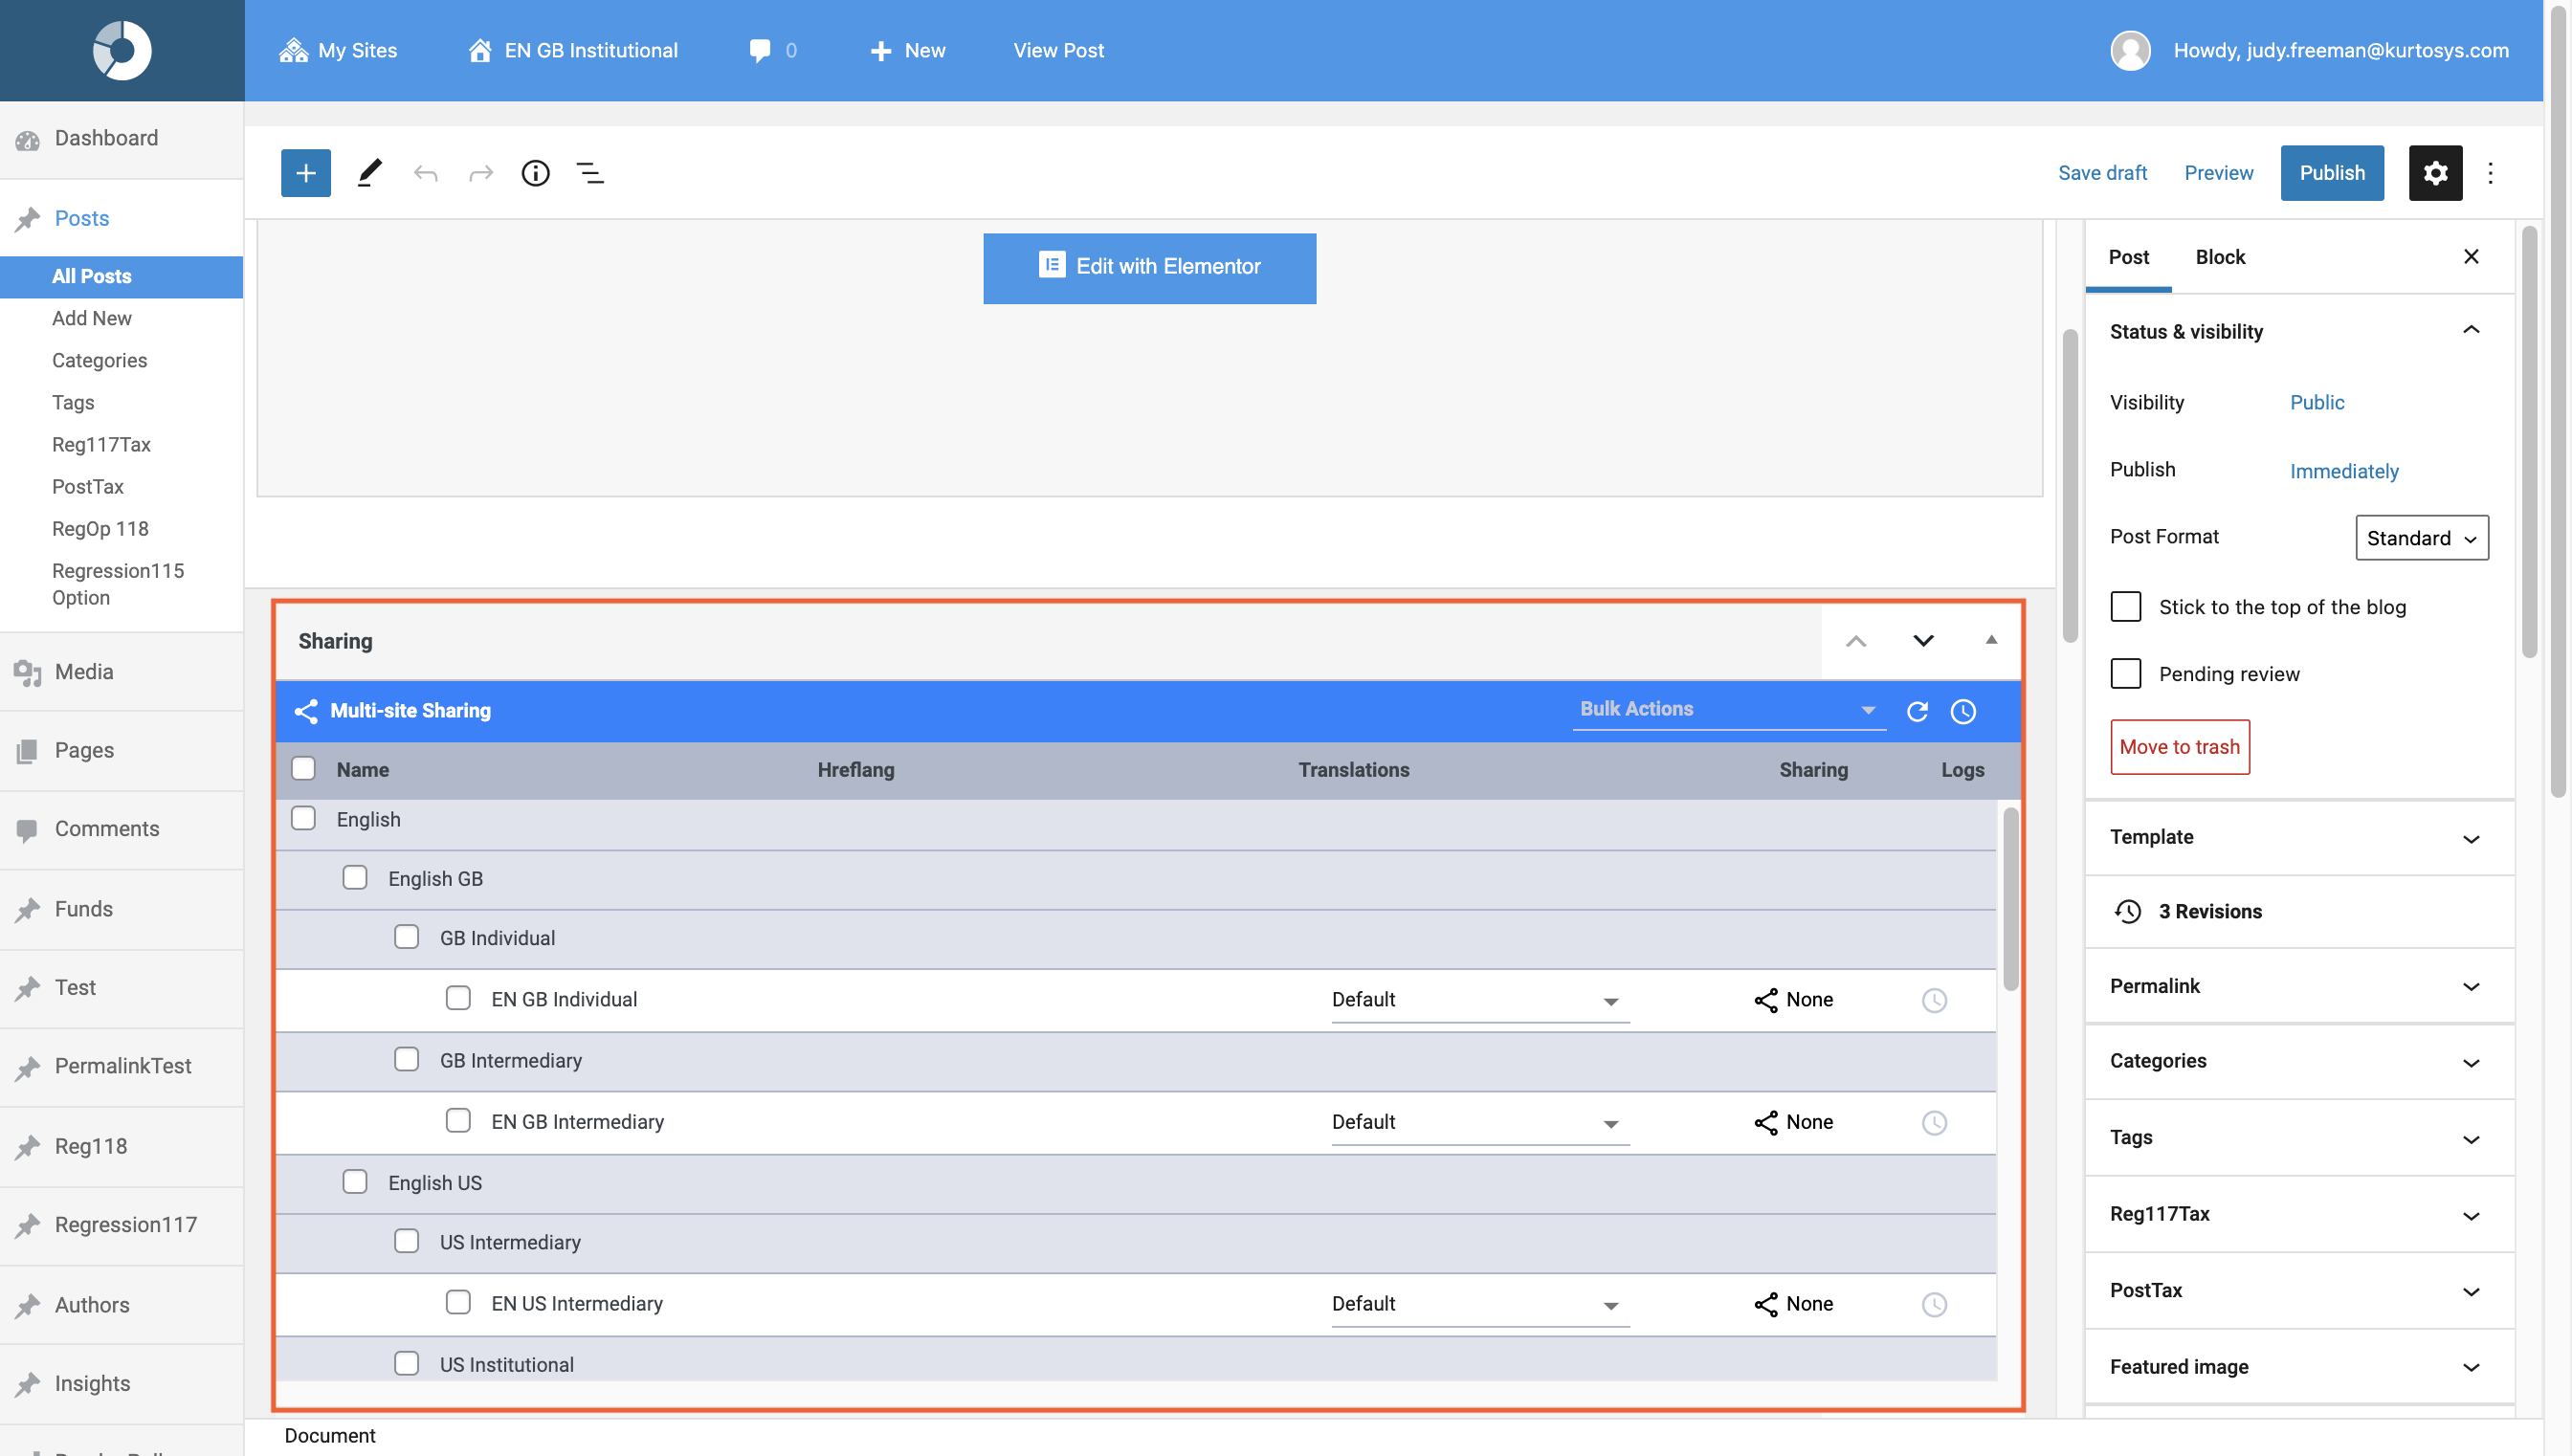
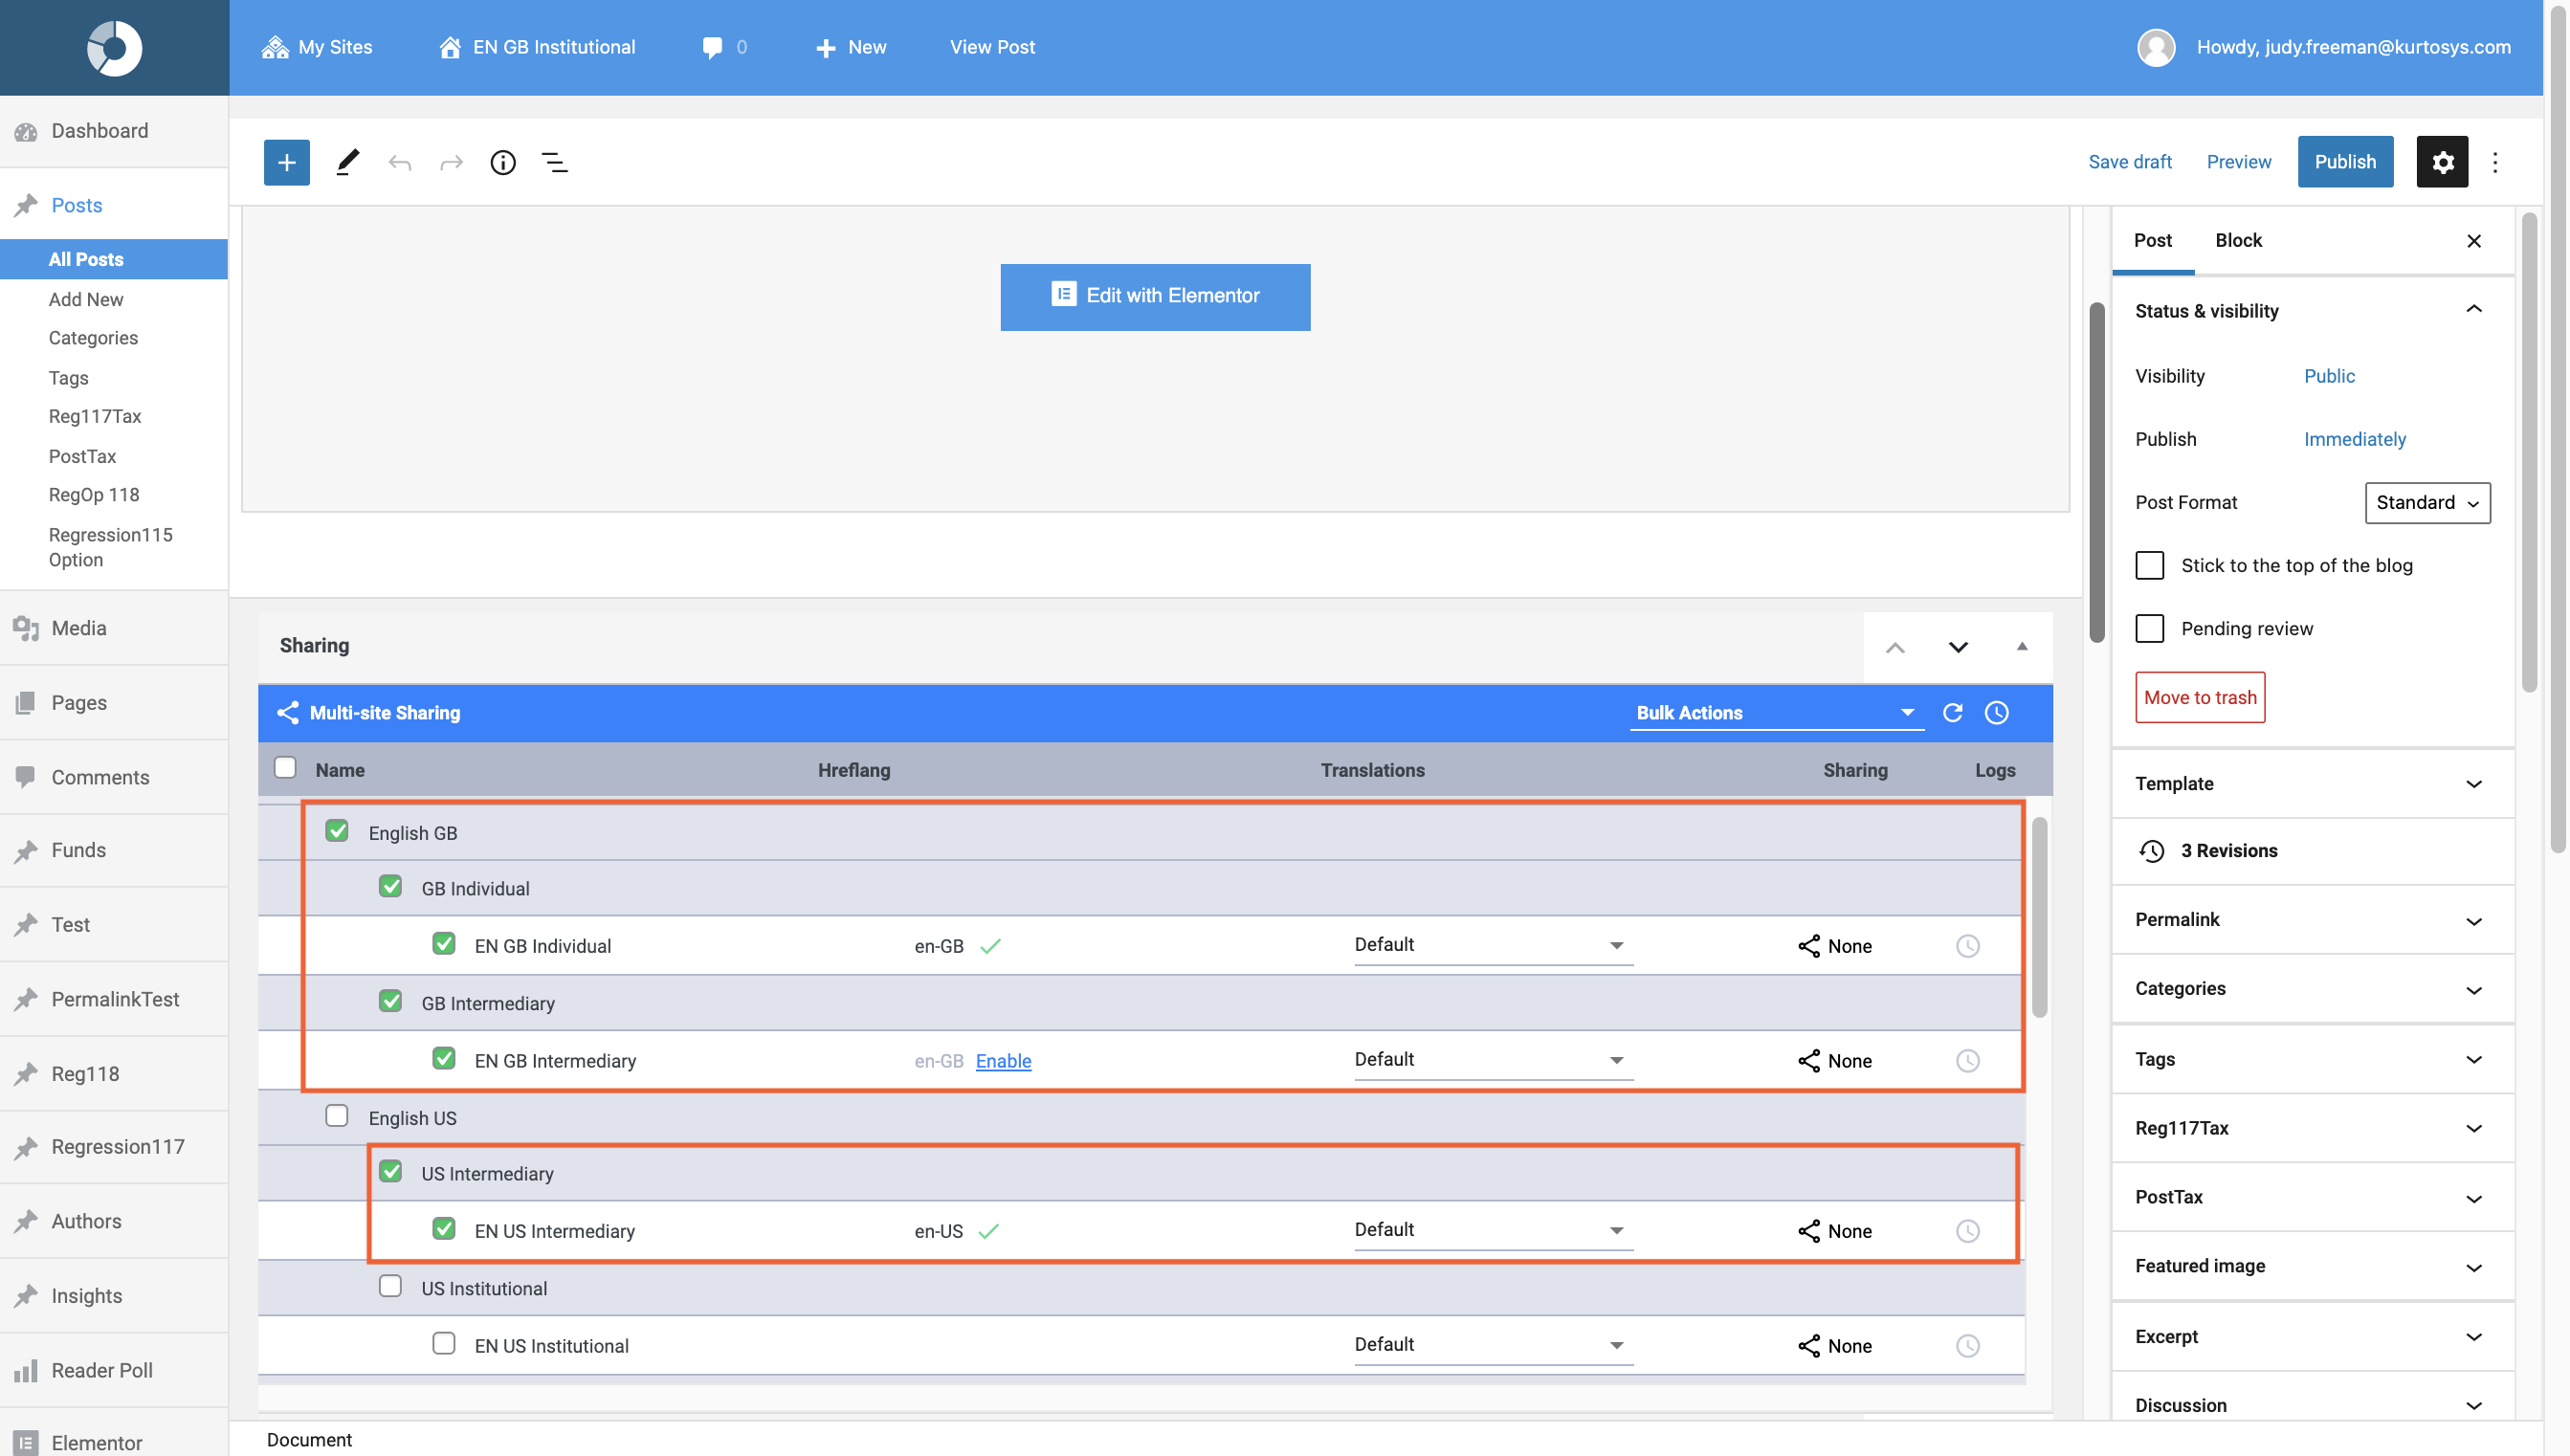
- Open a post in Post Edit view, and scroll to the Sharing widget, the Sharing groups are now visible.
- Based on the hierarchical structure, it is easy to select a group, subgroup or specific site to share.