
The Document Production Center has the functionality to automatically distribute your fund documents created in the Production Center to your Kurtosys Document Hub and other sftp services, like FundInfo.
When setting up a workflow within the Production Center you have the option to select which services (if any) you would like to send your documents to.
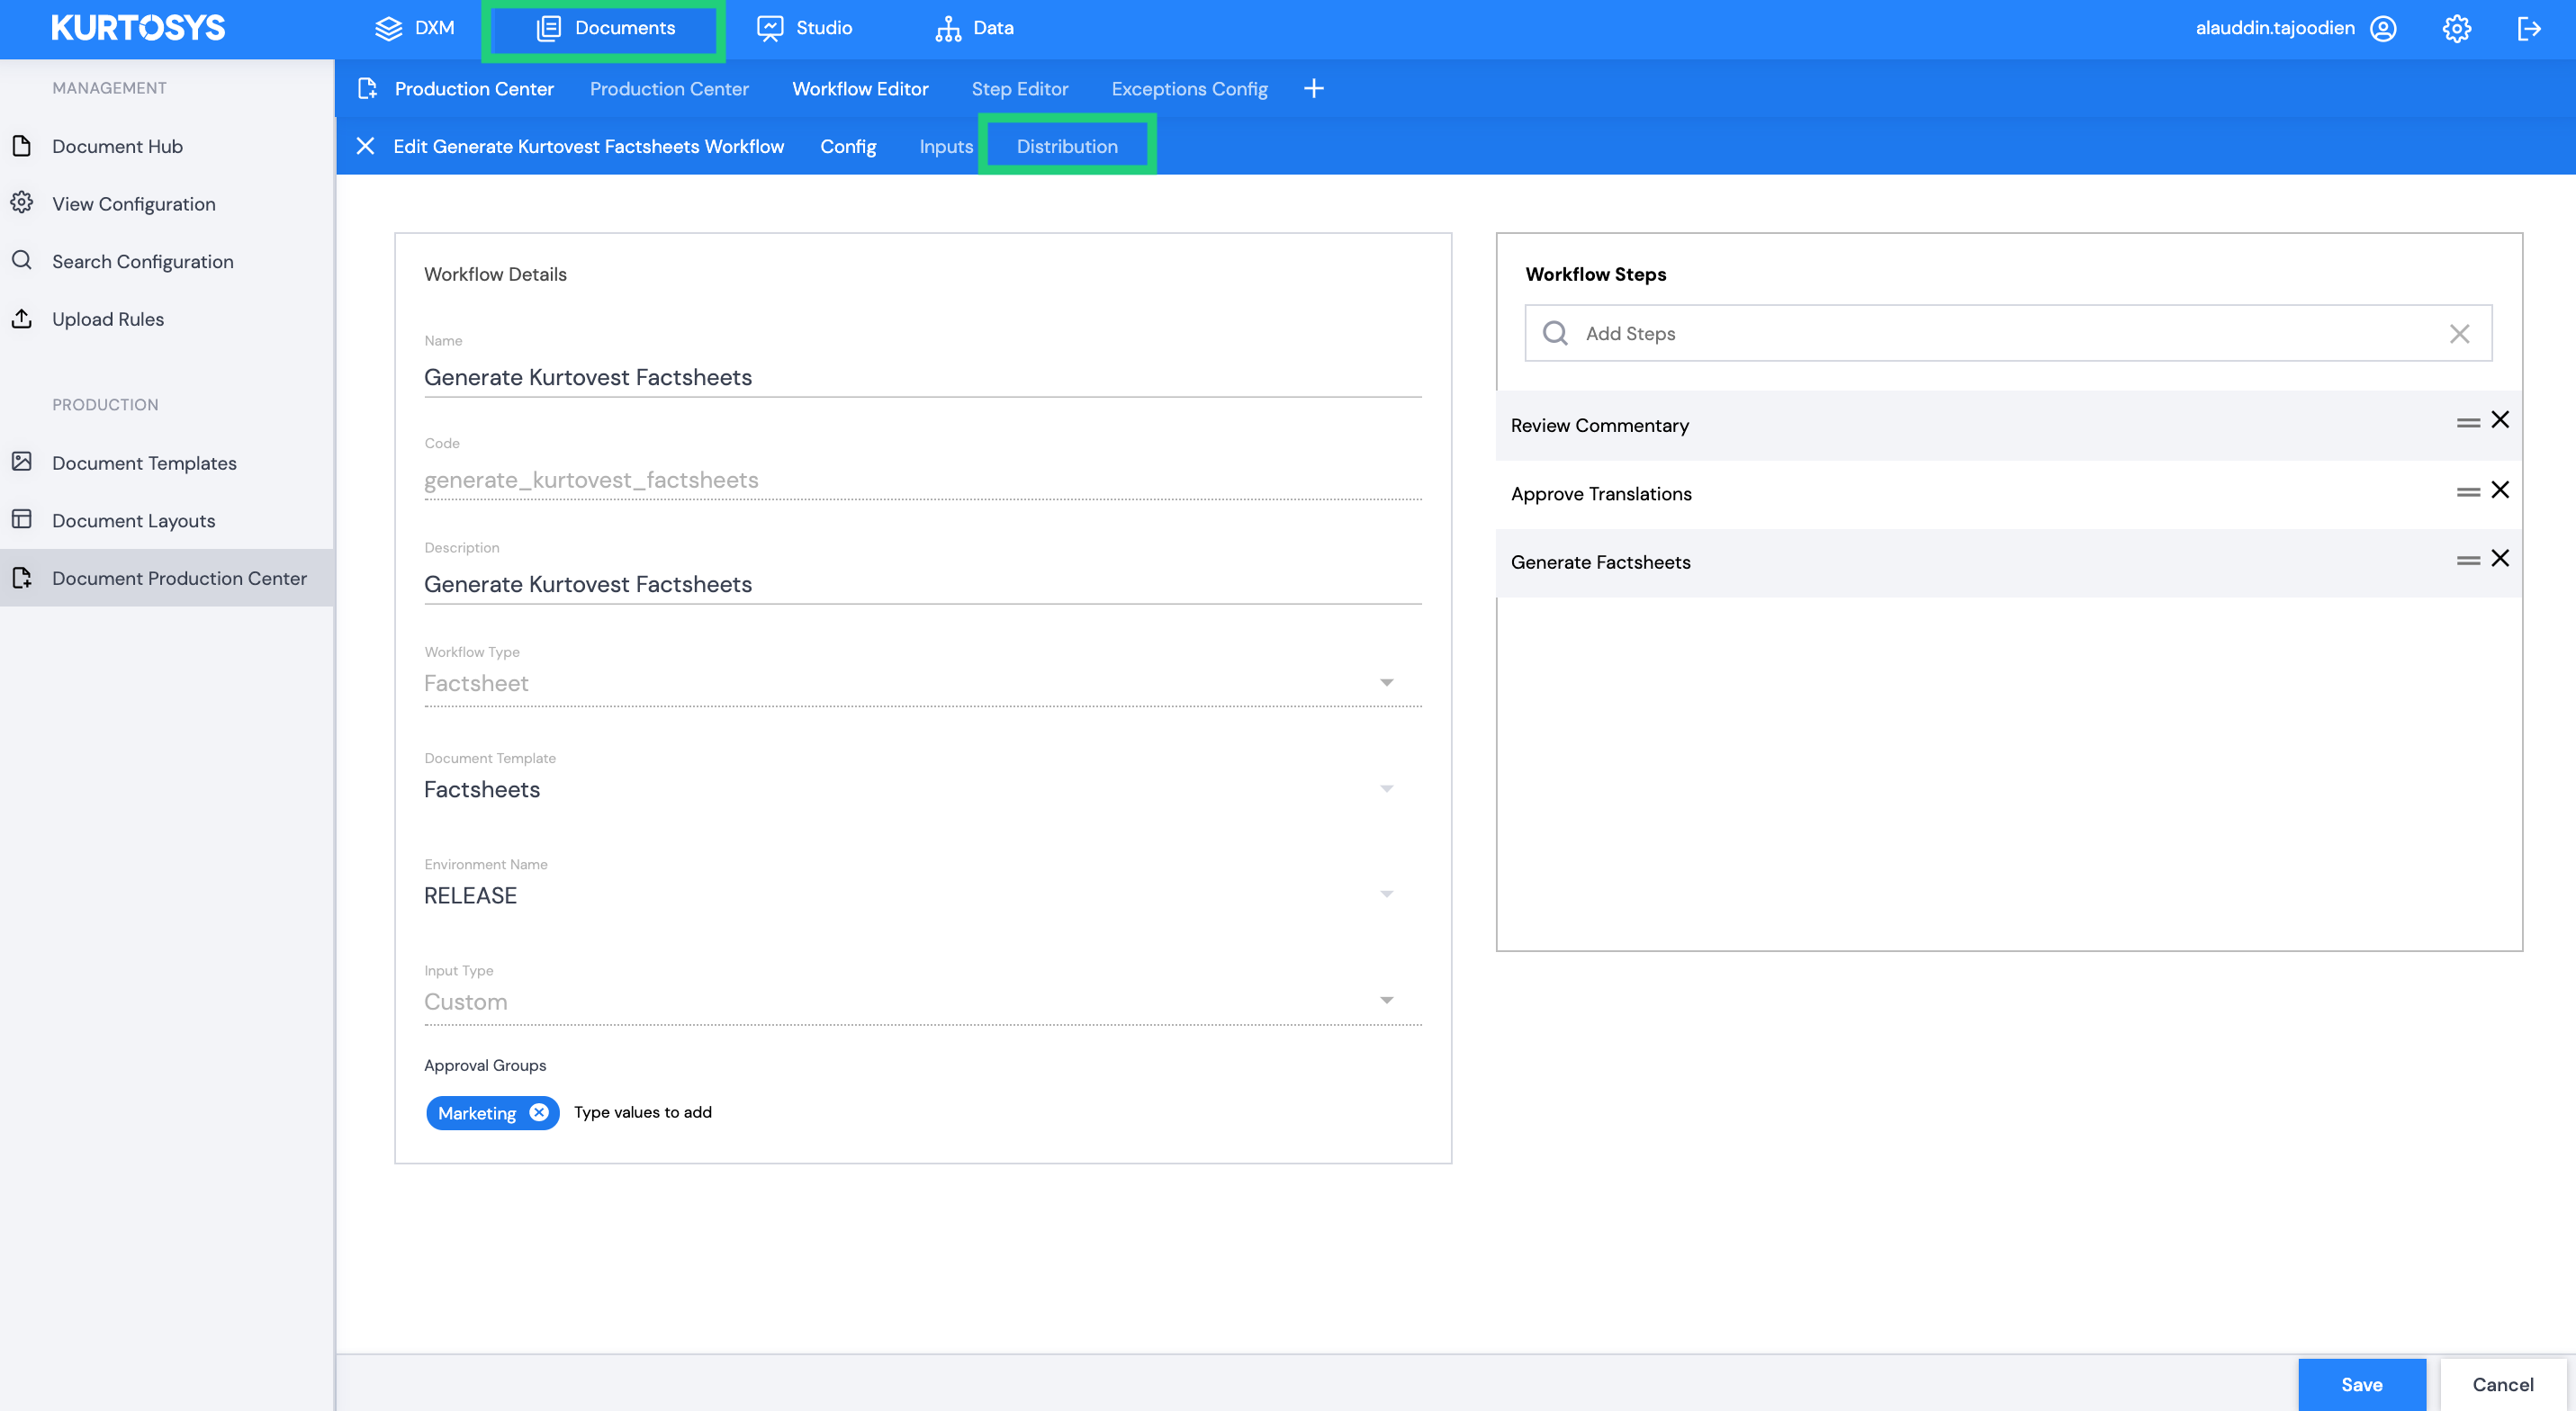
To set up document distribution, first follow the steps set out in the Production Center Workflows article. Once you have completed the workflow Config and Inputs sections in the workflow editor for your new workflow, select the Distribution tab to start setting up document distribution.
Setting up distribution to Document Hub
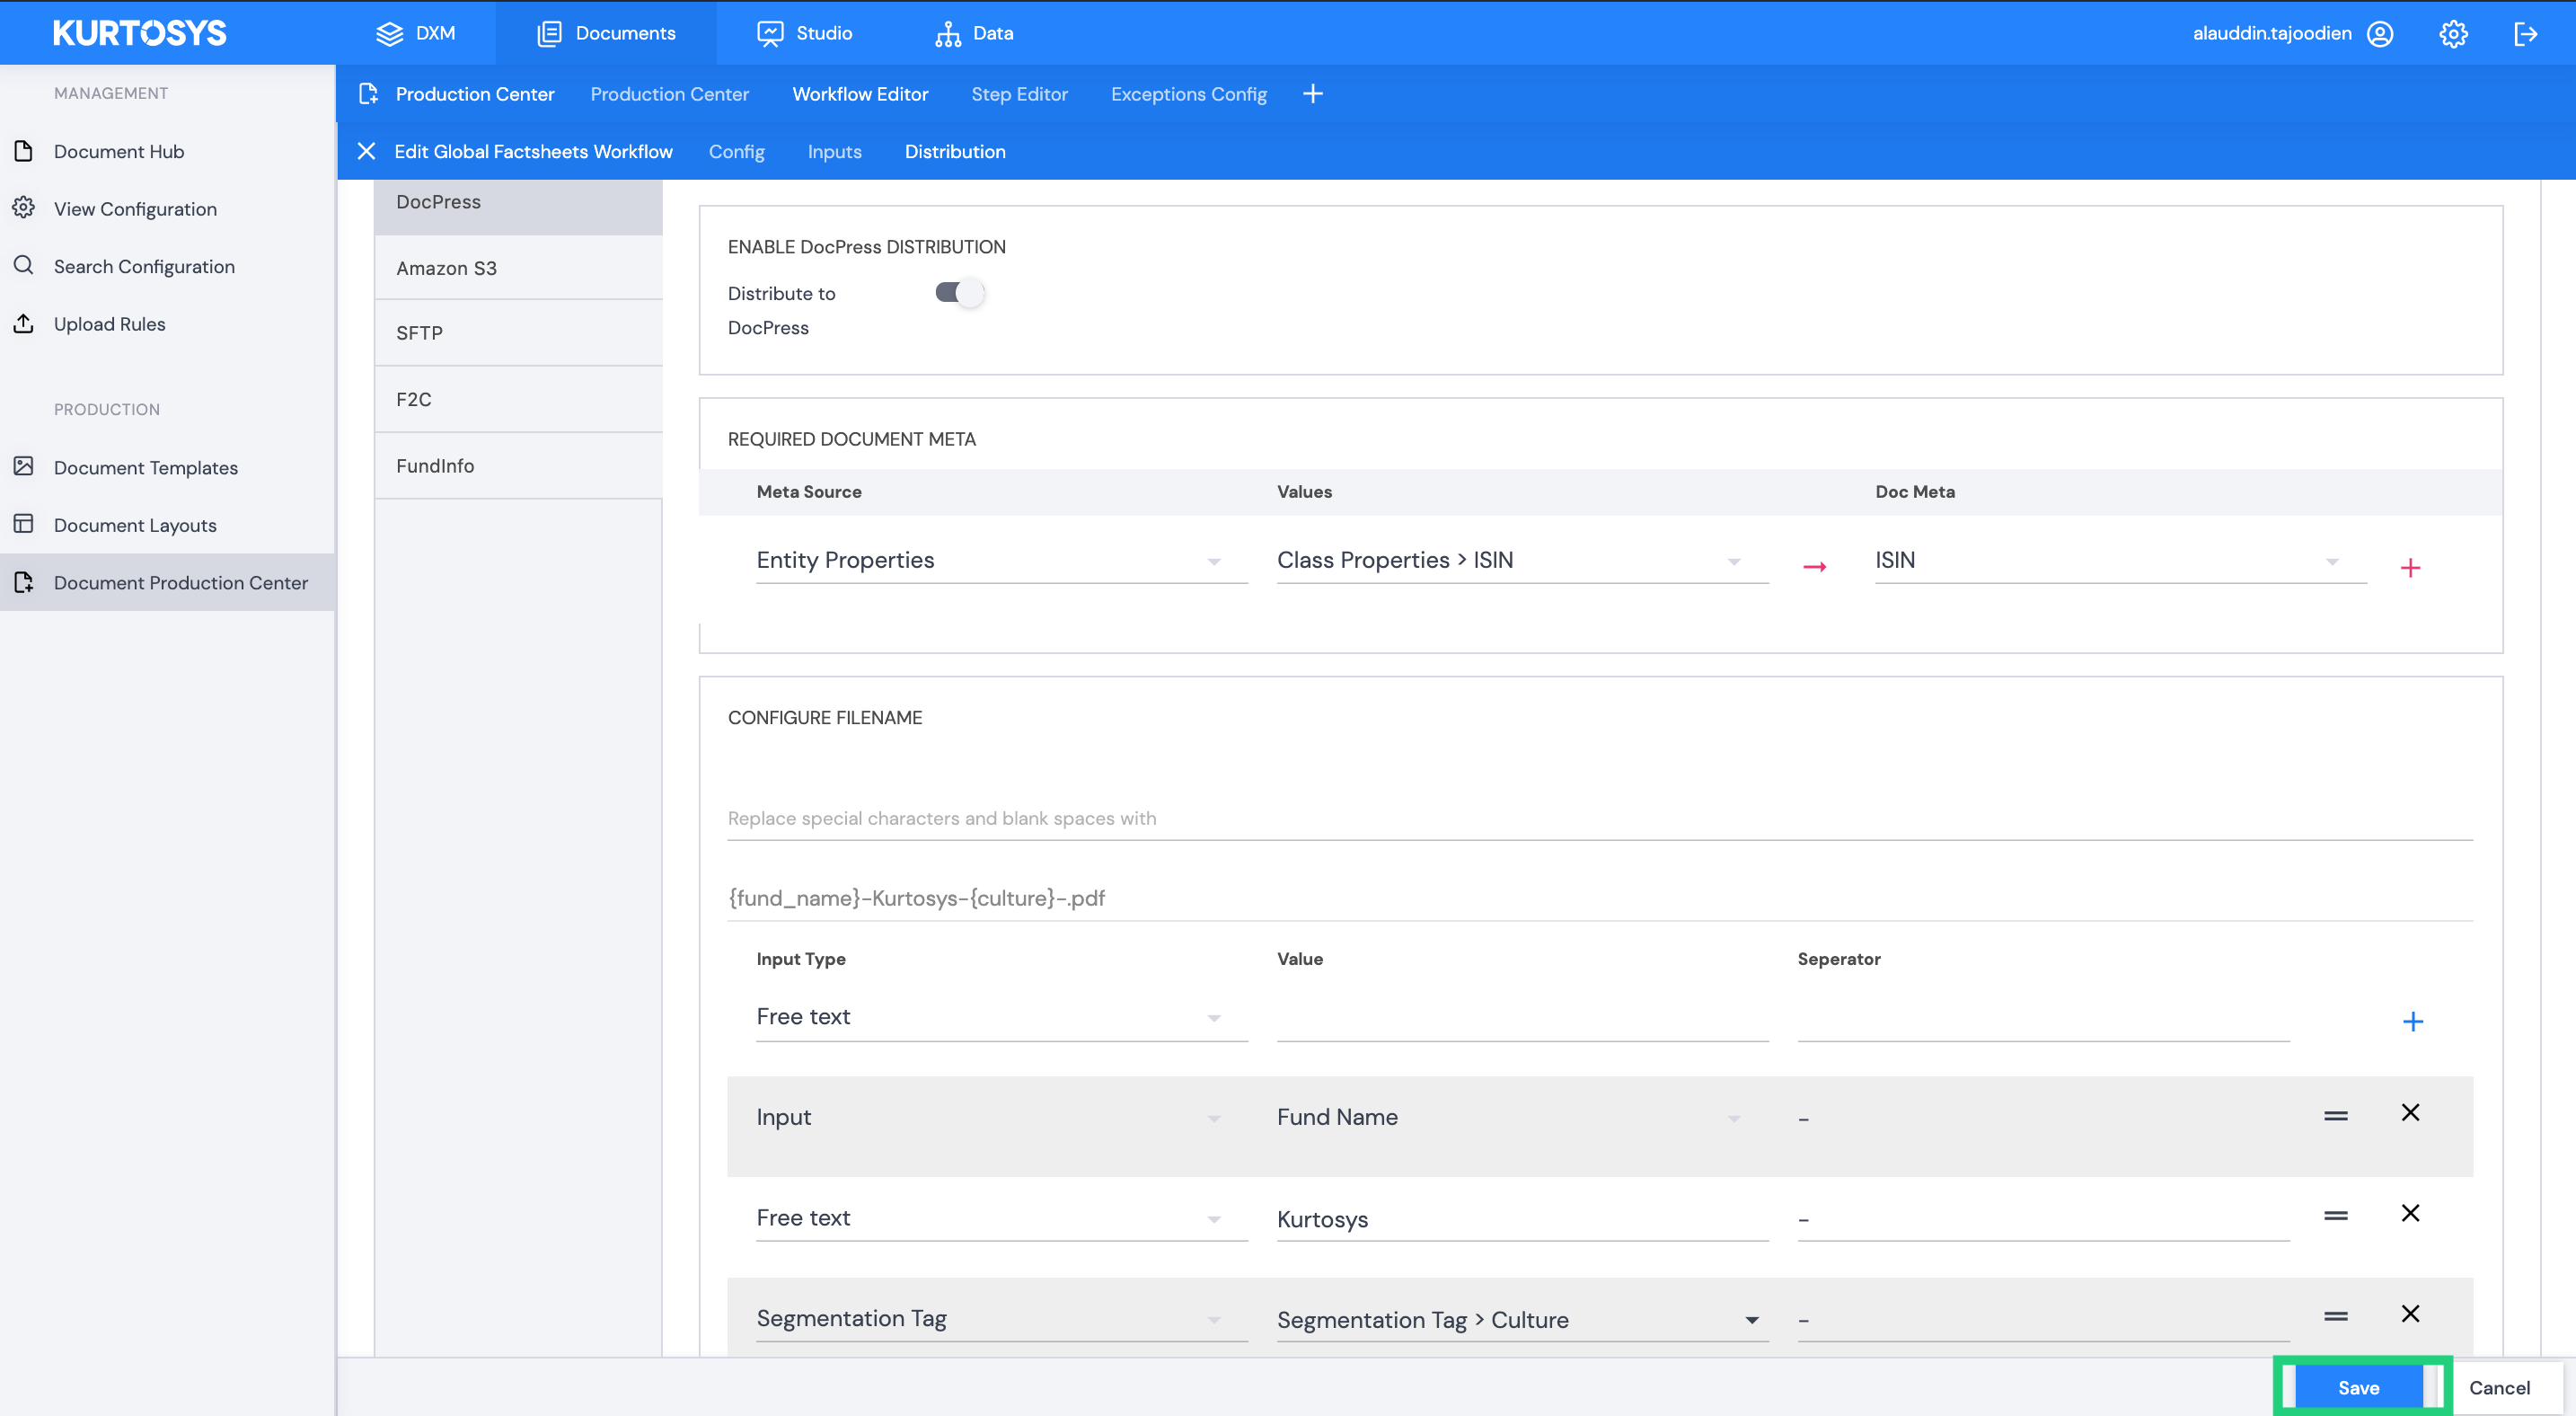
To set up automatic document distribution to your DocPress Document Hub, select DocPress from the menu on the left and toggle the switch to enable DocPress Distribution.
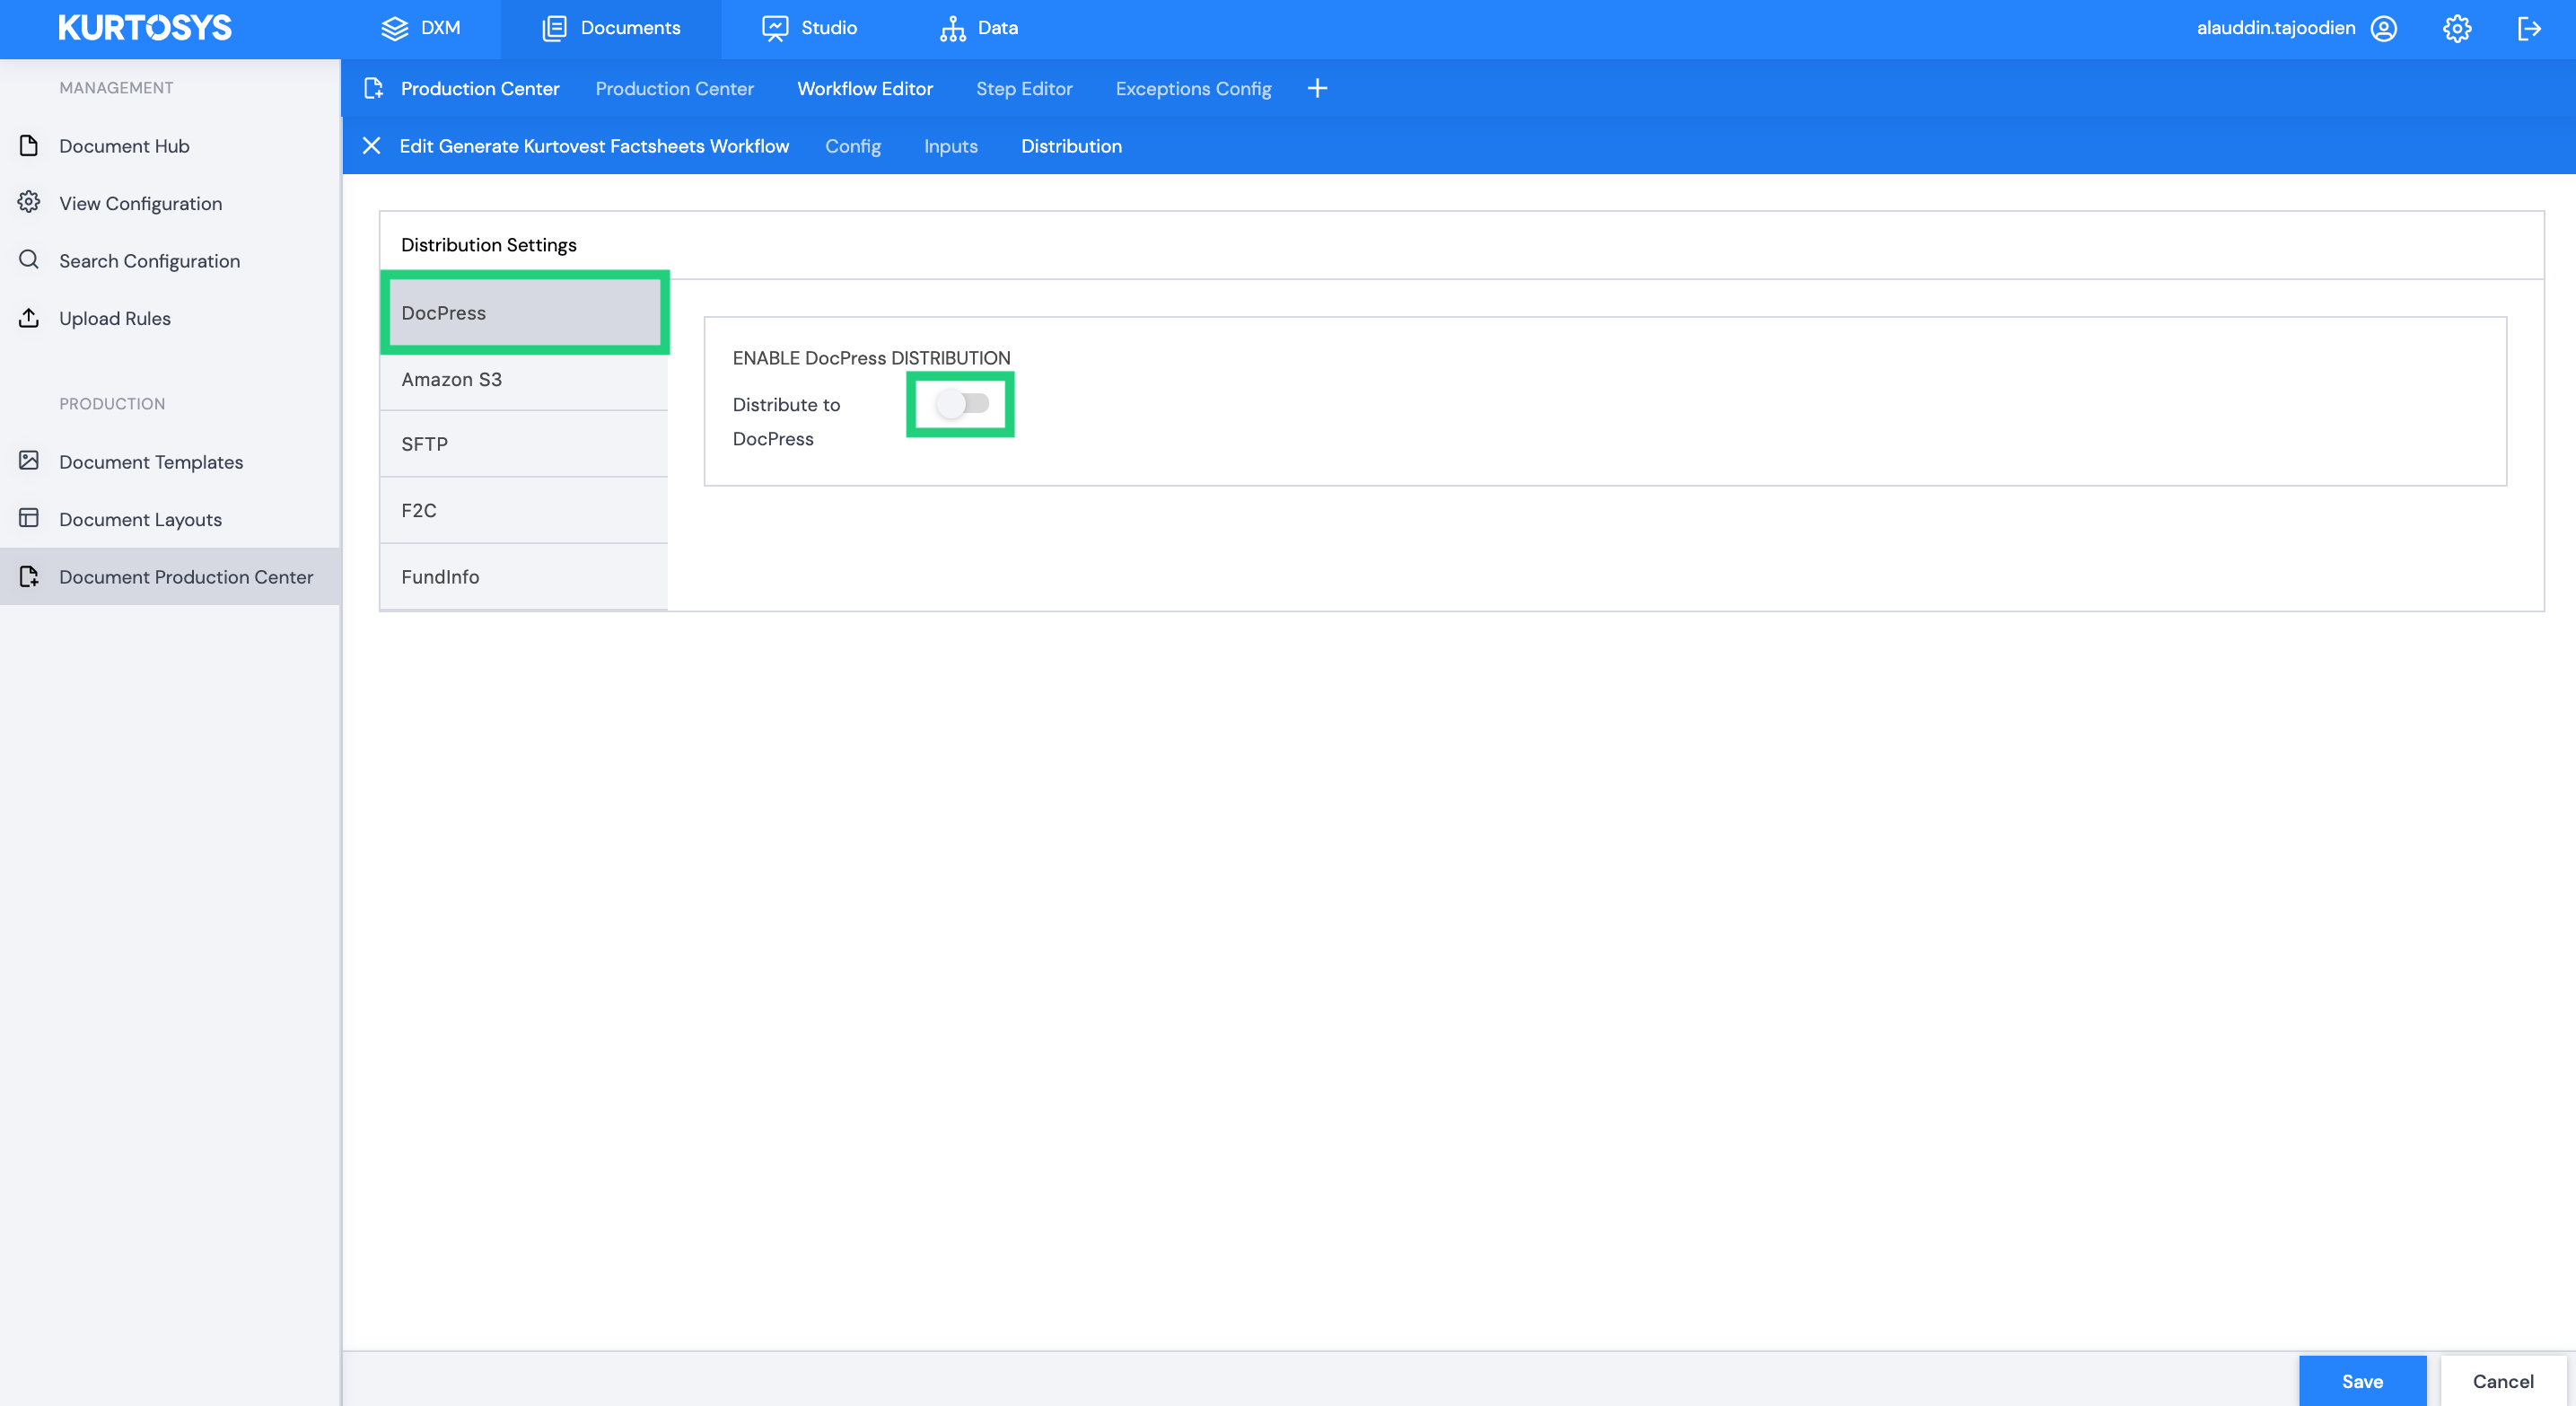
Once switched on, the DocPress Distribution form will display.
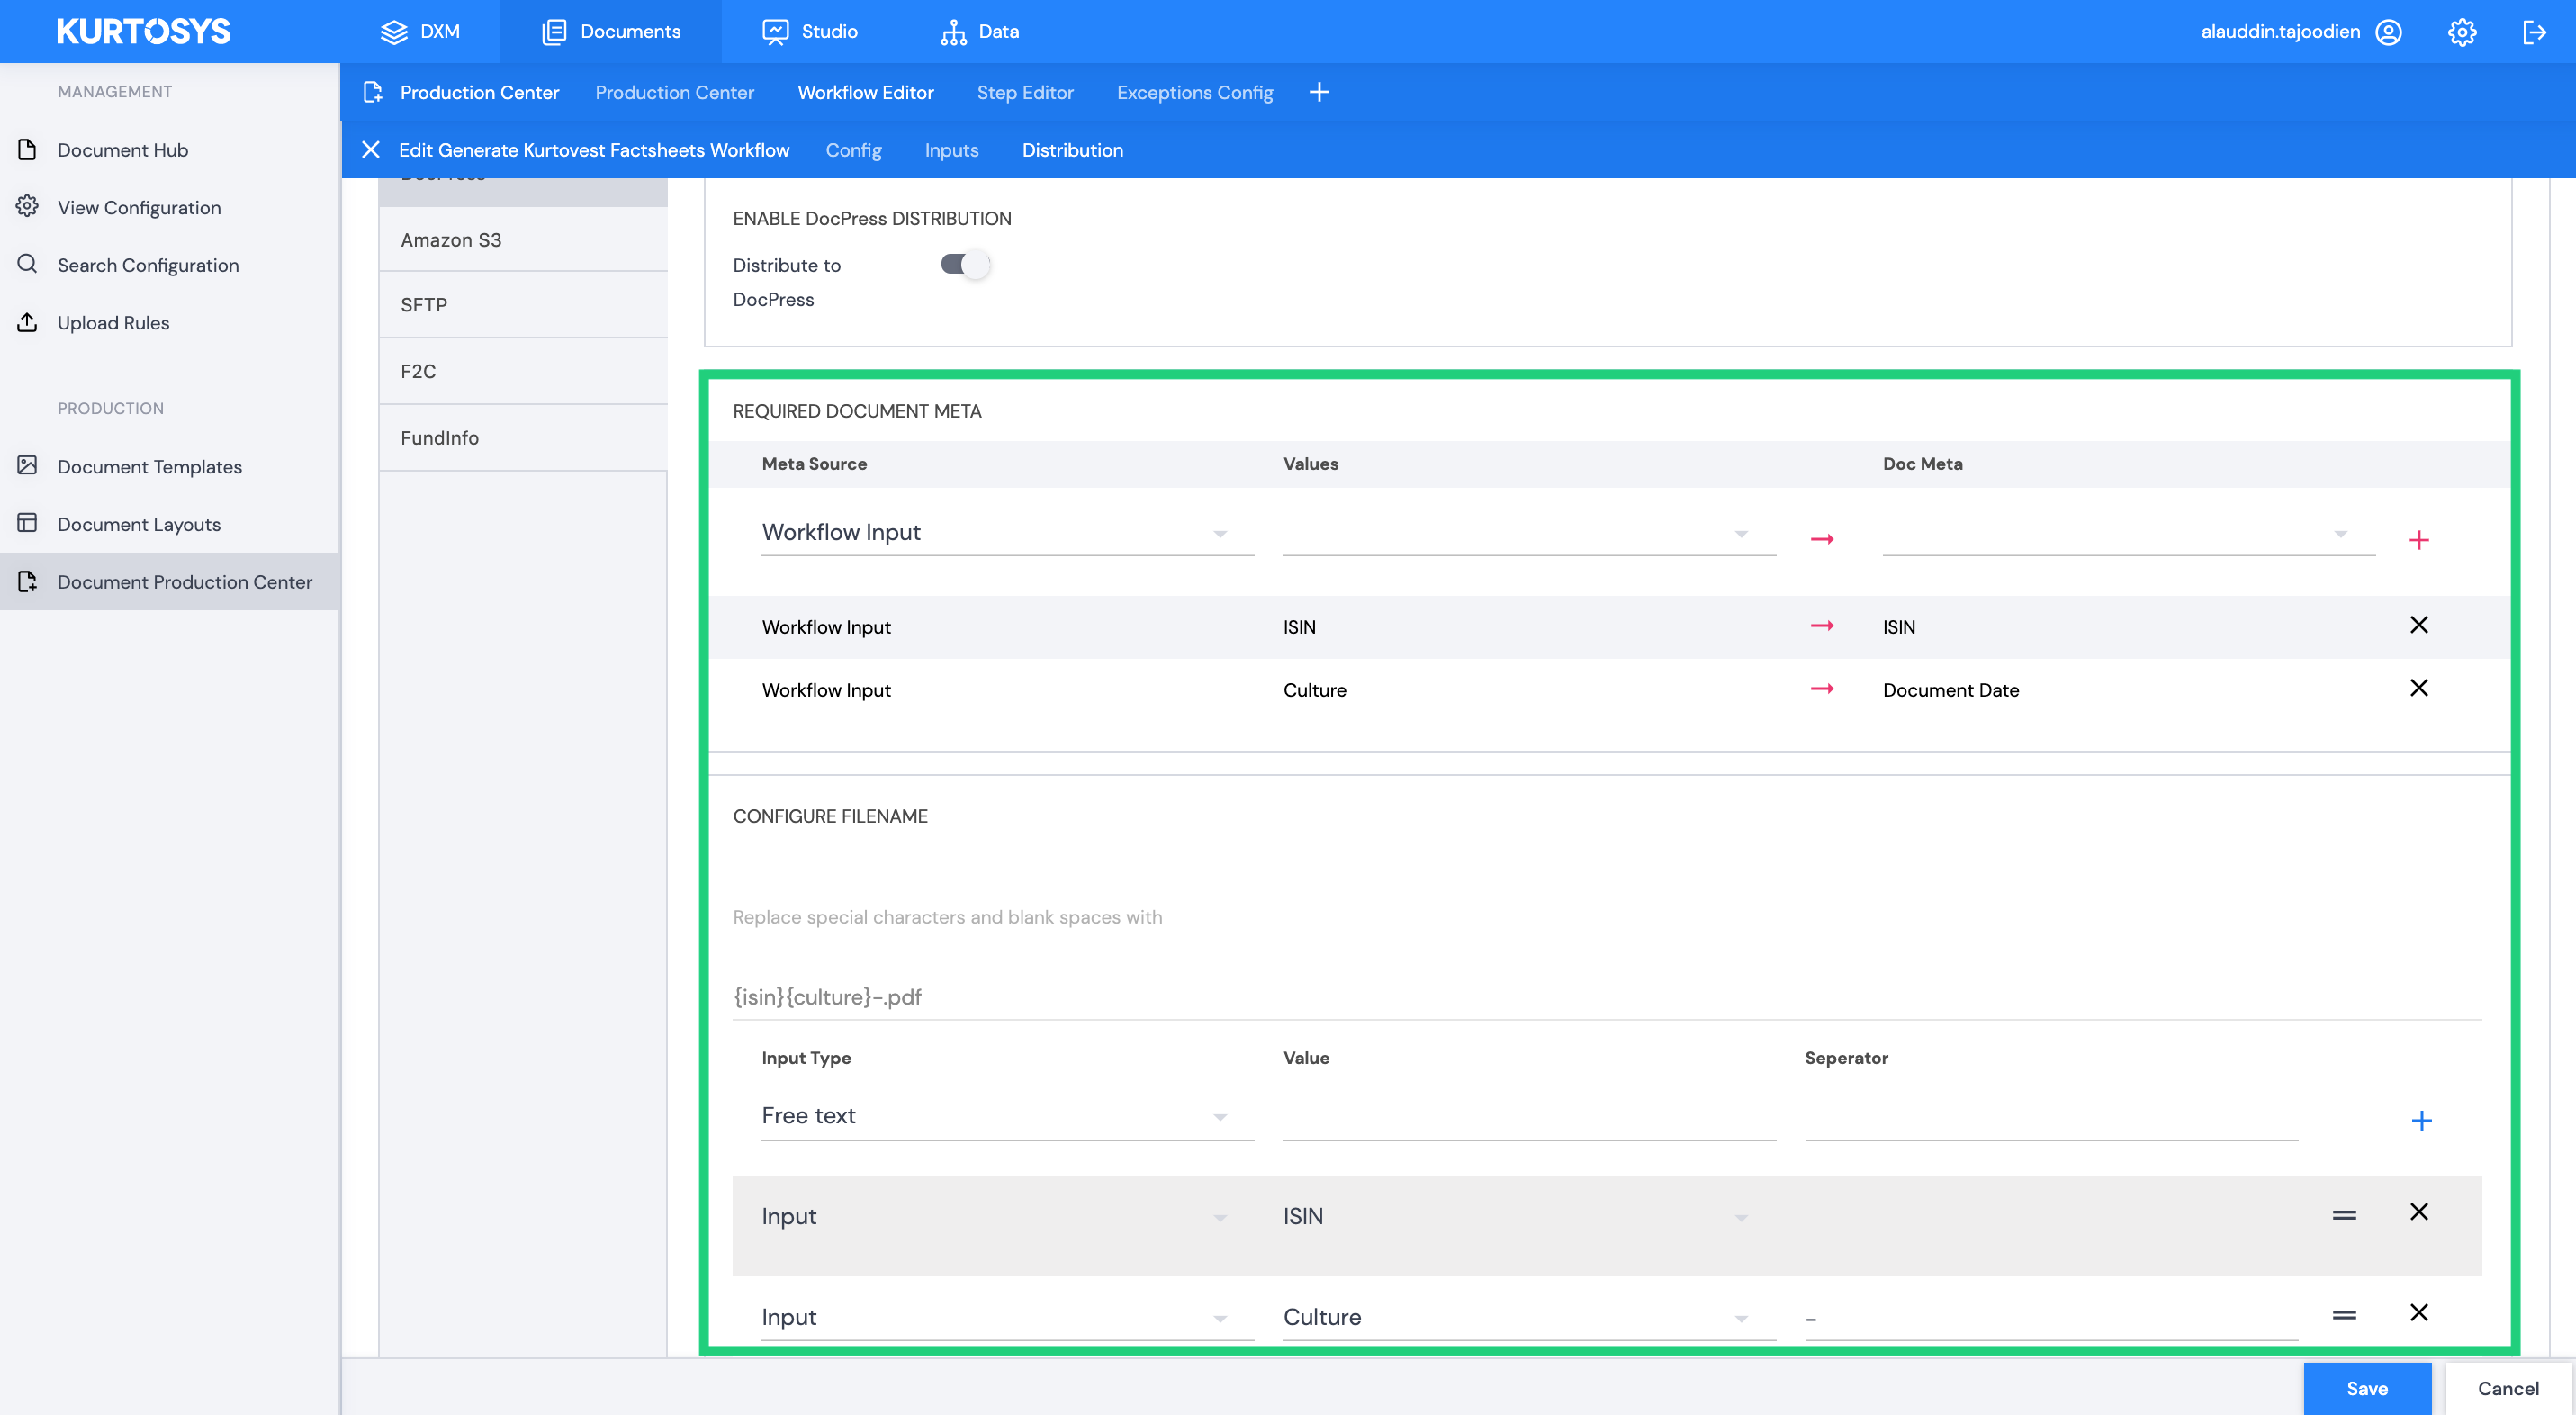
Required Document Meta
First you need to add the required document meta. You need to all the metadata you would like to attach to the documents when they are sent to DocPress.
Complete the following form fields:
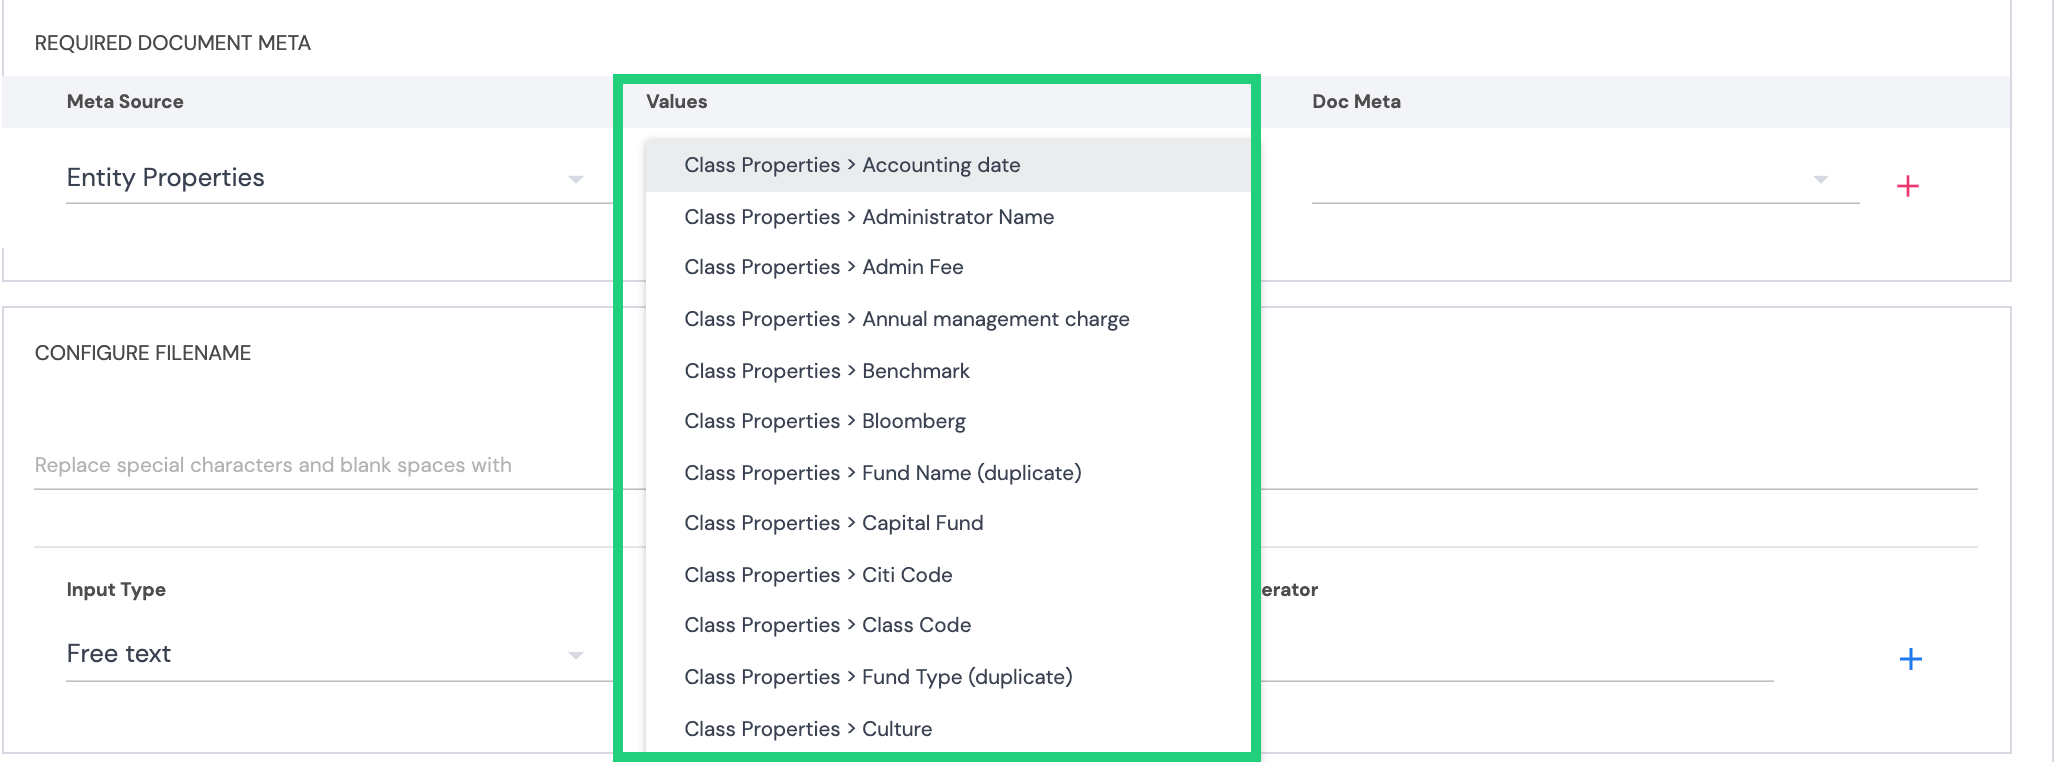
Meta Source – specify where DocPress should source the specific metadata from. Select the downward arrow to see your options.

The options presented to you will vary depending on the workflow type you have selected (either custom or segmentation). If you have built a custom workflow you will only be able to select workflow inputs as meta sources, whereas if you have built a segmentation workflow you will also be able to choose Segmentation Tags or Entity Properties as metadata sources.
This is because, custom workflows are built manually, and aren’t linked to any other sections of the Kurtosys application – so you can only choose from the data you have provided.
Segmentation Workflows on the other hand, are linked to Segmentation Lists created in Data and are linked to your data stored in Data module, which means you have select any property stored in Data to use as meta source.
Values – Select the metadata value you would like to add to the documents generated using the dropdown menu.
Doc Meta – choose which document metadata field you would like to put this value into. You will be able to choose from all the document meta options you have set up in your data dictionary.

Once you have completed all the fields, select the + icon to add it and create another row.
Repeat this process until you have added all the metadata you require.
Configure Filename
DocPress also gives you the ability to configure how the filename for each document will display. This is useful as you can structure the filenames according to your unique business requirements or that of the service to which you are sending the document.
Within the Configure Filename form you are able to build your preferred filename using inputs. To do so, complete the following form fields:
Input Type – Choose which input type you would like to use from the options provided in the dropdown list. Free text allows you to type in a custom input (like your company name for example), Input allows you to choose from the Inputs provided under the Inputs tab in the workflow editor. If you have built a Segmentation workflow you will also be able to select ‘Property’ which will allow you to choose any of the properties set up in your Data Dictionary.

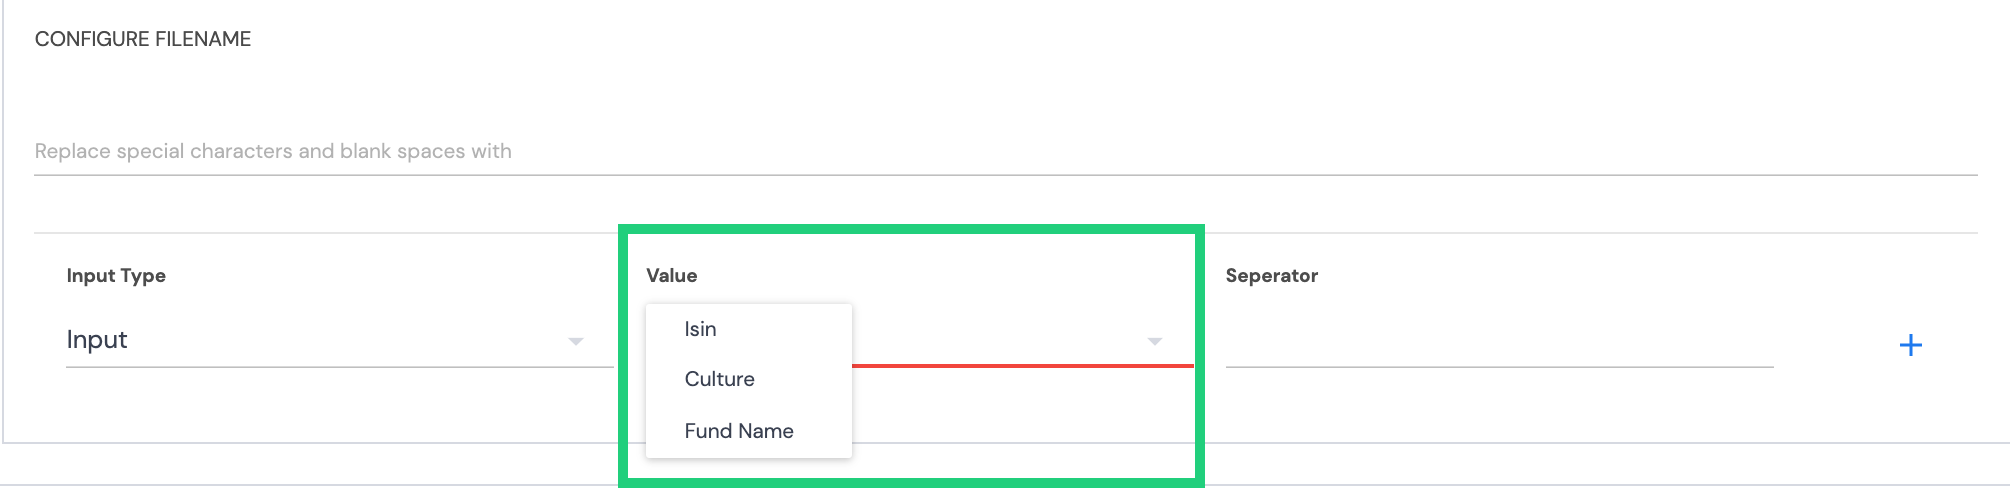
Value – Select or type in the value you would like to use in the filename.
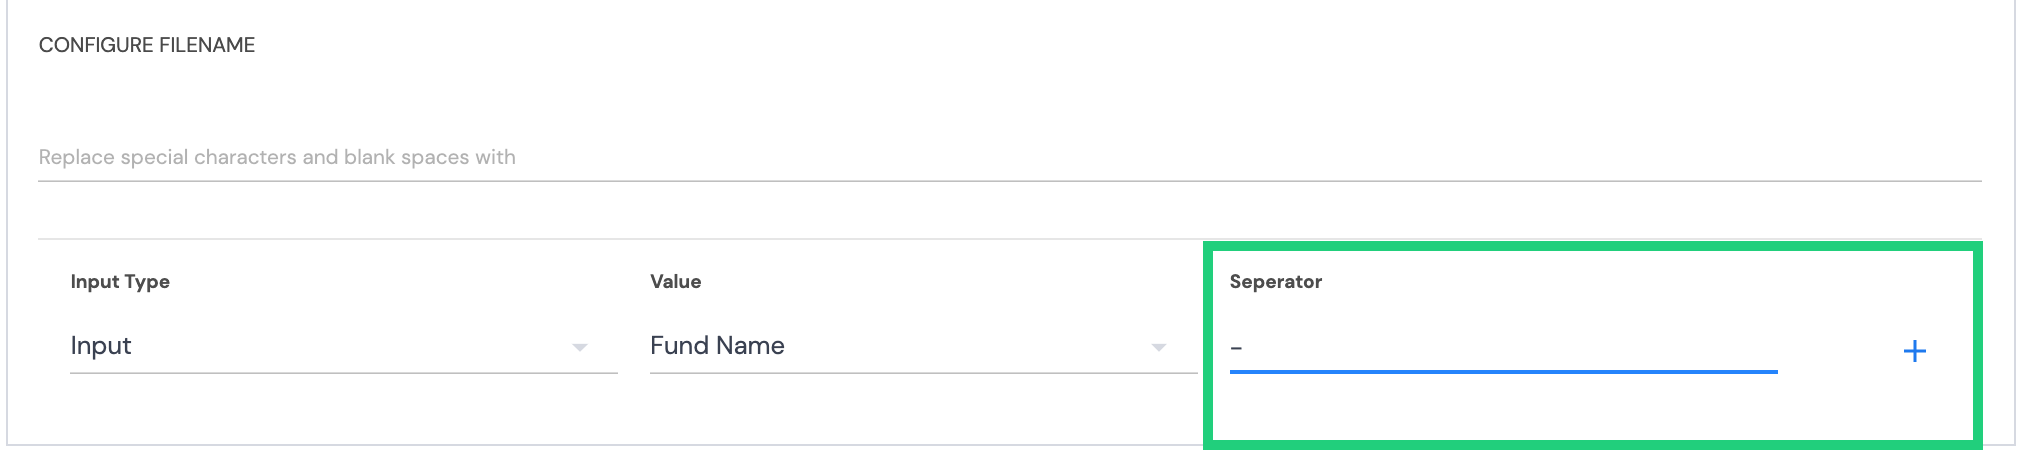
Separator – choose how you would like to separate this portion of the filename from what follows it. You can choose use a full stop (.), dash (-) or an underscore (_).
Once you have completed all the fields, select the + icon to add it to your filename and to create another line.
Repeat this process until you have created your desired filename. Note that portions of your filename can be reordered using the drag and drop controls.
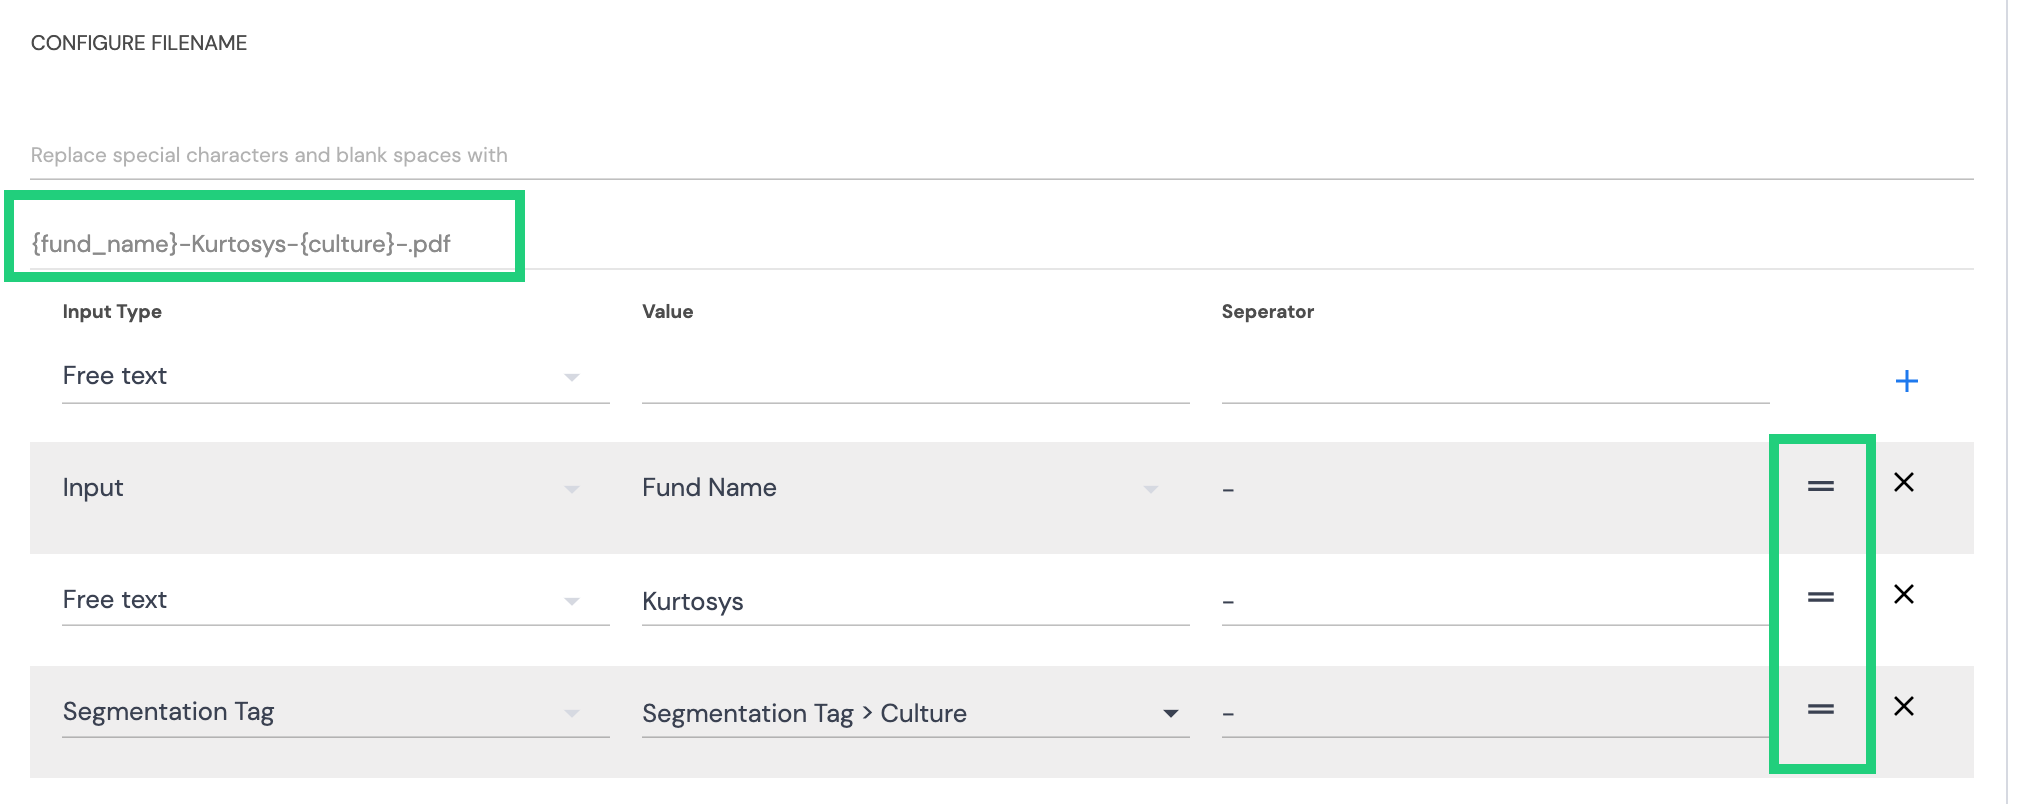
Also note that your current filename will be displayed and updated as you make changes to your inputs.
Once you are satisfied with the data you have provided you can select save to finish setting up document distribution to your Document Hub.
Setting up distribution to an sftp service
To set up document distribution to an sftp service, select SFTP from the lefthand menu and toggle the switch to enable sftp distribution.
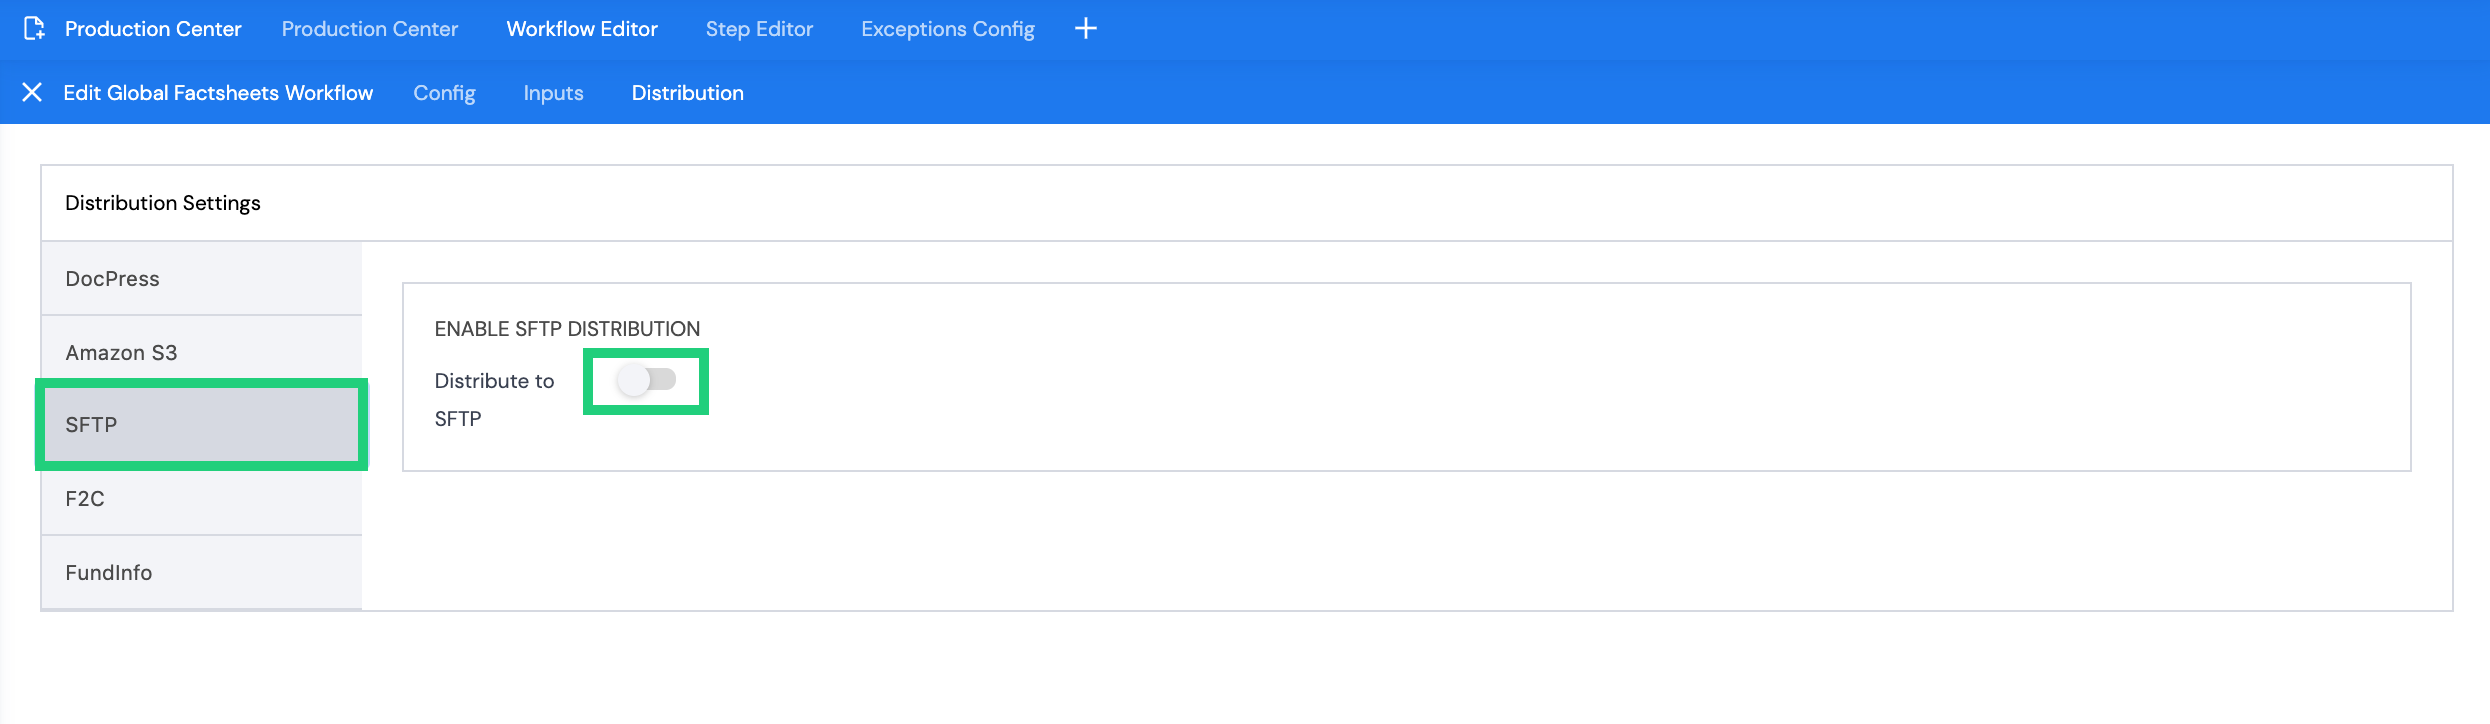
Once switched on the sftp distribution form will display.
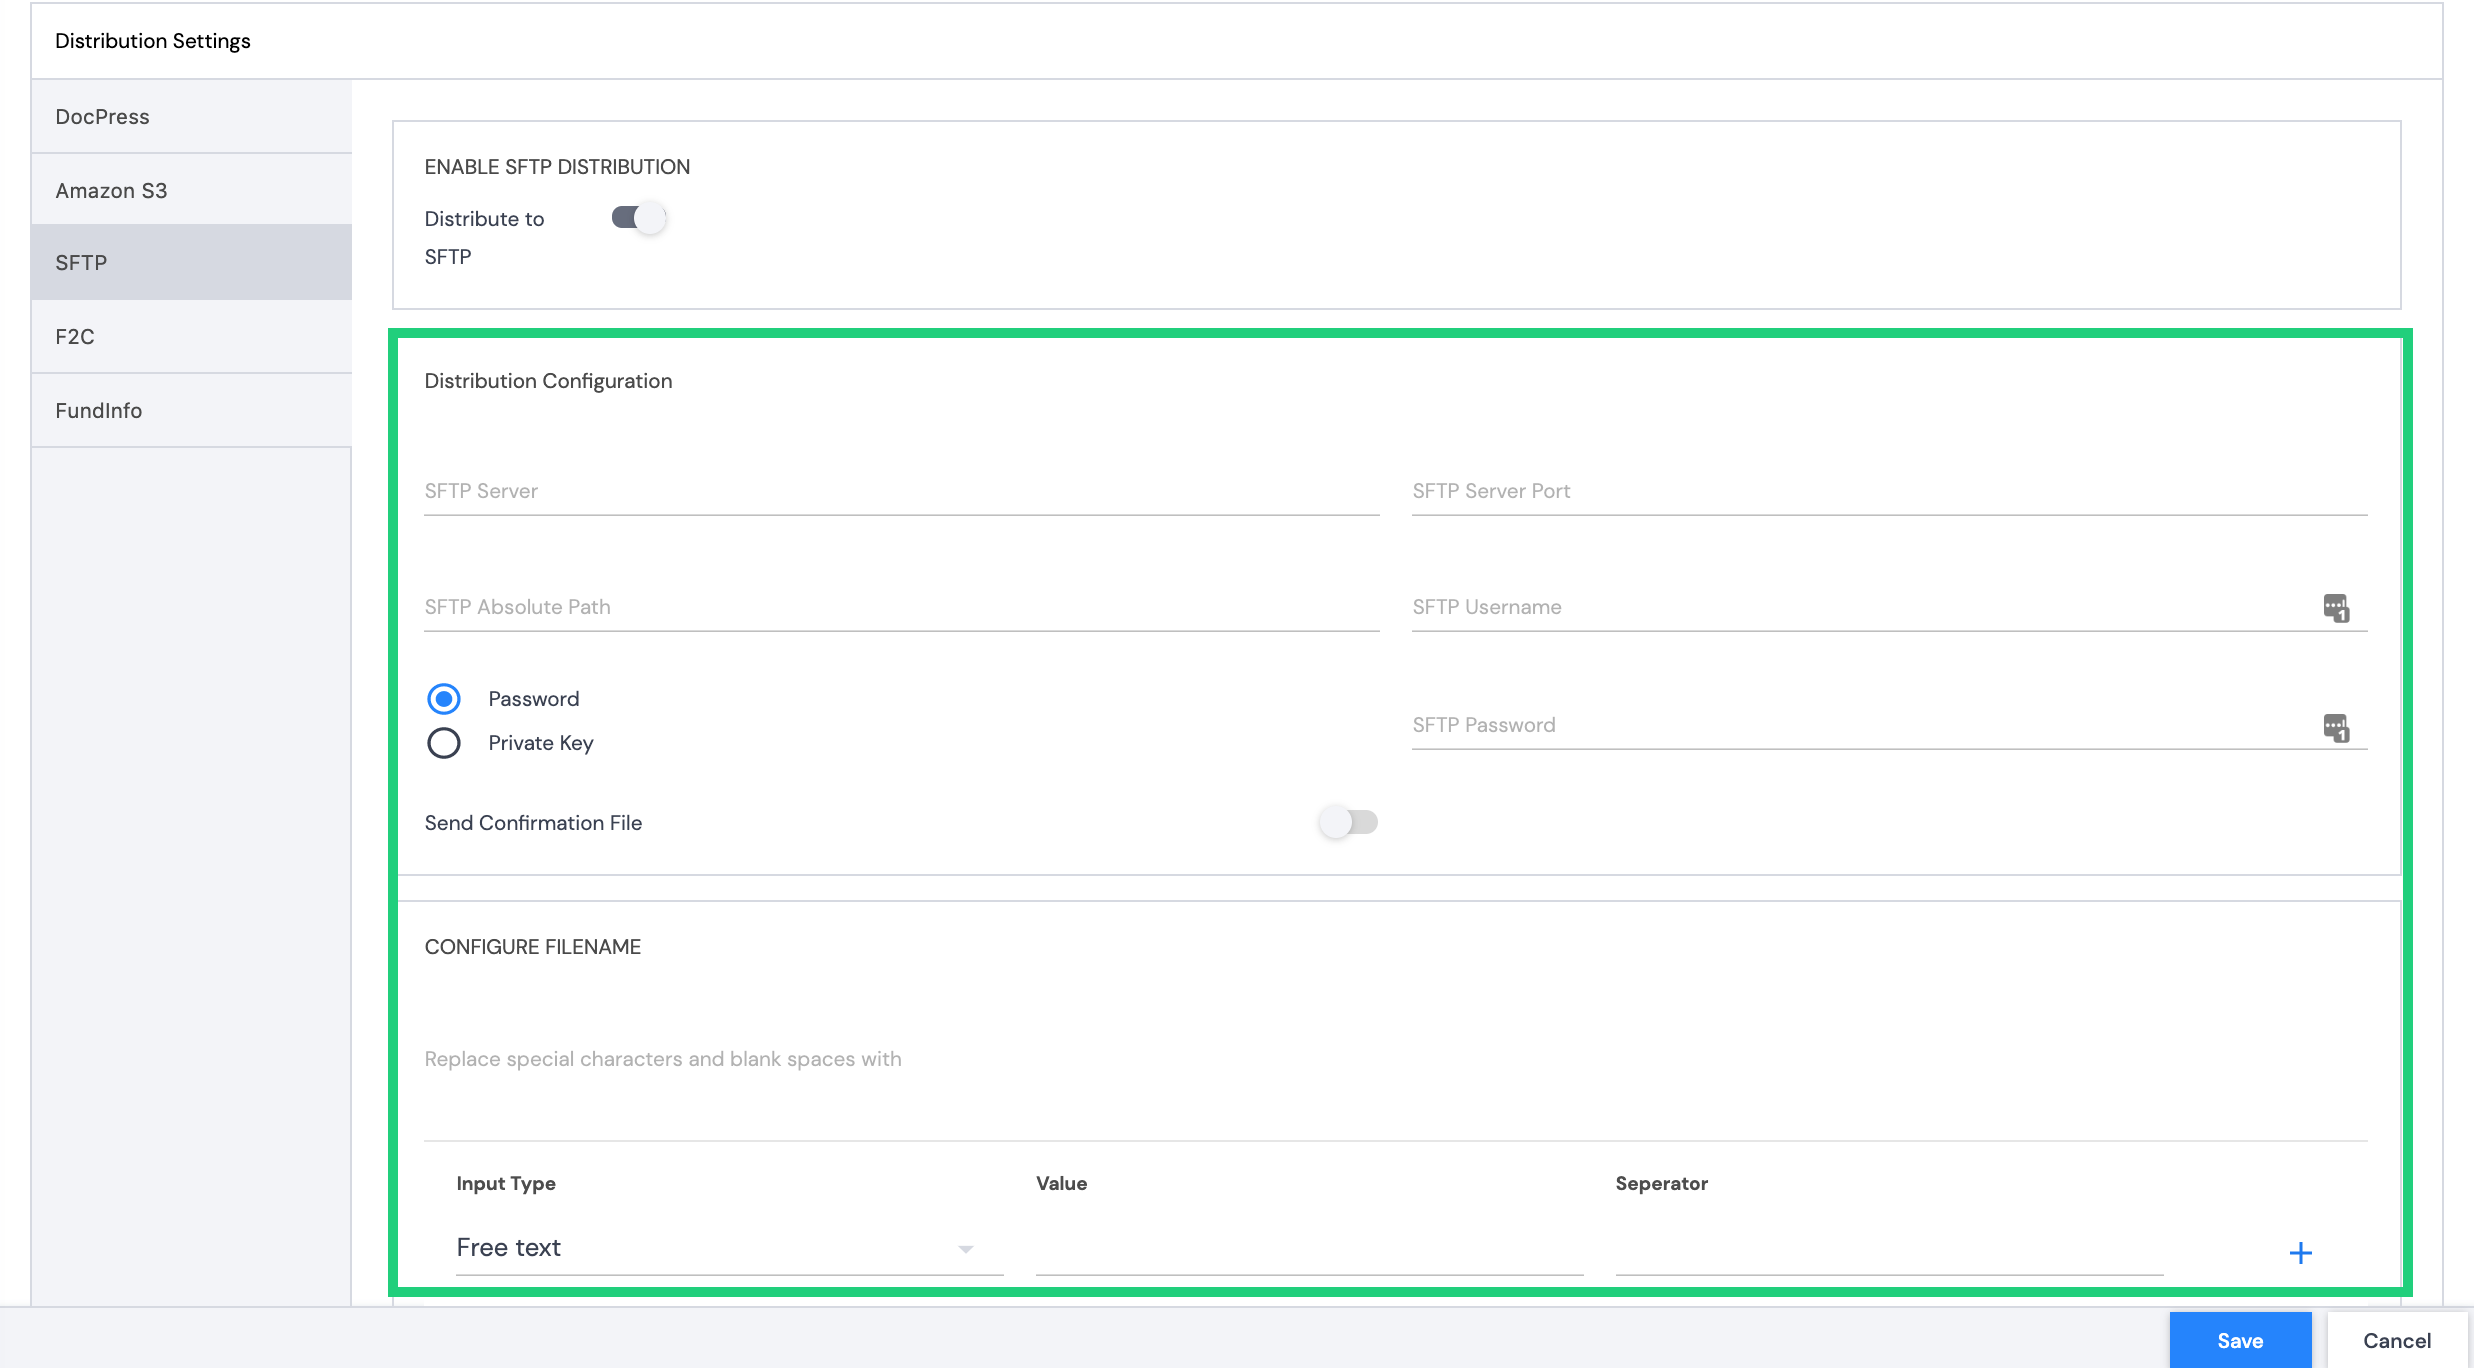
Distribution Configuration
Under this section you need to provide your credentials for the document repository you would like the documents to be sent to.
Configure Filename
Documents module gives you the ability to configure how the filename for each document will display. This is useful as you can structure the filenames according to your unique business requirements or that of the service to which you are sending the document.
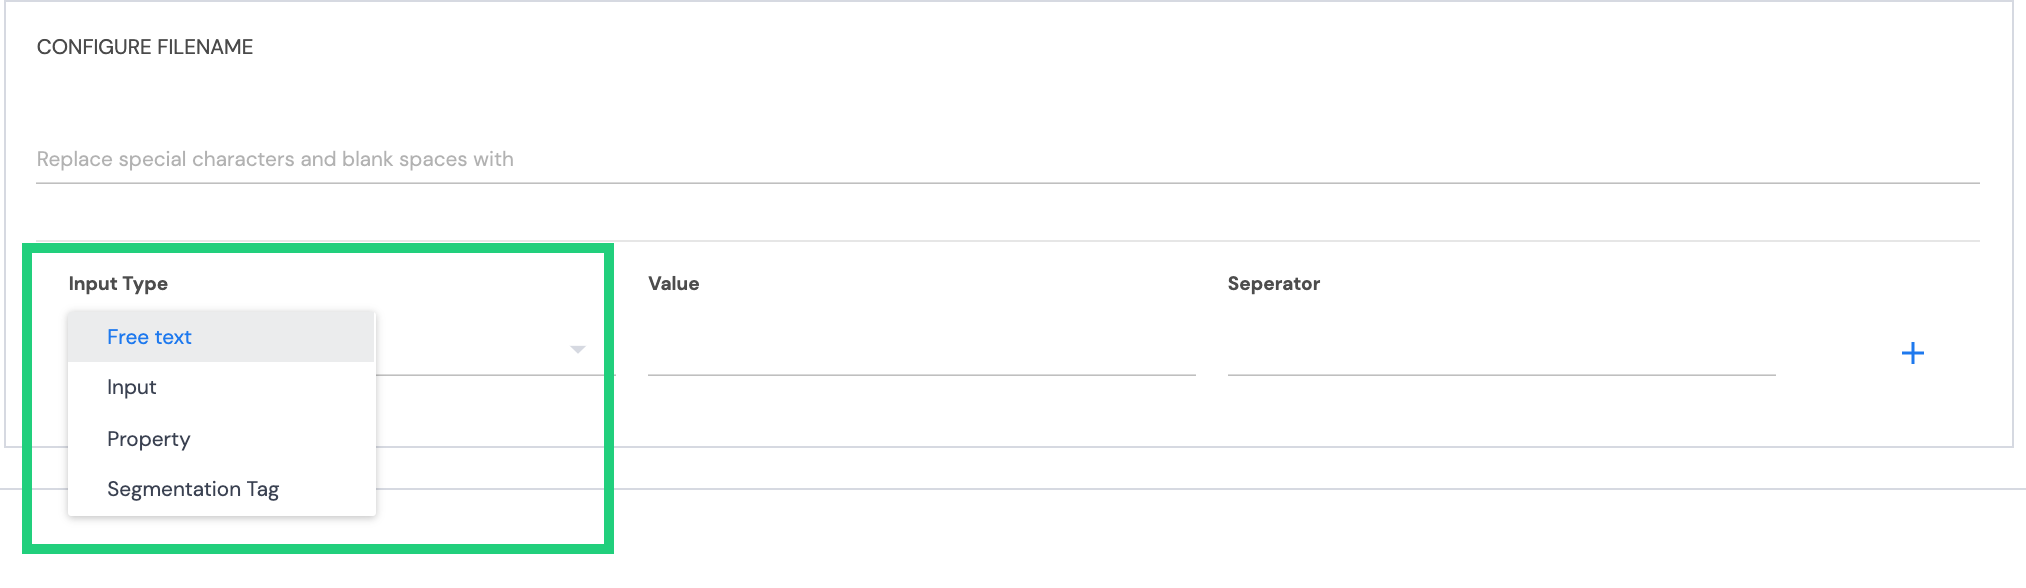
Within the Configure Filename form you are able to build your preferred filename using inputs. To do so, complete the following form fields:
Input Type – Choose which input type you would like to use from the options provided in the dropdown list. Free text allows you to type in a custom input (like your company name for example), Input allows you to choose from the Inputs provided under the Inputs tab in the workflow editor. If you have built a Segmentation workflow you will also be able to select ‘Property’ which will allow you to choose any of the properties set up in your Data Dictionary.
Value – Select or type in the value you would like to use in the filename.
Separator – choose how you would like to separate this portion of the filename from what follows it. You can choose use a full stop (.), dash (-) or an underscore (_).
Once you have completed all the fields, select the + icon to add it to your filename and to create another line.
Repeat this process until you have created your desired filename. Note that portions of your filename can be reordered using the drag and drop controls.
Also note that your current filename will be displayed and updated as you make changes to your inputs.
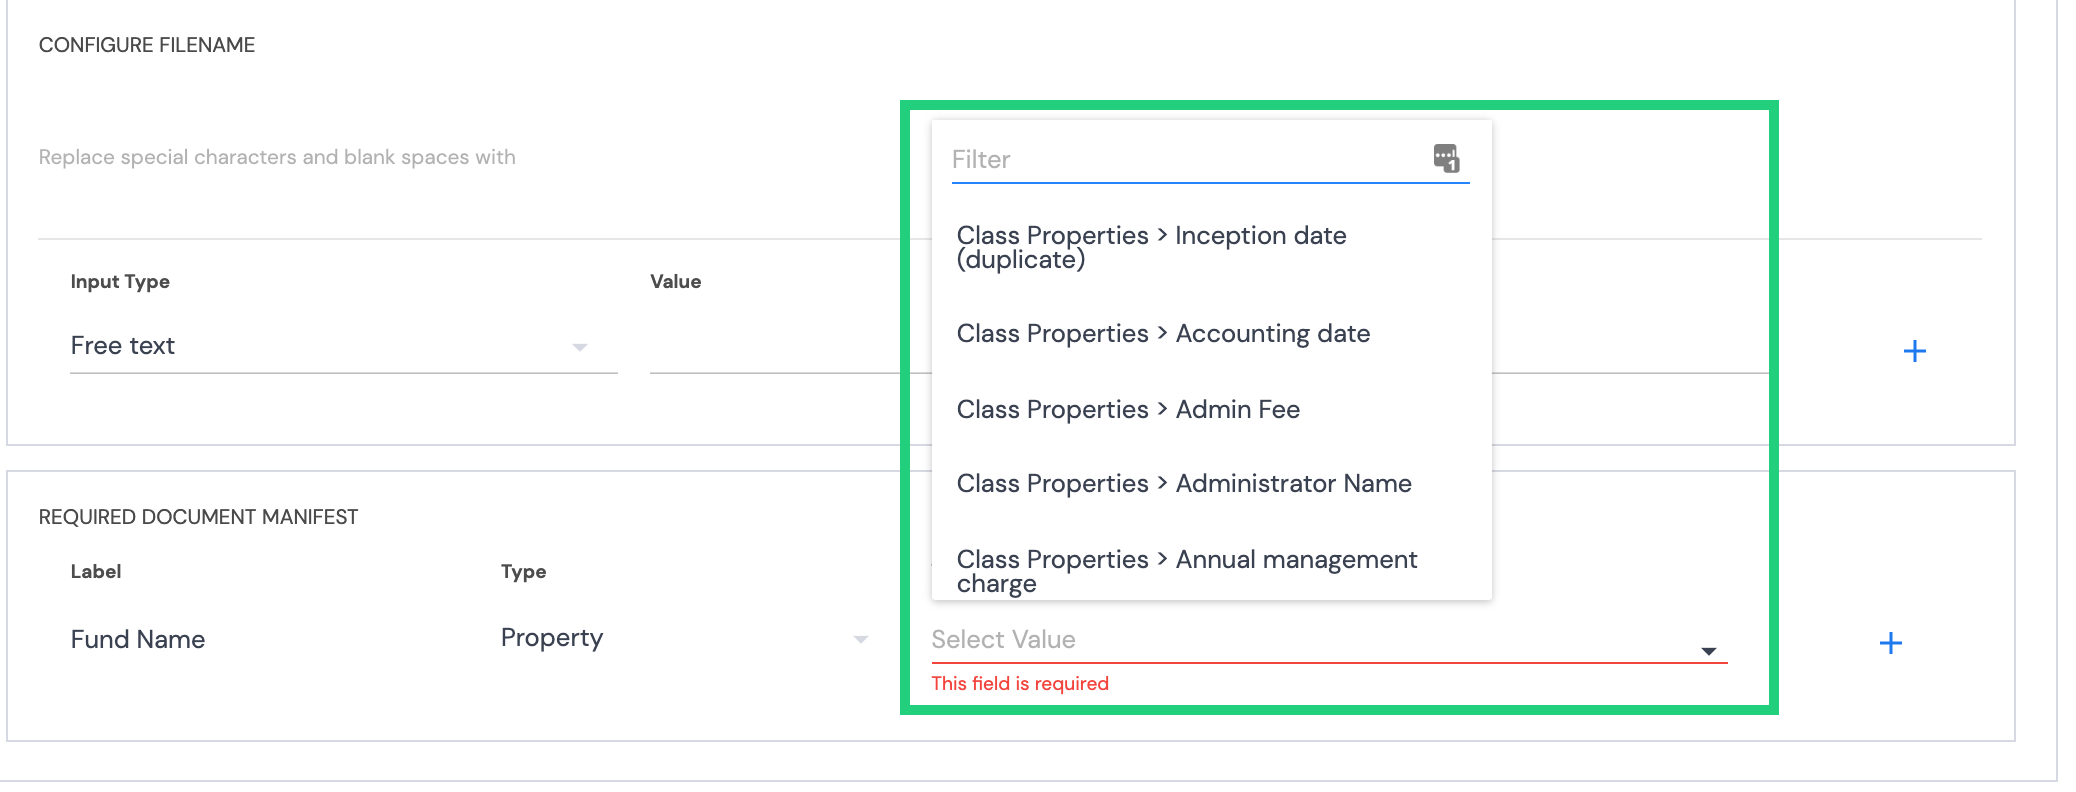
Required Document Manifest
On this section of the form you need to specify the inputs to be included in the document manifest file that Kurtosys will send to your sftp service.
Label – Specify the label ‘or name’ given to the specific input in the manifest file. This is a free text field so you can ensure the label matched that which is required by your sftp provider.

Type – Choose the type of metadata you will provide. You can choose from workflow inputs and properties defined in your Data Dictionary (in segmentation workflows).
Value – choose the corresponding input value from the dropdown list.
Once you have completed all the form fields you can select ‘save’ to complete your sftp distribution setup.