
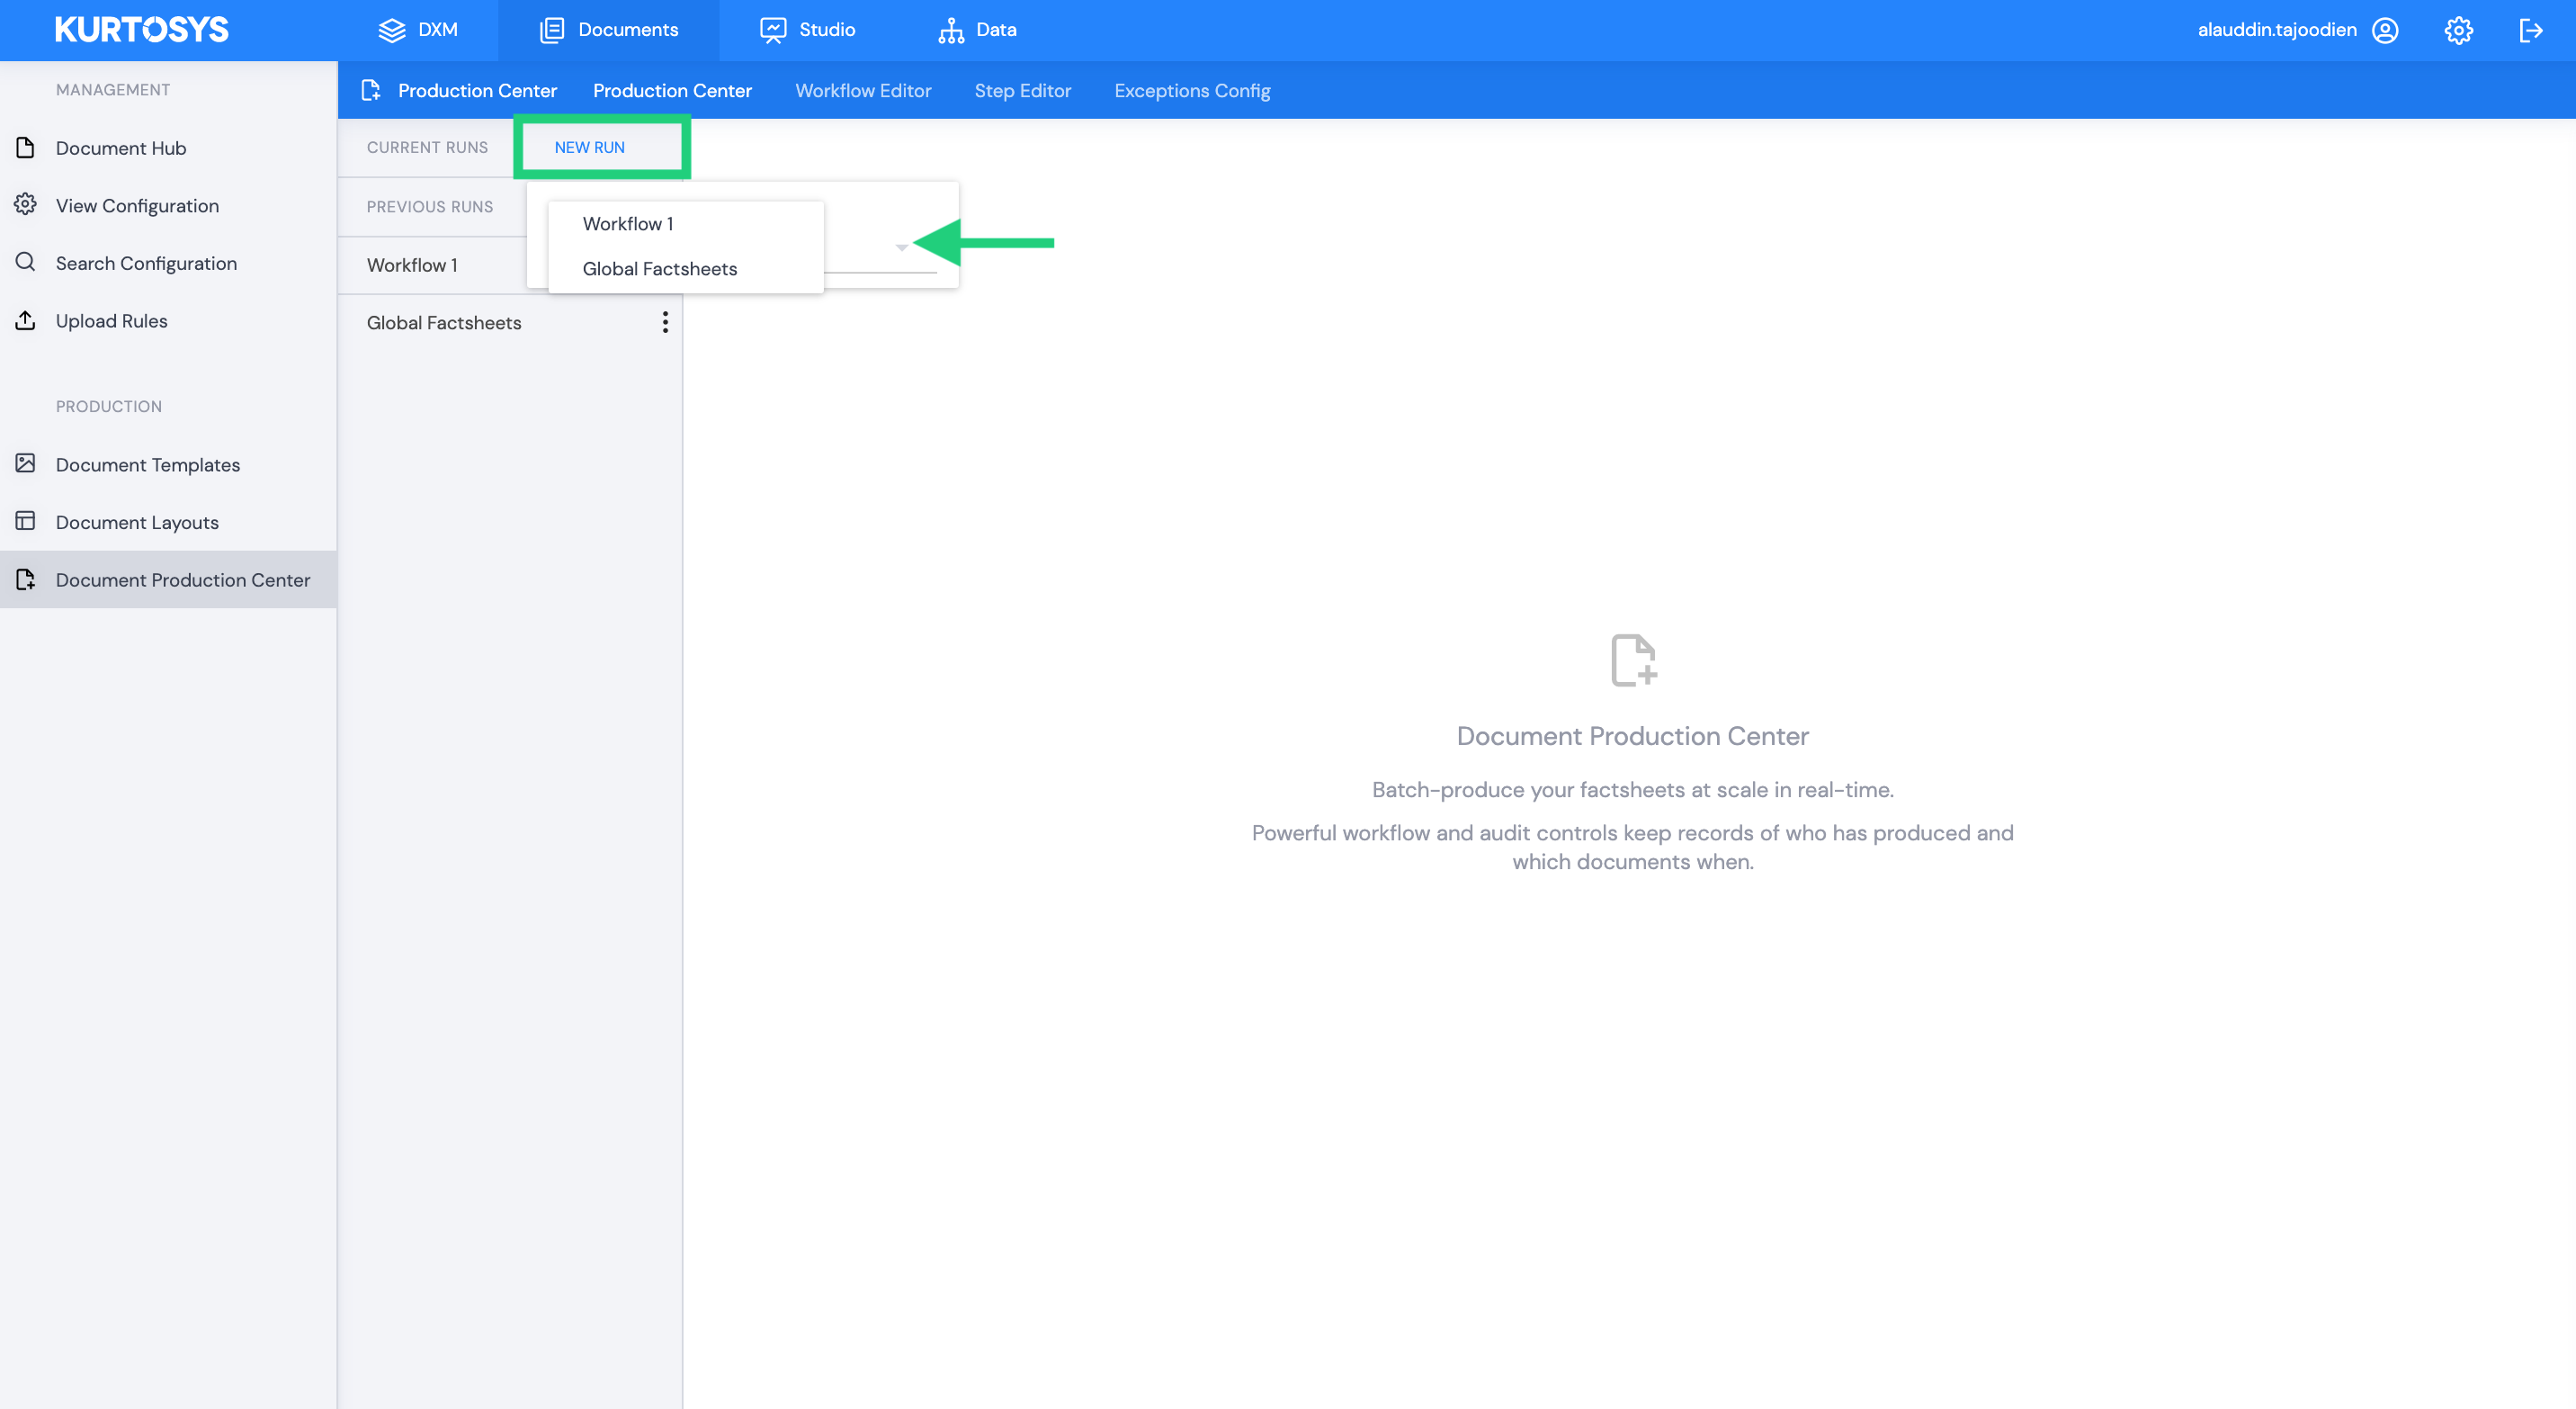
How to start a Production Centre Workflow Run
To start a Production Centre Run you will need the following:
- A fully configured Workflow available in the Production Center
- Authority to start a run i.e. your user must have a role assigned which includes the Initiate Factsheet Workflow permission.
If you have both of these in place then you may start a Workflow Run.
- Click New Run to the right of the Current Runs heading.
- Use the dropdown arrow to select the applicable workflow to Run. Once started the run will be listed under CURRENT RUNS.
How to approve or reject a Production Centre Workflow step
In order to complete a Workflow Run all steps need to be approved for all documents listed in the run. Only members of the assigned Approval Groups may accept or reject steps.
To access all active documents in the run, that still require approval, select the run you would like to view and then choose the In Progress tab.
You will now be able to view all the documents included in the run and their individual progress through the workflow.
Each step will give the assigned Approver the opportunity to either Accept (green checkmark) or Reject (red X) and create an Exception comment for that step.
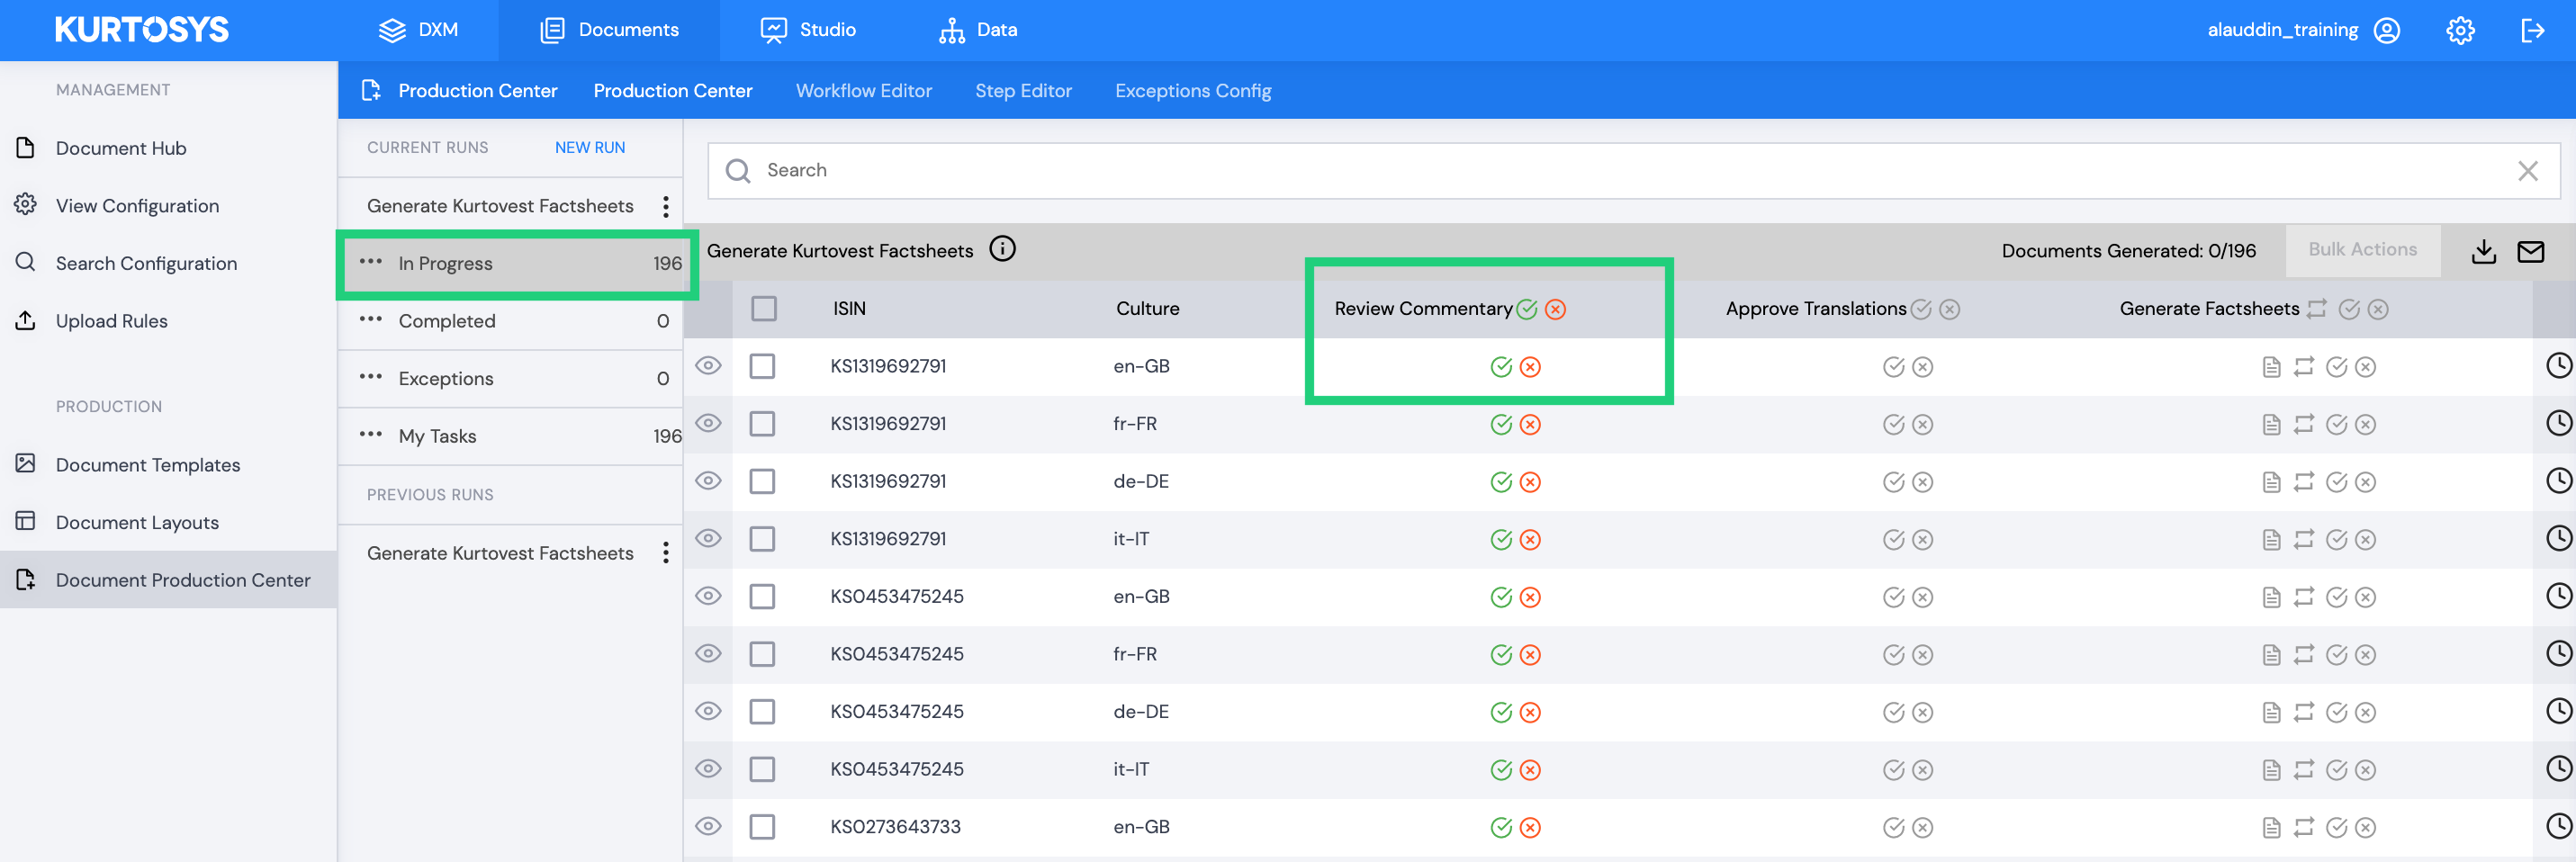
Typically each step requires the assigned Approver to cross check data for a specific component or set of components in the document e.g. the Compliance Approval Group may need to approve the Review Commentary or Approve Translation step. In this case they will need to make sure the correct disclaimers are appearing on the document and that the spelling, grammar and content is correct and up to date.
If the Approver is satisfied with the content, they should click the green checkmark to approve.
Note: This can be done at a global level (all documents in the step) or individual level (one document at a time).

A fully approved step (all documents approved) will complete that step and allow the next one to be approved by the next Approval Group.
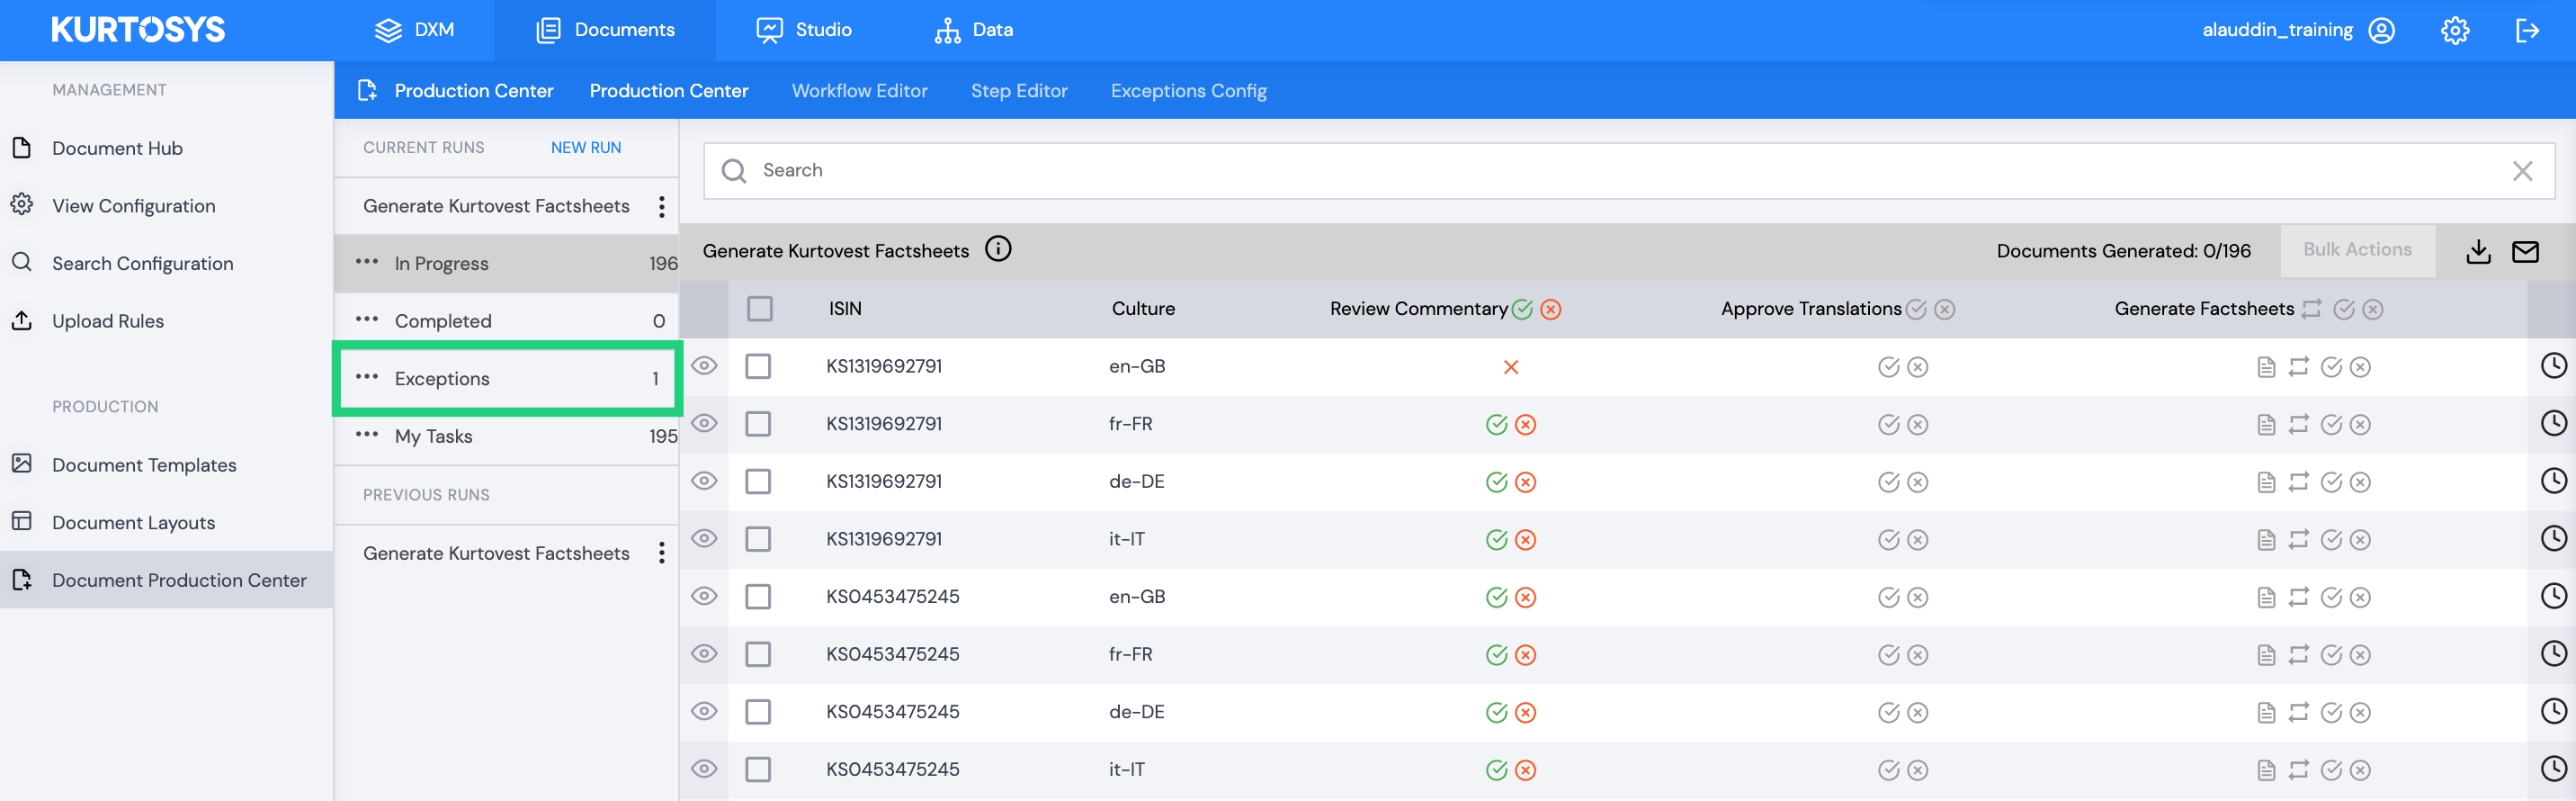
If the Approver is not satisfied with the content, they should click the red X to reject the content to create an exception. This can also be done at a global or individual level.
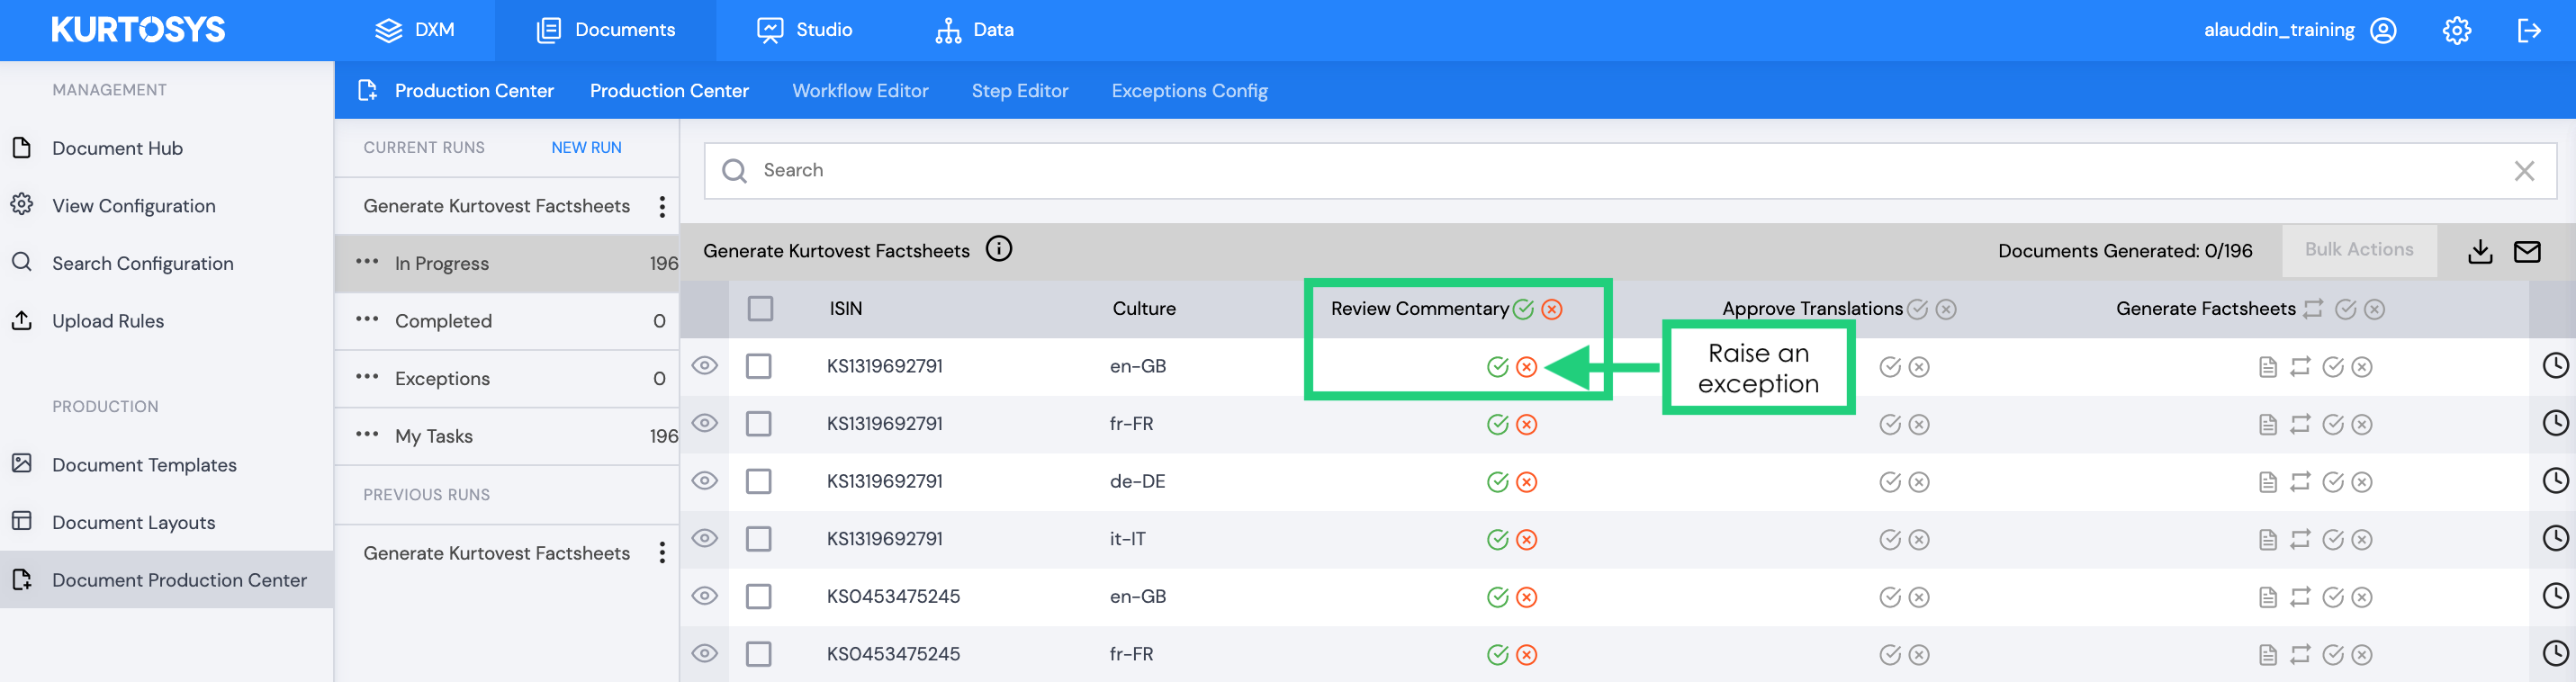
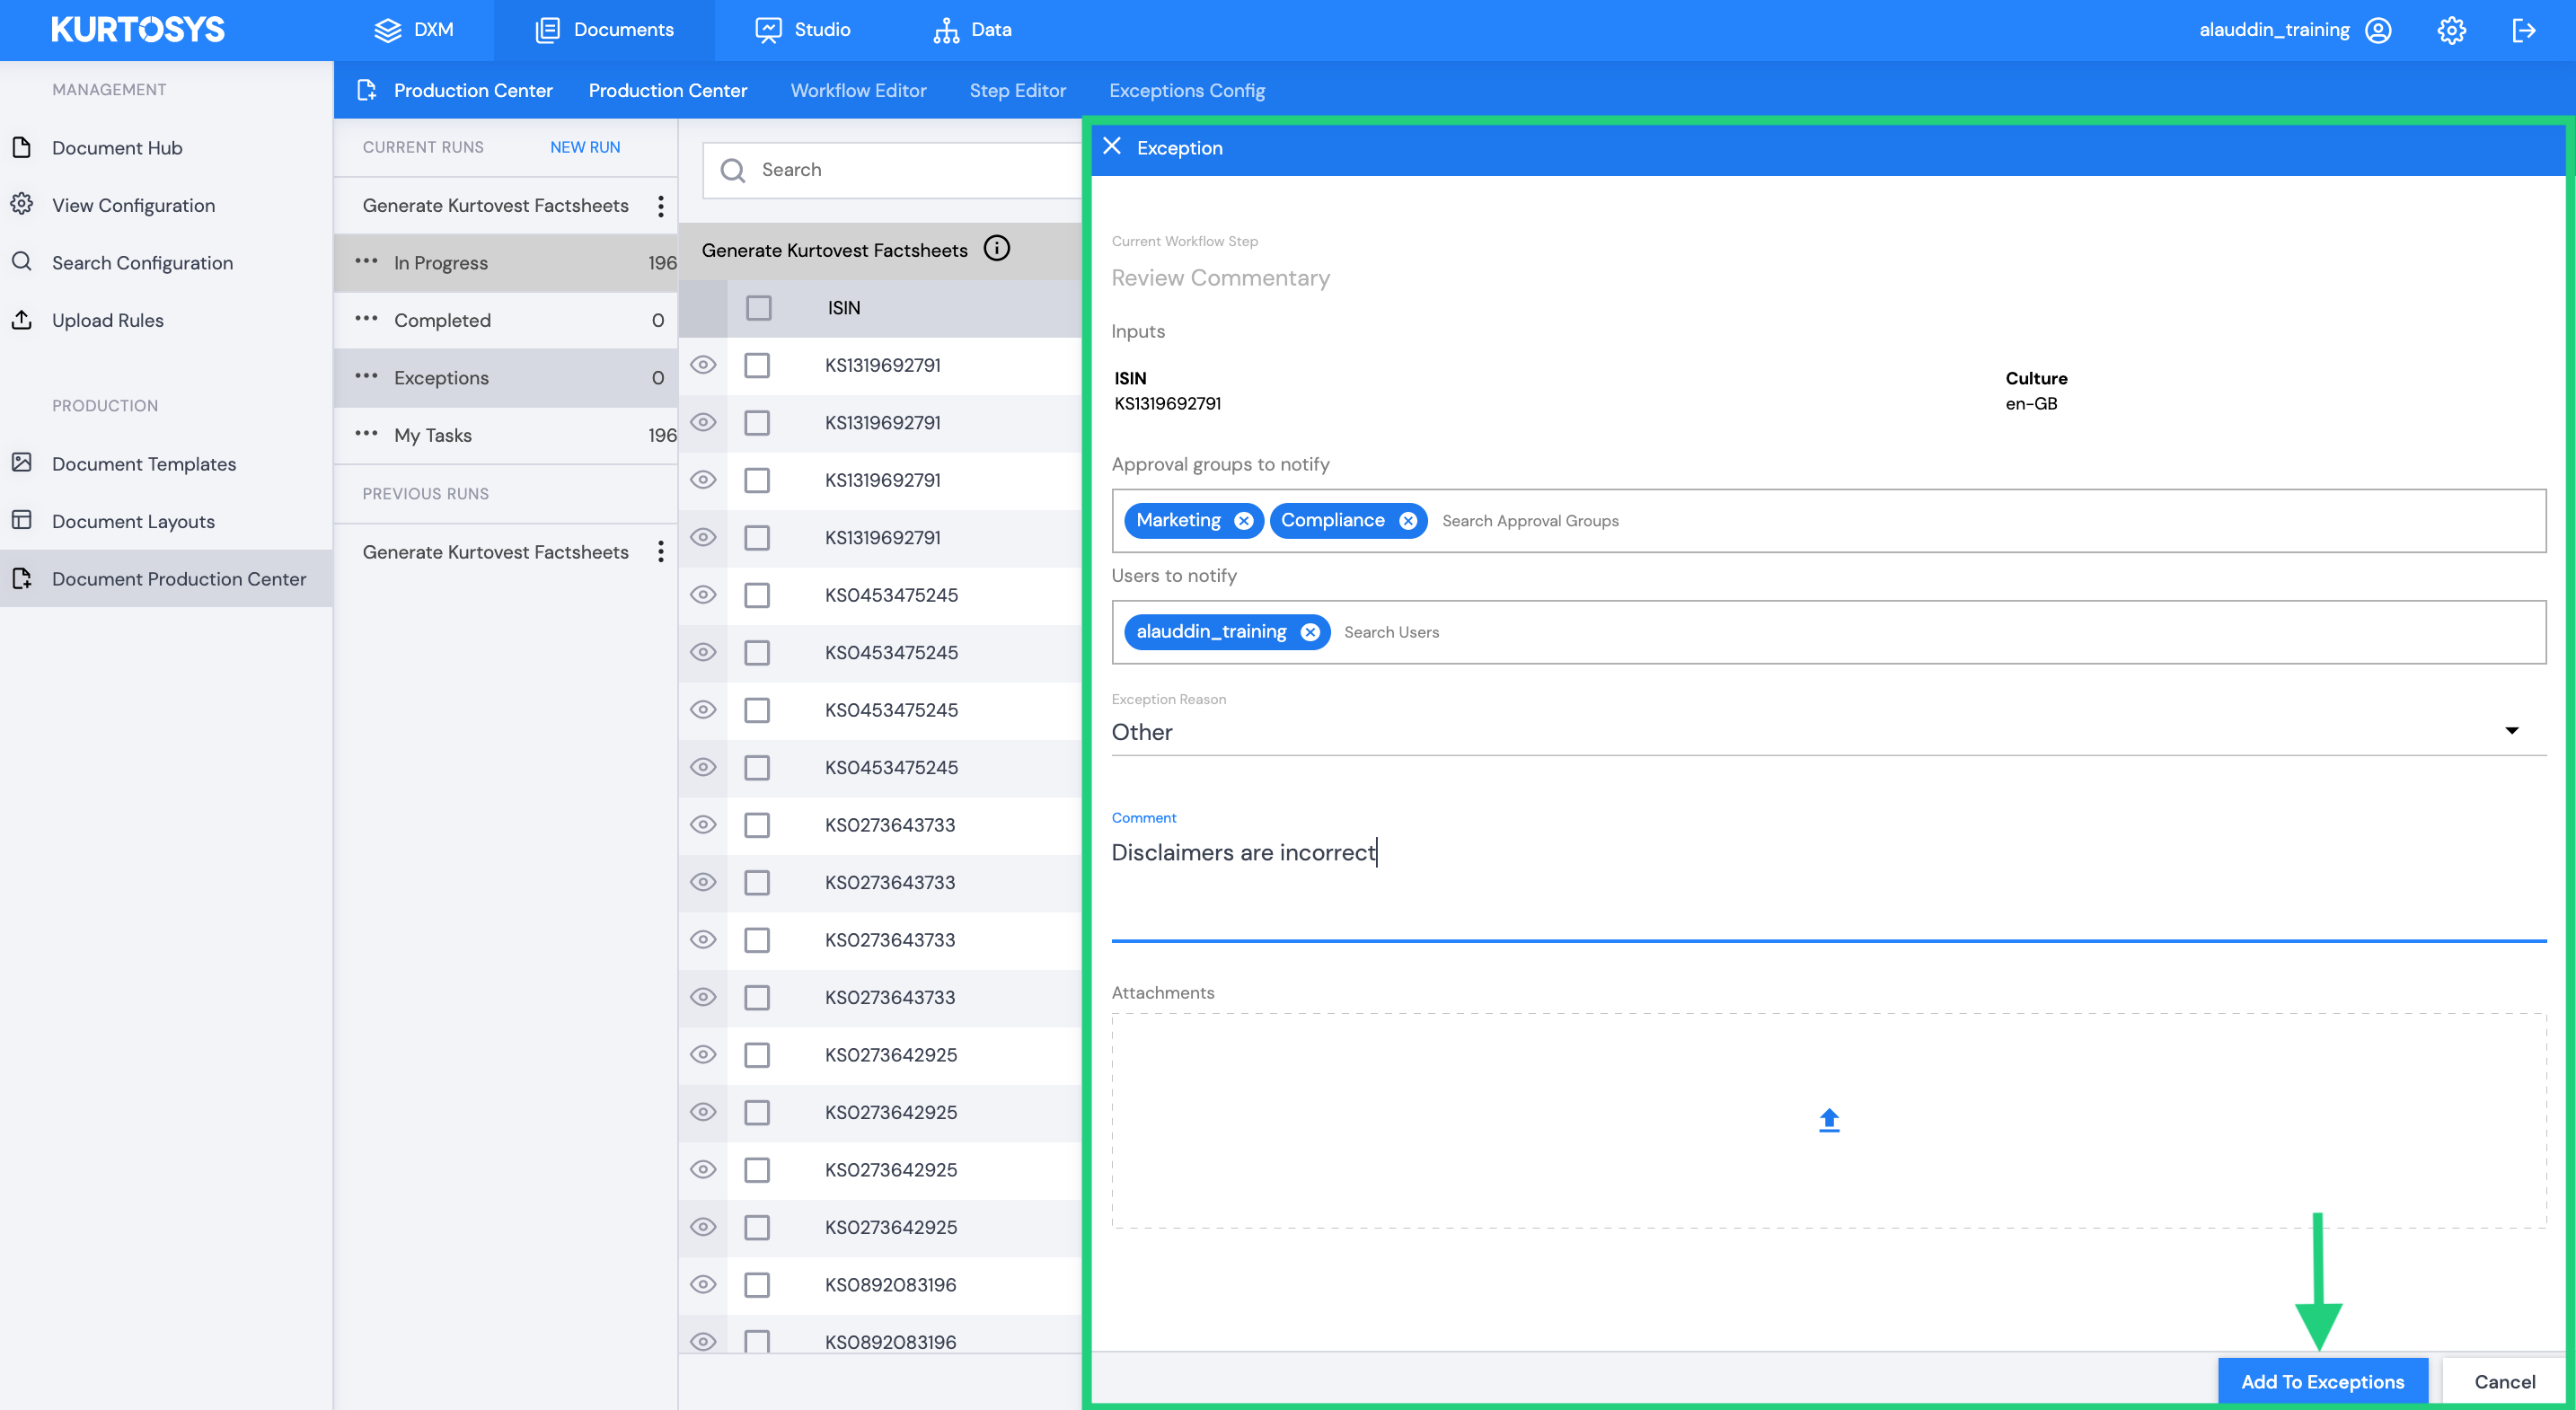
When a step is rejected, the Exceptions Panel will slide out from the right.
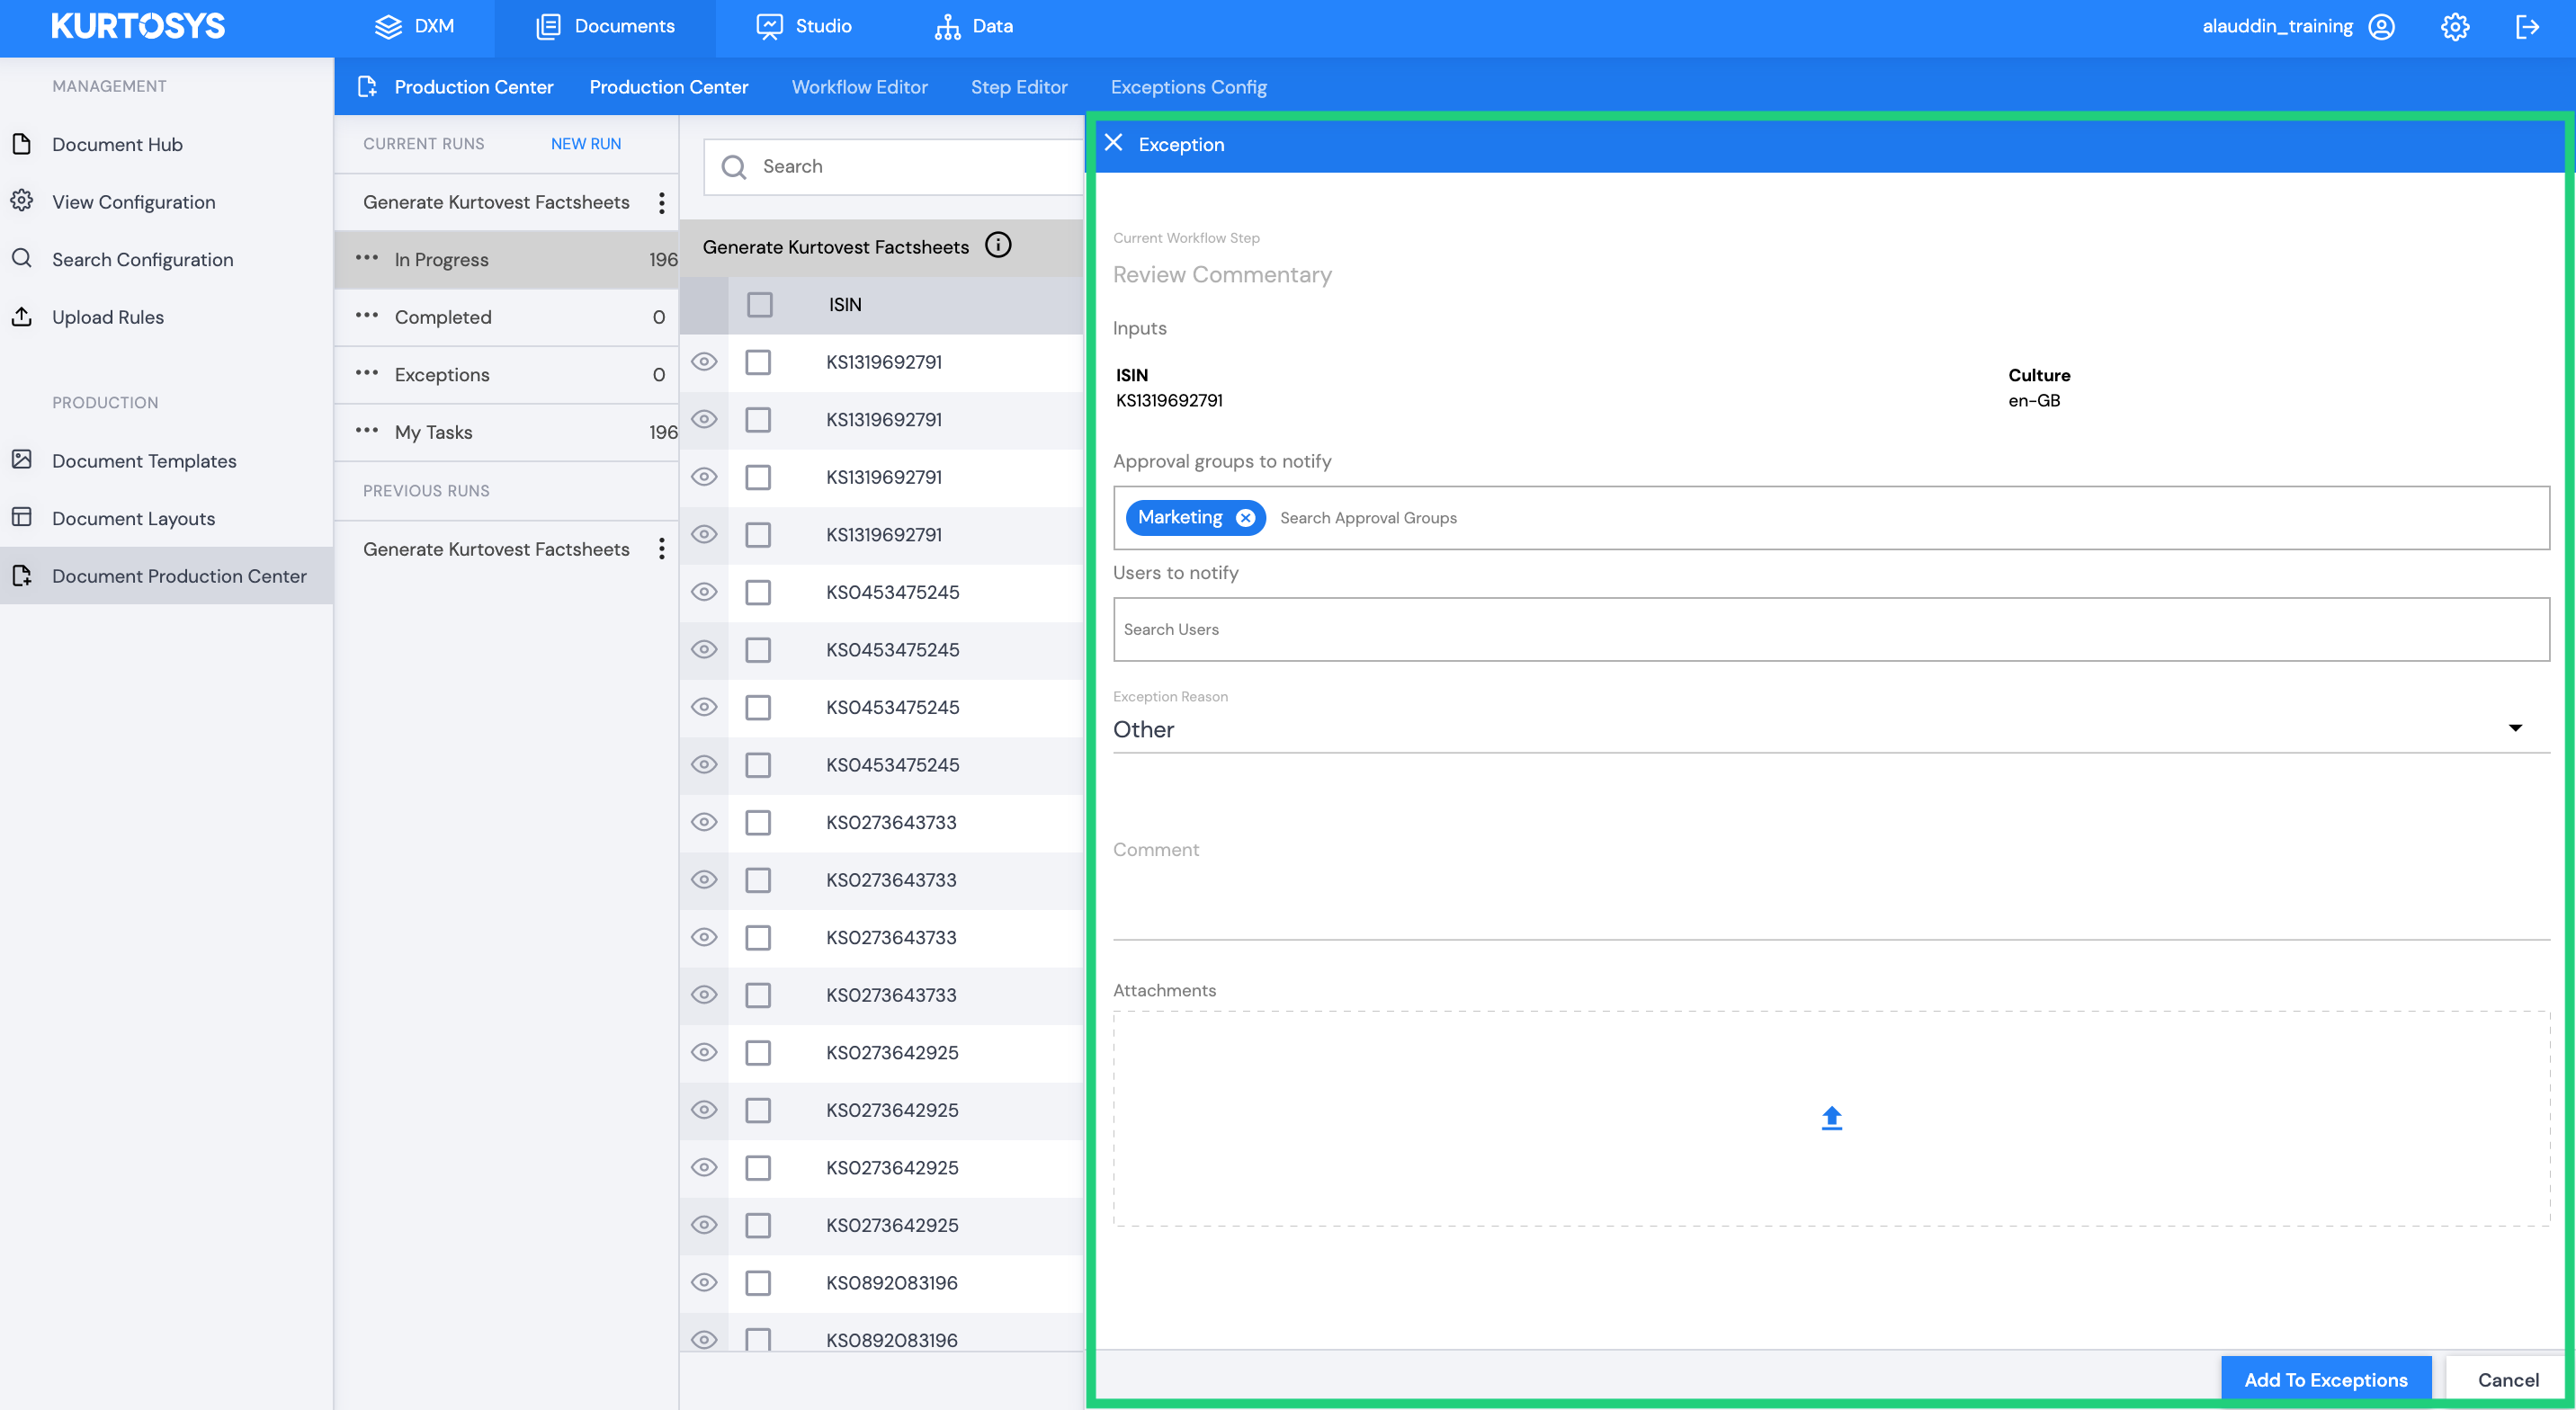
The user can then provide details relating to the issue with the particular document and notify the relevant people within the organization so the document can be amended.
Exception
Complete the following fields:
Approval groups to notify – choose the groups to be notified of the exception.
Users to notify – add any individual users you would like to notify of the exception.
Comment – provide details about the issue with the particular document.
Attachments – upload a screenshot or any other document that will help to explain why you have rejected the workflow step.
Once you have completed the form, click Add to Exceptions. All relevant users will now be notified of the issue via email.
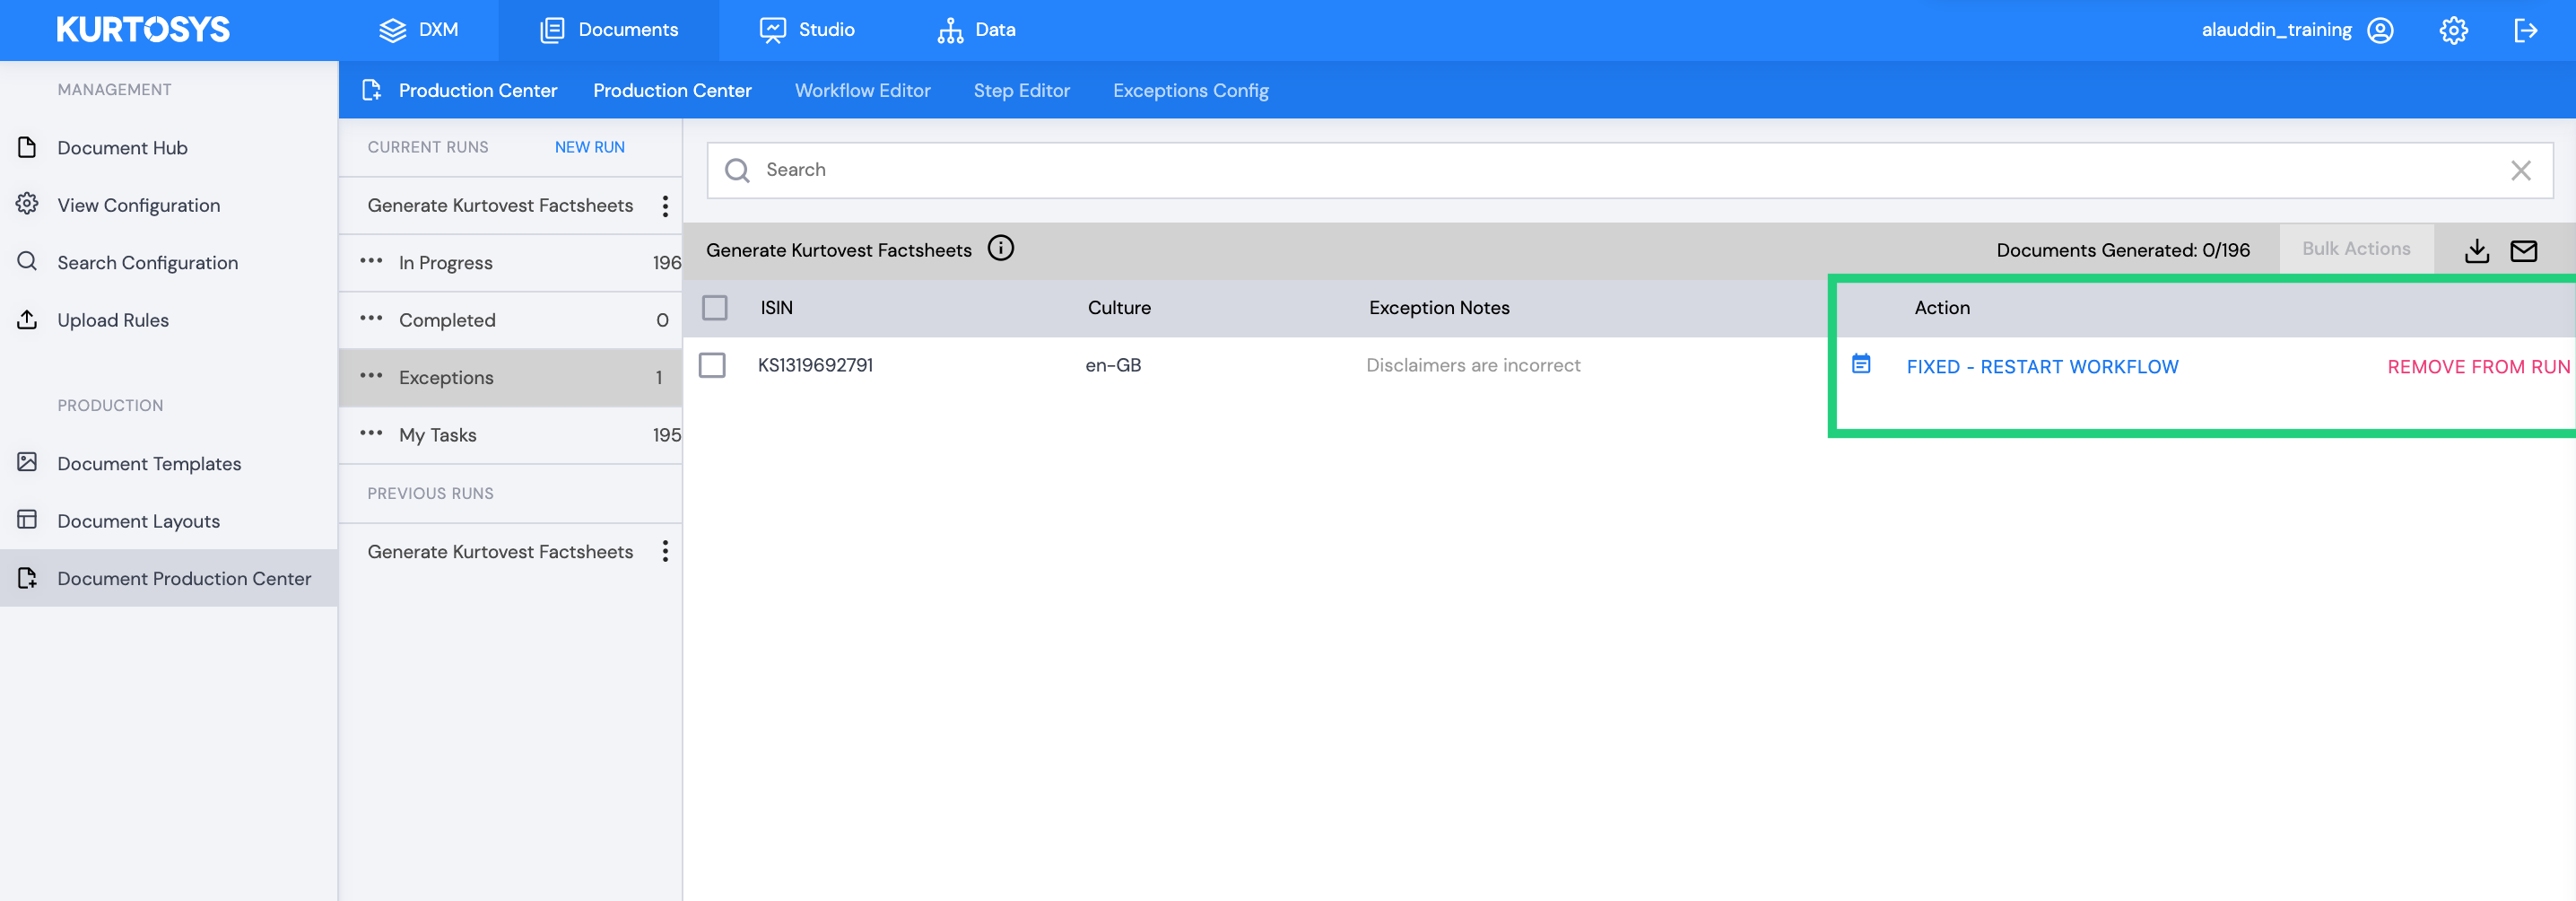
After the exception has been created, the linked document will move to the Exceptions section of the CURRENT RUN.
Within the Exceptions screen, authorized users will have the option to mark the issue as fixed and restart the workflow for that particular document, or remove the document from the run.
Once the workflow for a specific document has been completed (all steps and the final generated document have been approved), the document will move to the Completed tab under CURRENT RUN where you can download the final document or send it to the Document Hub.