Client Admin
When your organization is setup inside of Kurtosys, you can grant certain members of your firm a Client Admin role.
As a Client Admin, members of your team will be able to:
- Create new users and assign them roles.
- Create roles and assign permissions to those roles so that they can access specific modules and configurations.
It is important to remember that the role needs to be created before you can assign it to a user.
How to create a new role
A User can access or interact with any module and feature associated with the Role allocation assigned to them by the ClientAdmin.
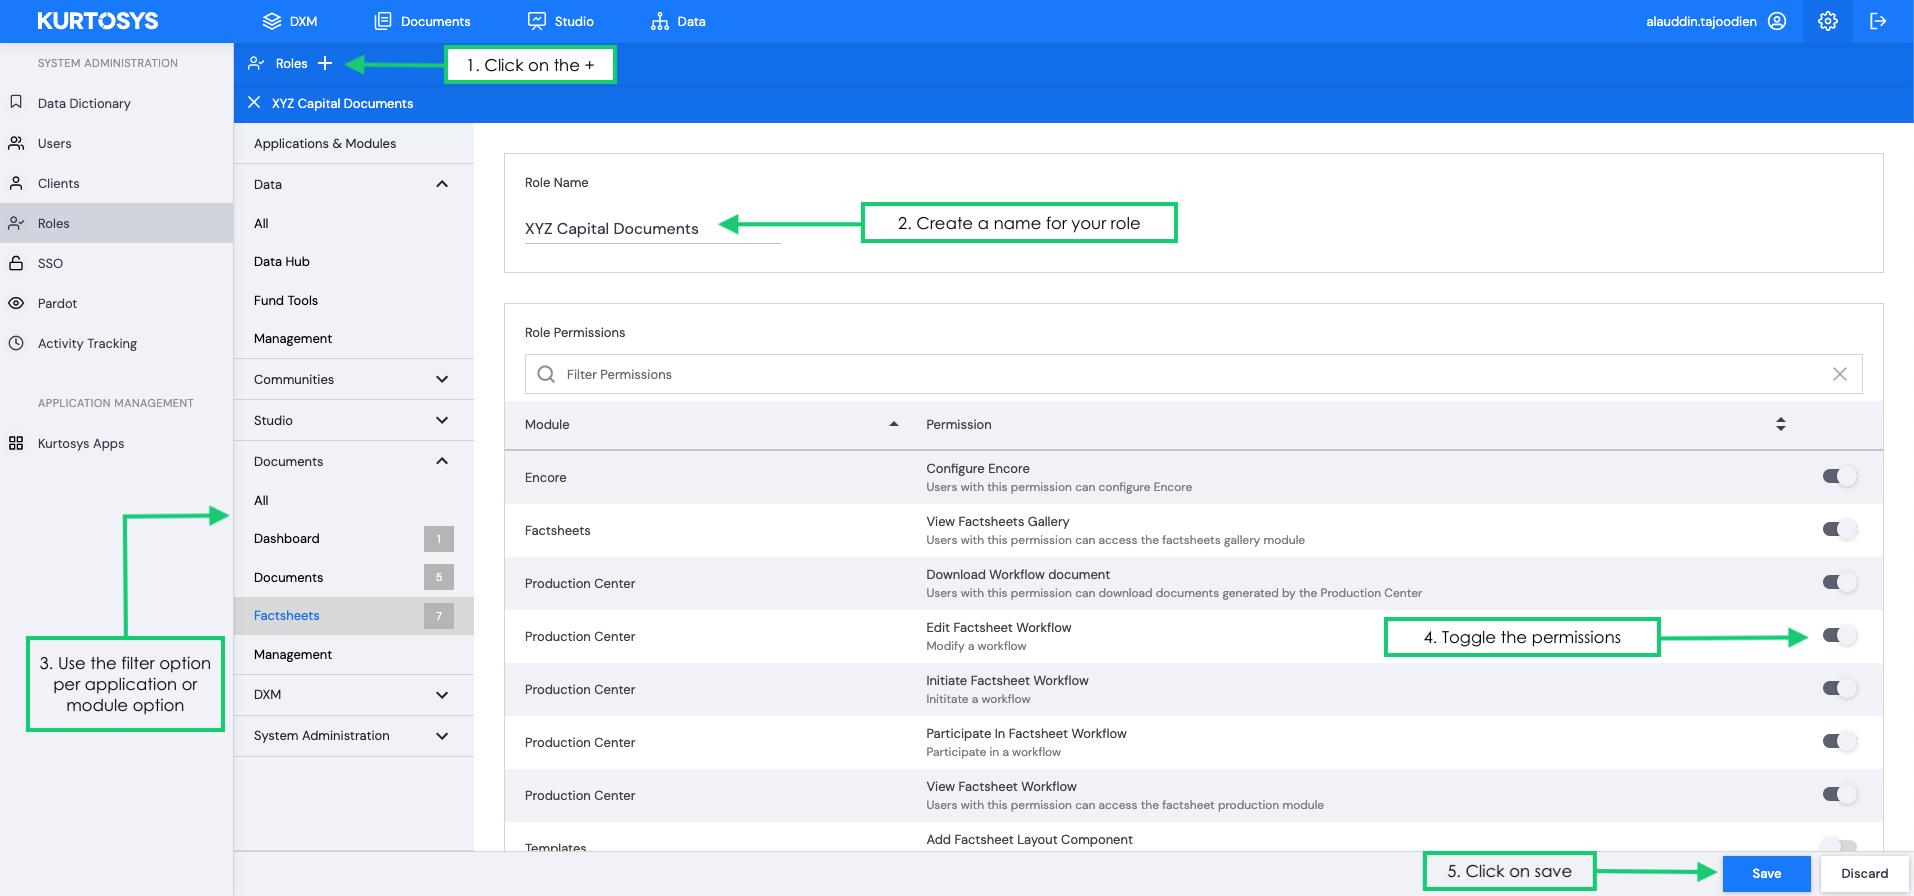
Step 1: Click + to add a new role.
Step 2: Create the role name and align it to what you want the user to do.
Step 3: Use the side bar filter option to choose permissions based on applications.
Step 4: Toggle the permissions on or off.
Step 5: Click Save.
Once your role has been created, you will create a new user and attach that role to the user.
There are 2 options available when creating a new user, you can add a single user or add multiple users.
How to create a new user – single user
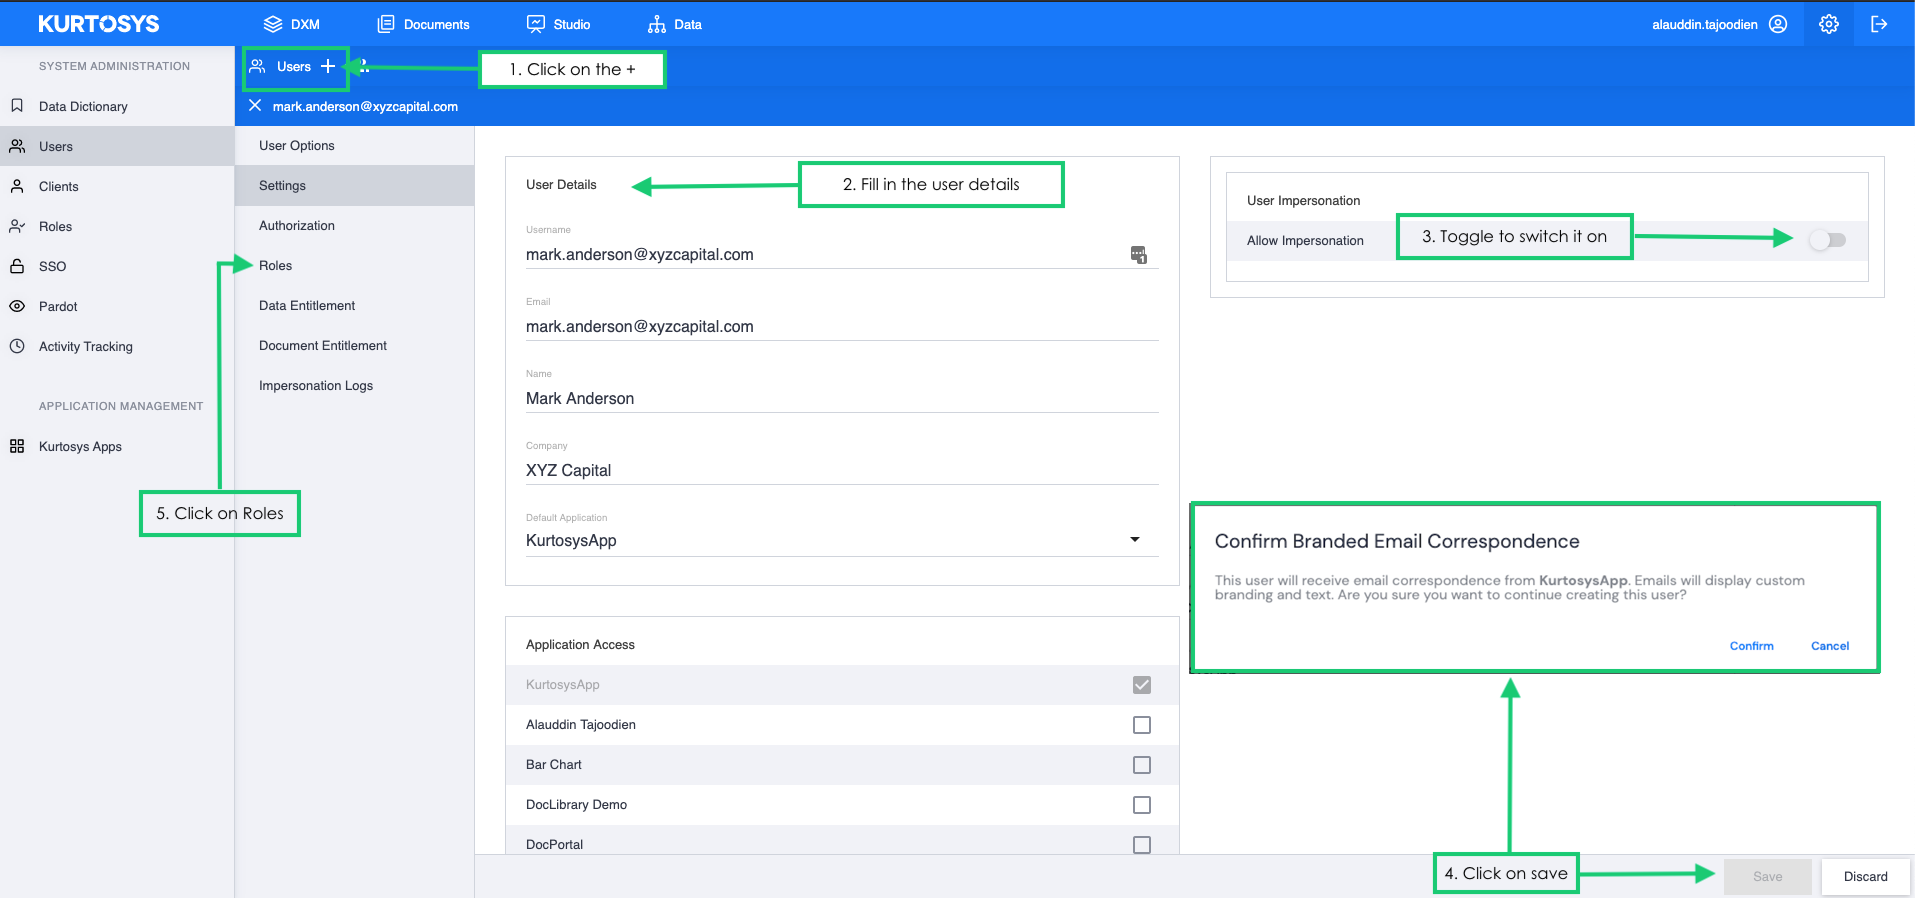
Step 1: Click + to add a single user
Step 2: Complete the user details section, make sure the email address is correct as they will be receiving confirmation email. Leave the default application as is.
Step 3: Toggle impersonations on or off. For more information on impersonations and how to set it up, please read the following article.
Step 4: Click Save. You will get a pop up asking you to confirm if you want to continue creating this user. If you edit a user’s details, the save button will become active if changes are made, if there are no changes, it will remain inactive.
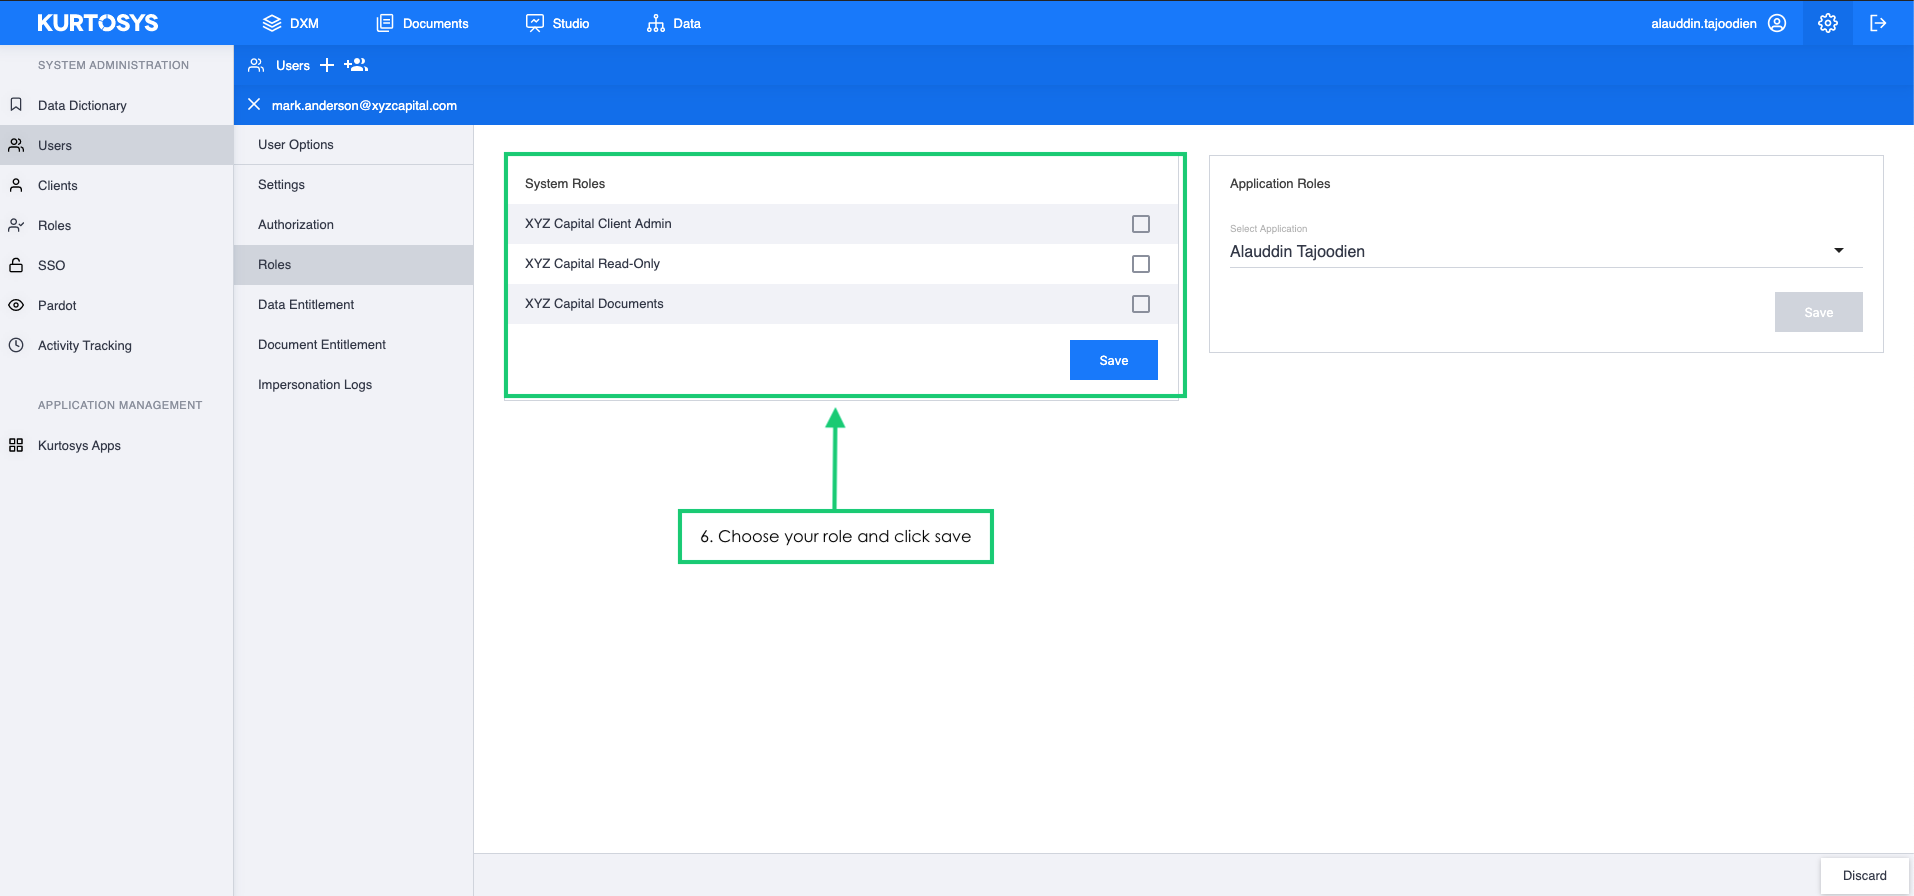
Step 5: Click the Roles tab which can only be accessed once the user details has been saved.
Step 6: Once in the roles section assign the specific role/s to the user, then click Save.
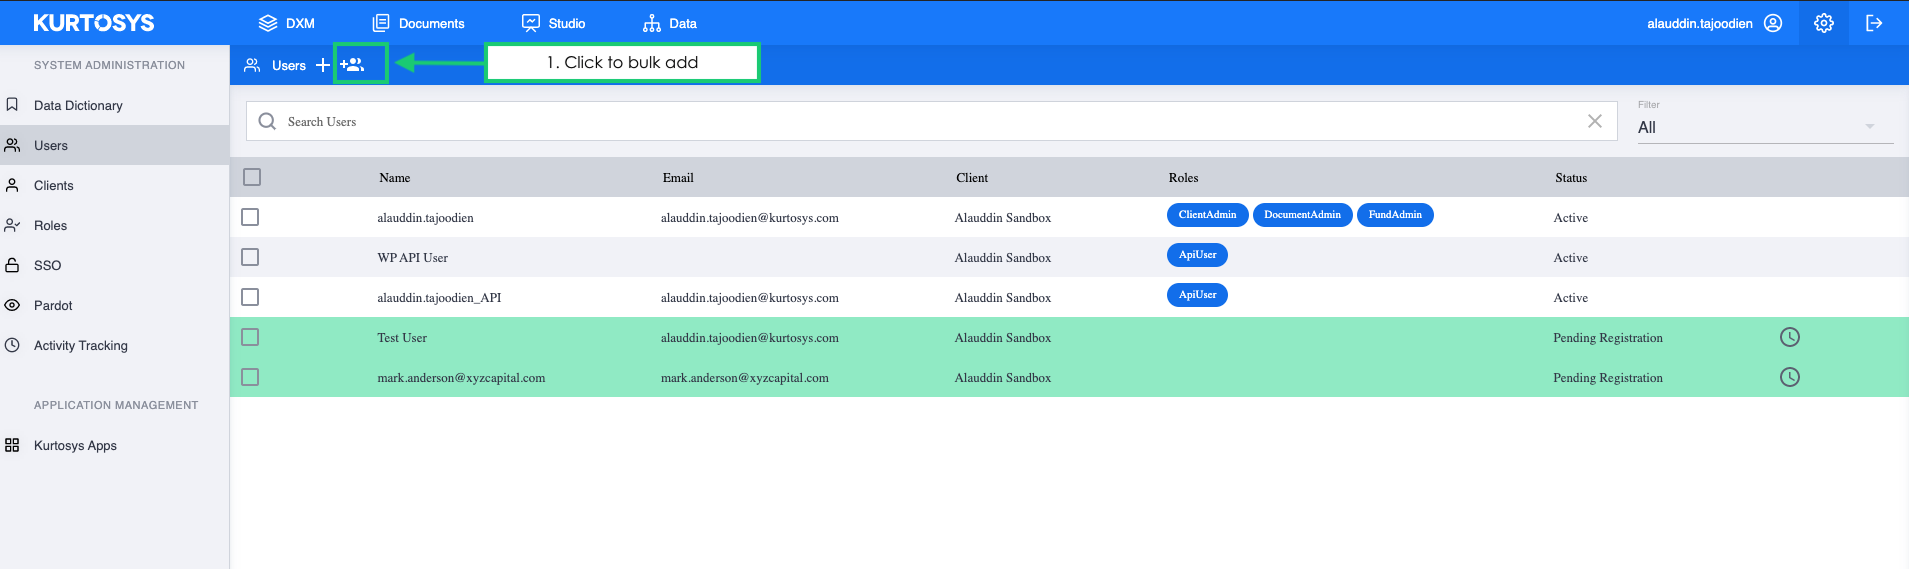
How to create a new user – bulk users
Step 1: Click the bulk add user icon.
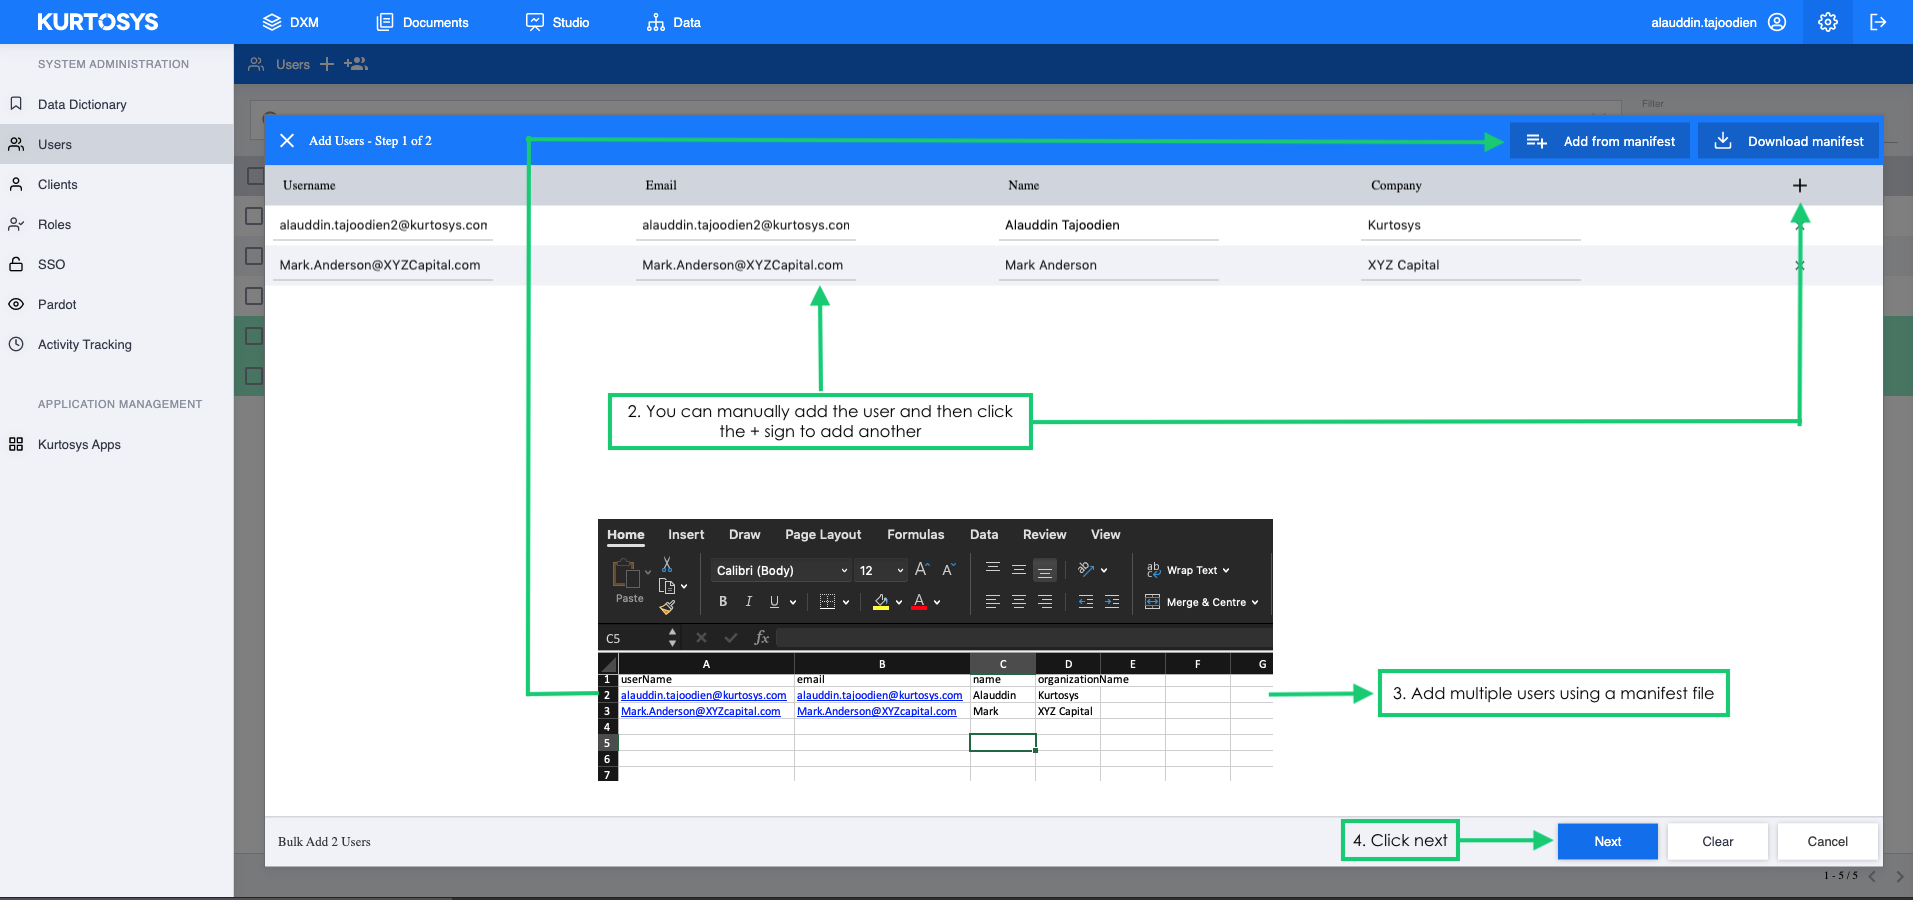
Step 2: Choose between adding user details manually and click on the + sign to add rows to the table.
Or
Step 3: Add bulk users using a manifest file, if you do not have one you can choose to download one by clicking the Download Manifest button and adding details to the spreadsheet.
Step 4: Click Next.
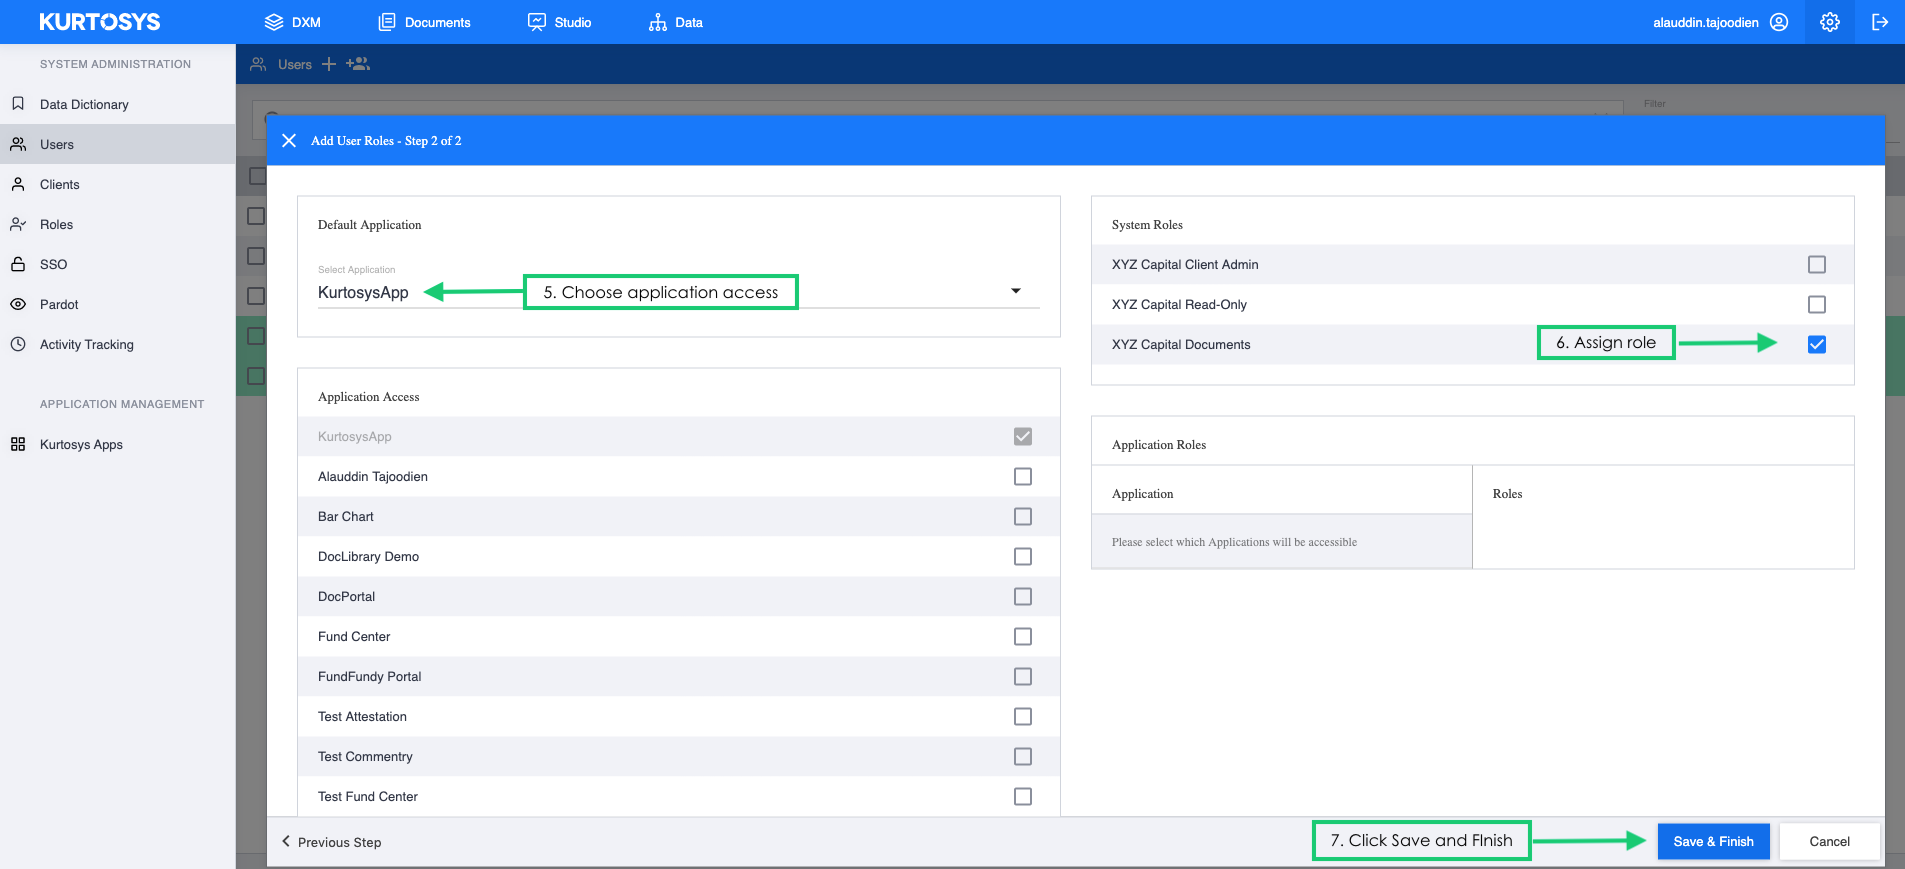
Step 5: Choose the default application that the user will have access to.
Step 6: Assign the desired role.
Step 7: Click Save & Finish.