
SFO Data functionality allows a user to query data in the Data product, add it into Microsoft Word documents, and dynamically update it as needed.
Table of Contents
Setting up a Data Set
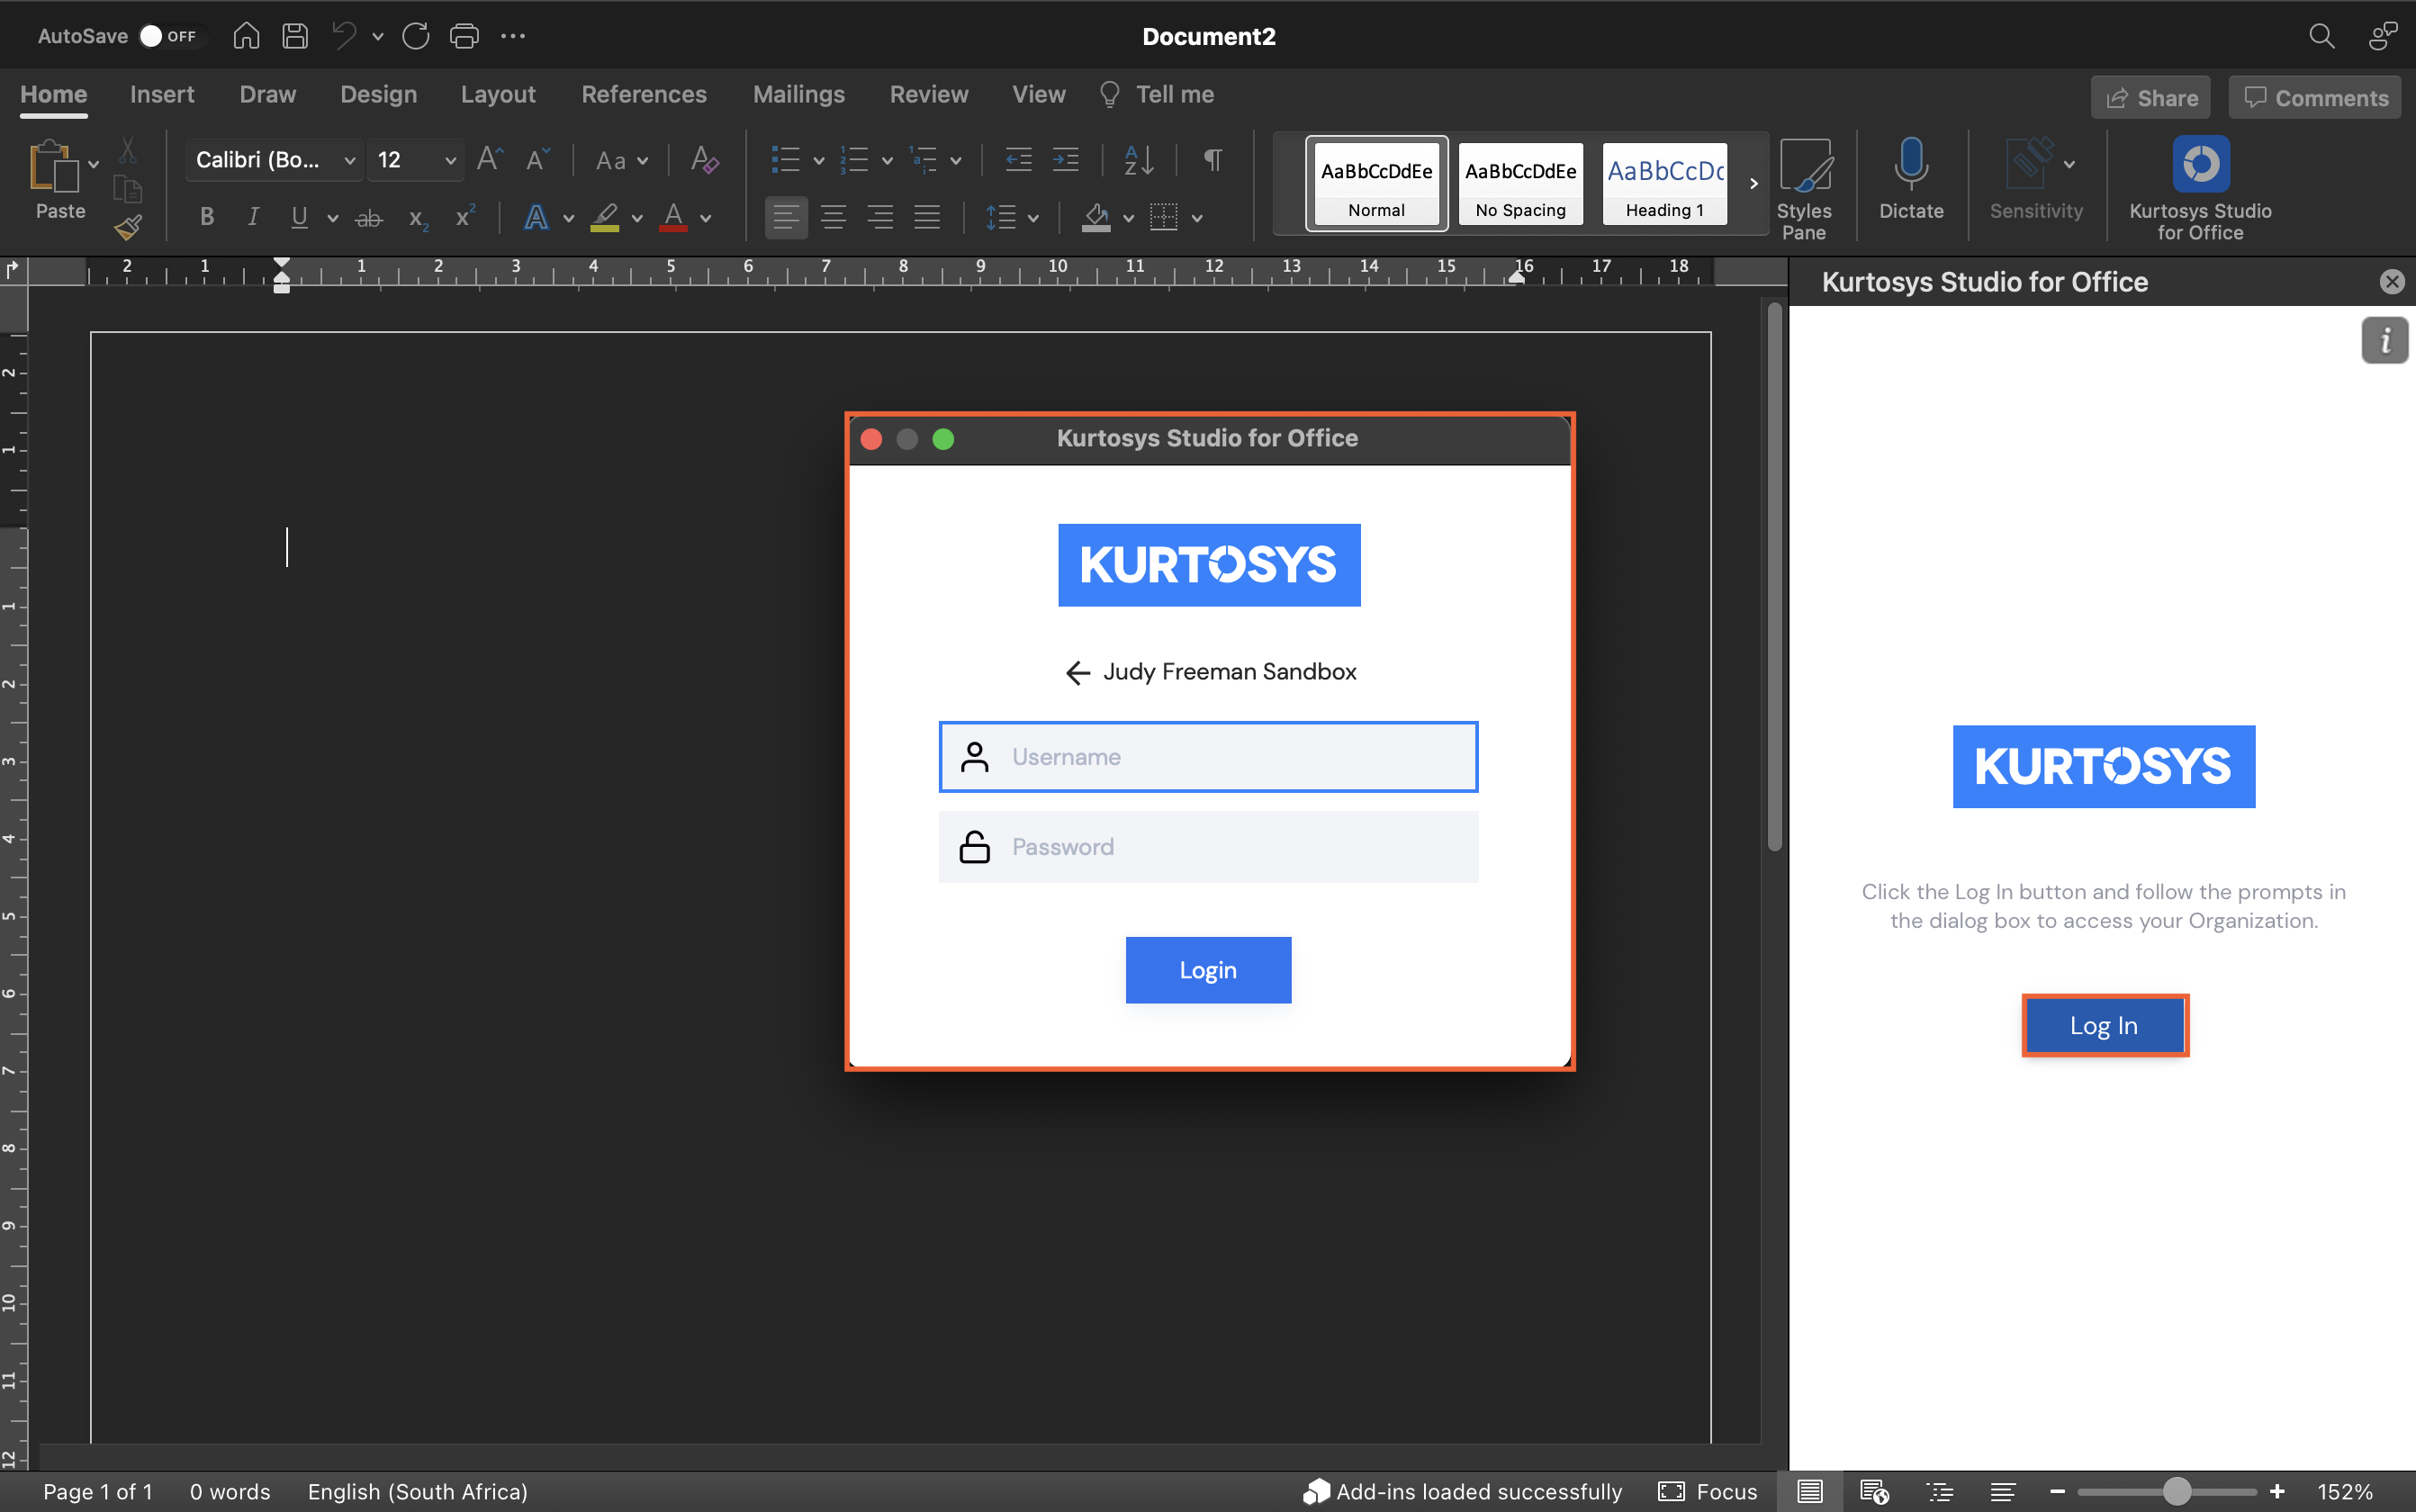
- In Microsoft Word, click the Kurtosys Studio for Office icon, then select the appropriate environment.
- Click Next.
- Log In by entering the applicable client instance, your username and password.
- Click Login.
- Complete any additional authentication required.
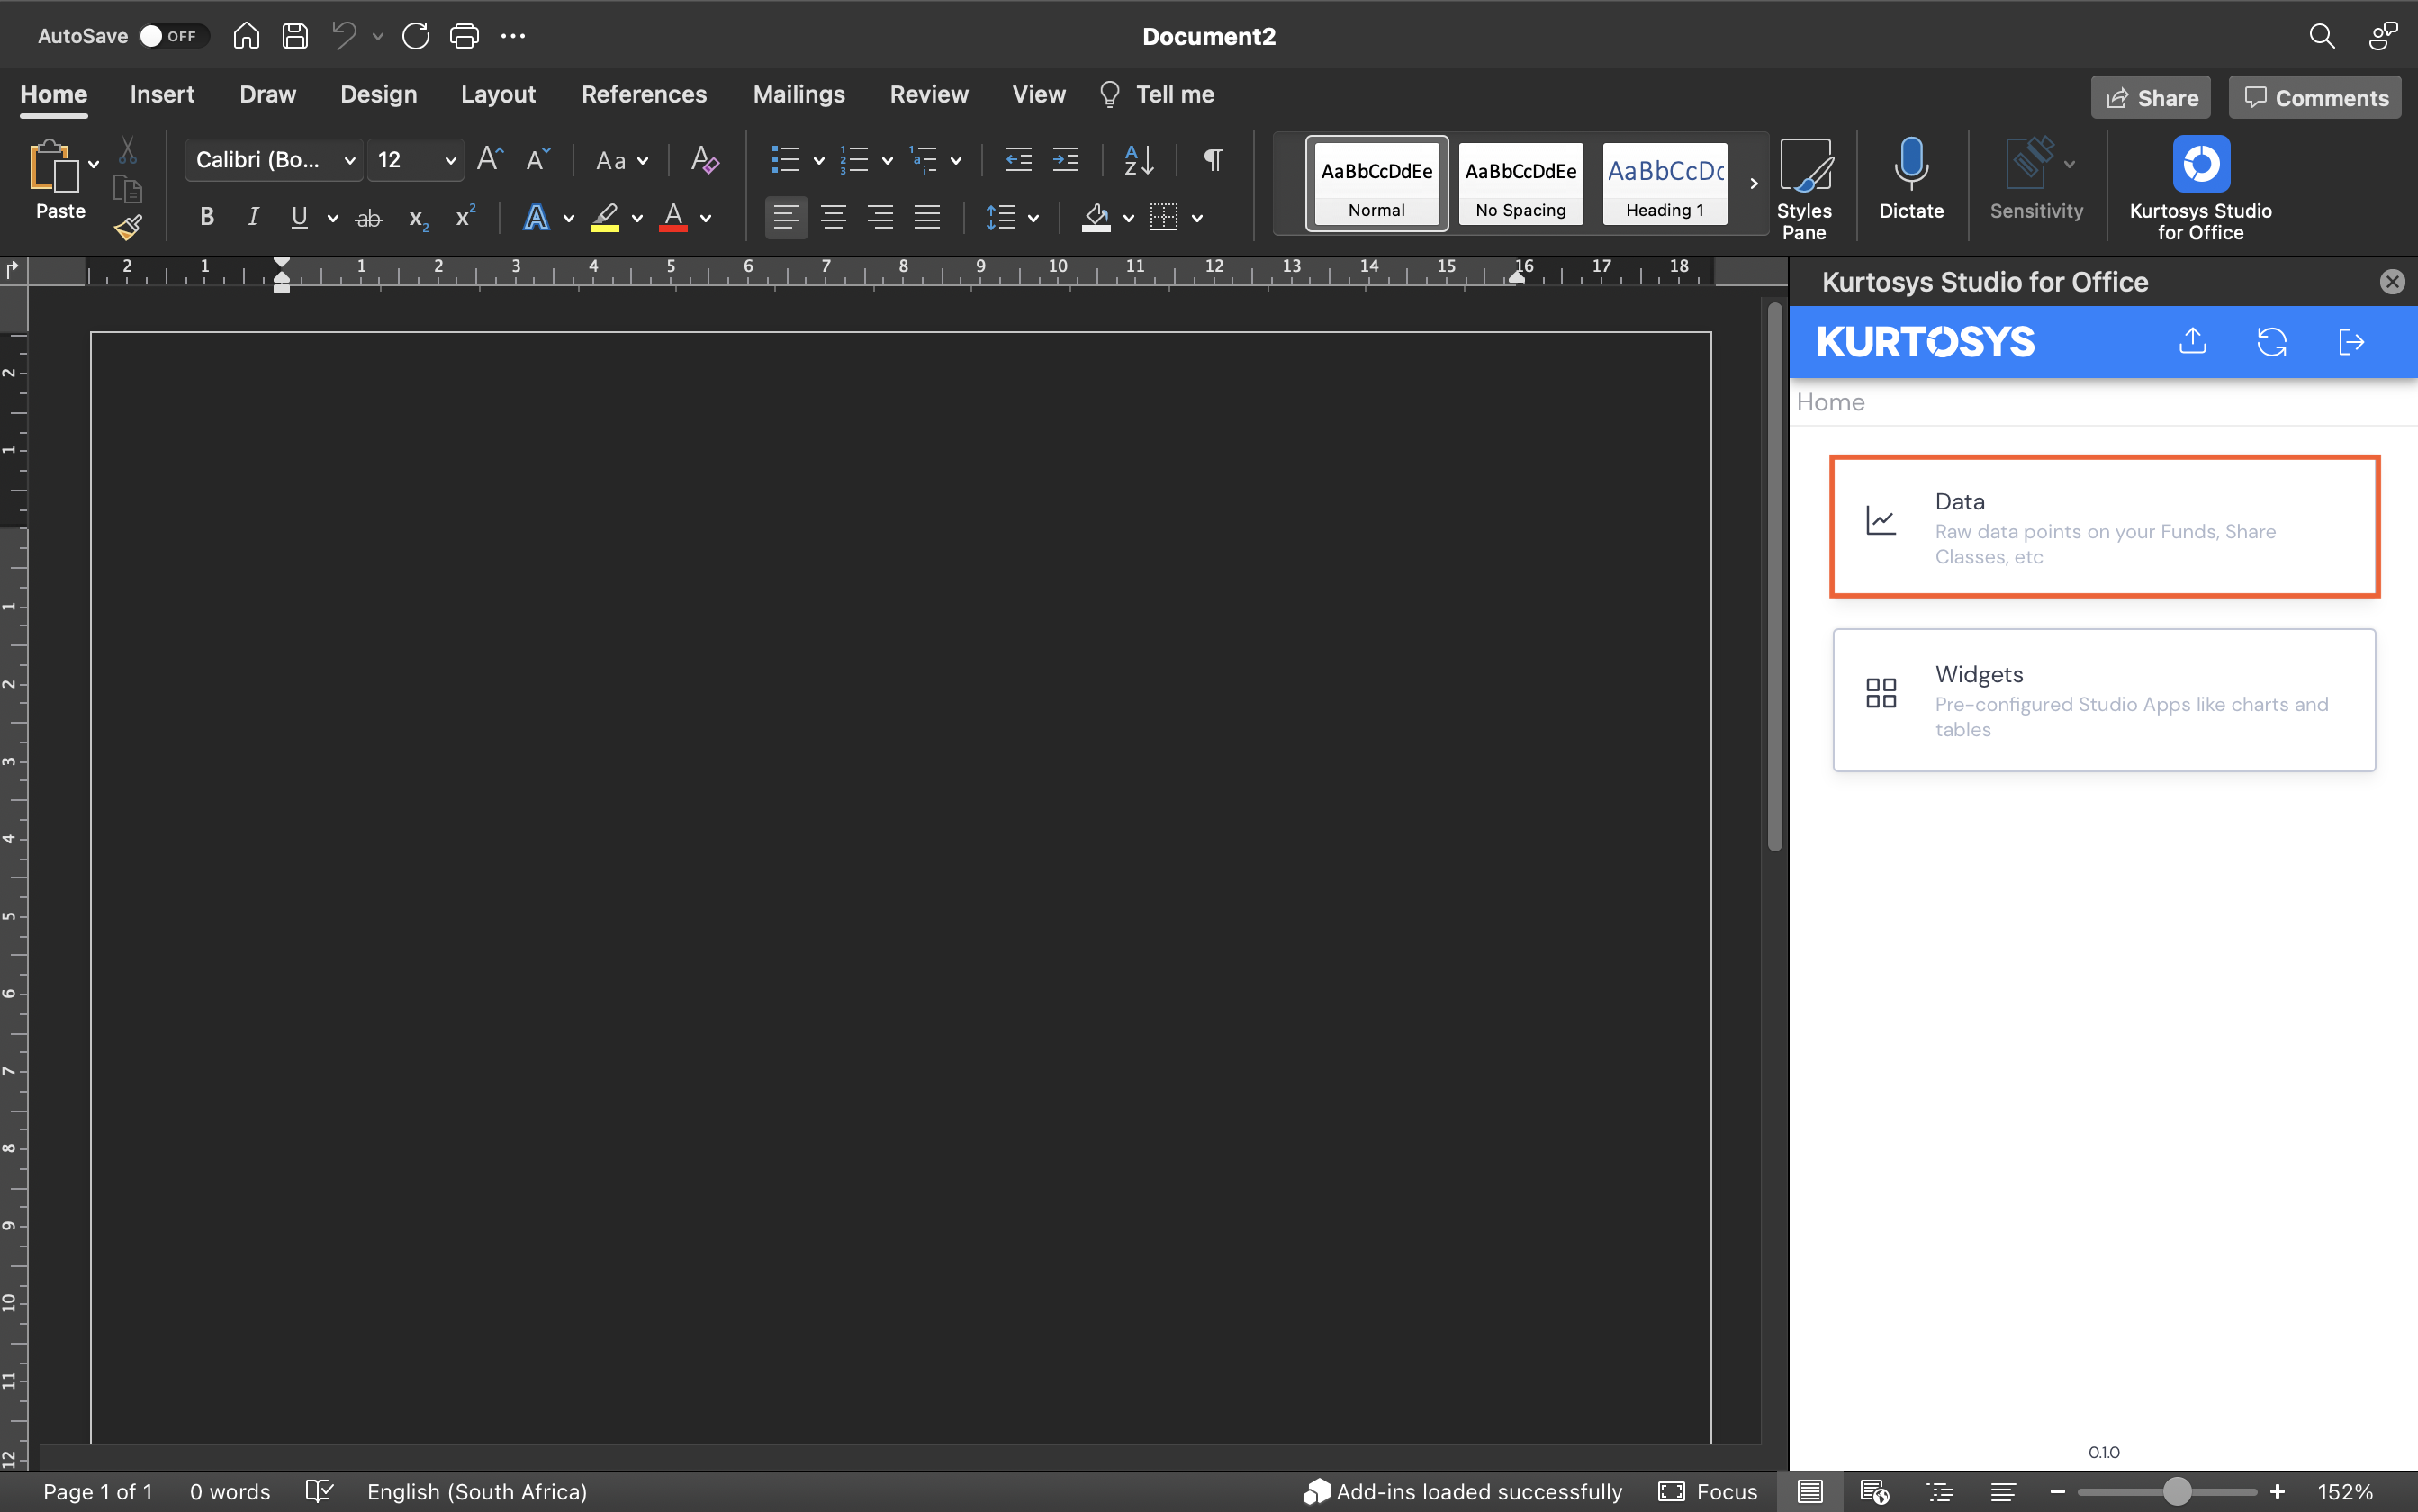
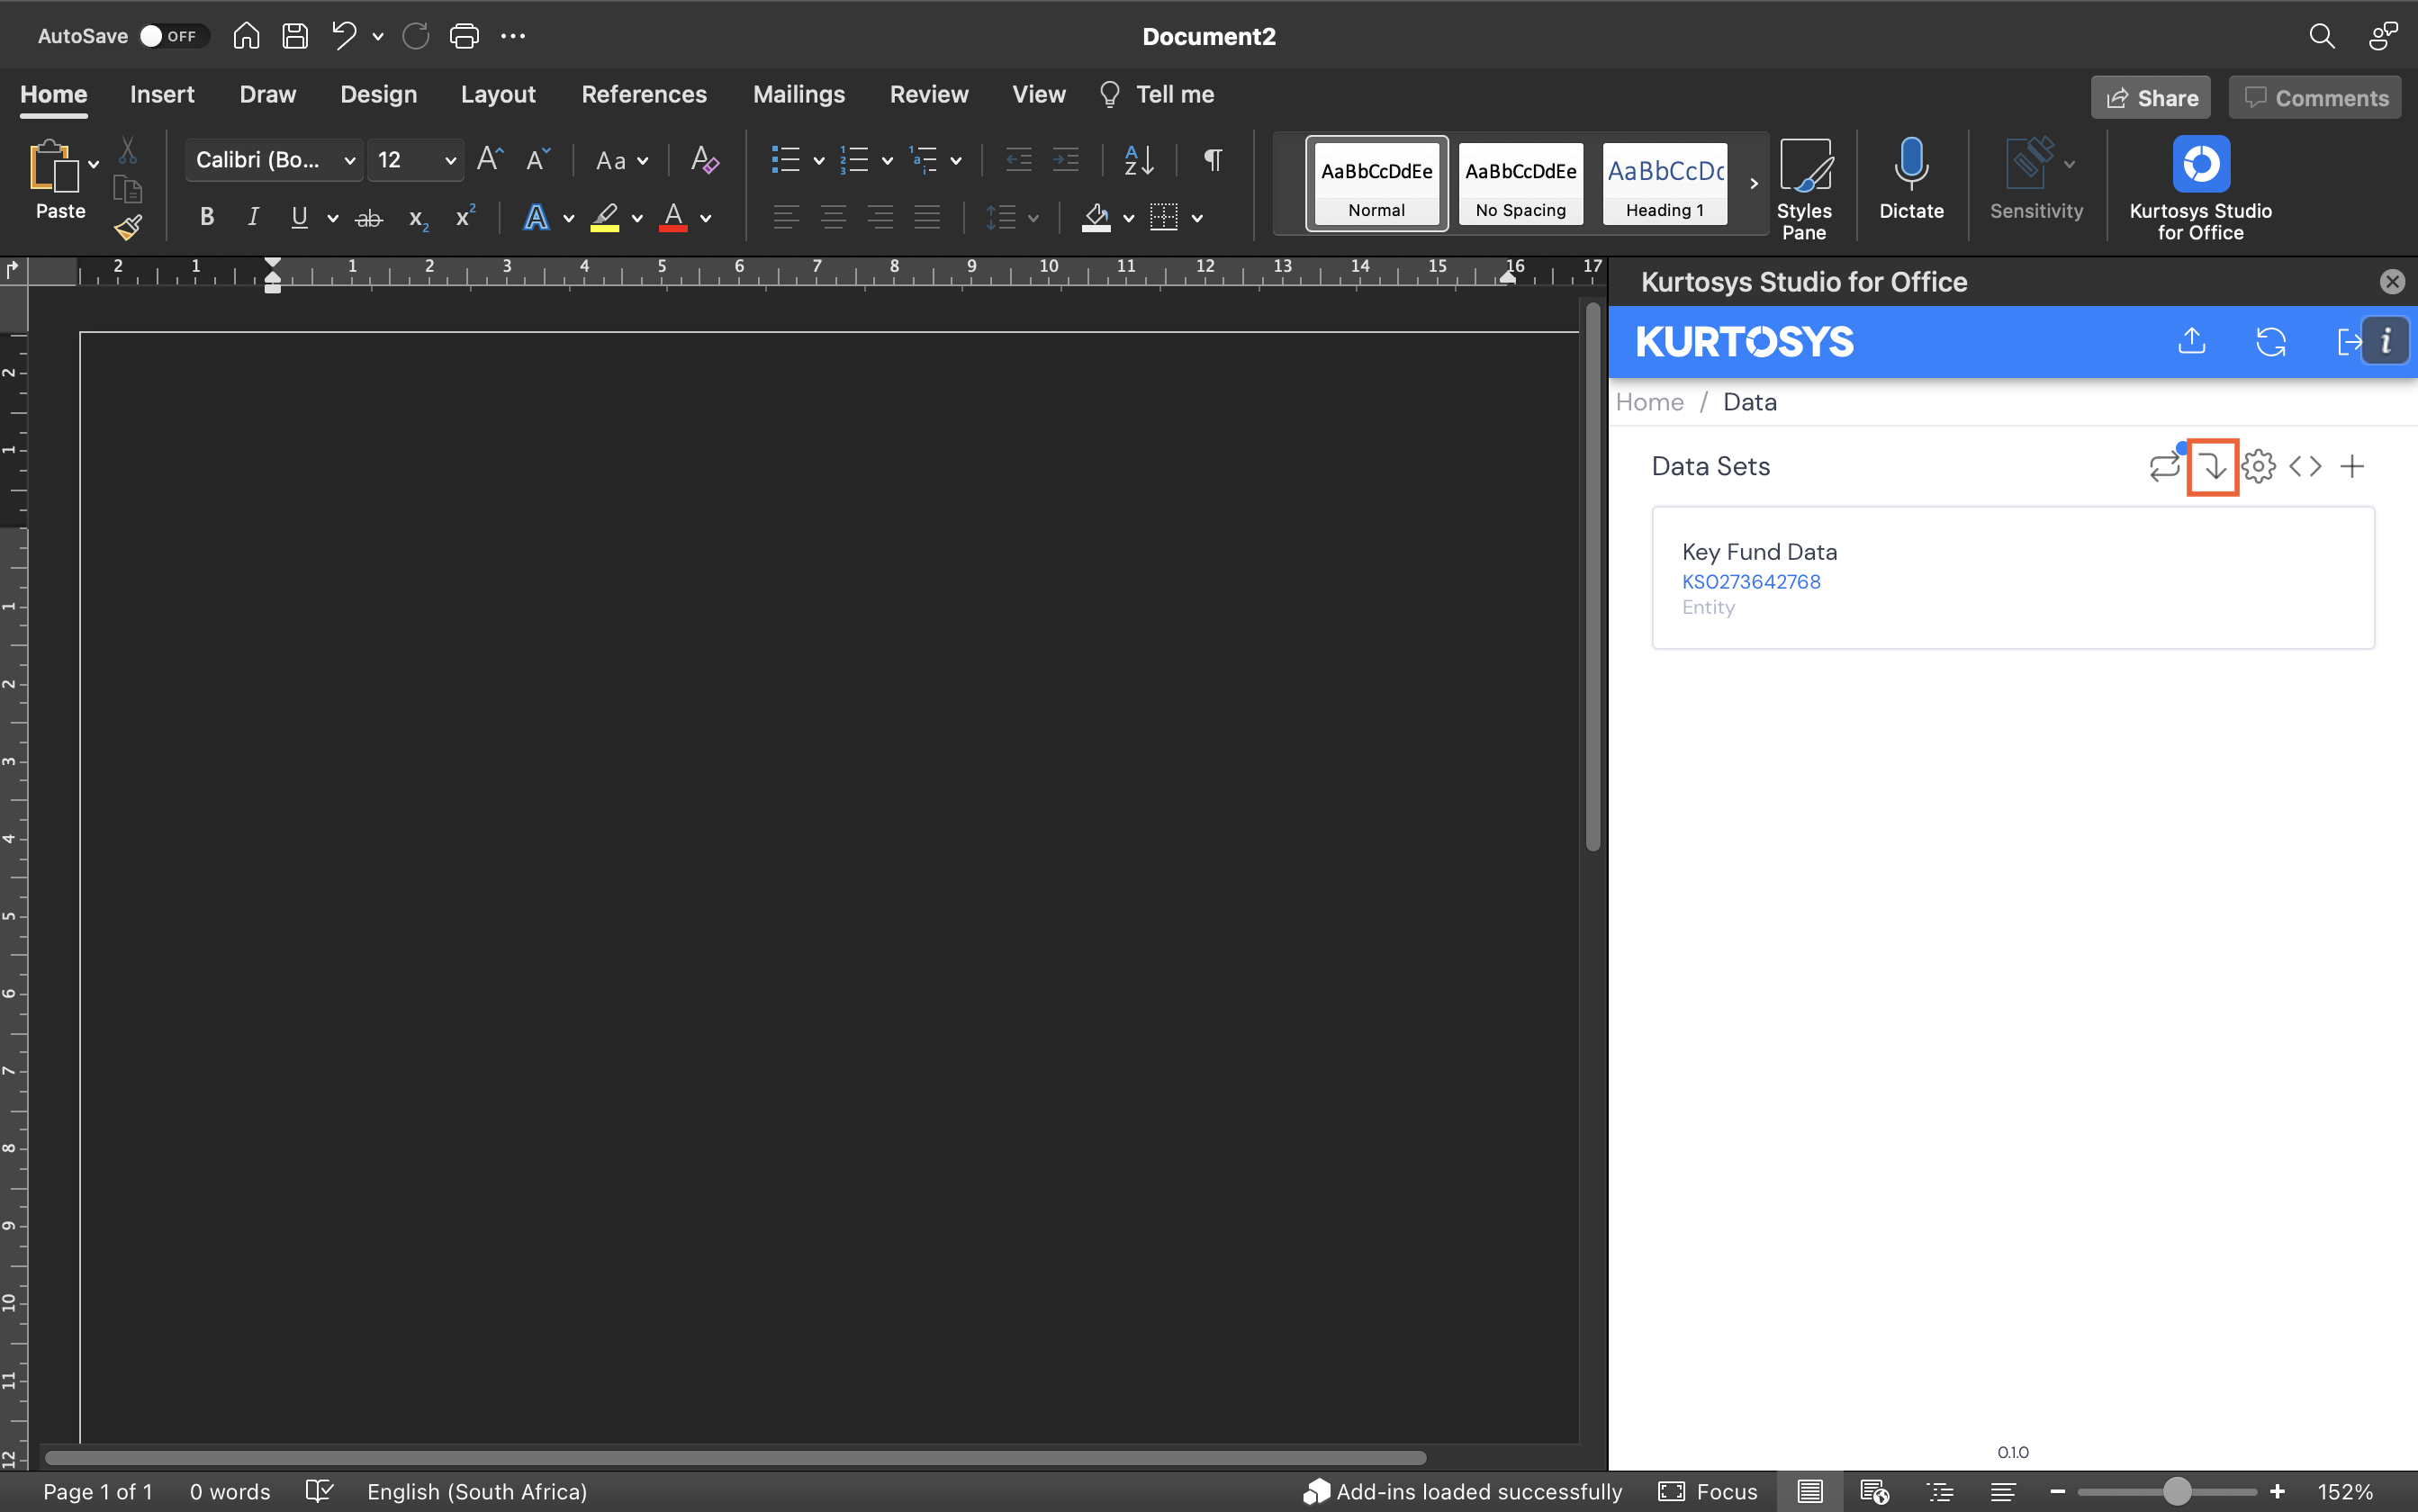
- Click Data.
- If you are starting a new document, you will need to click + Add Data Set to begin.
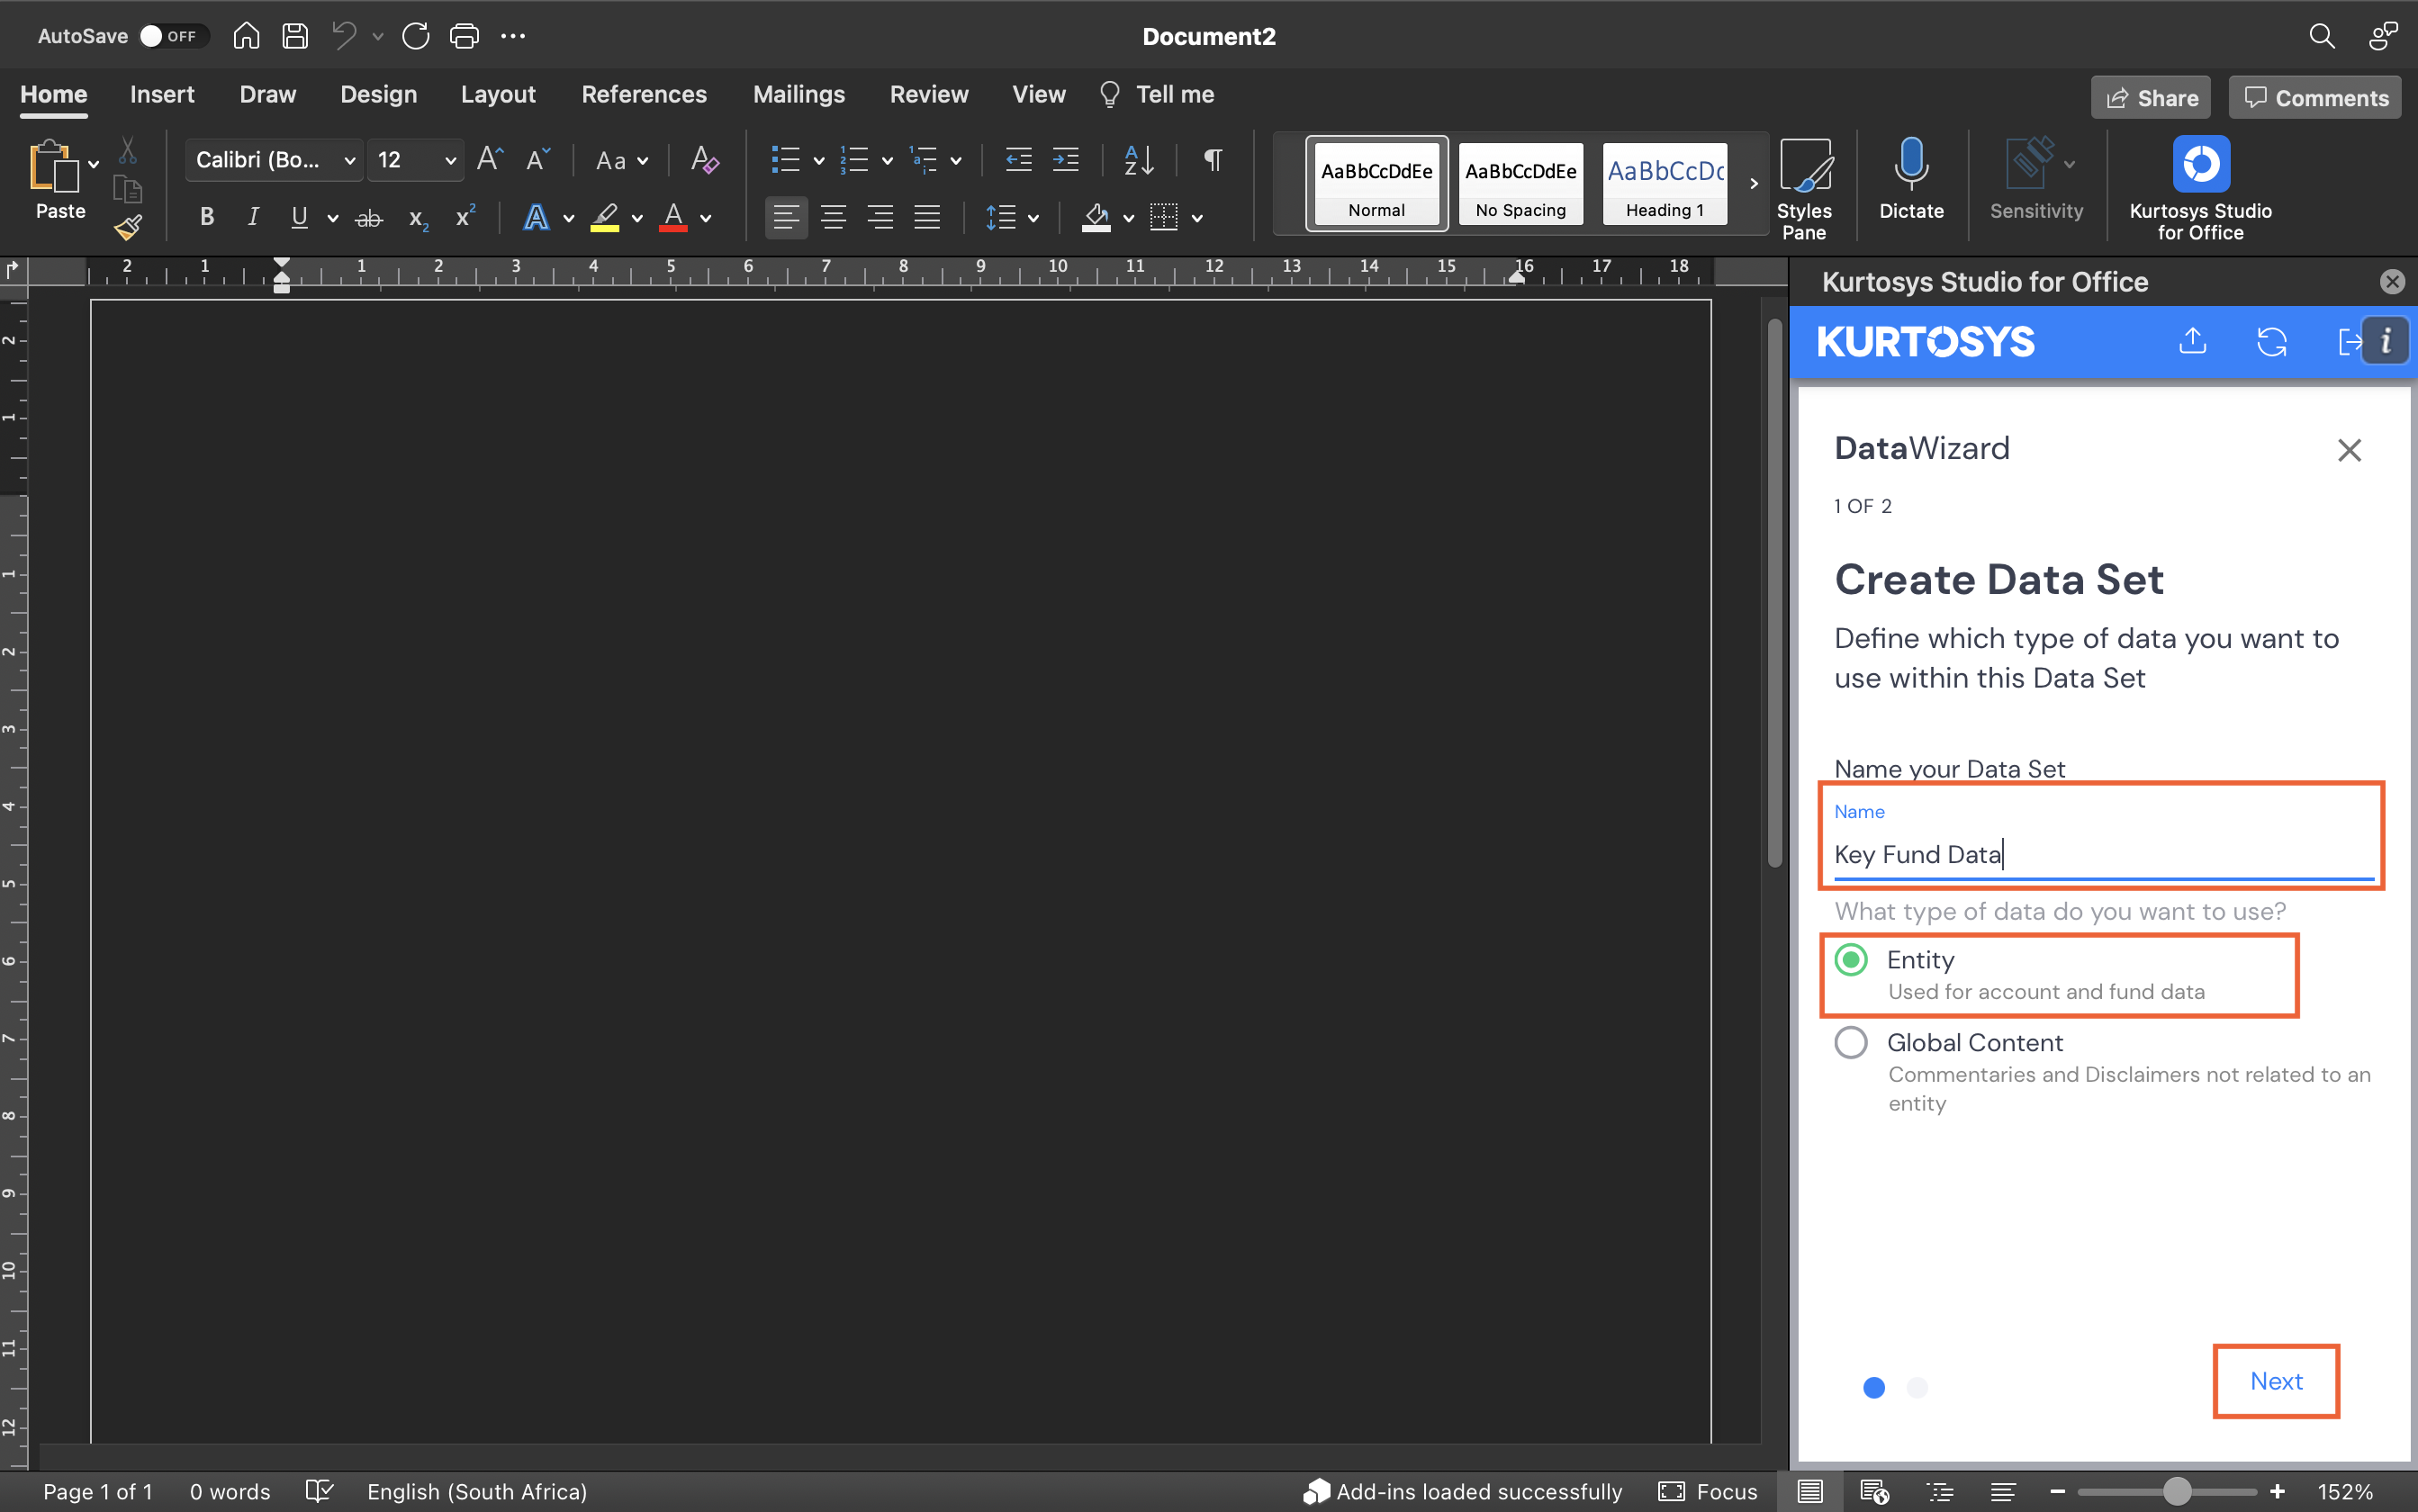
Create Data Set
- Type in a Name for this data set, then select either Entity (for Entity-related data) or Global Content (for non-Entity-related data).
- Click Next.
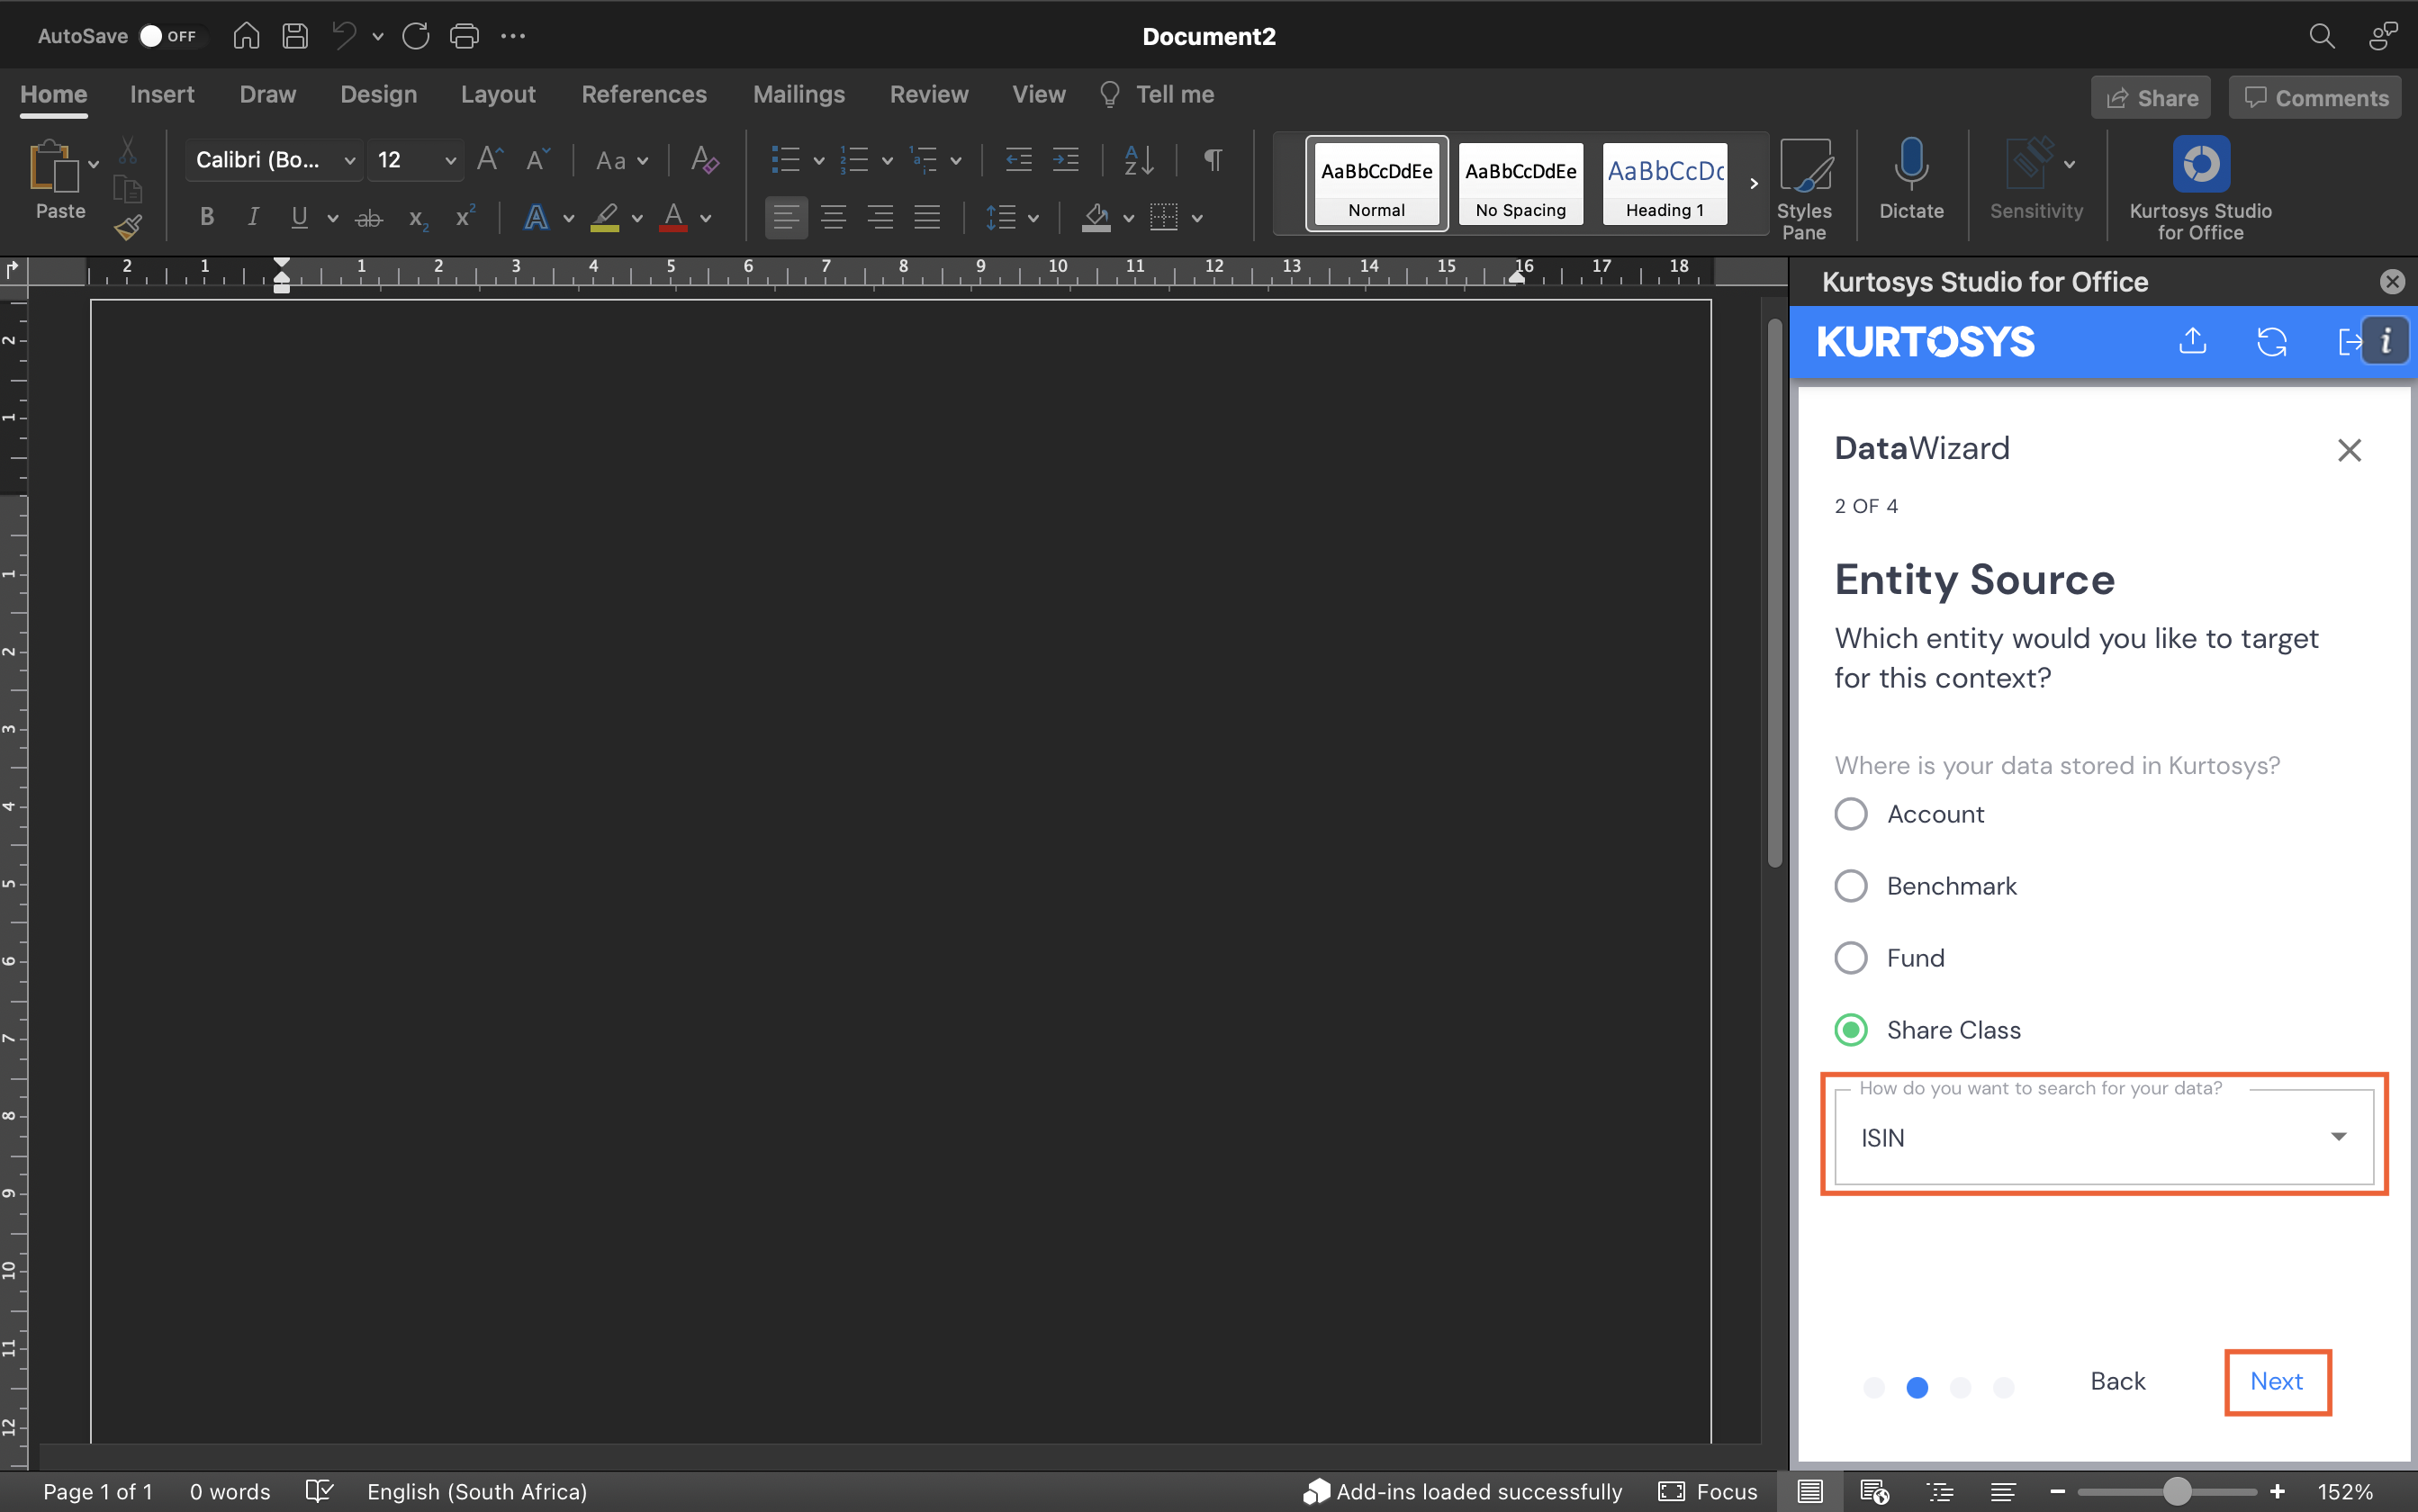
Entity Source
- Select the Entity Source to use, e.g. Share Class.
- Type in the Entity Source property to be used as an identifier, e.g. ISIN. The list of available options is dependent on the entity type you have selected as your entity source.
- Click Next.
Choose Property Value
- Use the dropdown arrow to select a Property Value. The property value is dependent on the property chosen as an identifier in the step before. The selection made here specifies which entity’s data is to be used.
- Click Next.
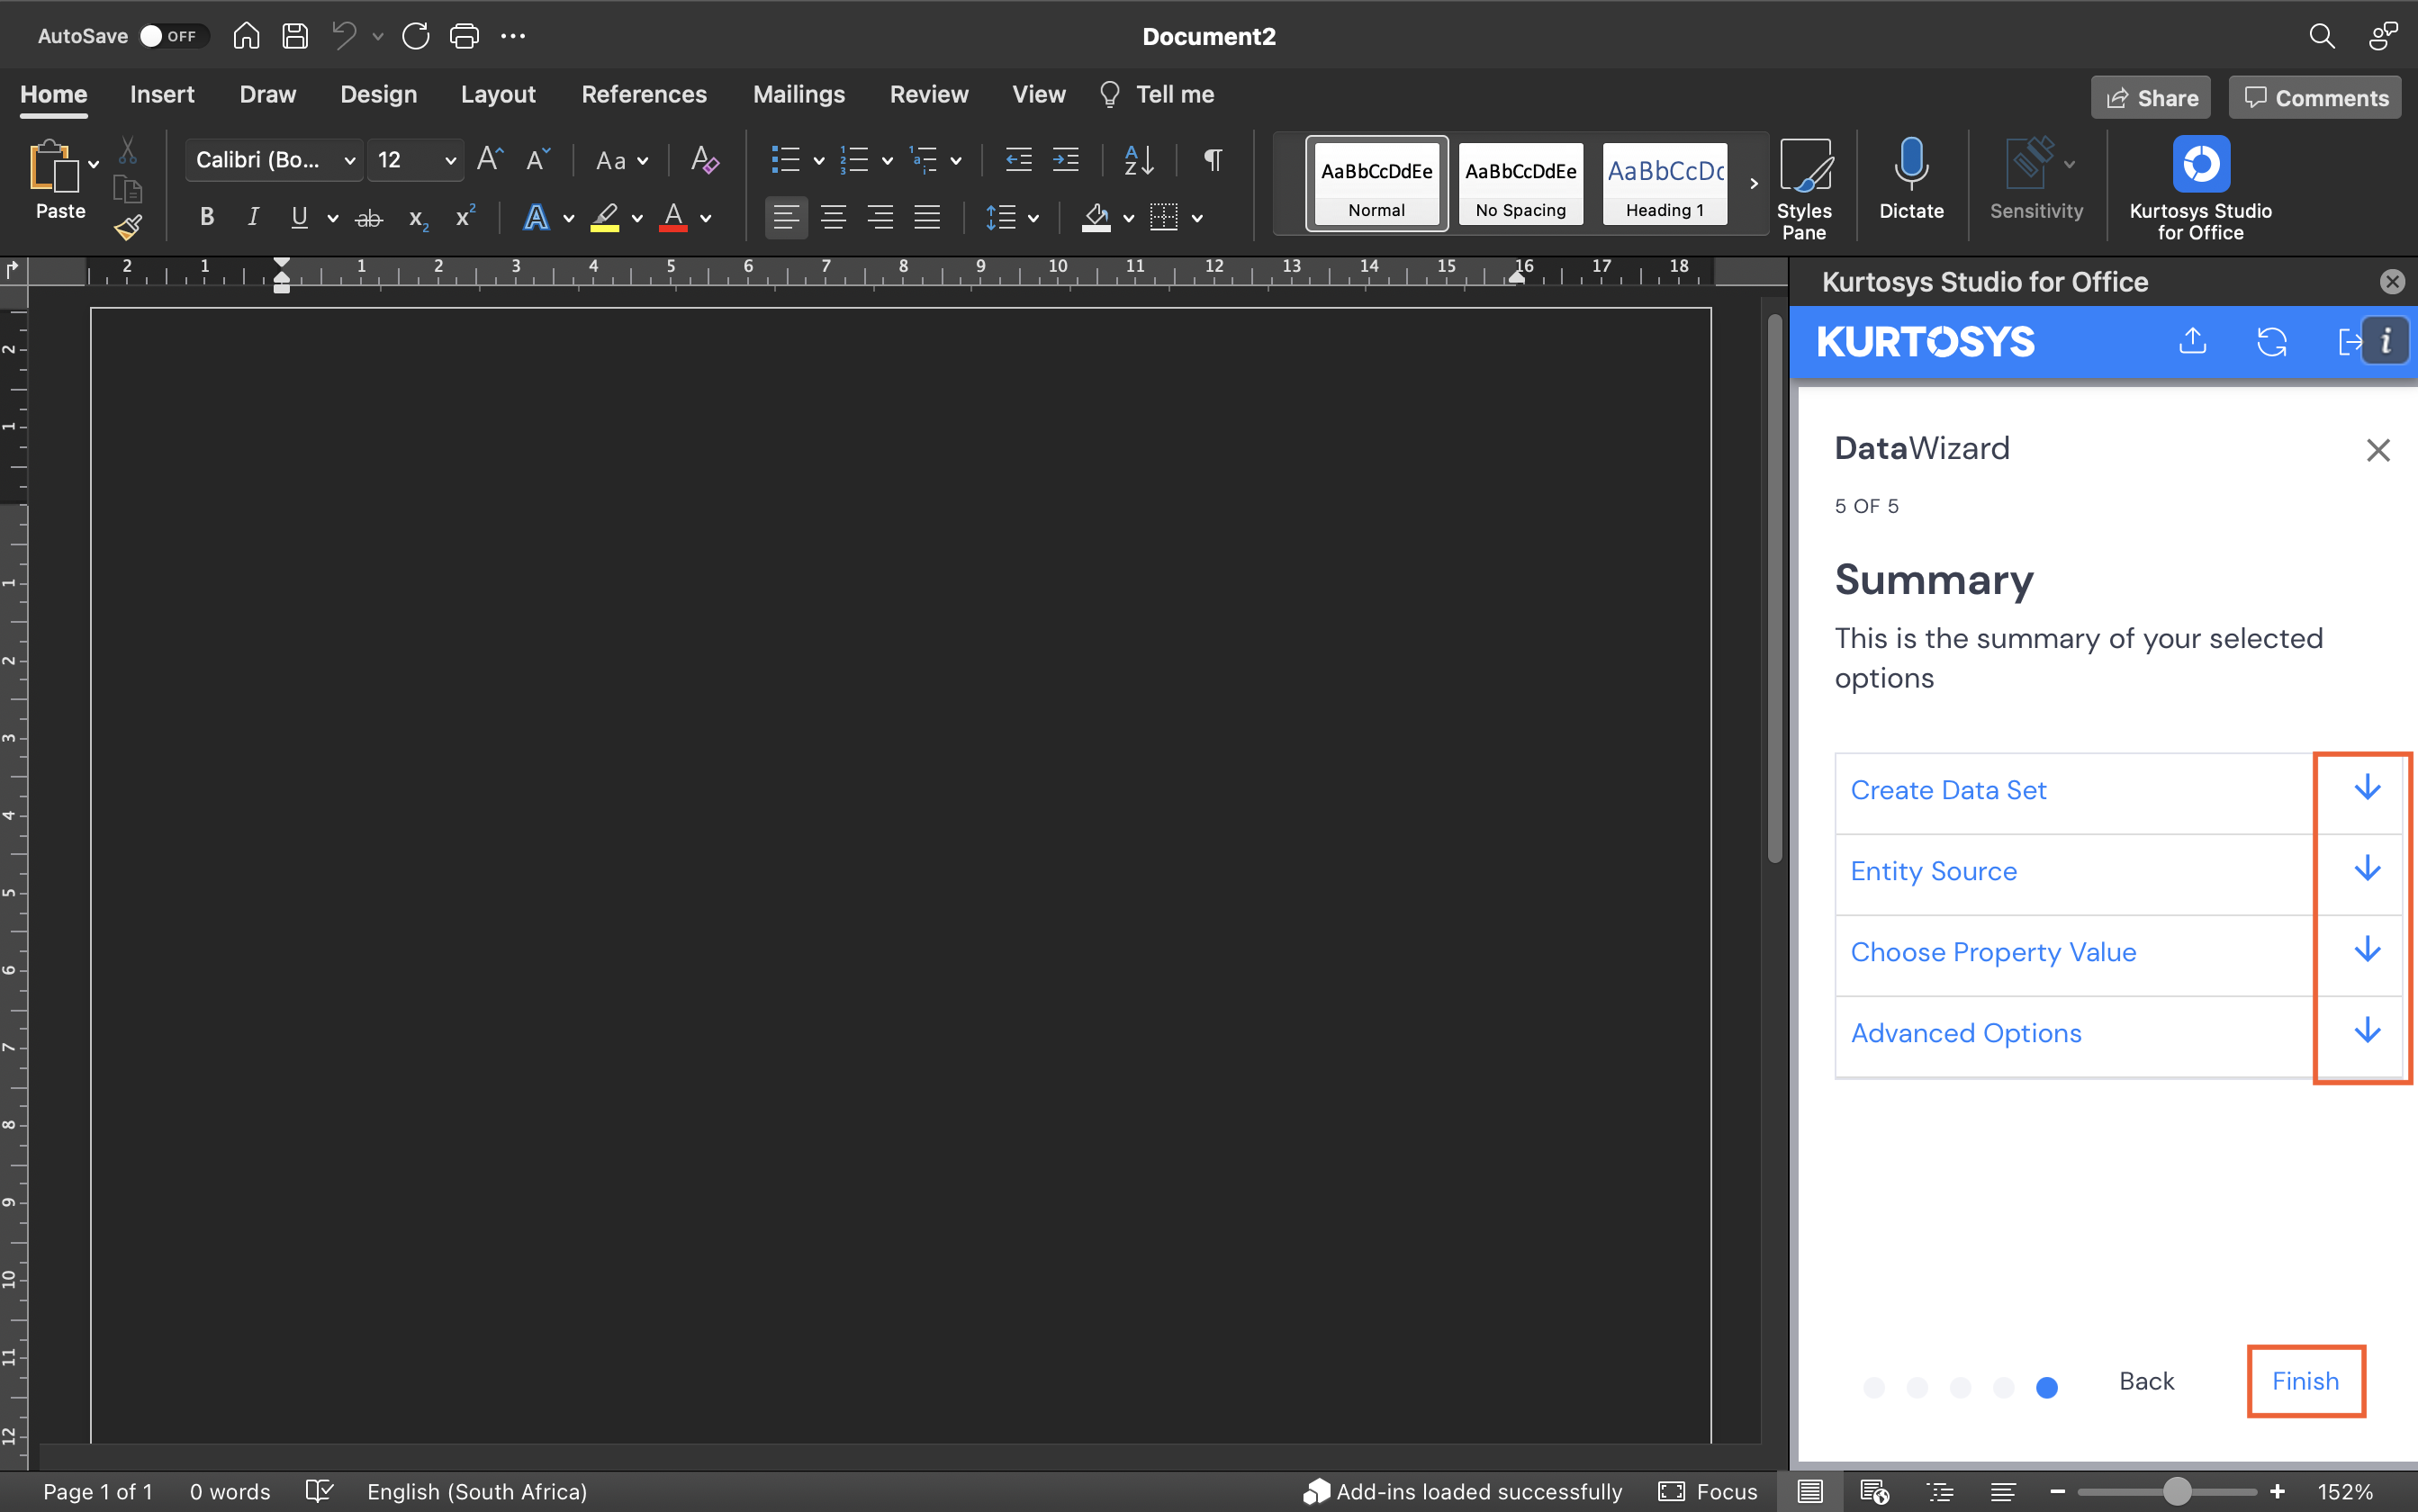
Advanced Options
EITHER
- Select No for Advanced Options if your data selections are complete and you are ready to add queries to your document. Selecting No gives the user access to entity property data only. (No Allocation, Statistics, Timeseries, Commentaries or Disclaimers relating to the specified Entity Property Value may be accessed.)
Summary
- Summary – use the arrows to review your selections.
- Click Finish.
Advanced Options
OR
- Select Yes for Advanced Options if you would like to add data from Allocations, Statistics or Timeseries properties, Commentaries and Disclaimers, as well as Transforms options such as Translations and Cultures.
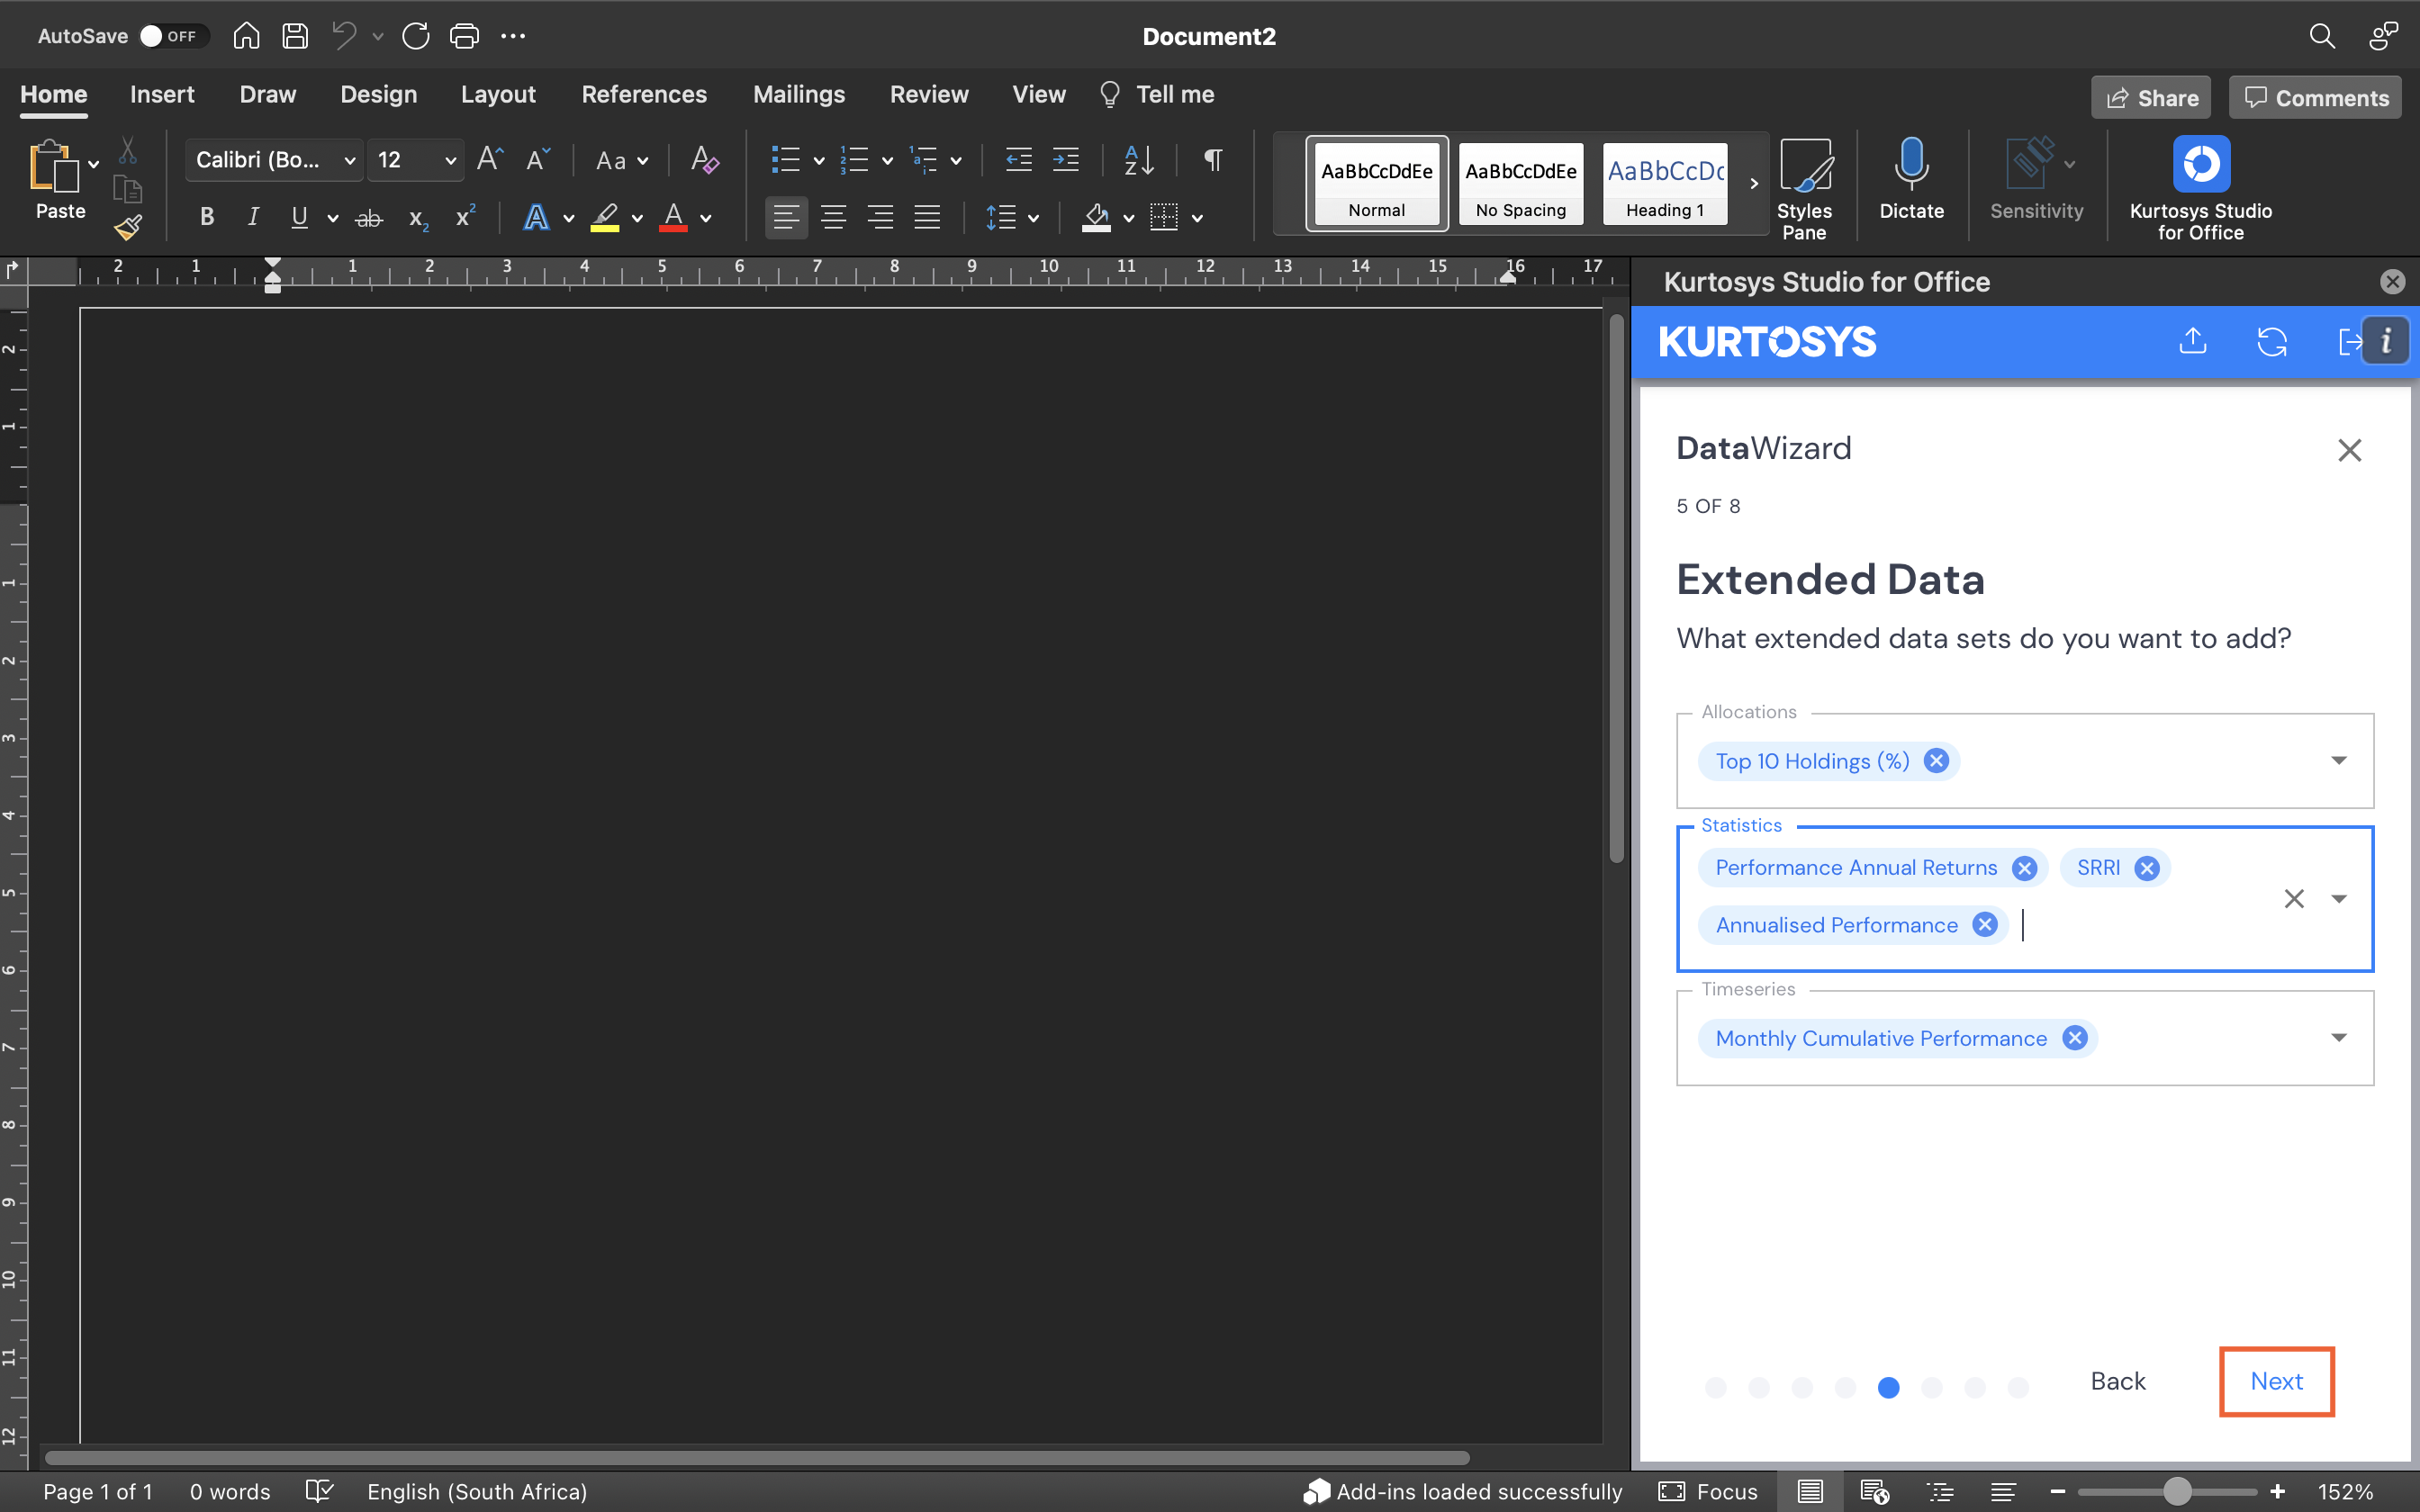
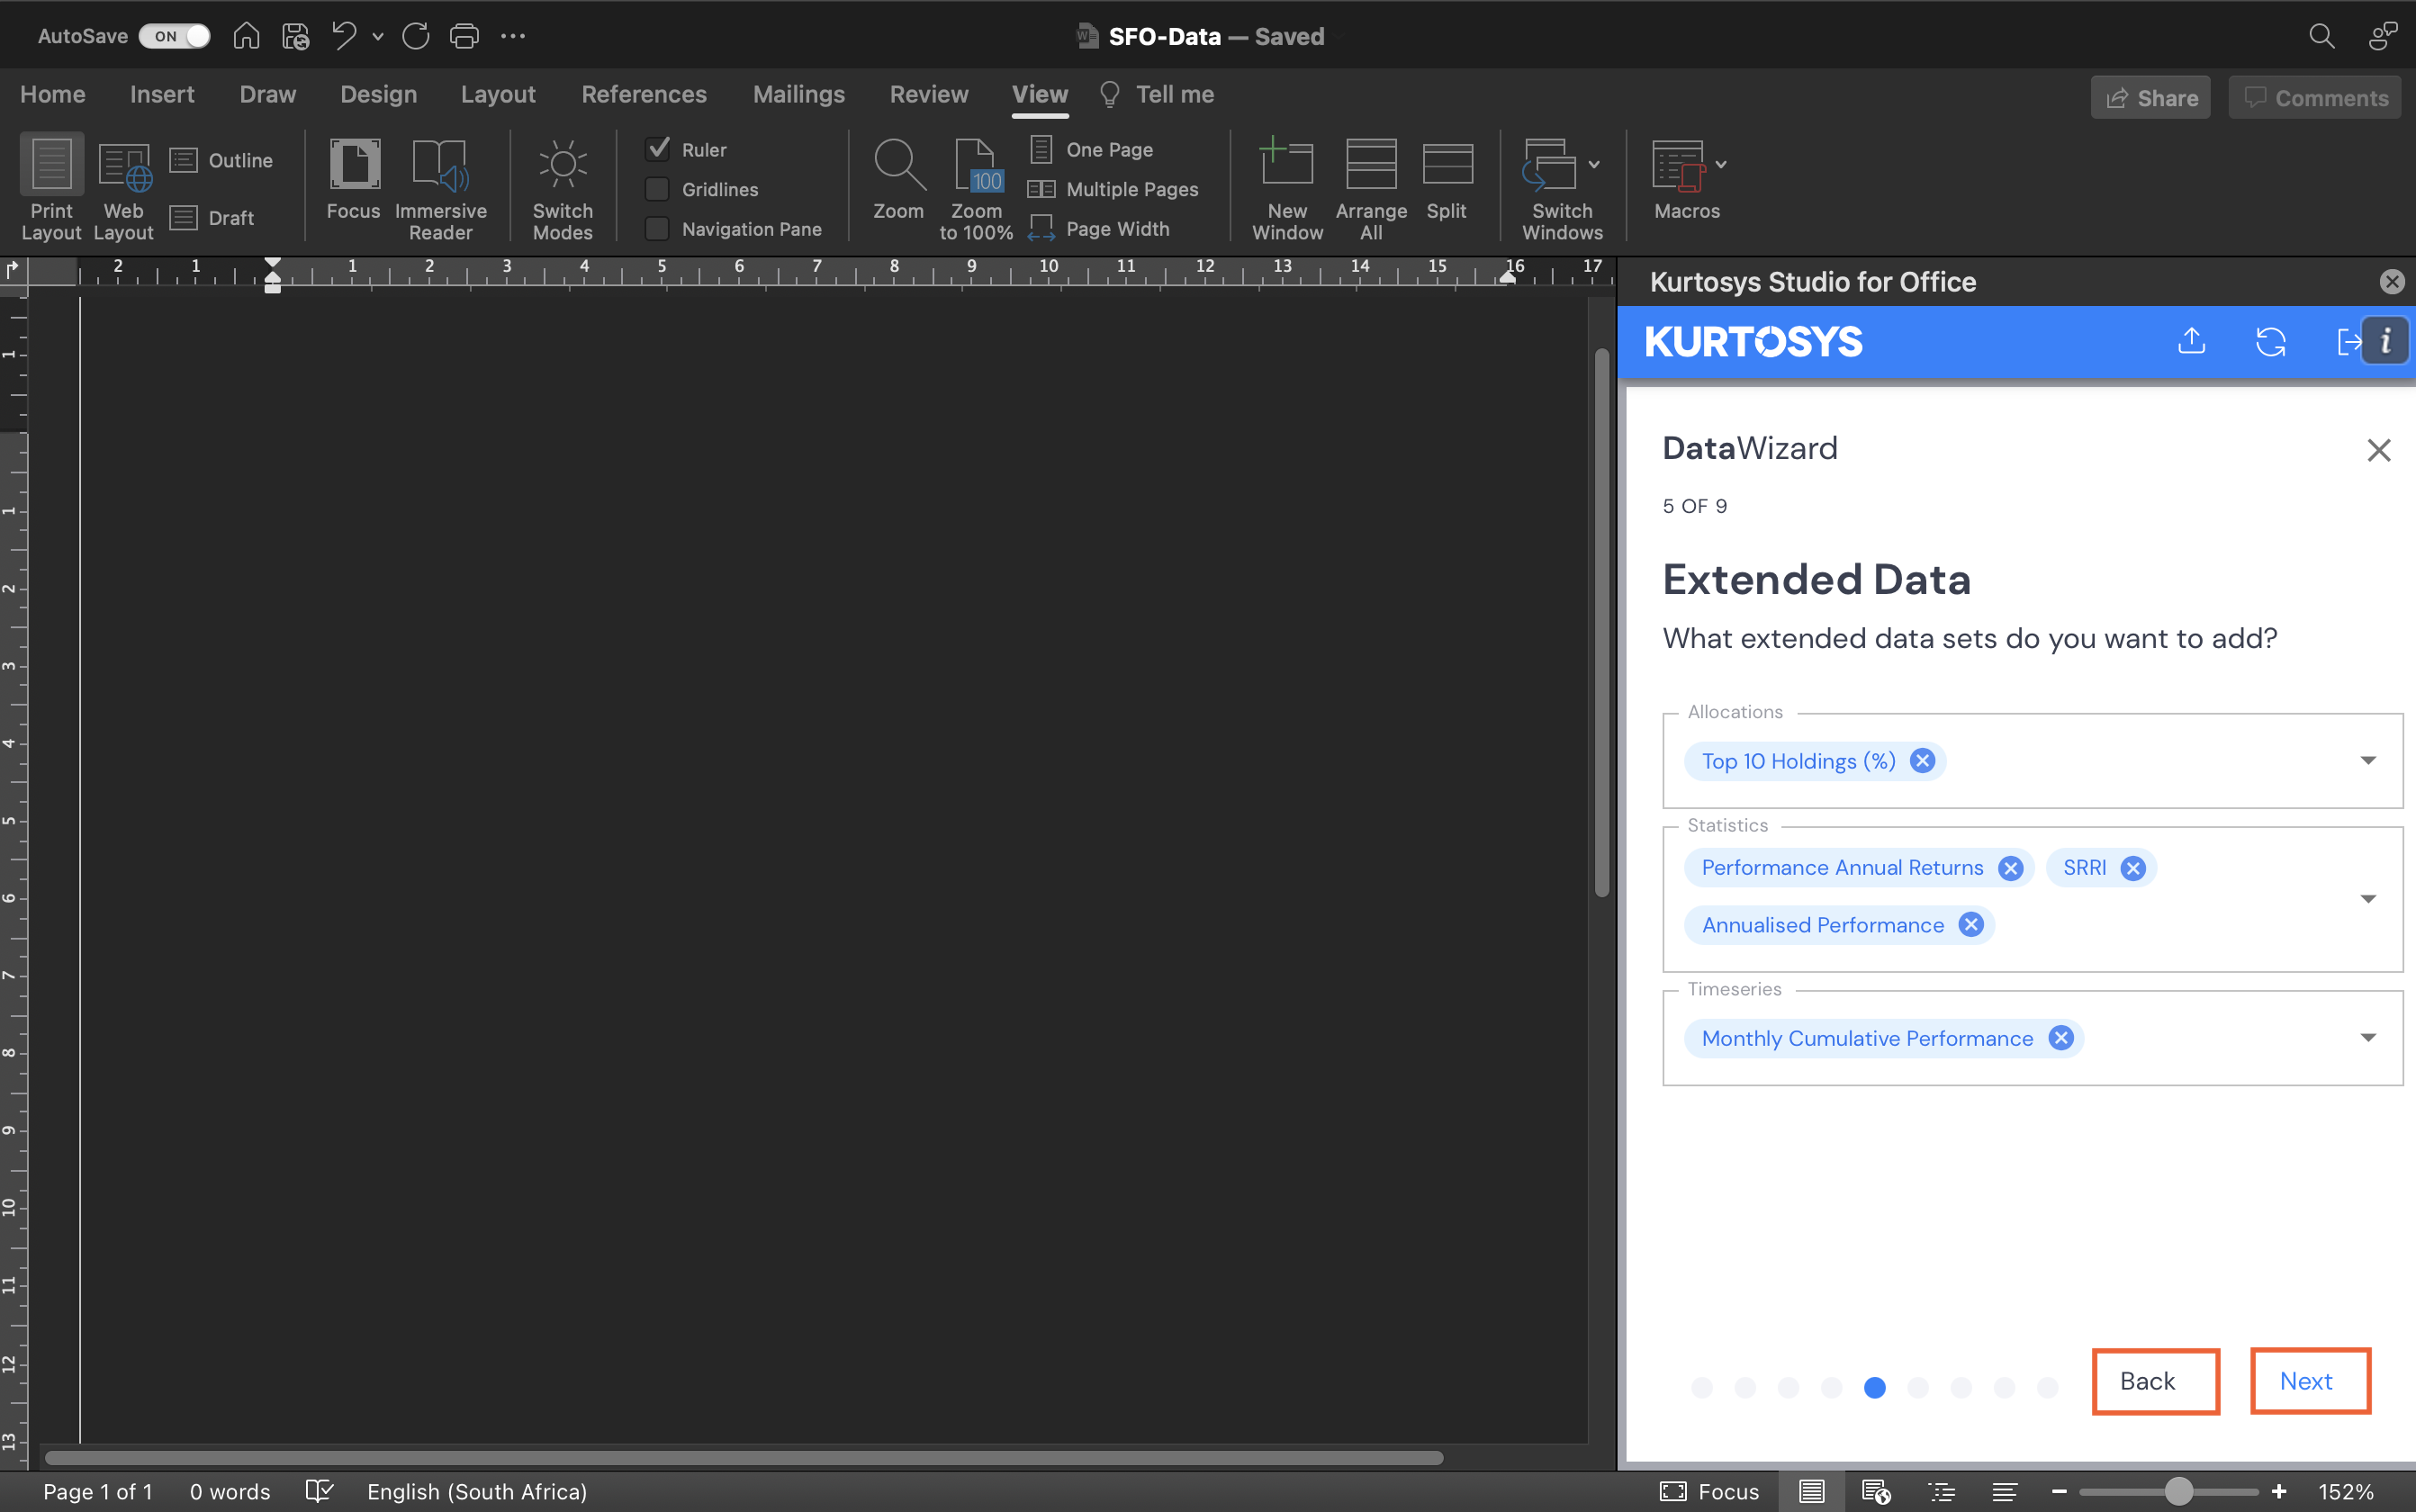
Extended Data
- Extended Data – use the dropdown arrows to select Allocations and/or Statistics and/or Timeseries properties. Multiple items can be selected, or click ALL to access all properties for each property type.
- Click Next.
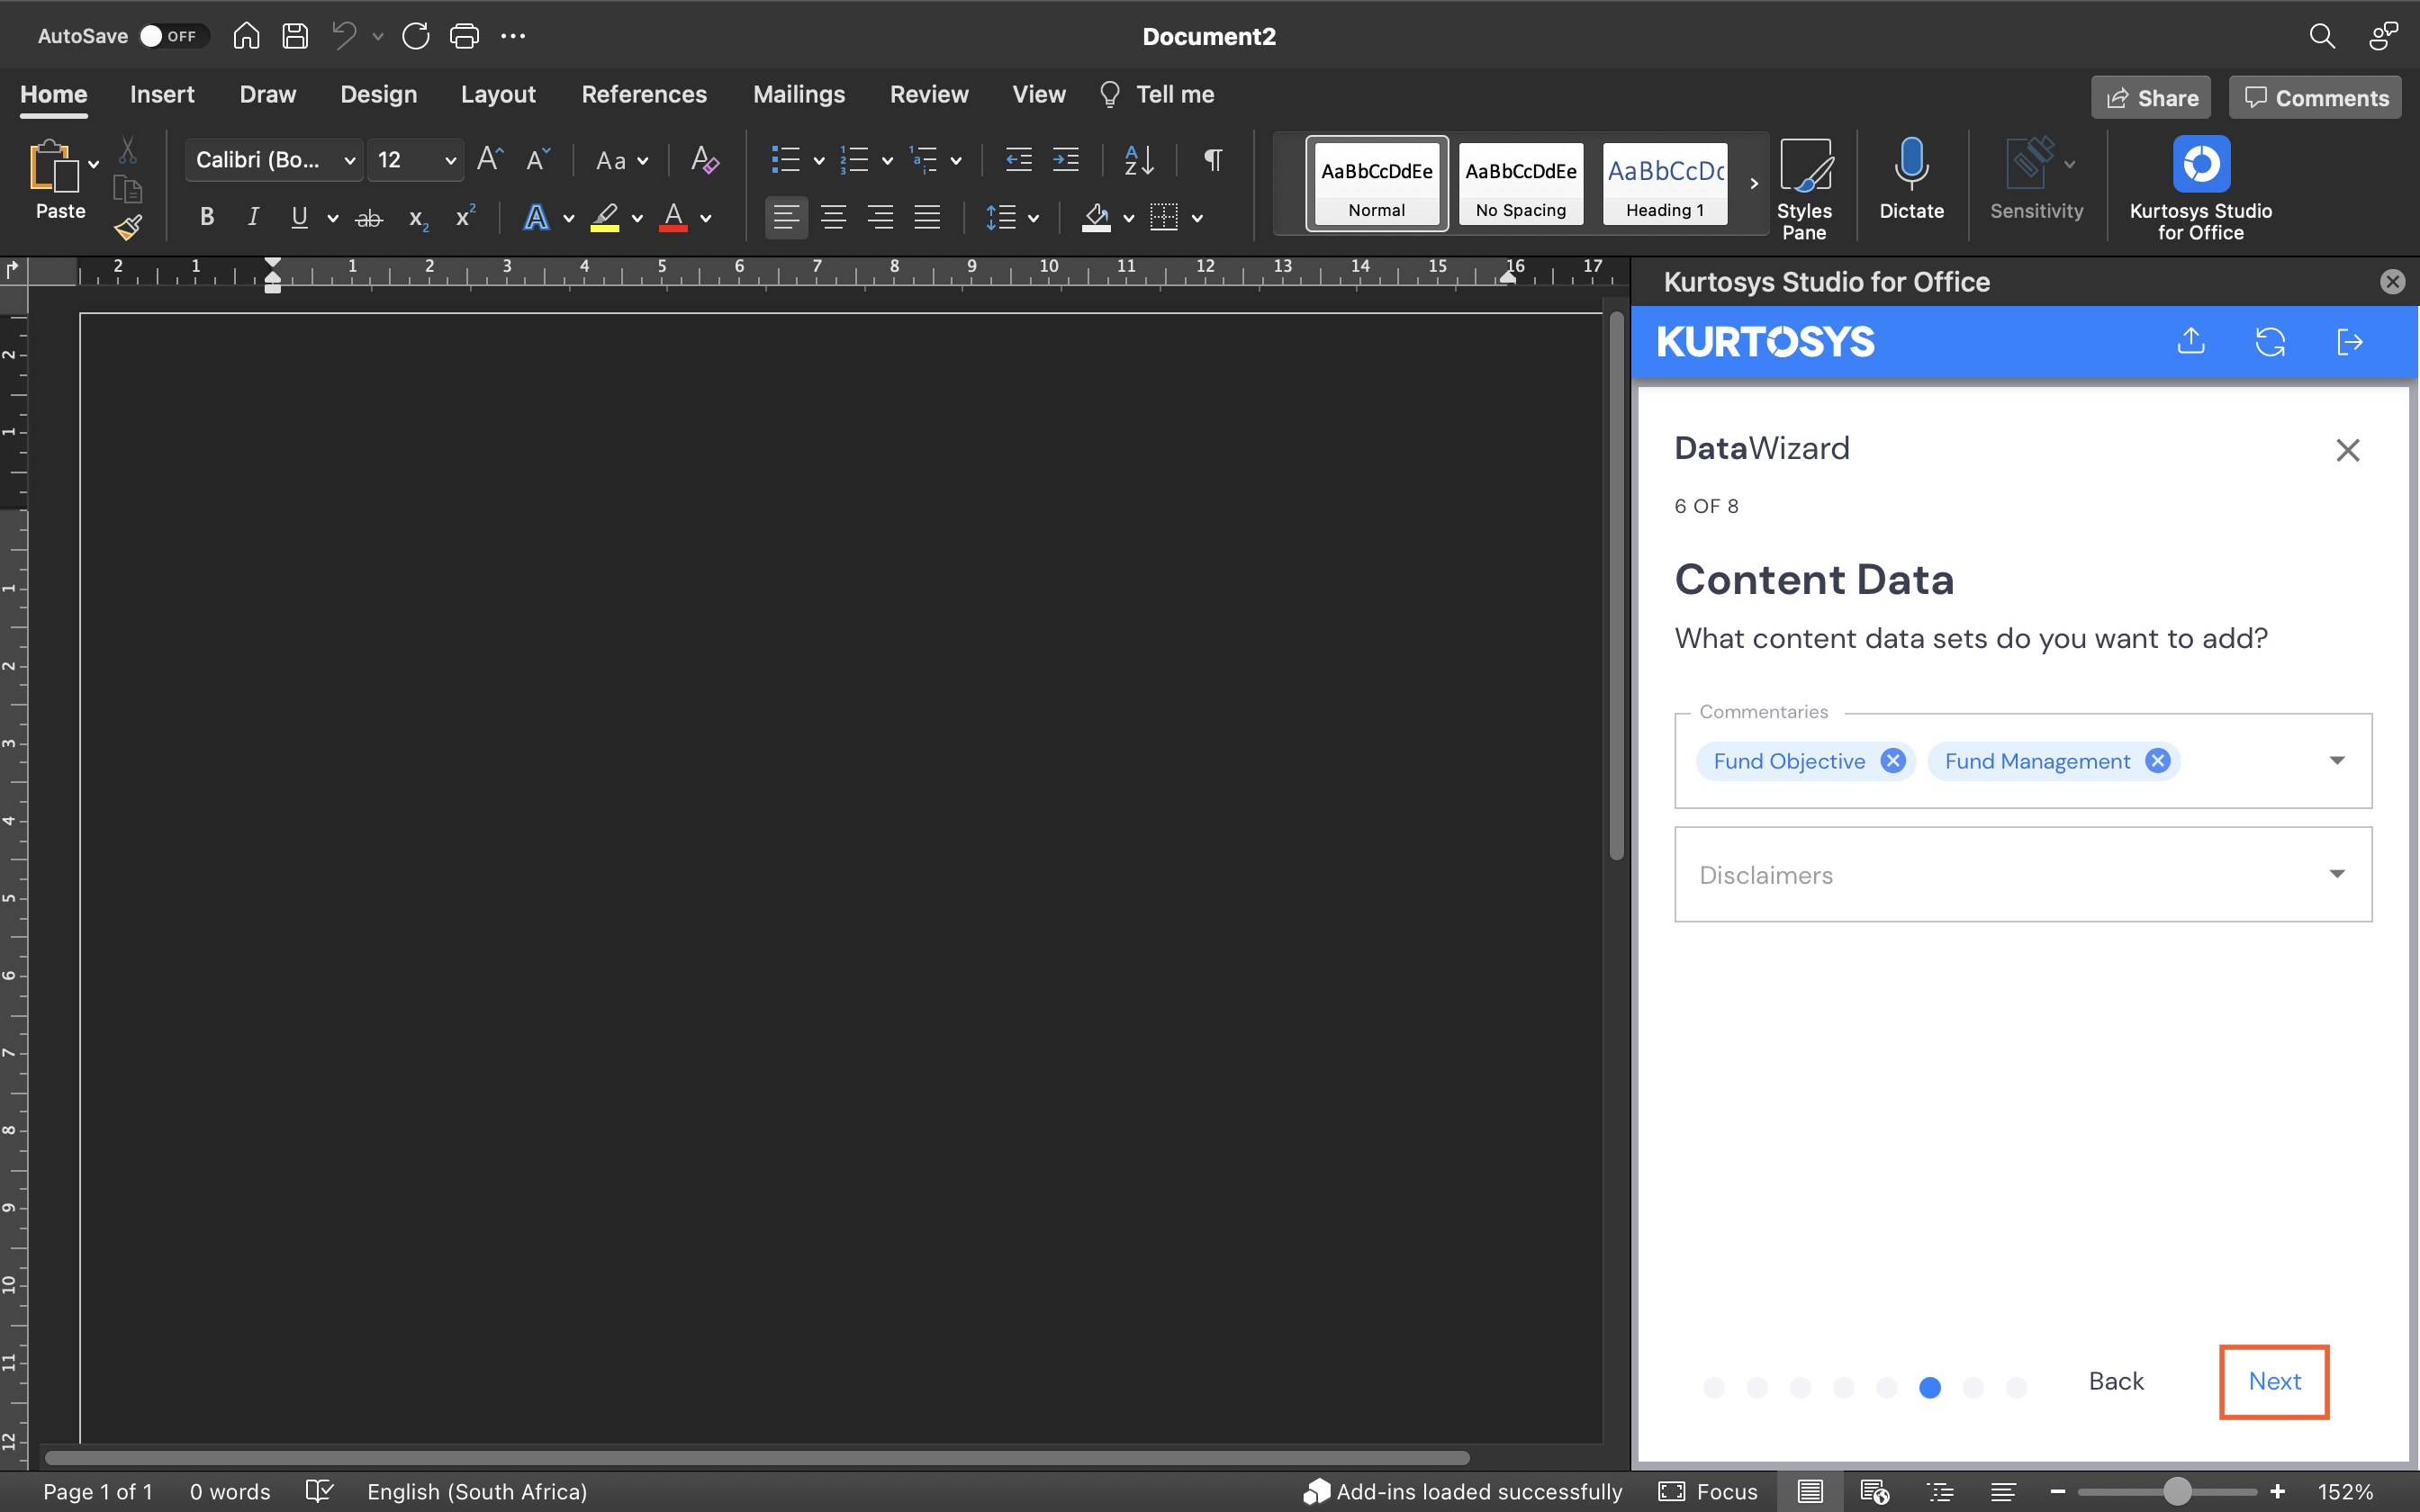
Content Data
- Content Data – use the dropdown arrow to select any Commentaries or Disclaimers you would like to include in your document. Multiple items can be selected, or click ALL to access all properties for each property type.
- Click Next.
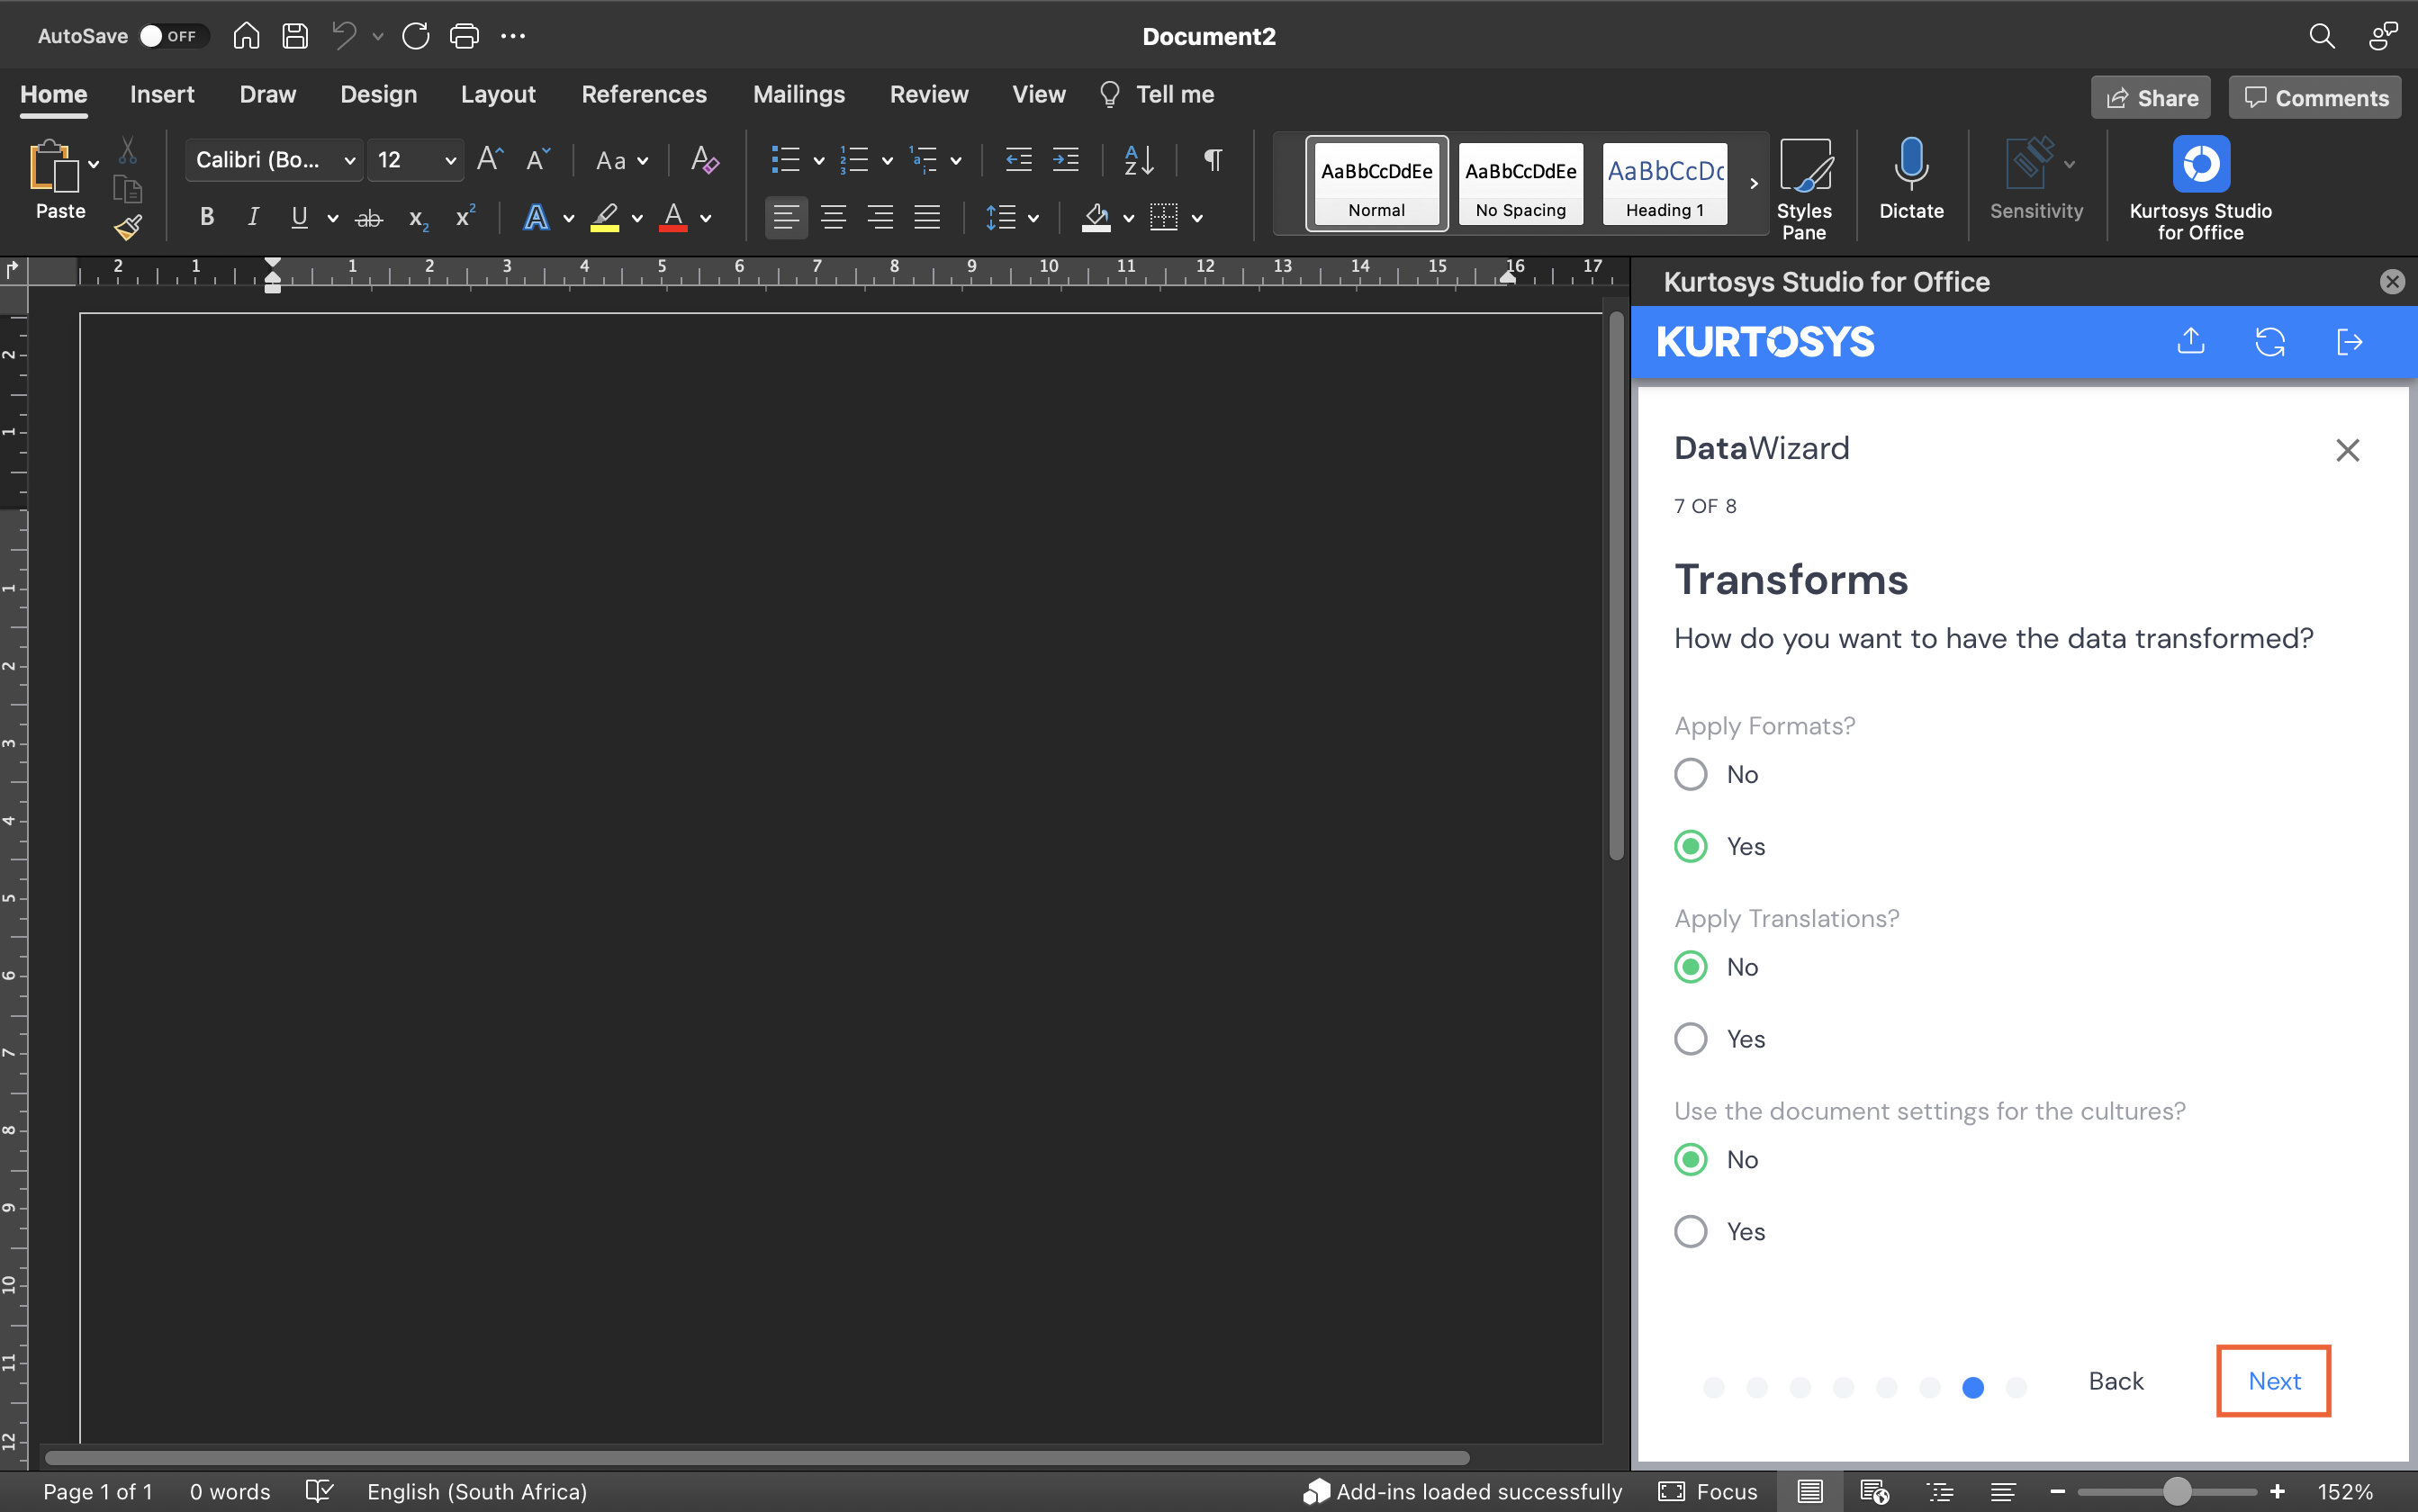
Transforms
- Transforms:
- Apply Formats – select Yes to apply formatting to data (e.g. date/number formats), or No to use data as is.
- Apply Translations – select Yes to use translated data or No to use Base language only.
- Use the document settings for the cultures – select Yes to use the overriding culture settings (explained below under Data Set buttons) or No to use specific culture settings per data set, setup in the next screen.
- Click Next.
Culture
- Use the dropdown arrow to select a Base Culture and a Document Culture (if translations will be required).
- Click Next.
Summary
- Use the down arrows to preview your data.
- Click Finish.
Repeat the steps above to add more data sets as needed.
Data Set Buttons
After adding a data set, use the following buttons for quick access to:
Refresh Data in a data set
A notification will appear when there are any changes in the data or queries that are not reflecting in your document. Clicking refresh will update all queries in your document template to show the correct data and the blue dot notification will be removed.
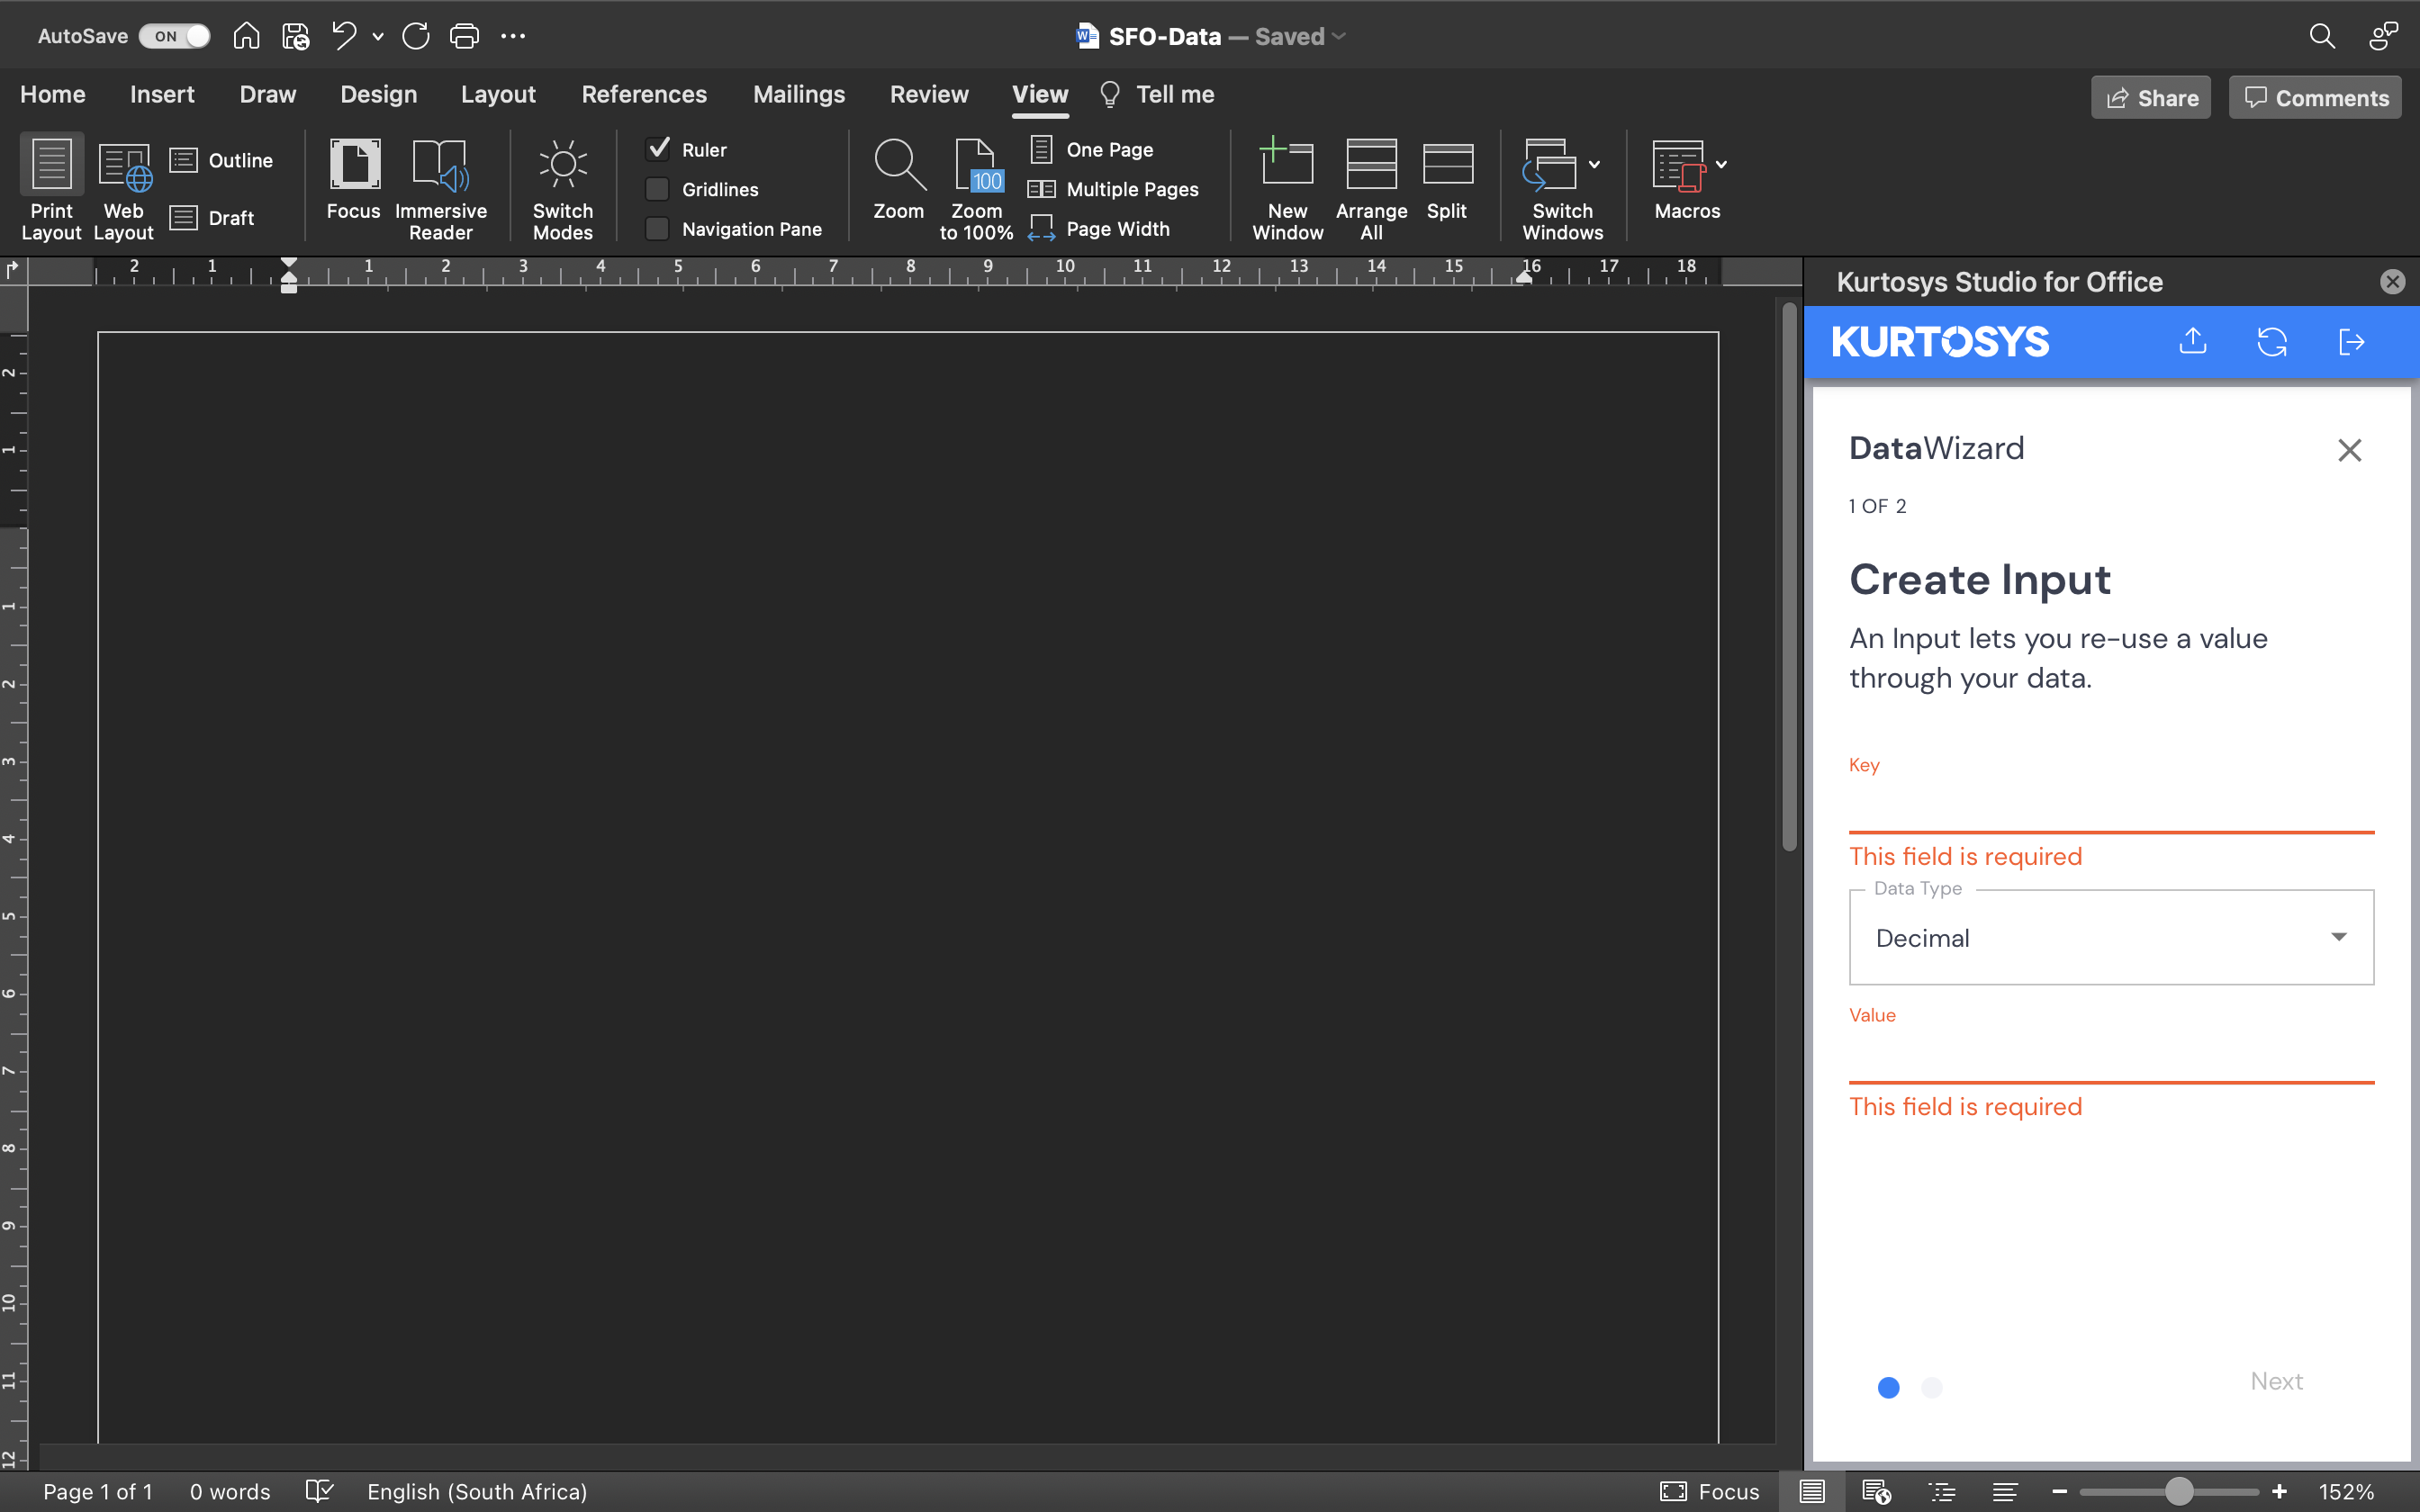
Add Inputs to data. Create a reusable key and value pair of a particular data type to be reused.
Culture settings for overriding cultures for Base and Documents. If you have not set cultures per data set, set global Base and Document cultures.
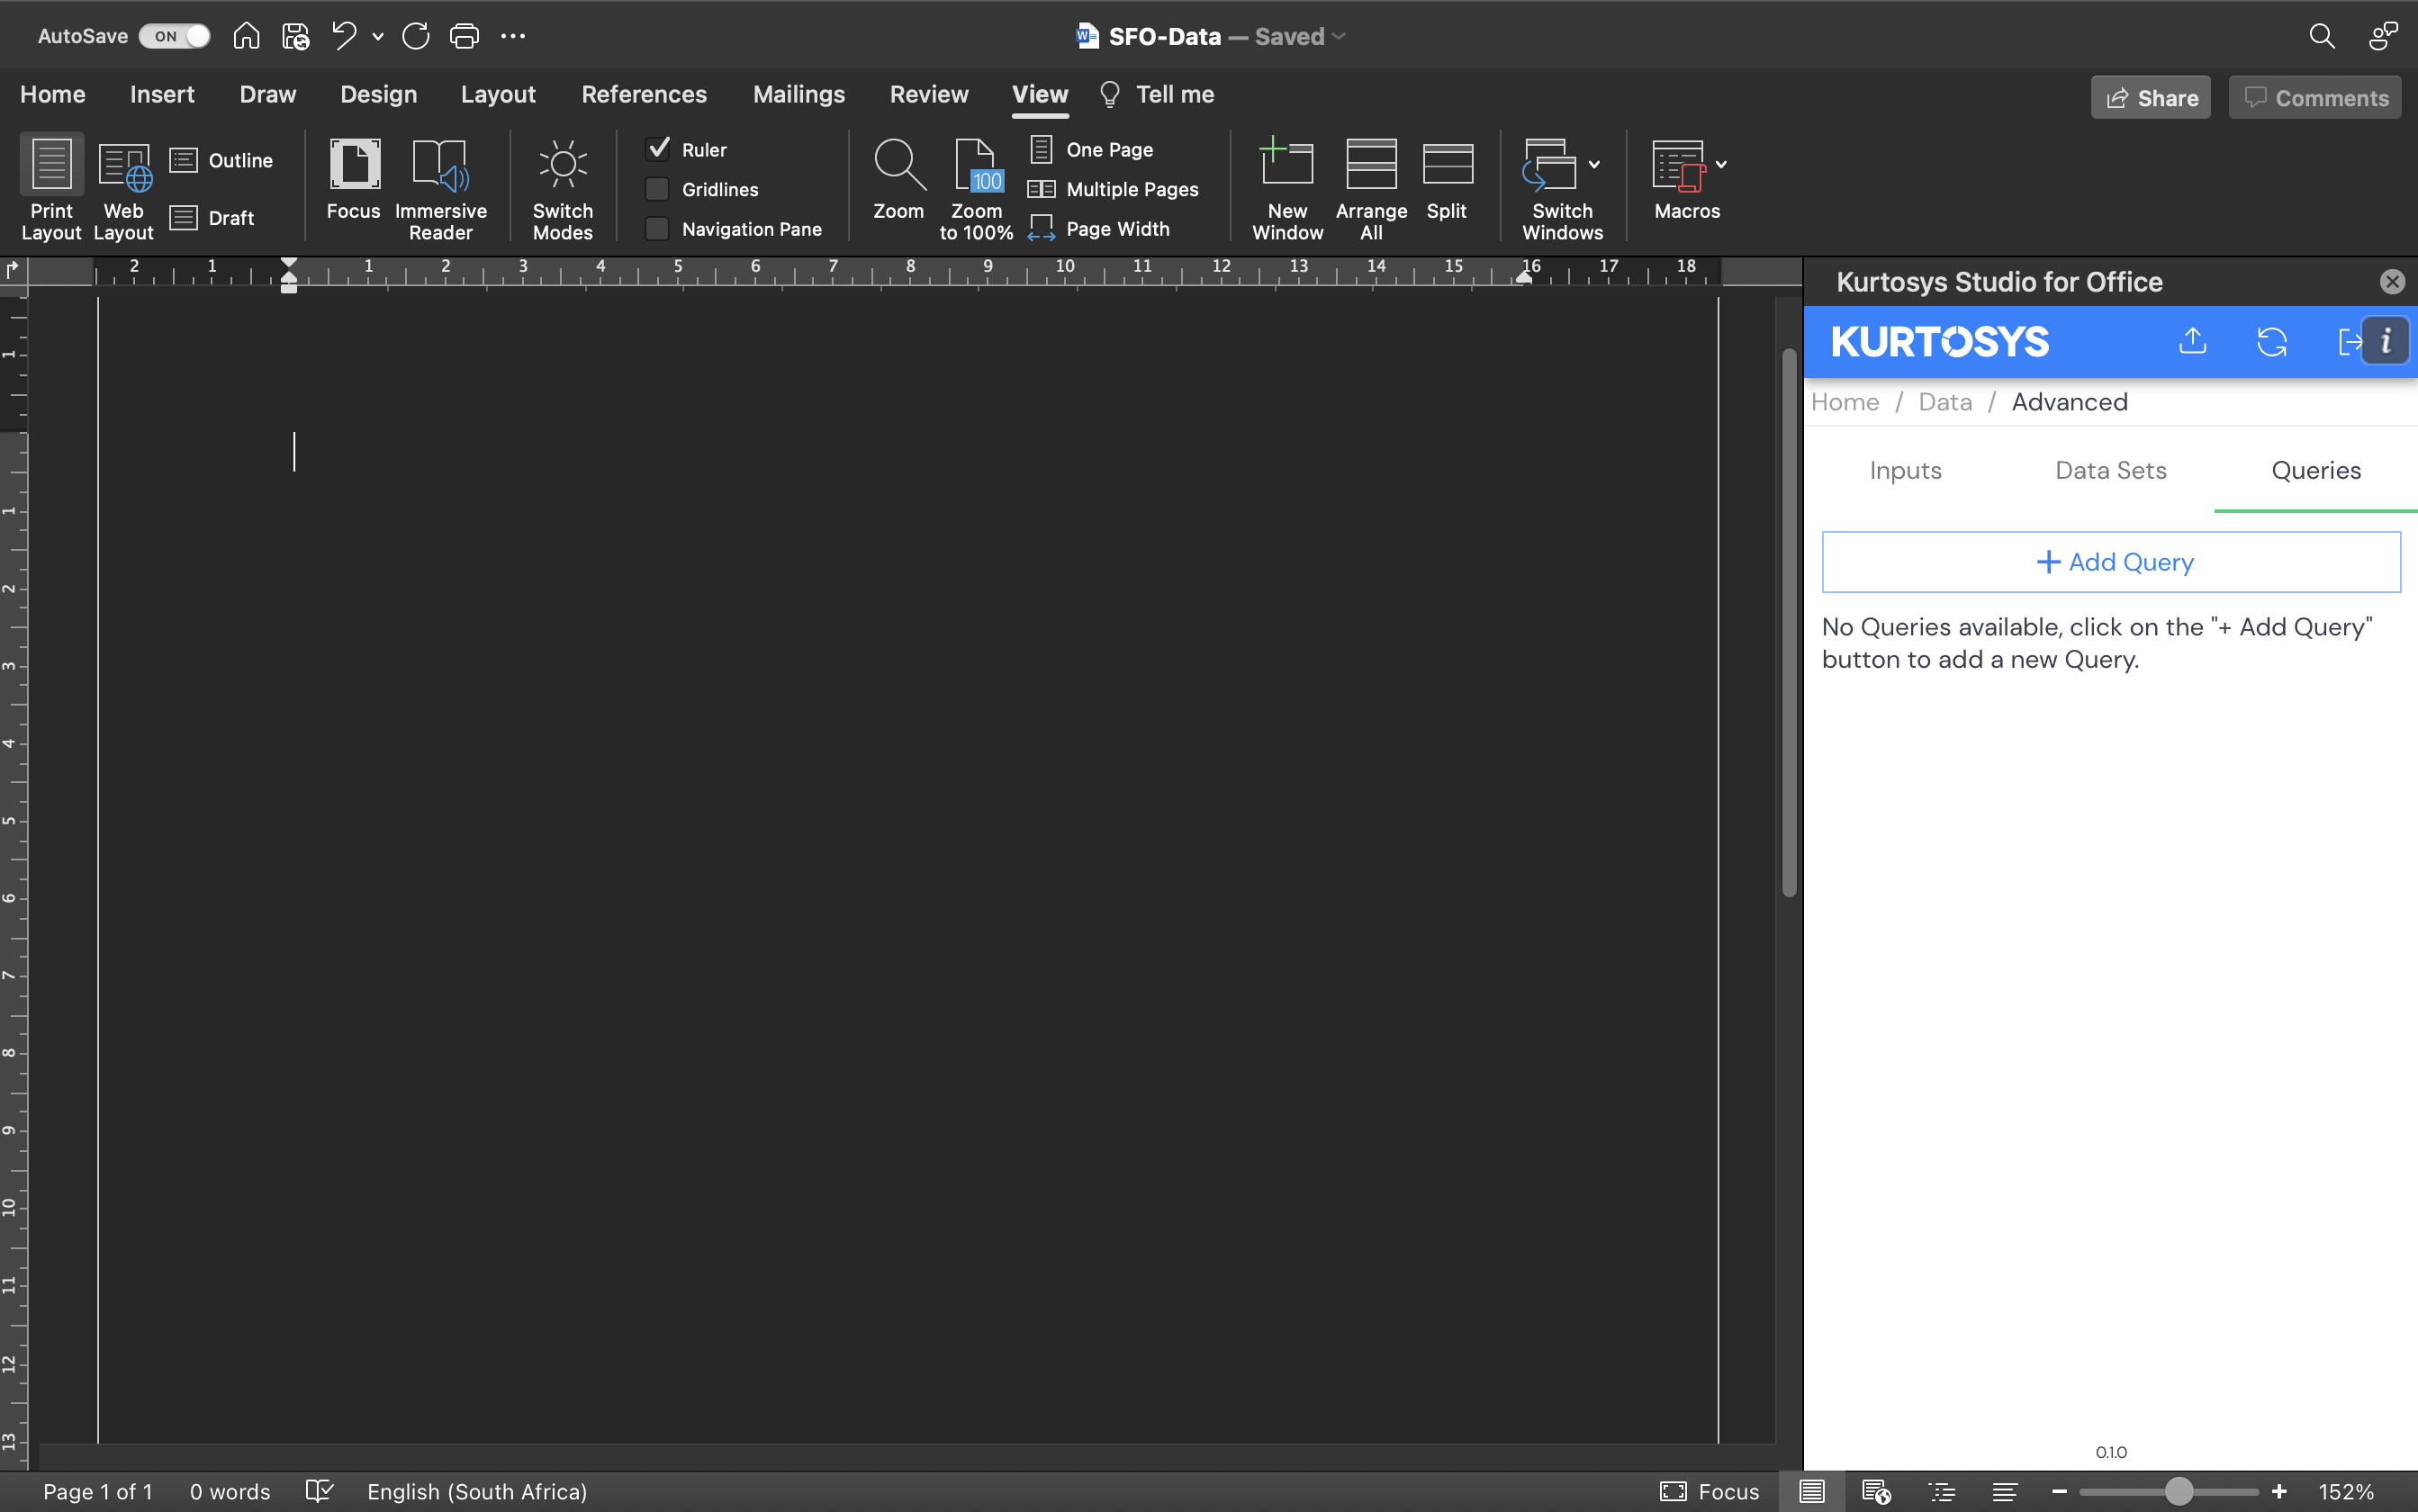
View existing, add additional, or delete JSON structure of Inputs, Data Sets or Queries.
Editing Data Sets
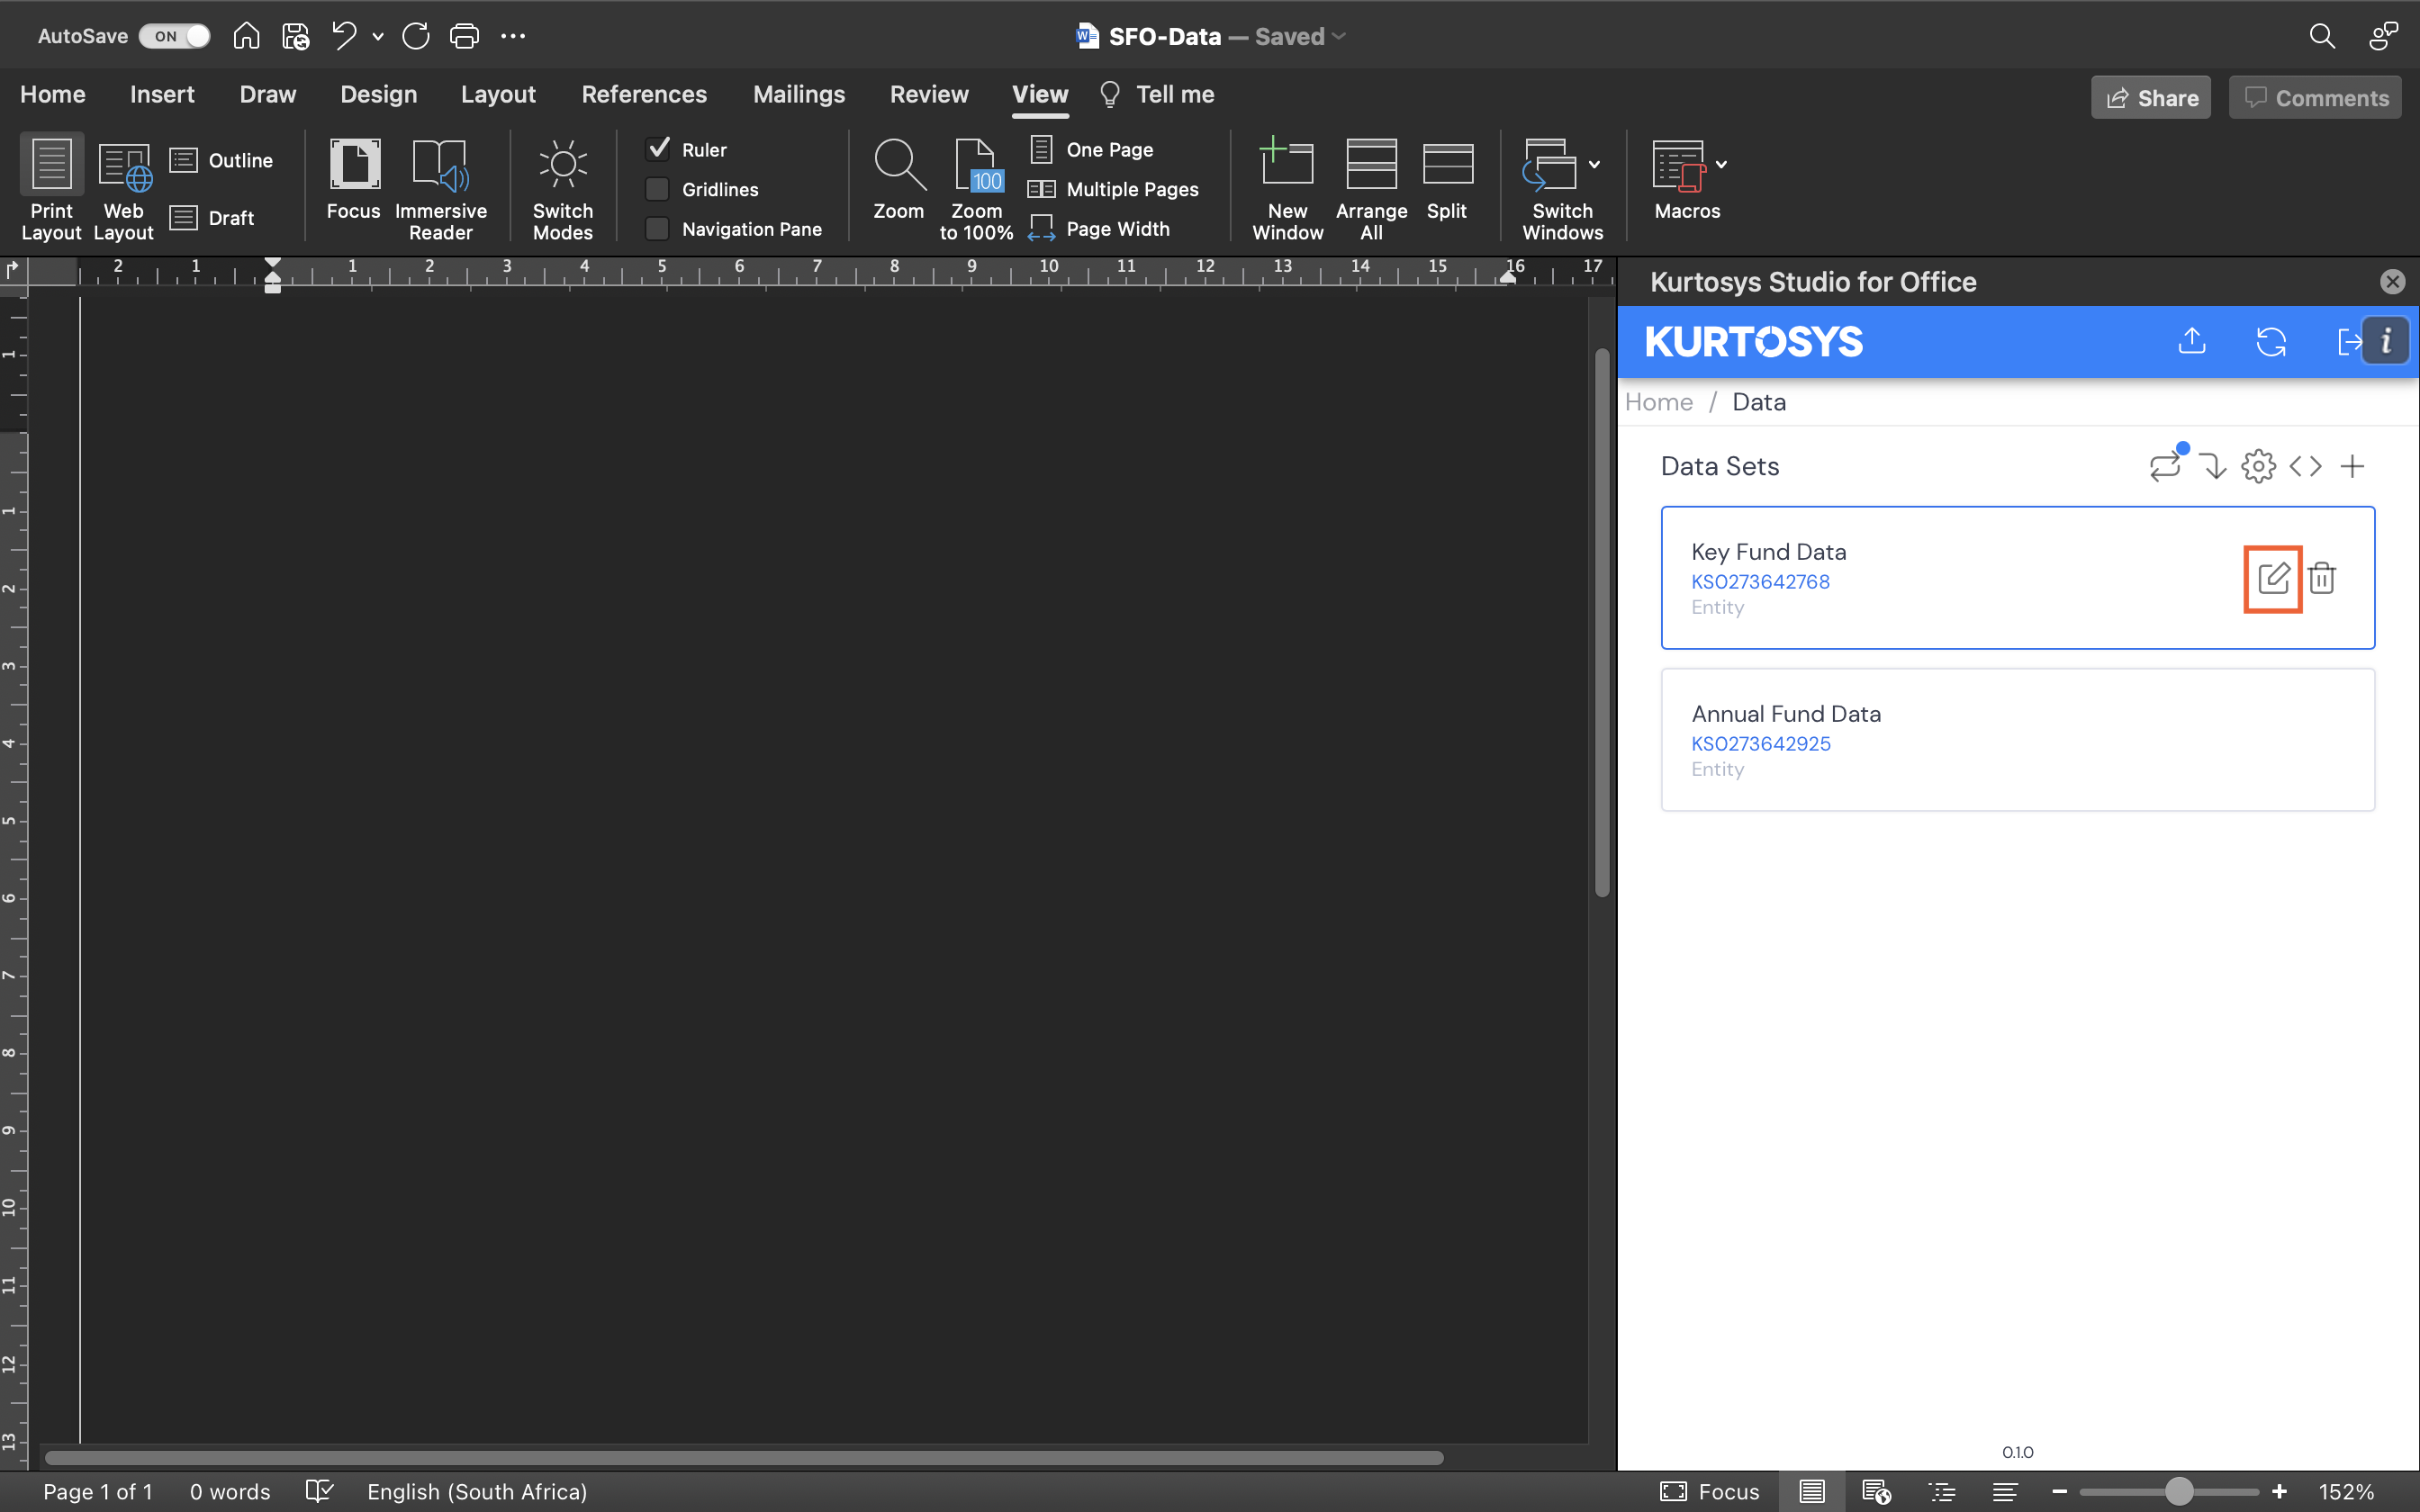
All data sets will be listed in the Data window.
- Hover over a data set to access the notepad icon.
- Click the icon to begin editing.
- Use Next and Back to navigate to the section to be edited.
- After editing, click Next to get to the Summary screen, then click Finish.
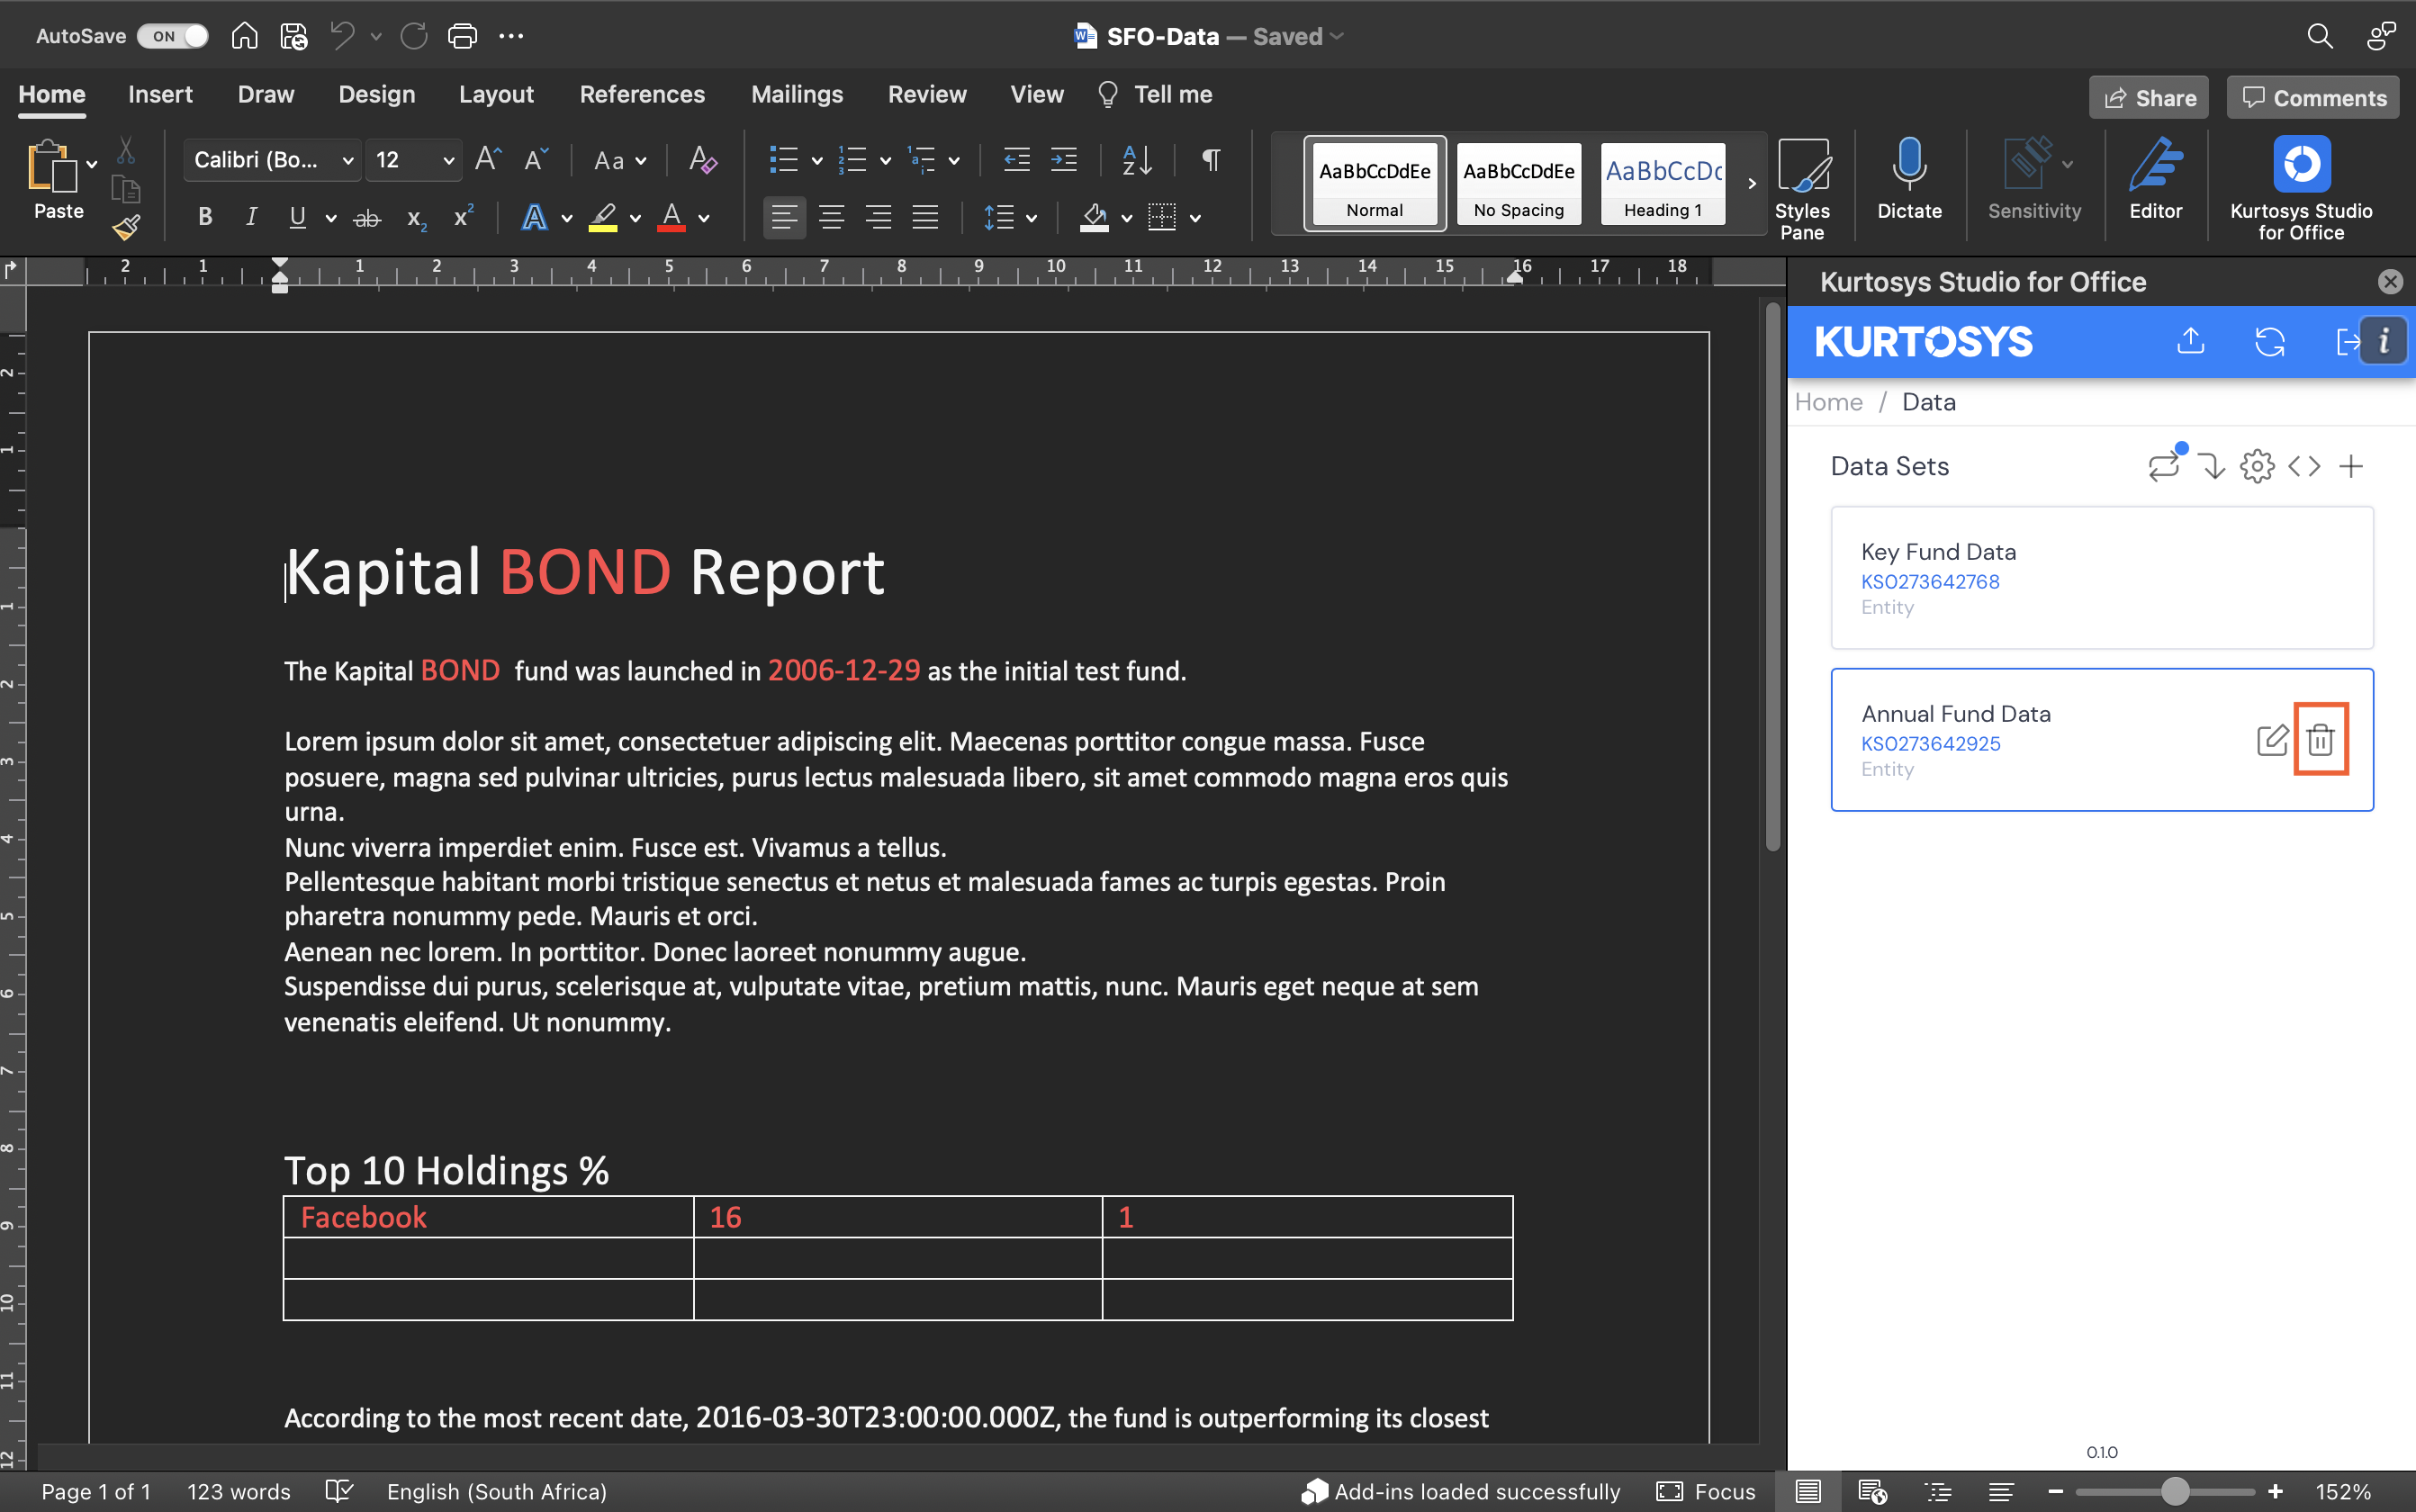
Deleting Data Sets
All data sets will be listed in the Data window.
- Hover over a data set to access the trash icon.
- Click Confirm to continue.
Note: If any data points in your documents use a query from a data set, the trash icon will not be available when hovering over that data set to prevent it being accidentally deleted resulting in a broken document.
Adding Data Points to Documents
Data points can be added inline with text, inside table cells or in any other document component and can be styled as needed using Word’s native text formatting options.
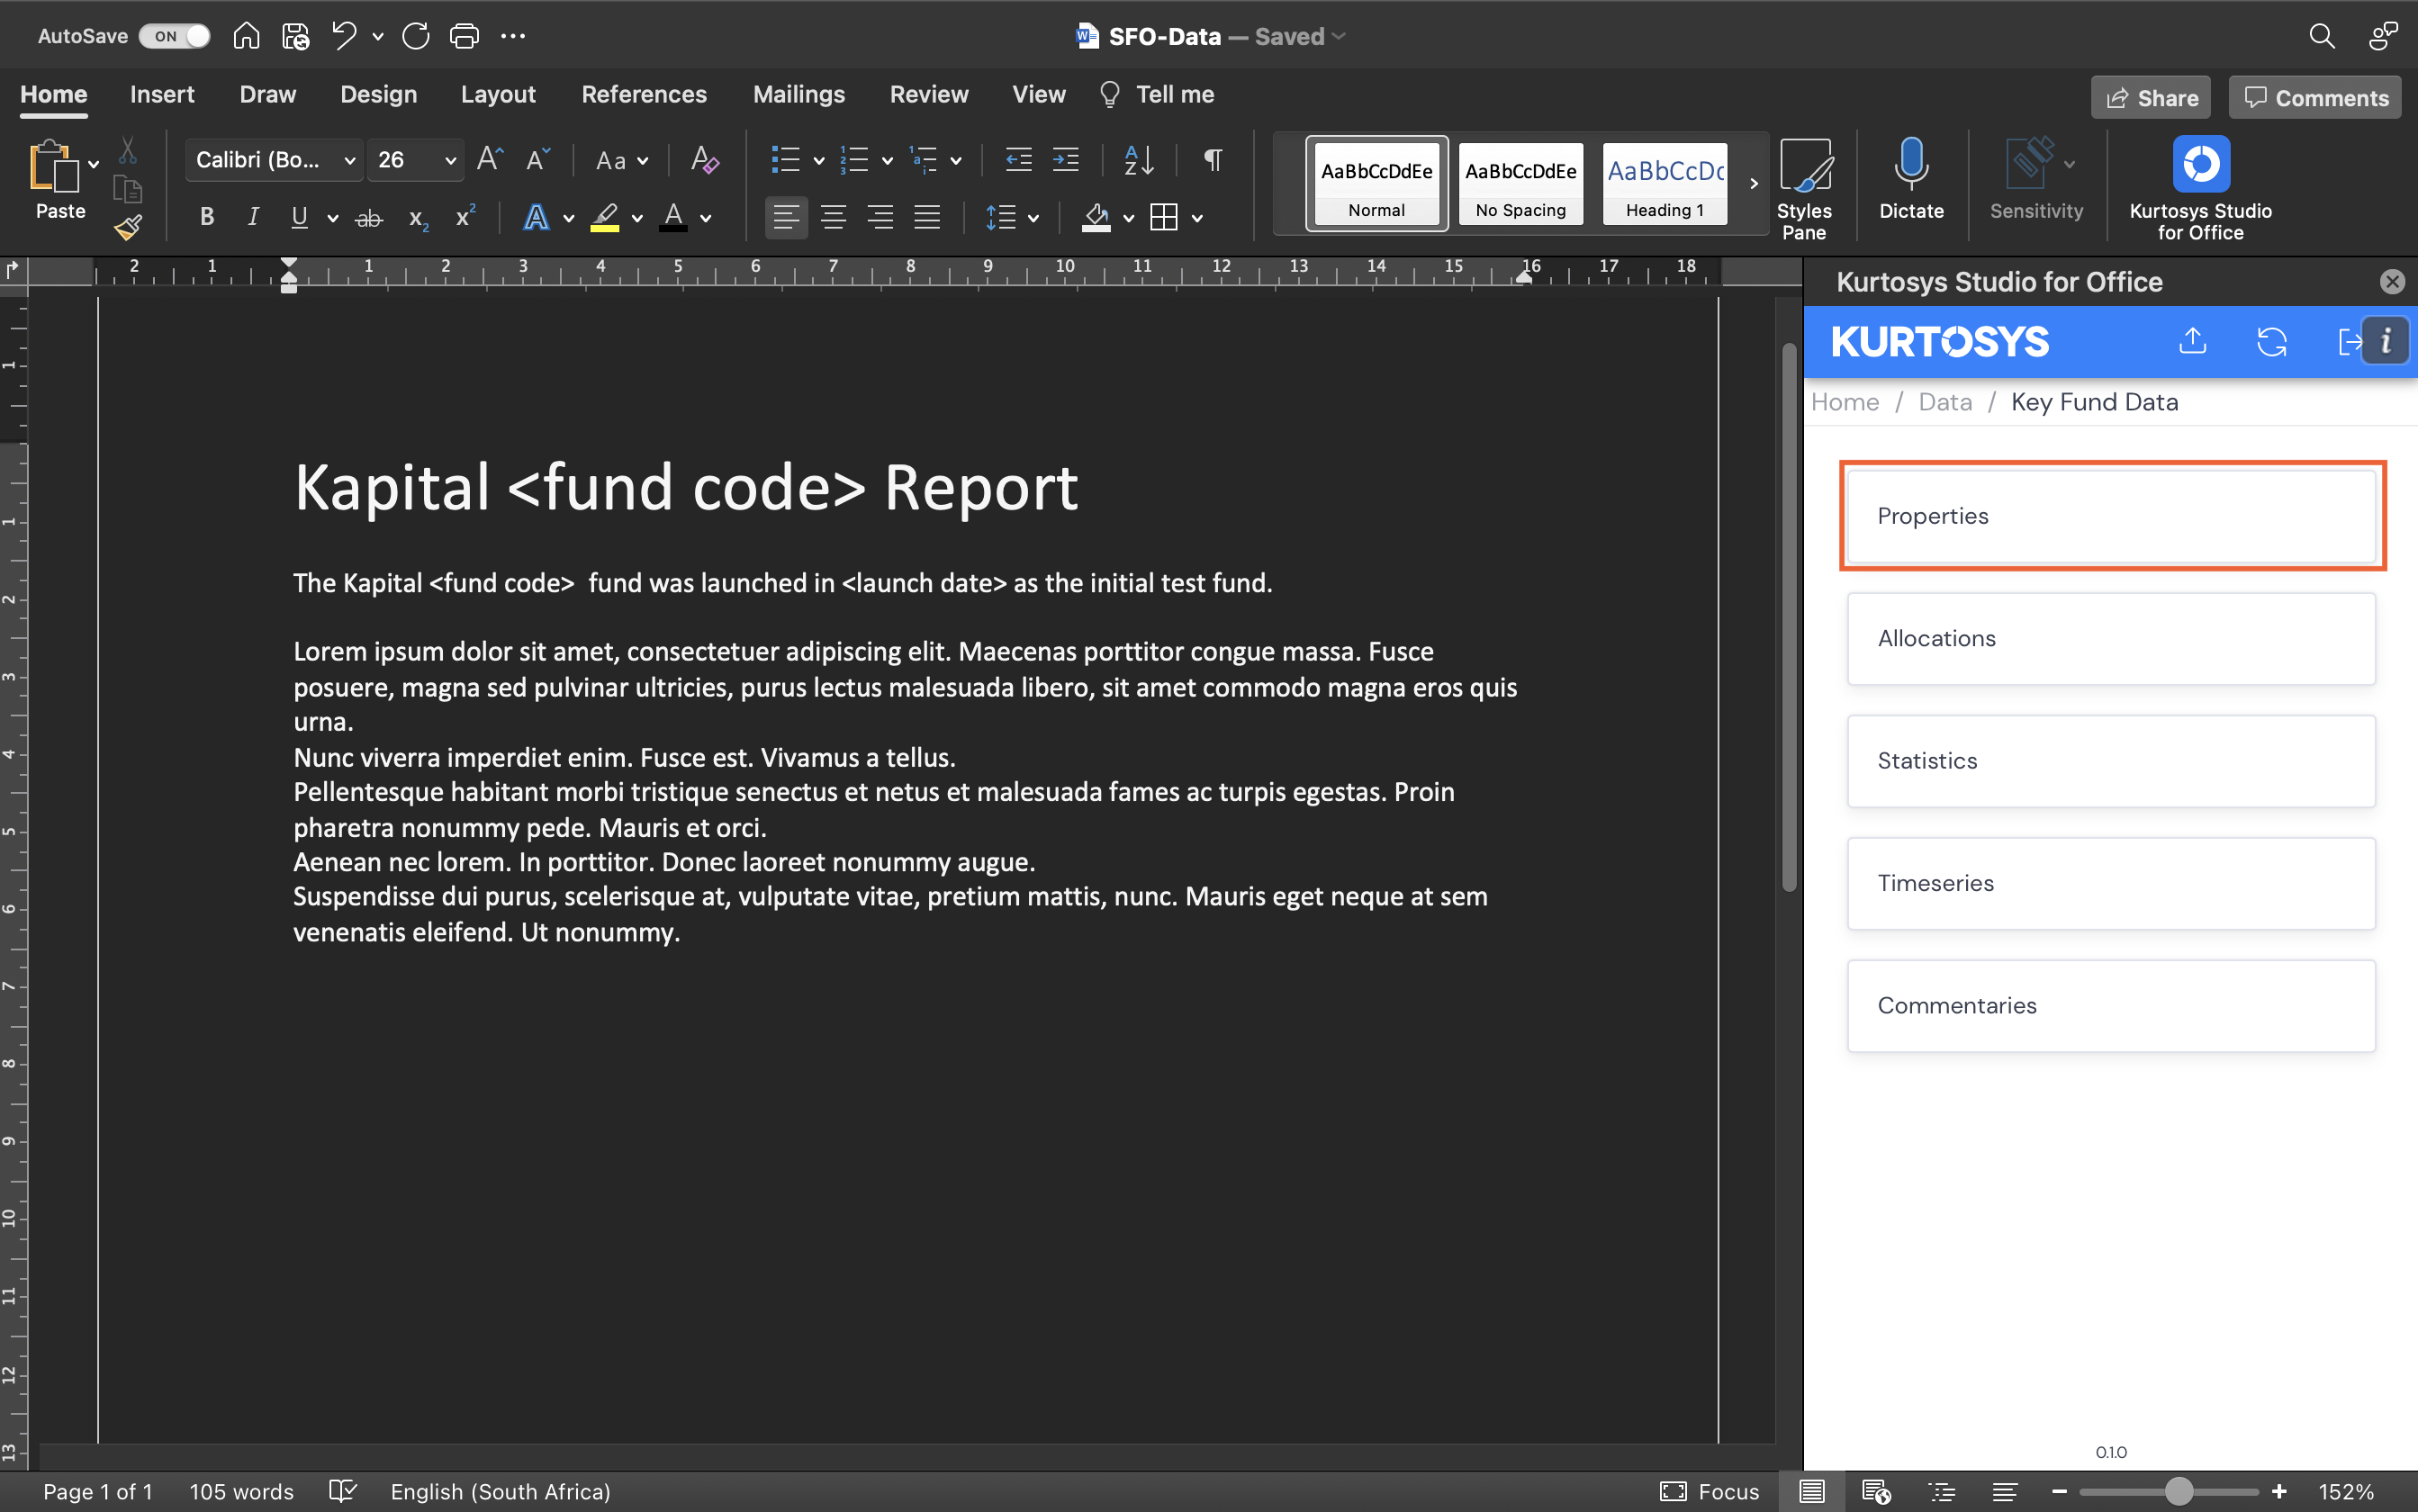
Adding Entity Properties
- Click in the document position where the data point is to be filled.
- Click on the appropriate data set from which to select the data.
- Select the Property type.
- Scroll or use the search bar to select the appropriate property.
- Click the property or the + sign when hovering over the property to add it to your document.
Note: Data points have been styled in red for easy visibility.
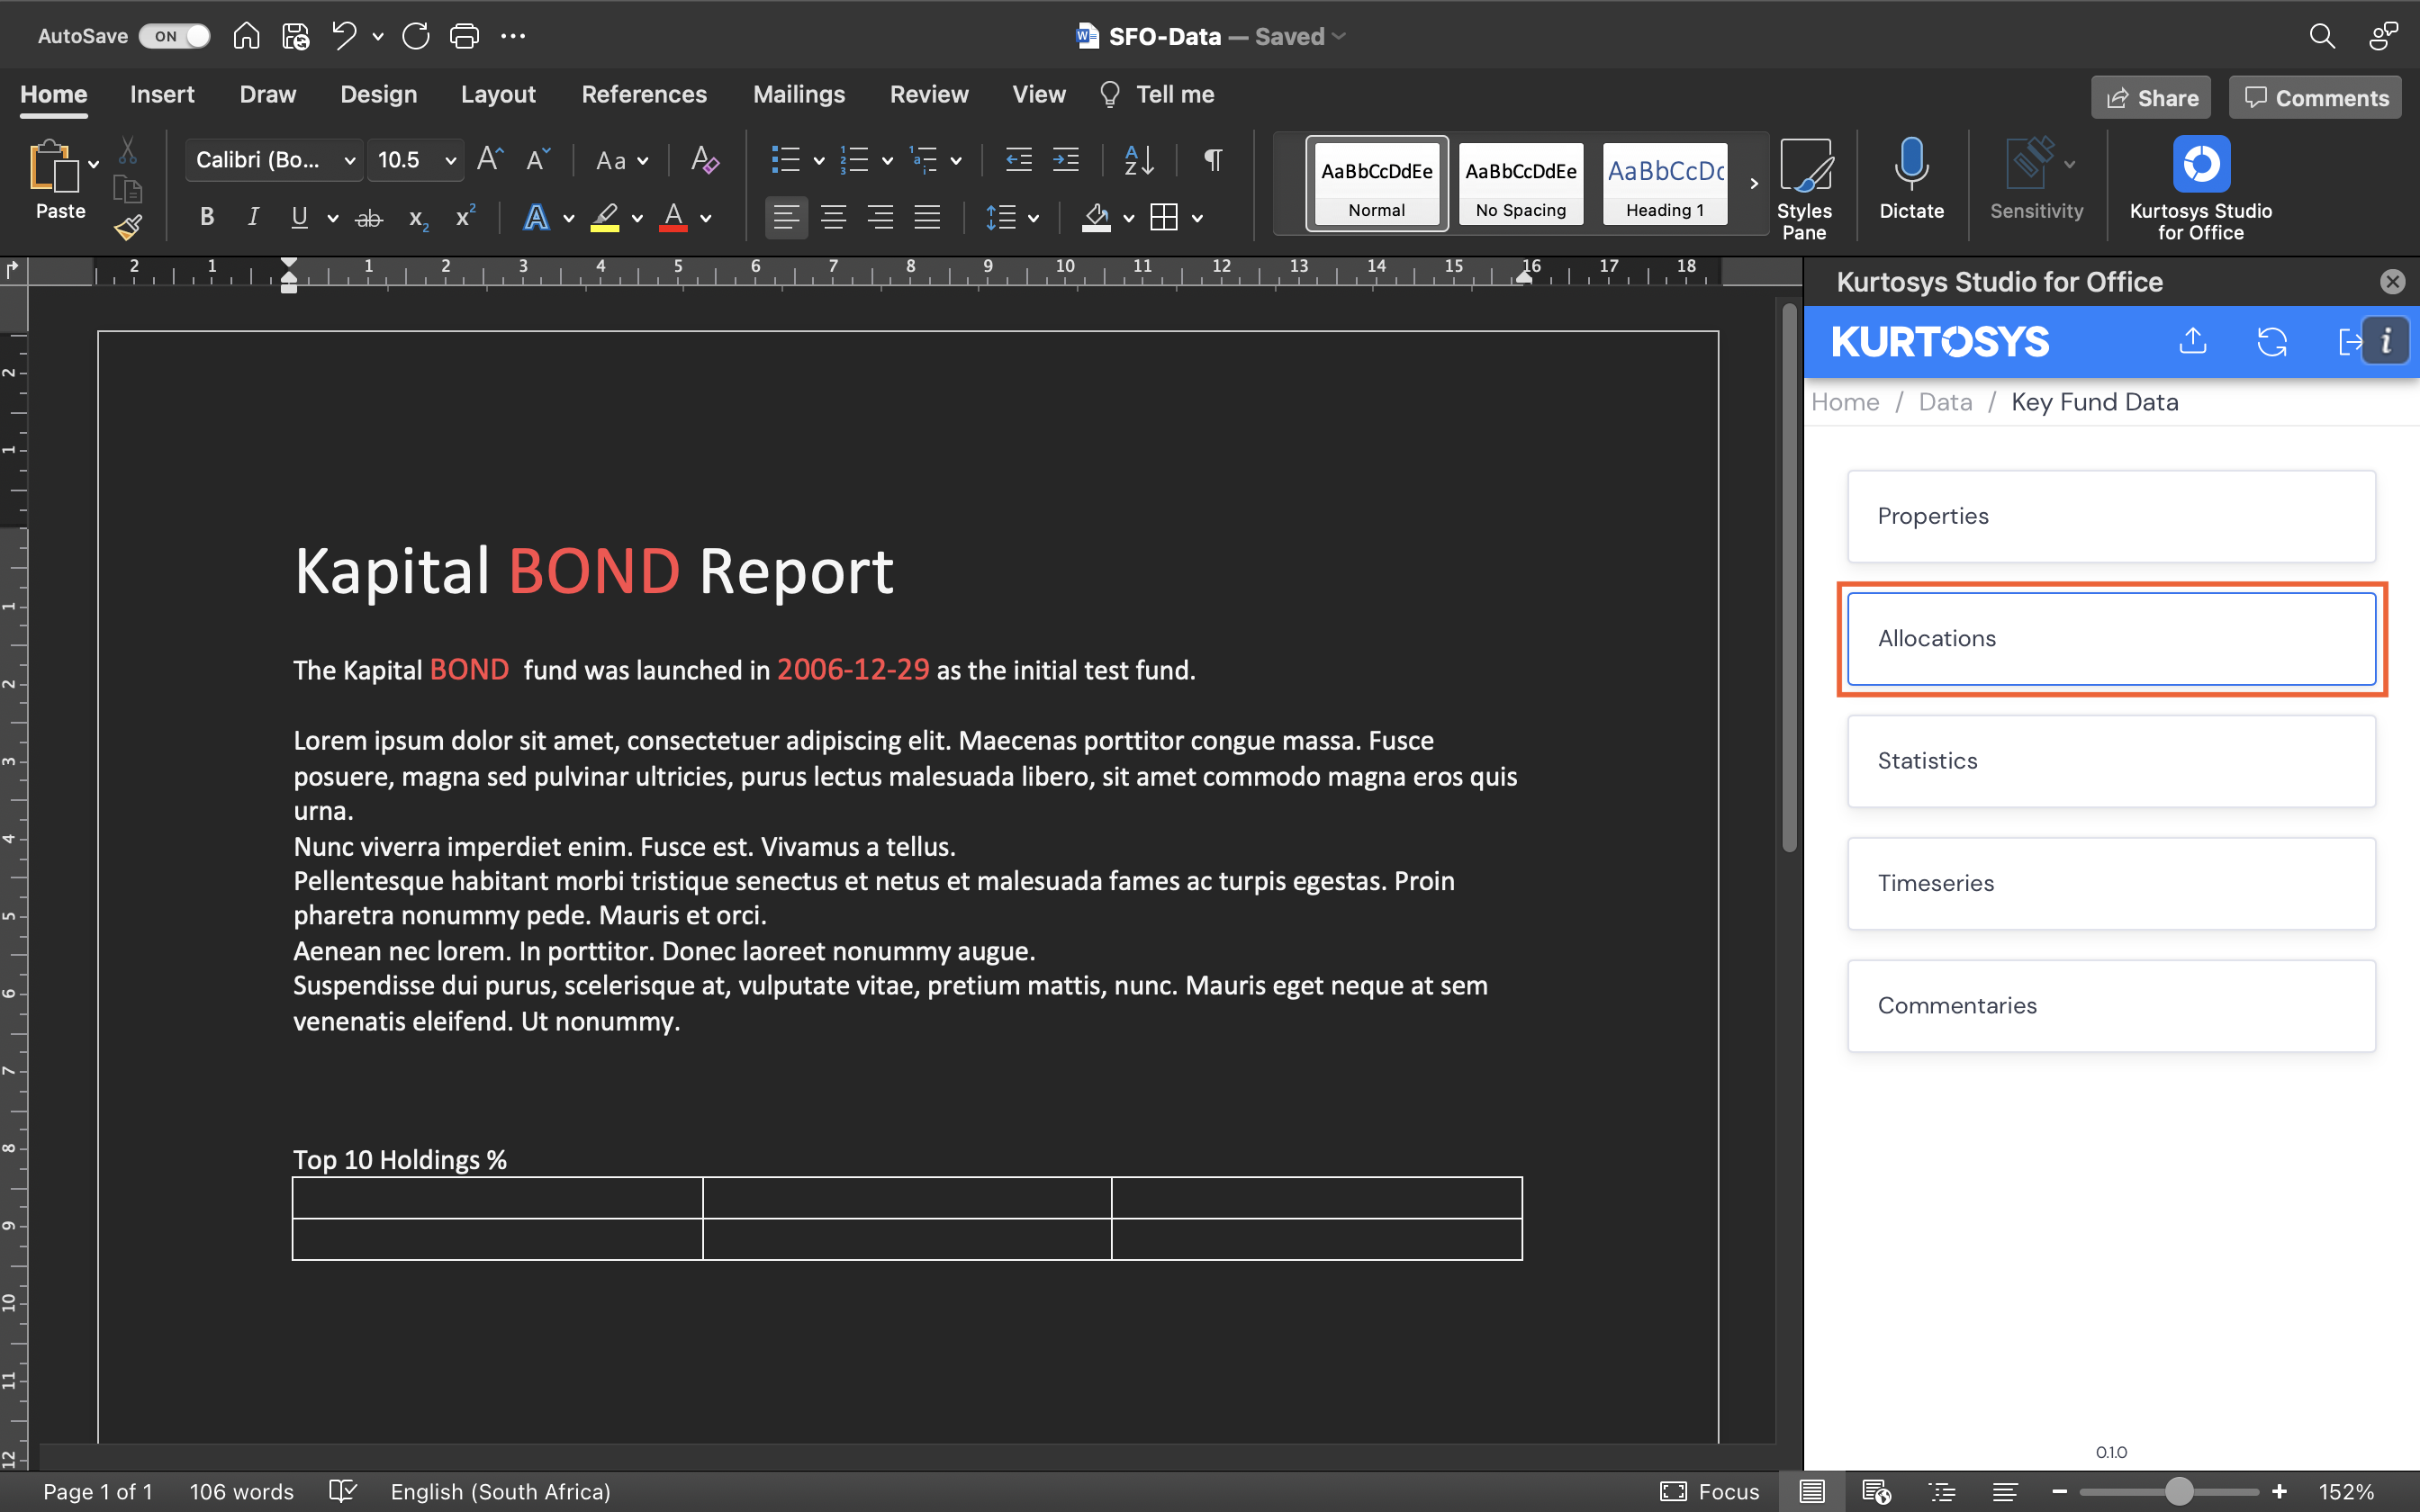
Adding Statistics/Allocations/Timeseries Properties
- Click in the document position where the data point is to be filled.
- Click on the appropriate data set from which to select the data.
- Select the Property type.
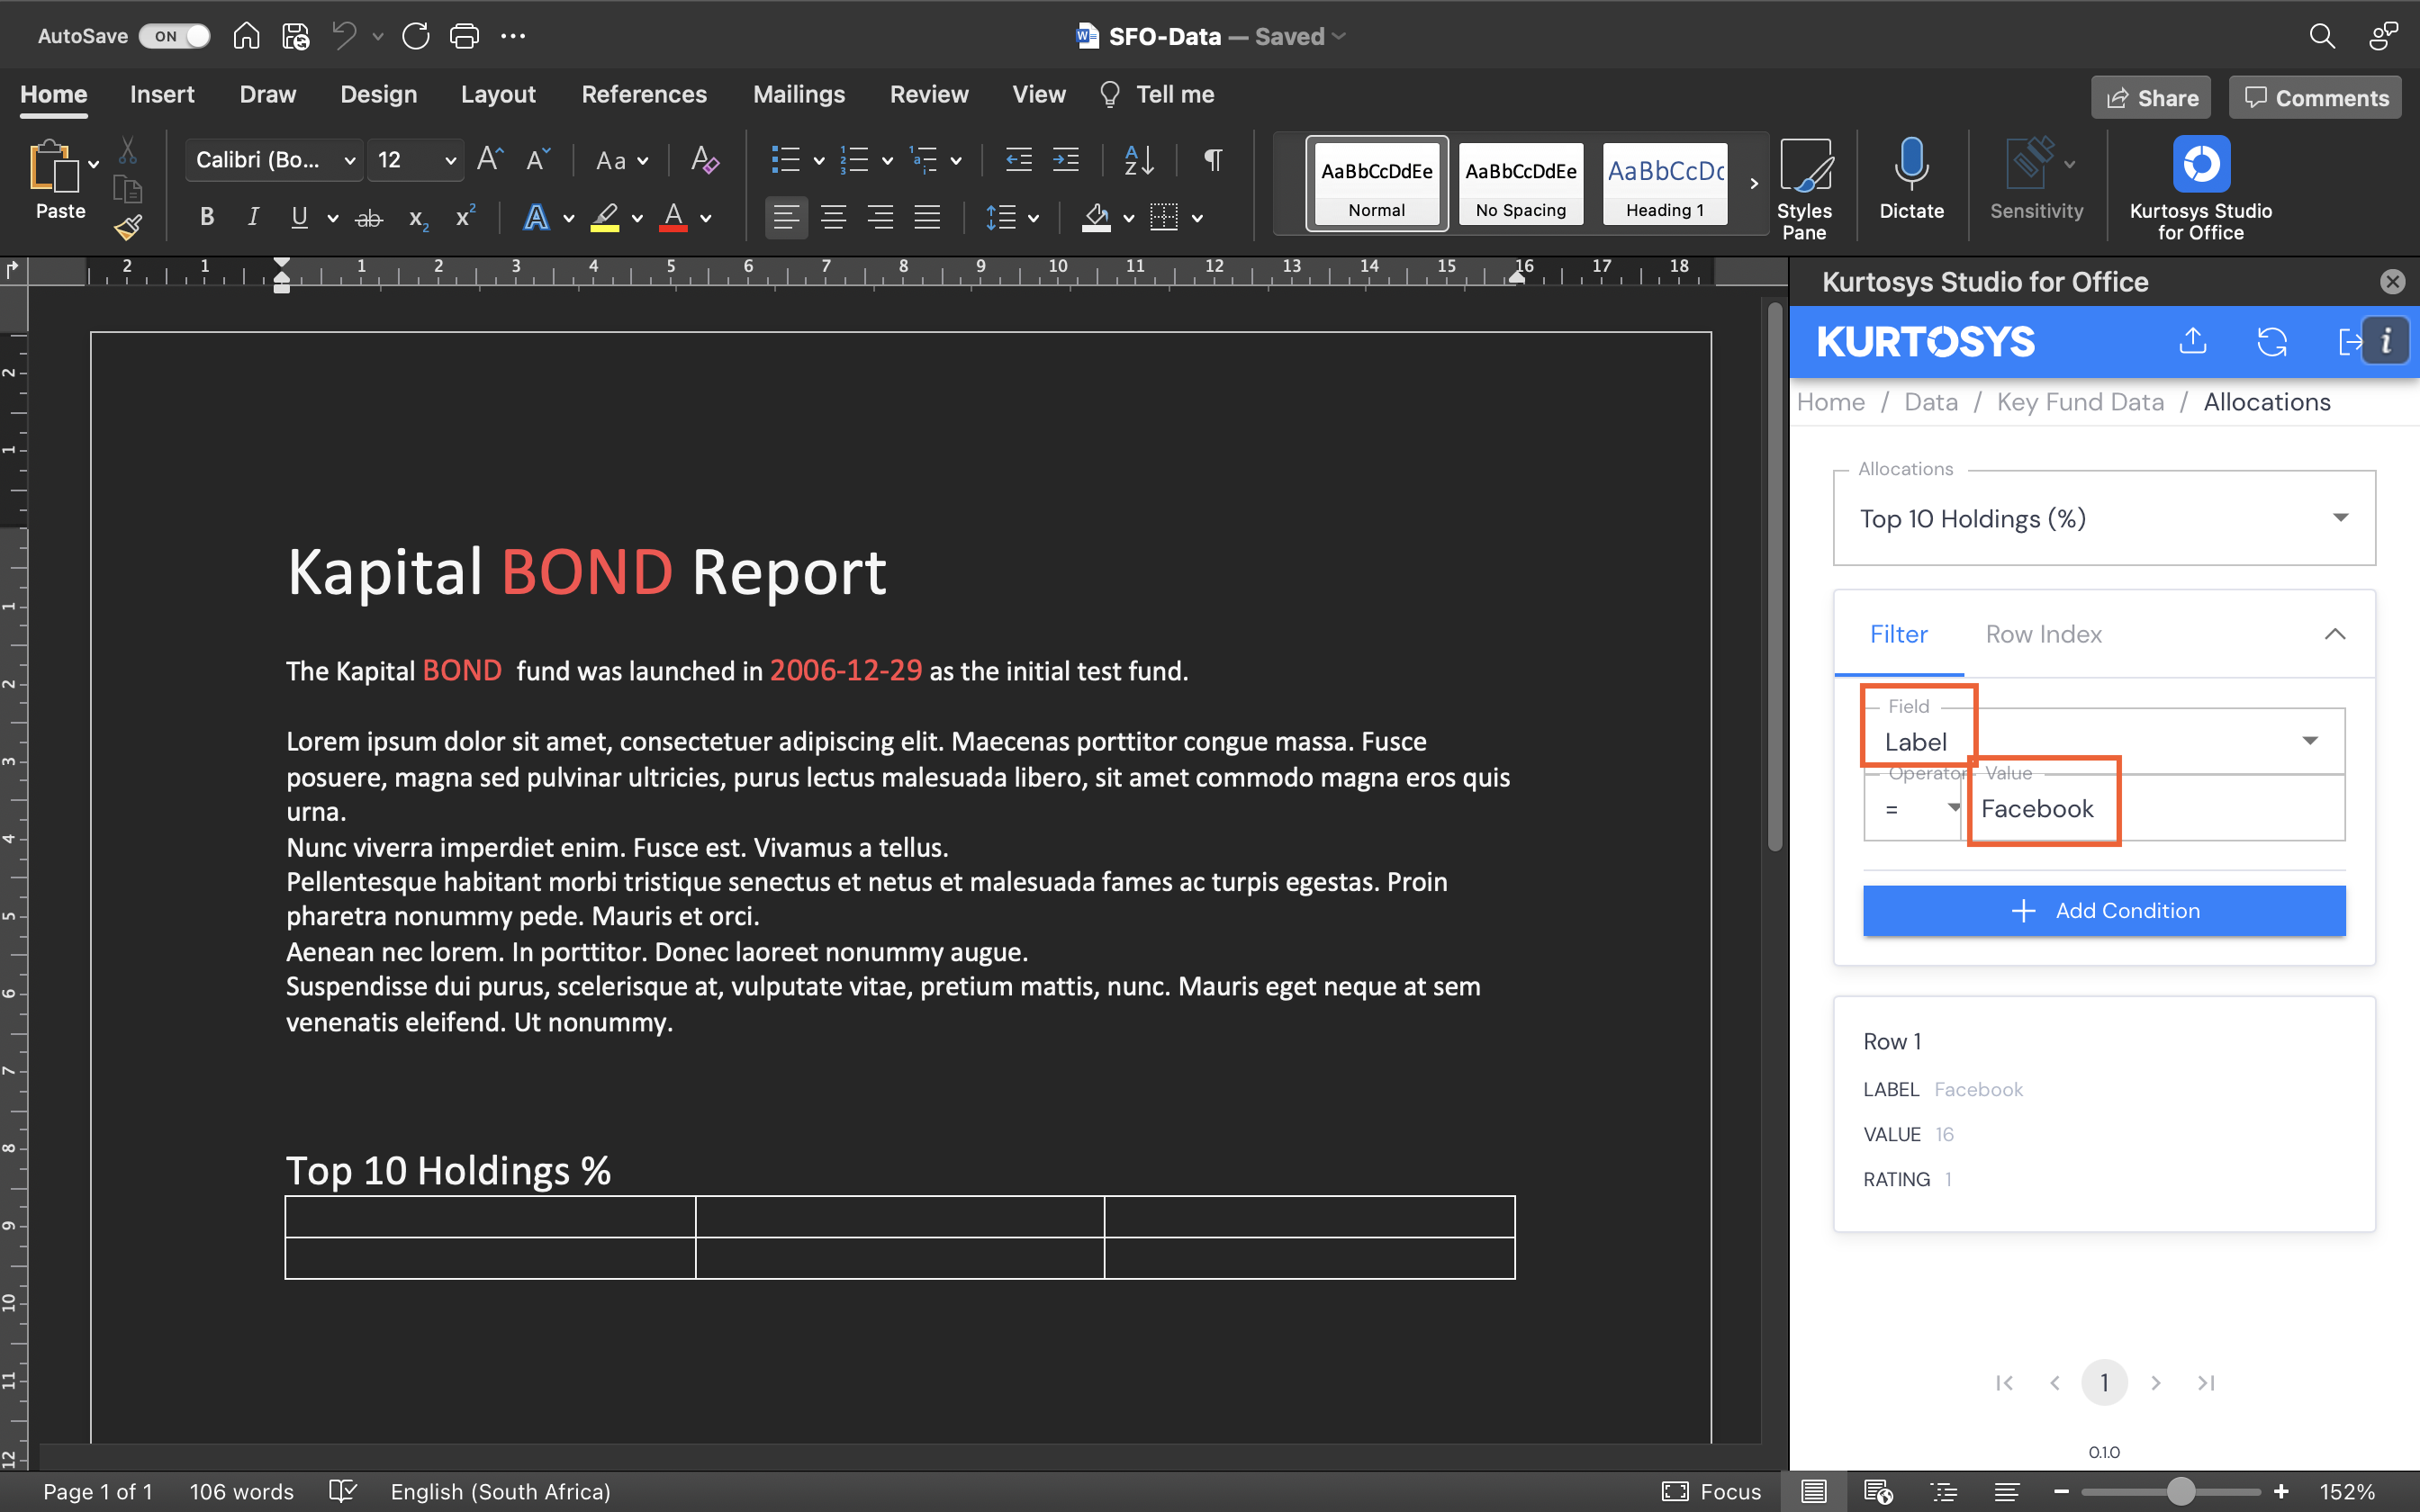
There are 2 options when adding data from Kurtosys Data tables.
Filter: If you are looking for specific data from specific fields in a table, use the Filter tab. You can filter to select based on the value in the field, e.g. “Facebook” should always show first in the table, type “Facebook” into the Value field for Label.
- Click in the document position where the data point is to be filled, then set the field and value to filter by.
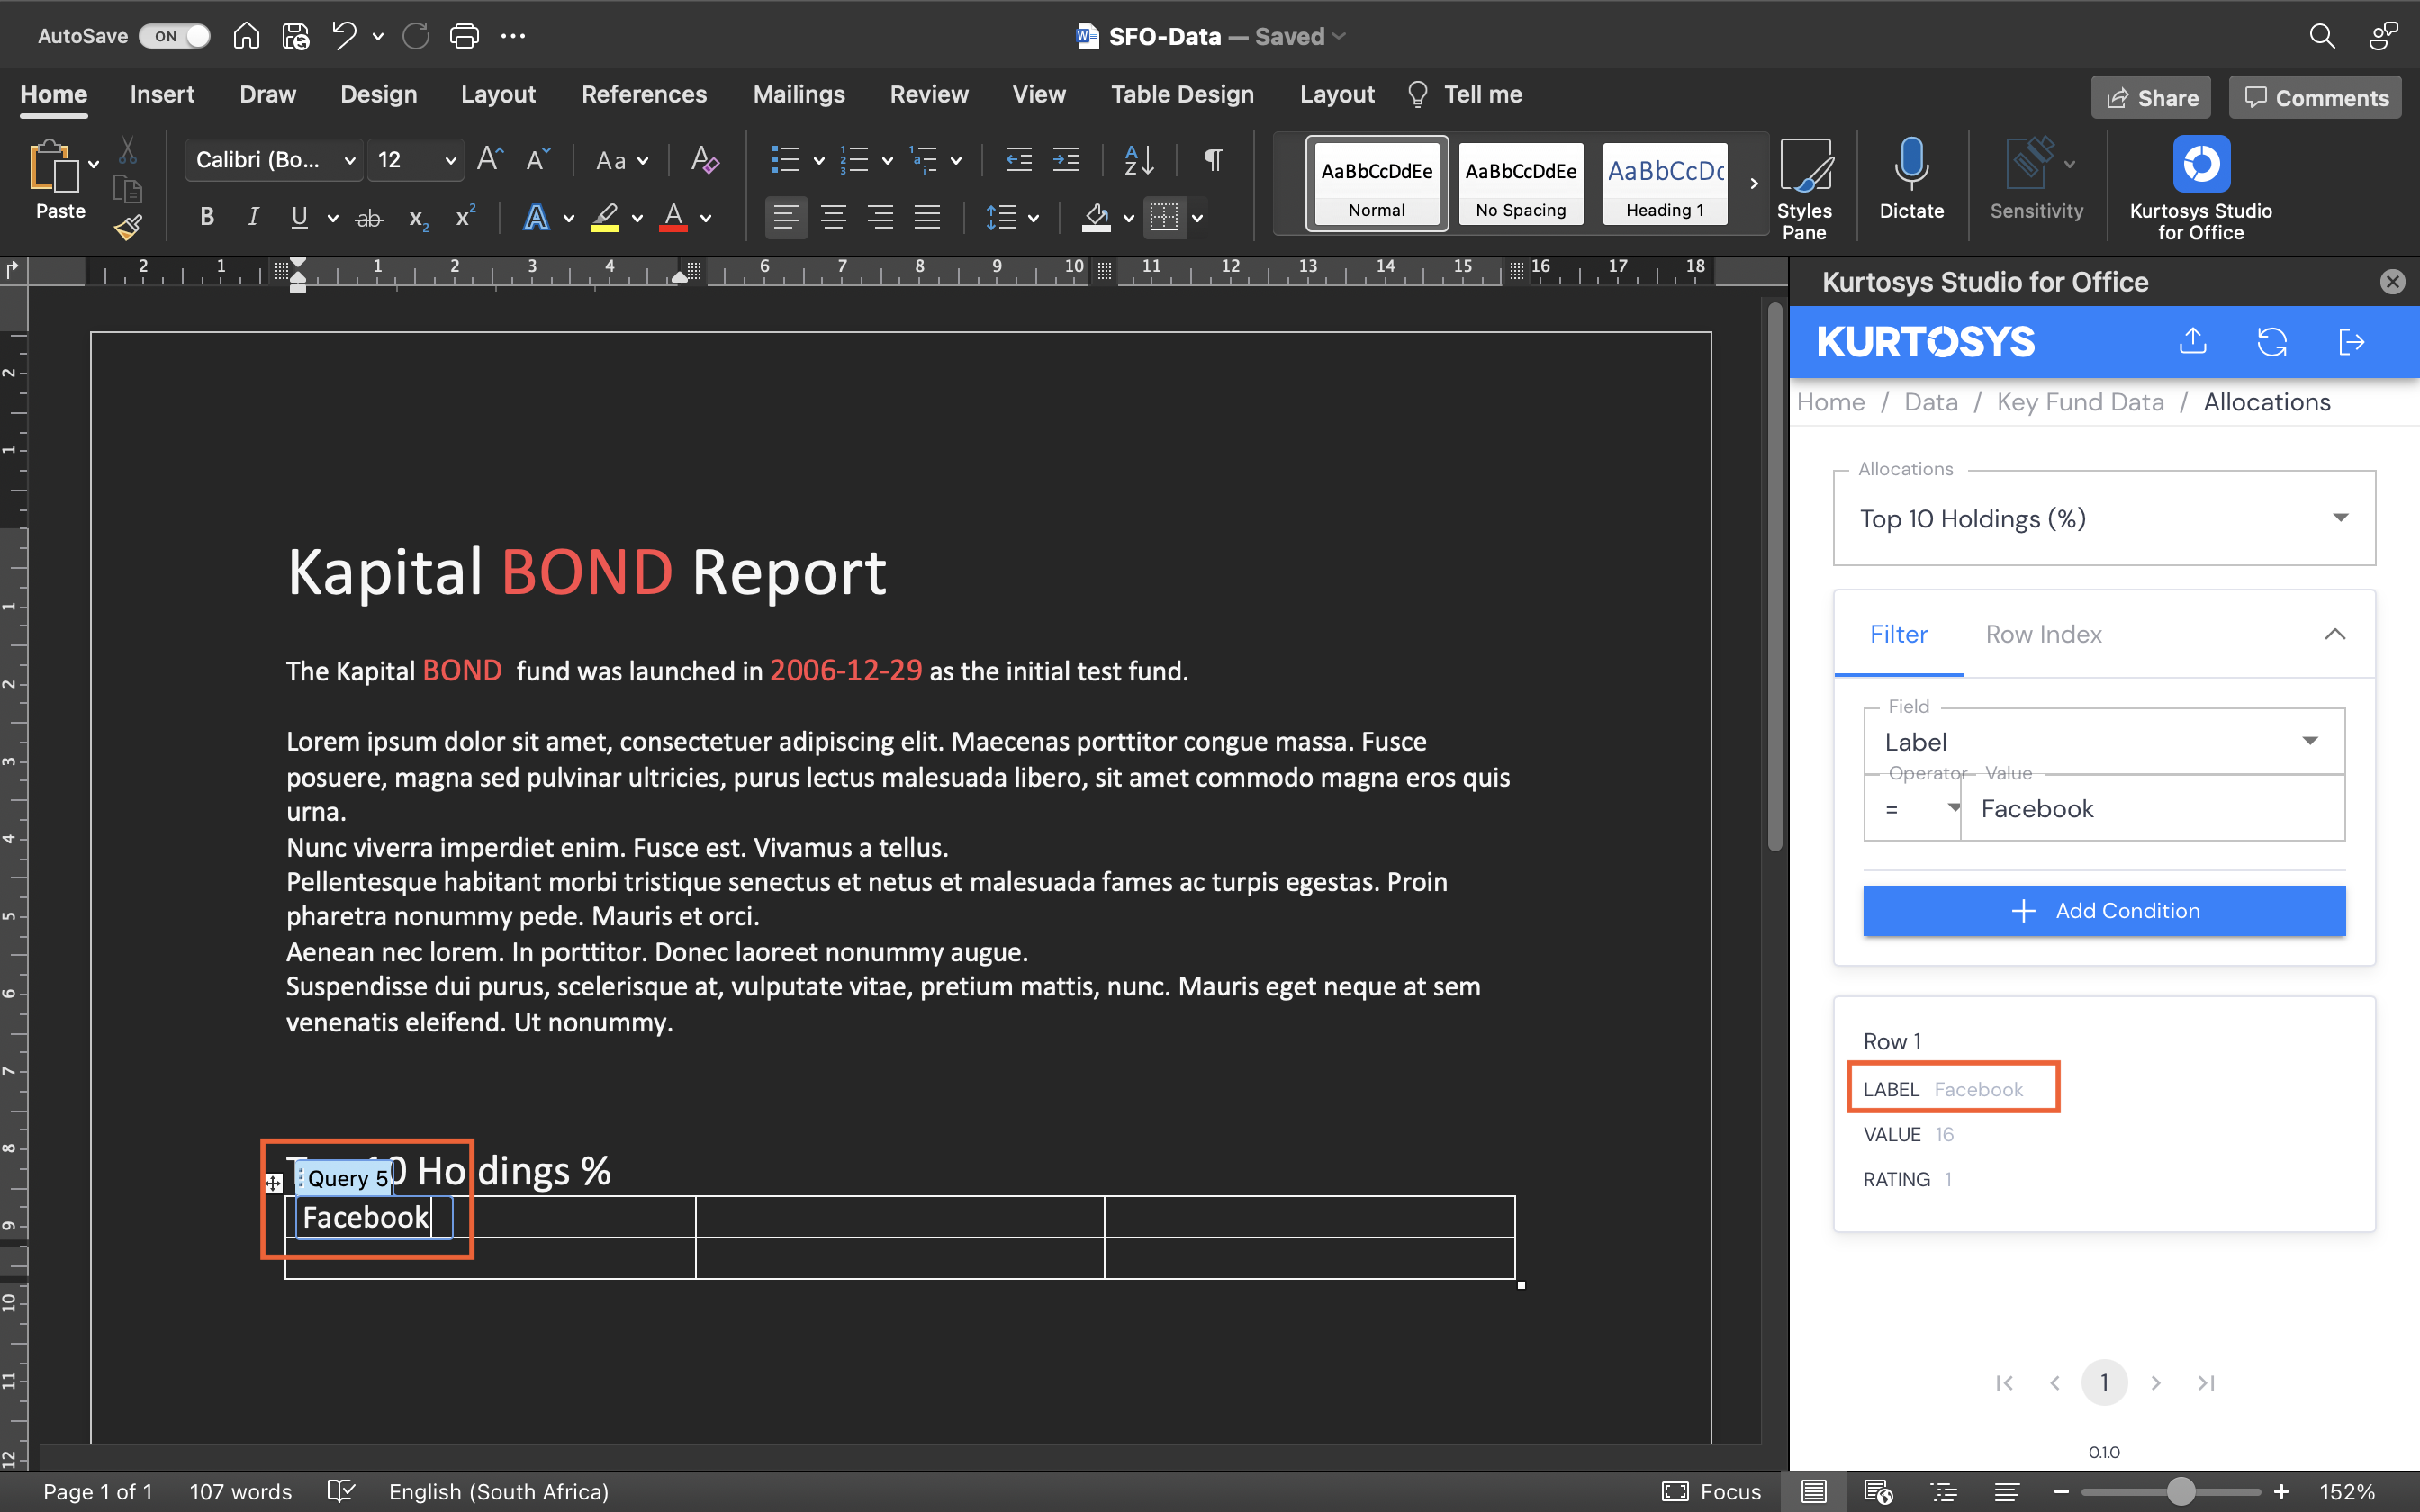
- Click the appropriate field in the Row section to add it to the document.
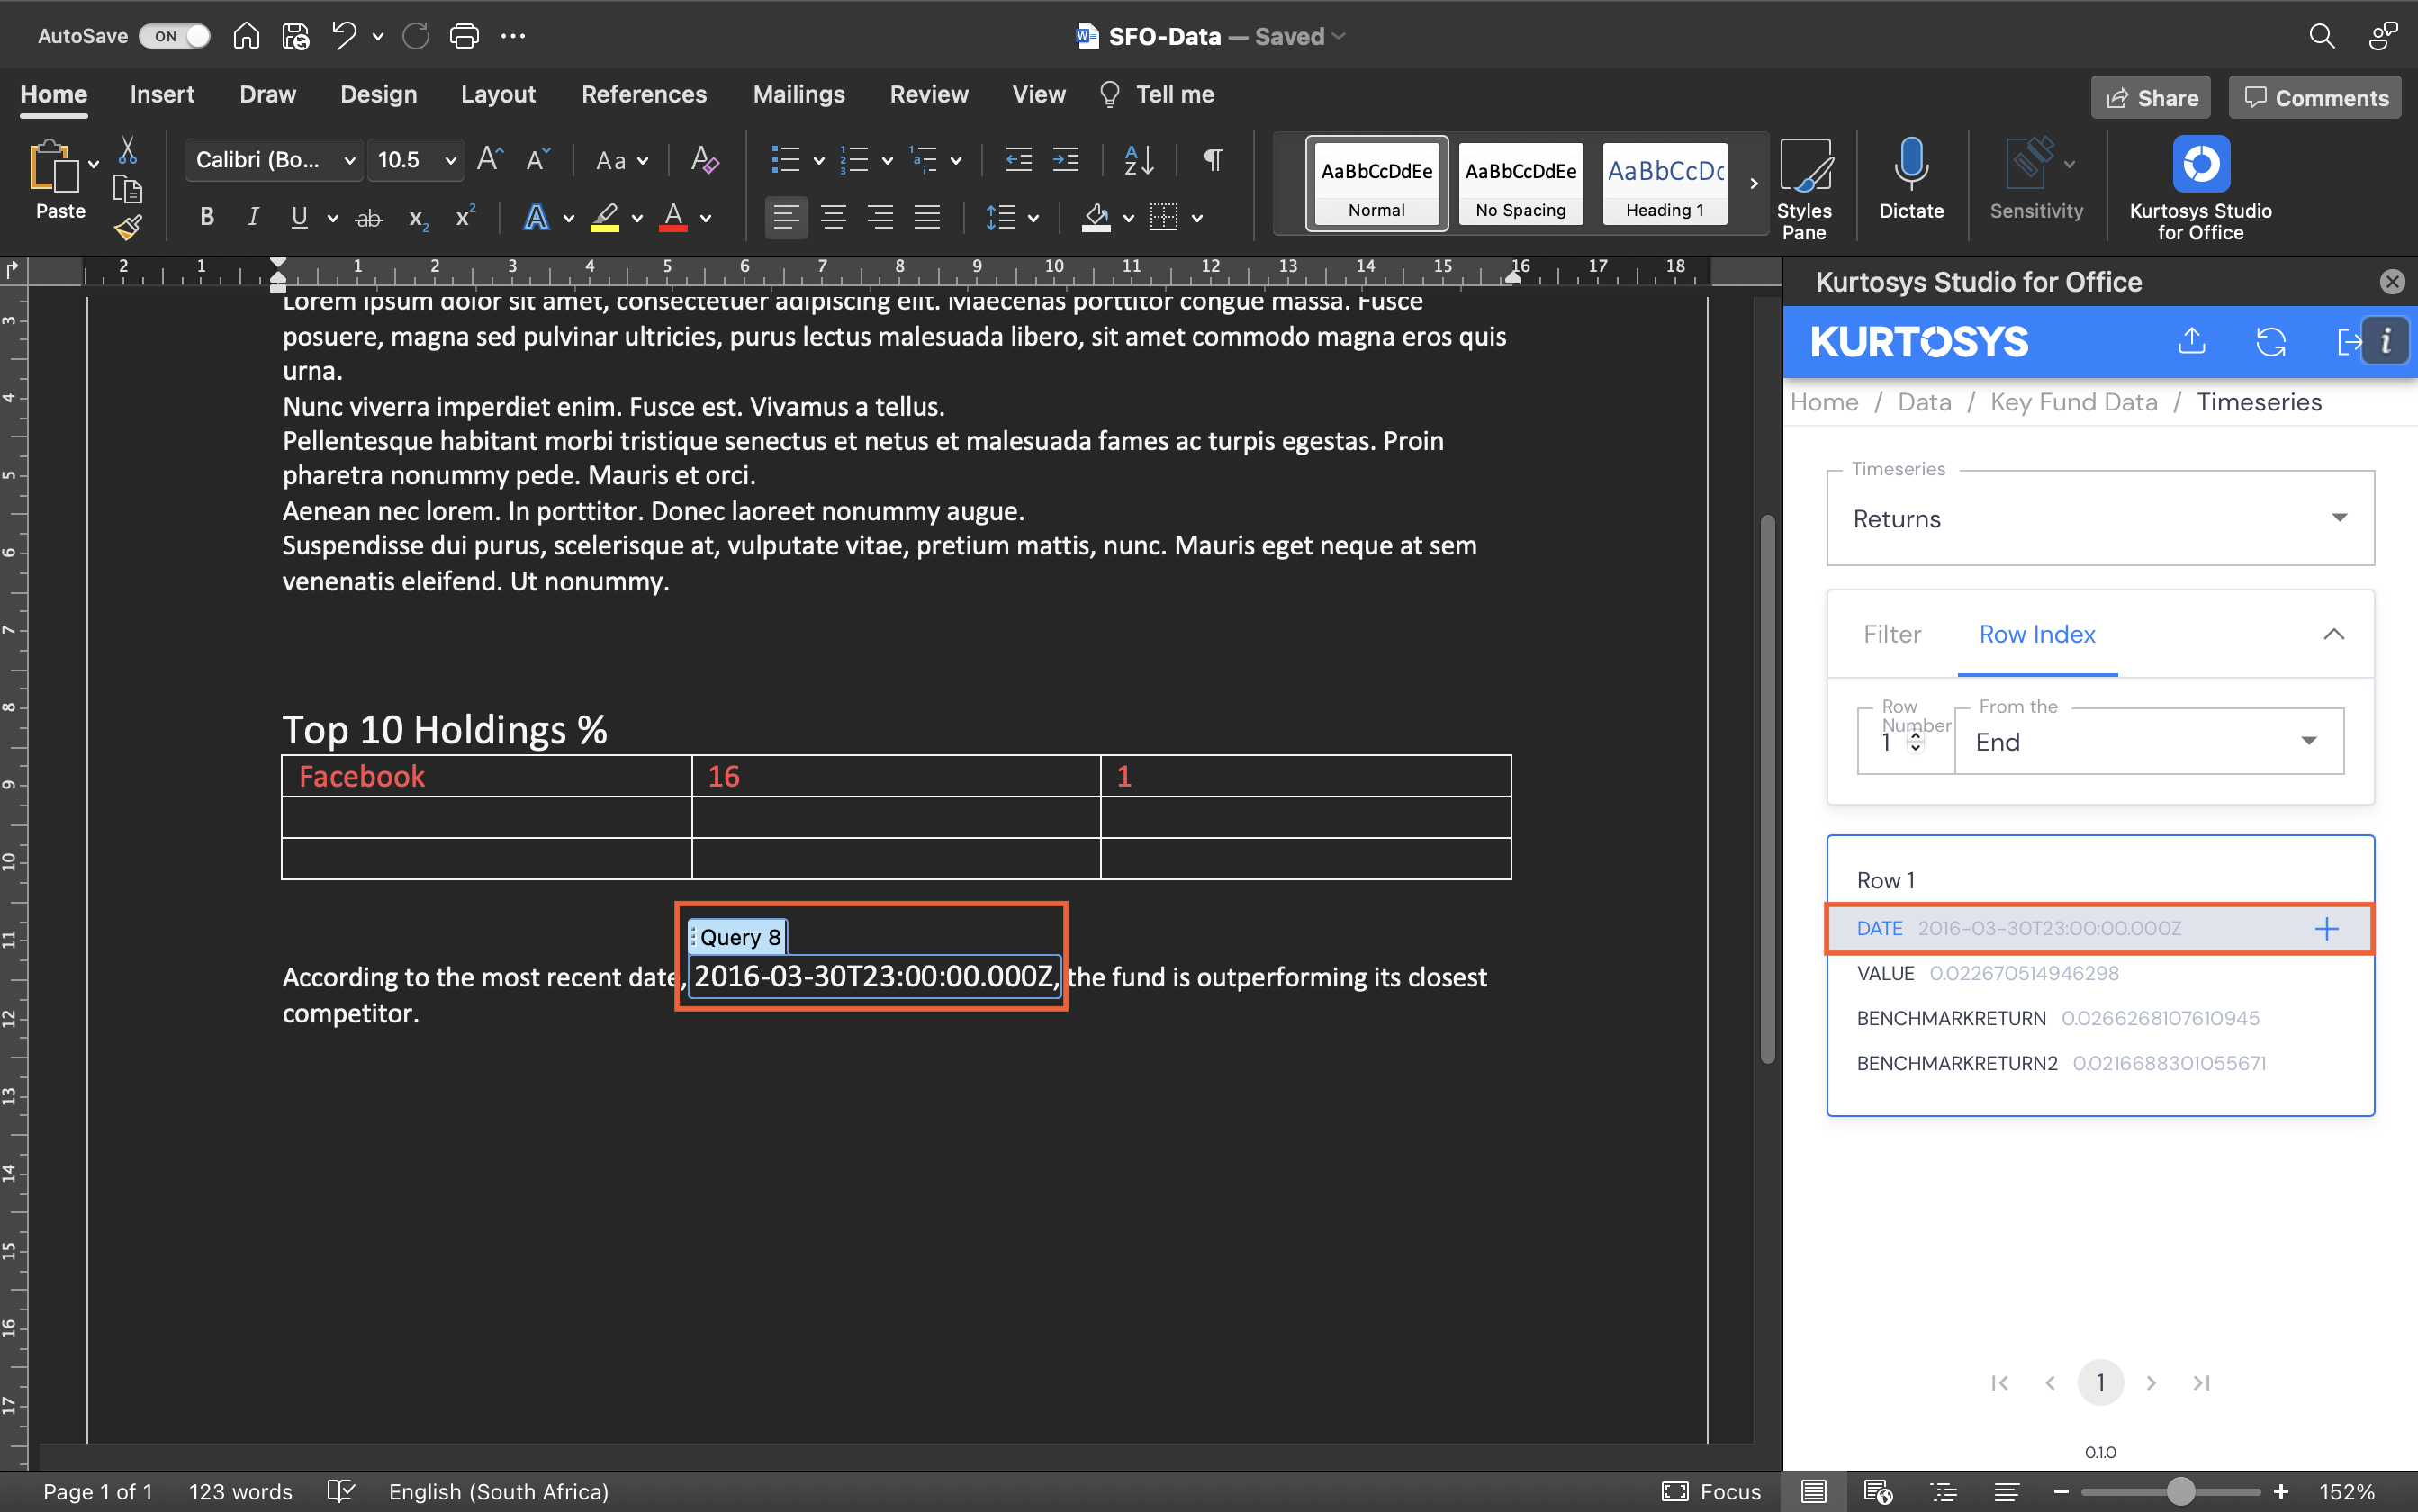
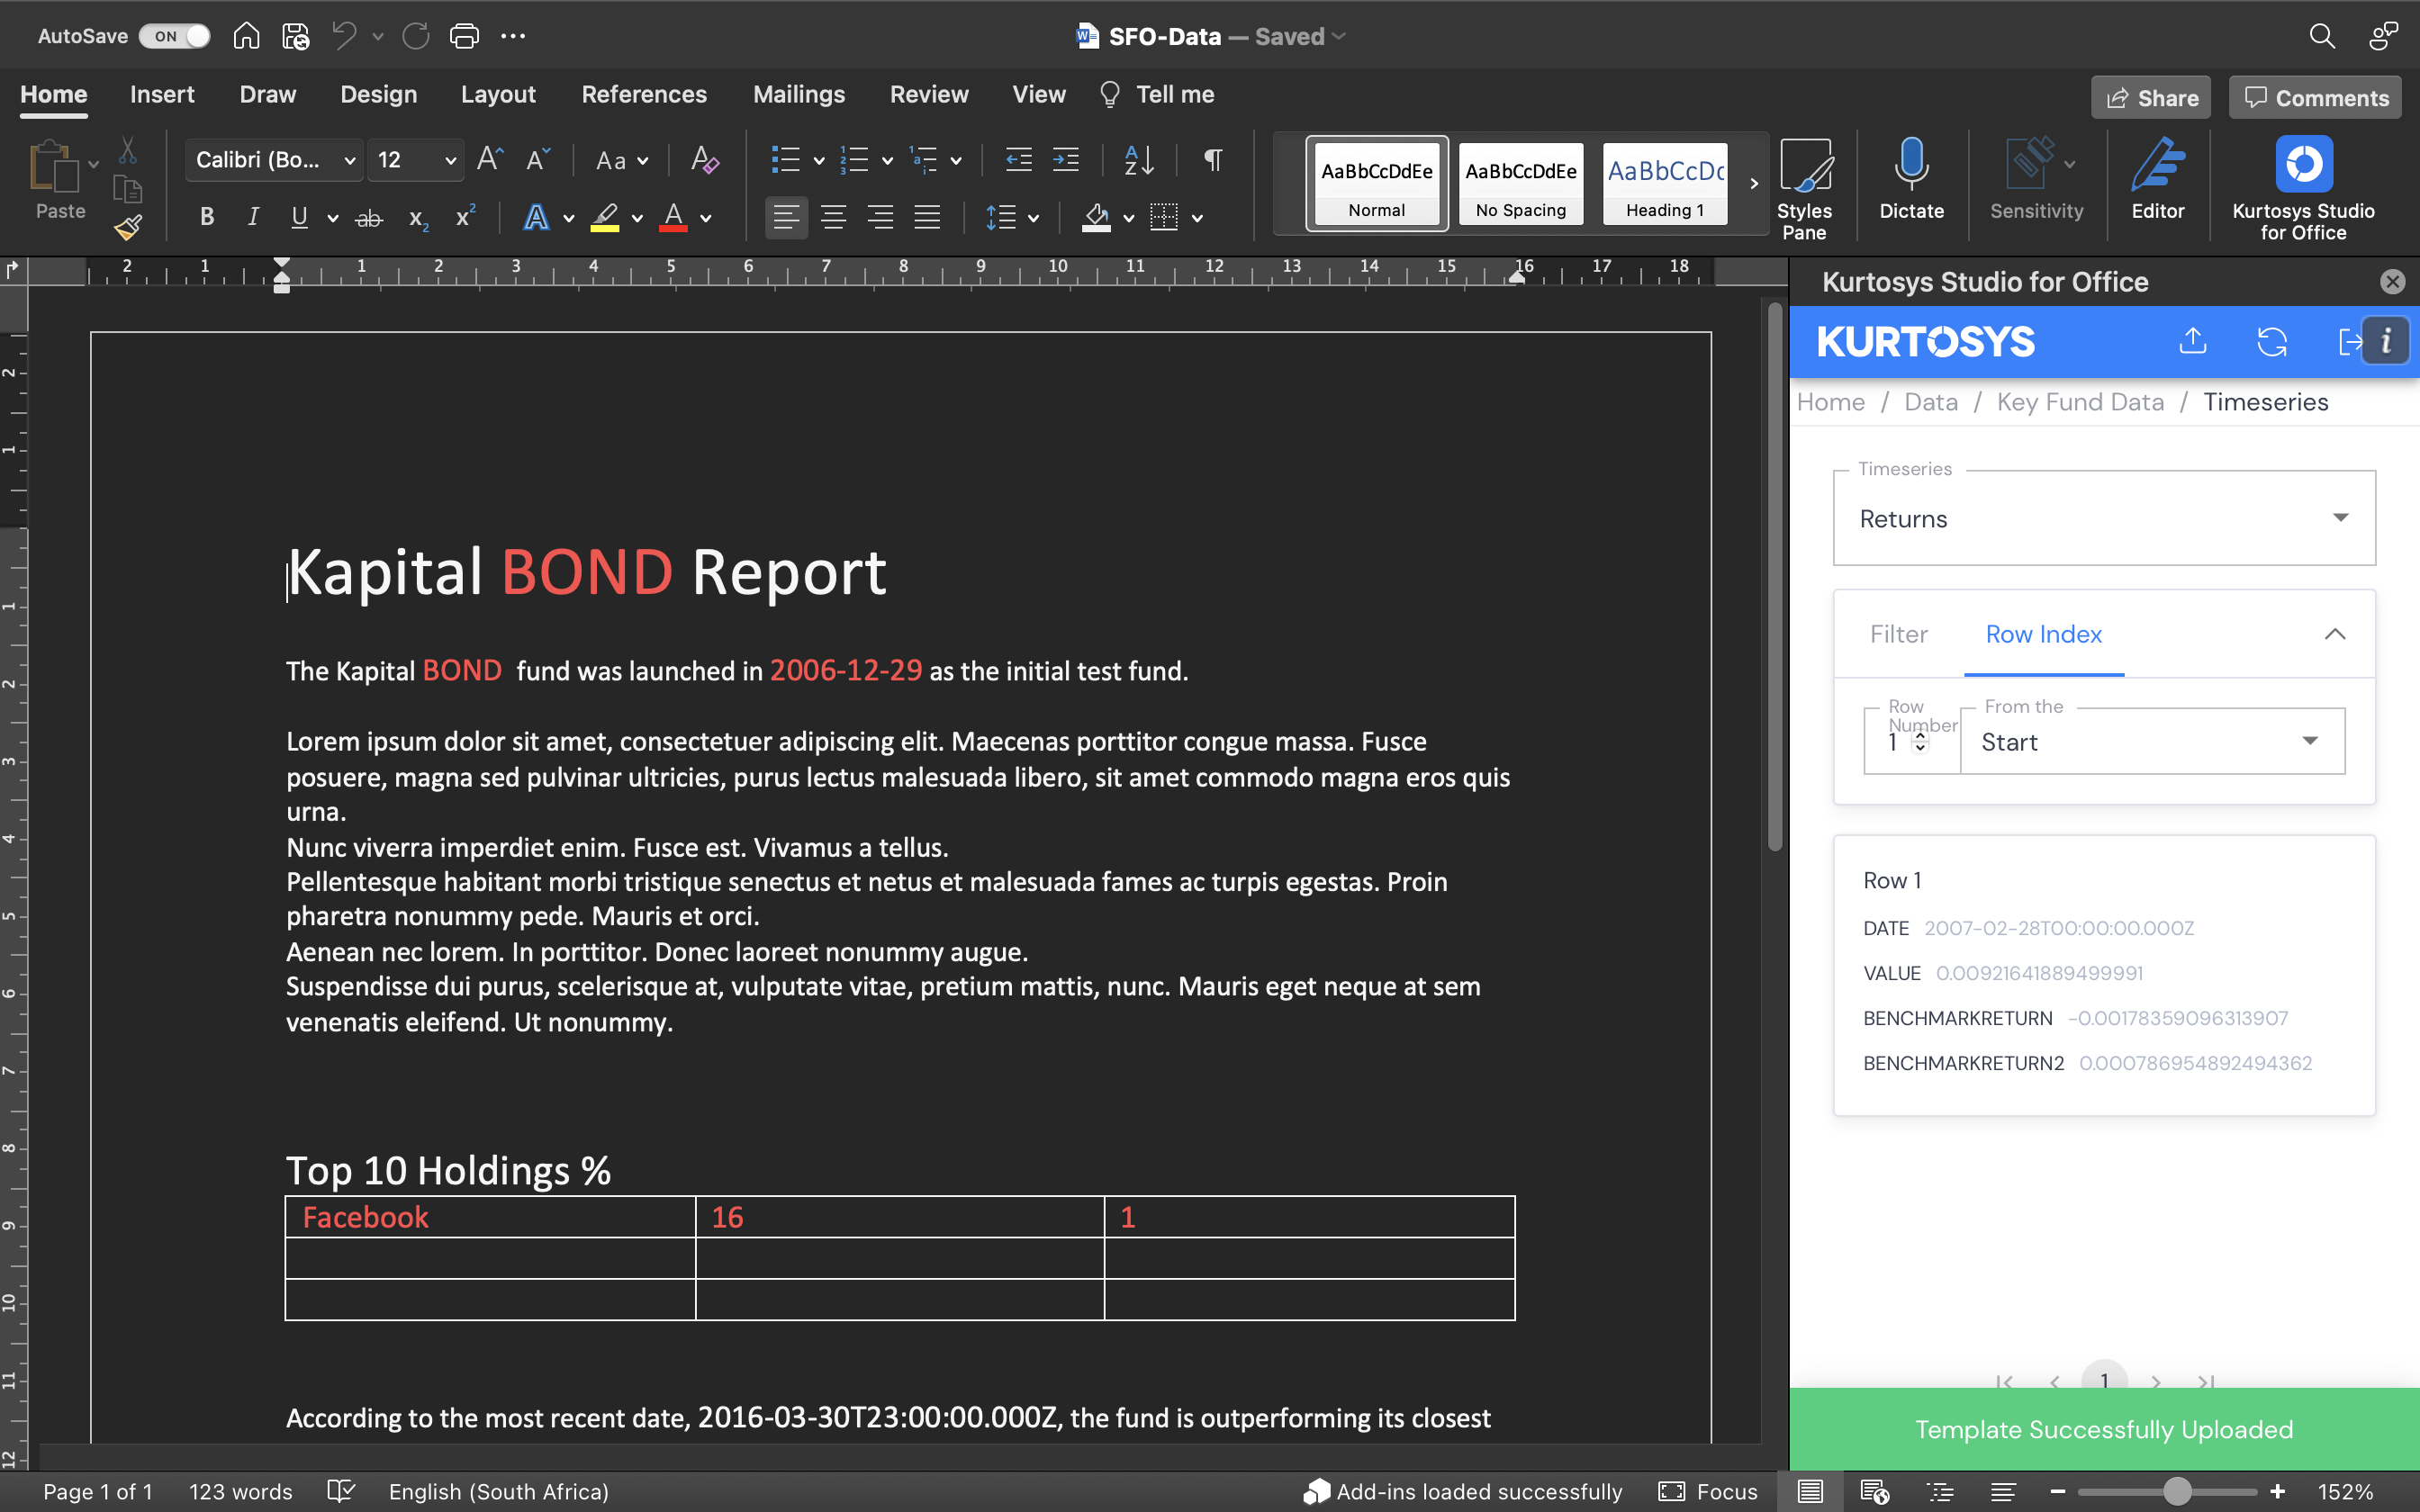
Row Index: If you want data to be displayed based on its position or order in a table, use the Row Index tab.
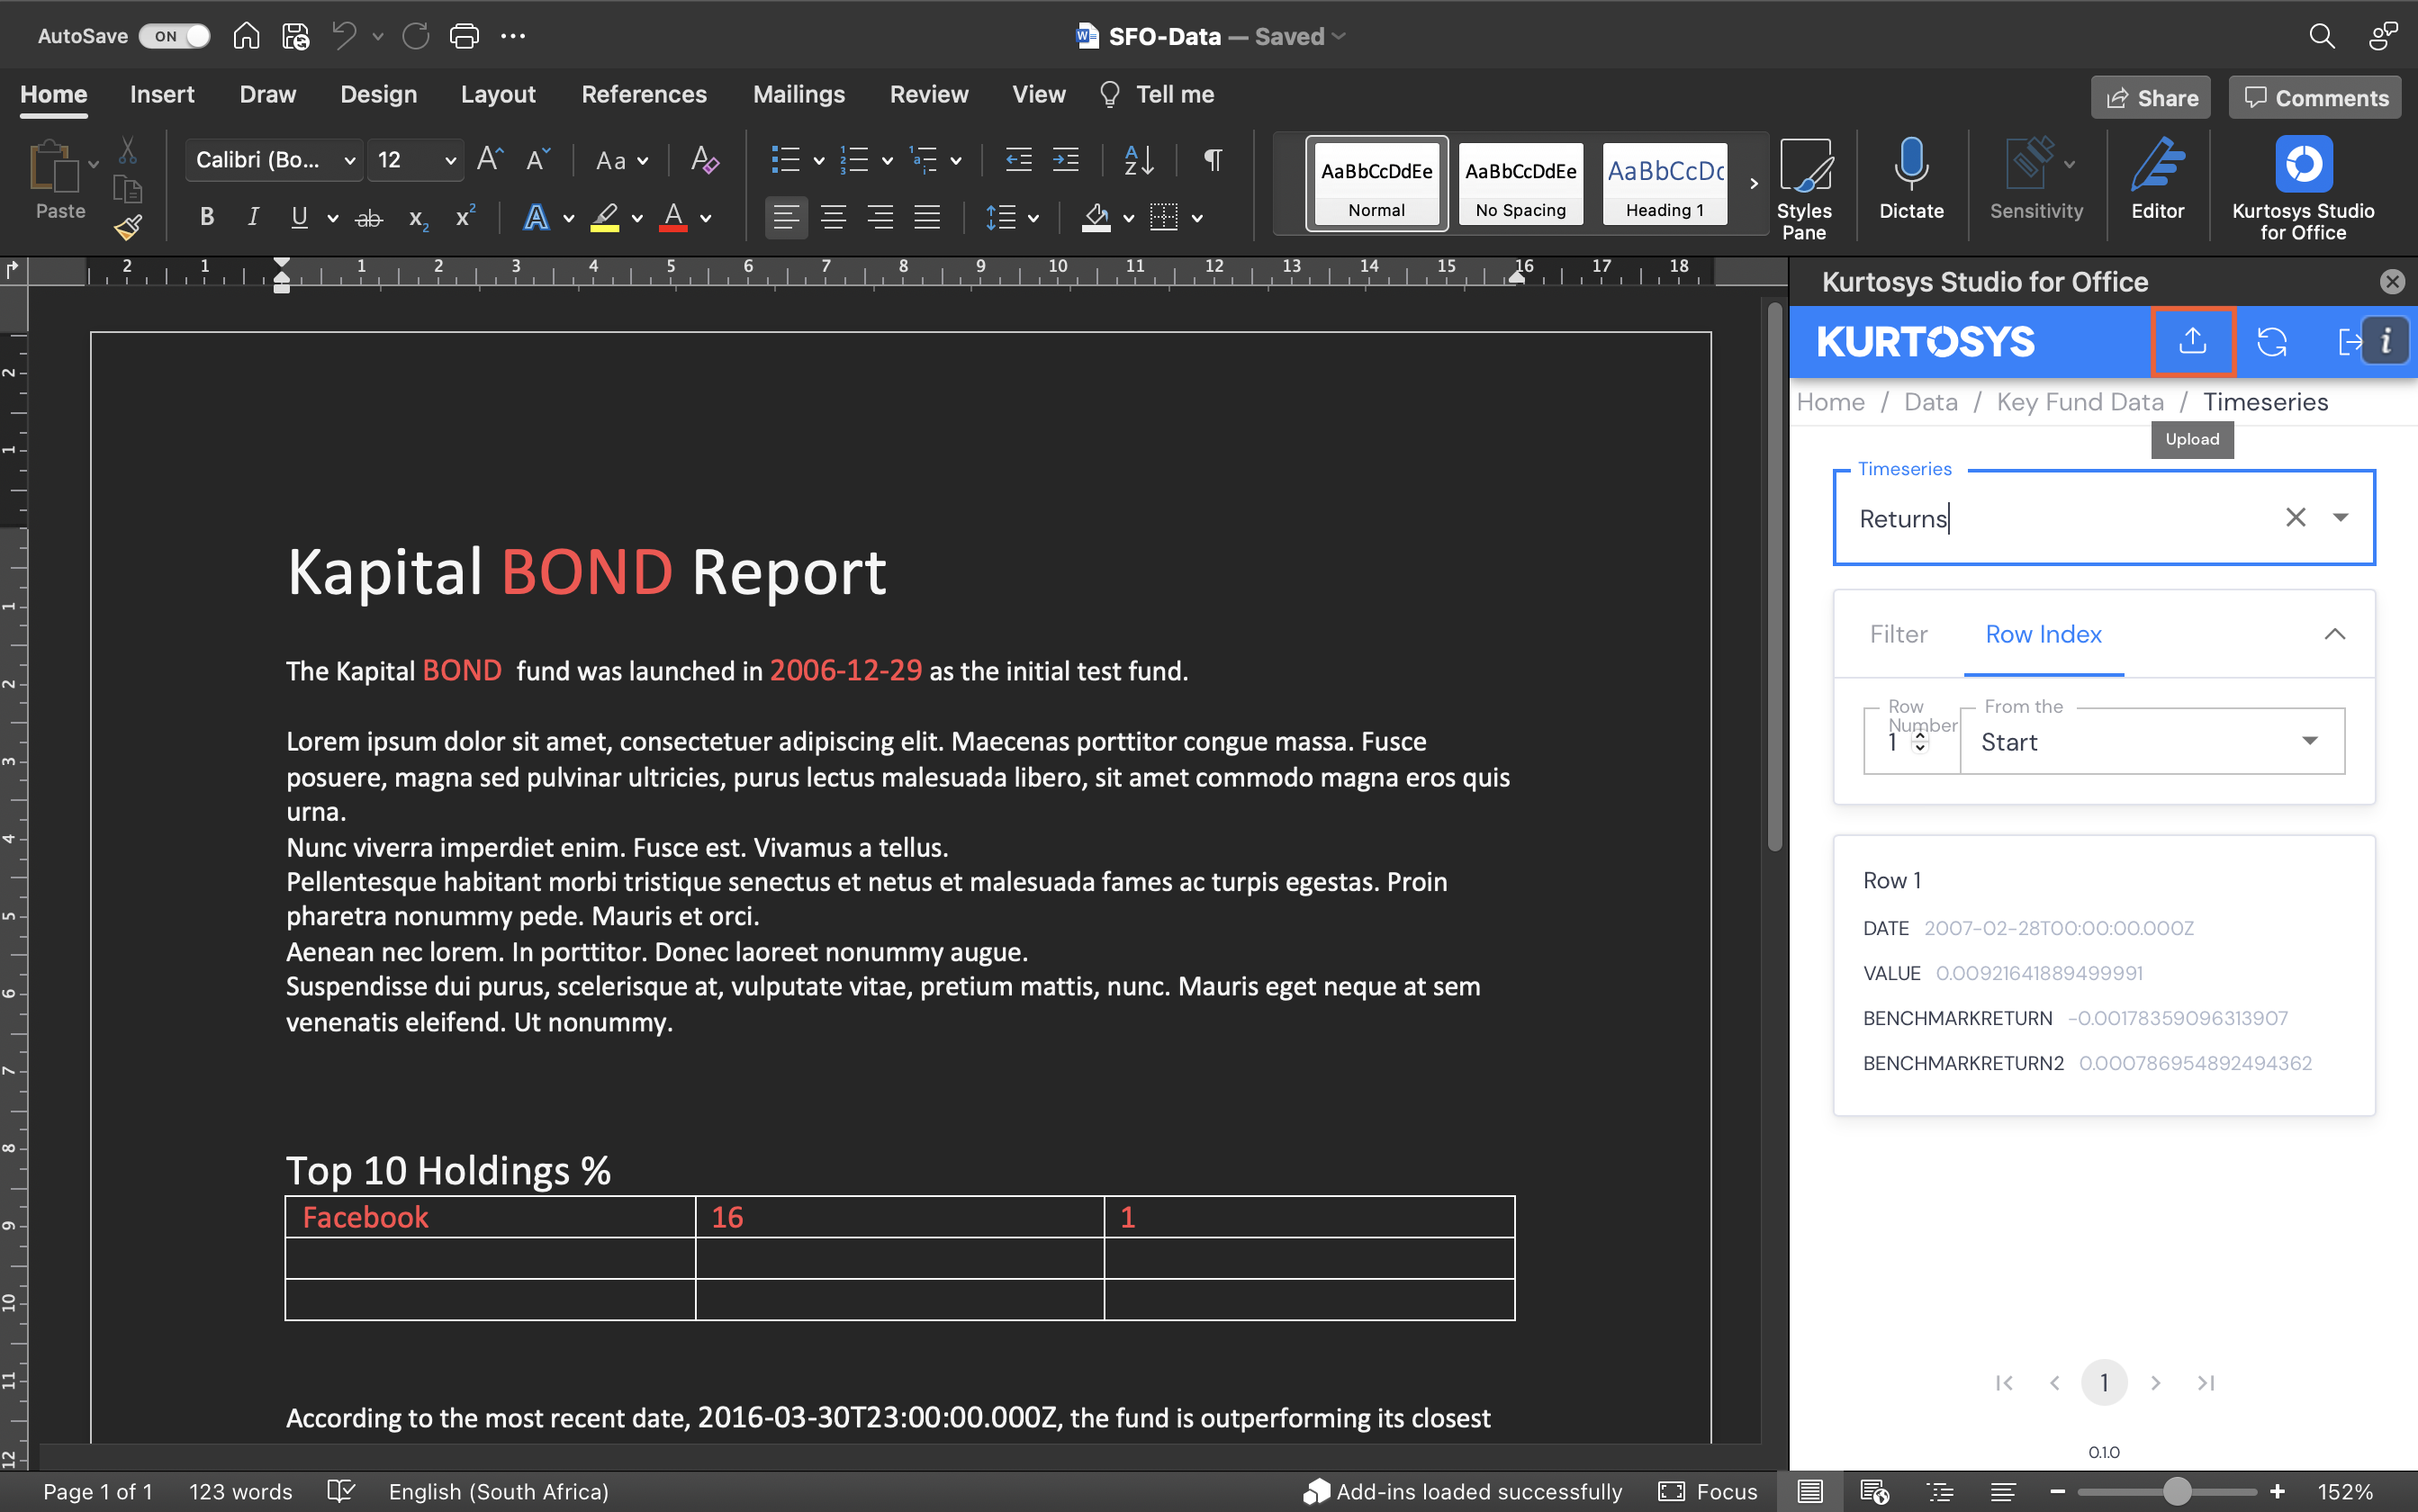
Click in the document position where the data point is to be filled, then set the Row # and select if you want to count the row number from the Start or End of your table.
- Click the appropriate field in the Row section to add it to the document.
- Continue adding data points to your document using these methods.
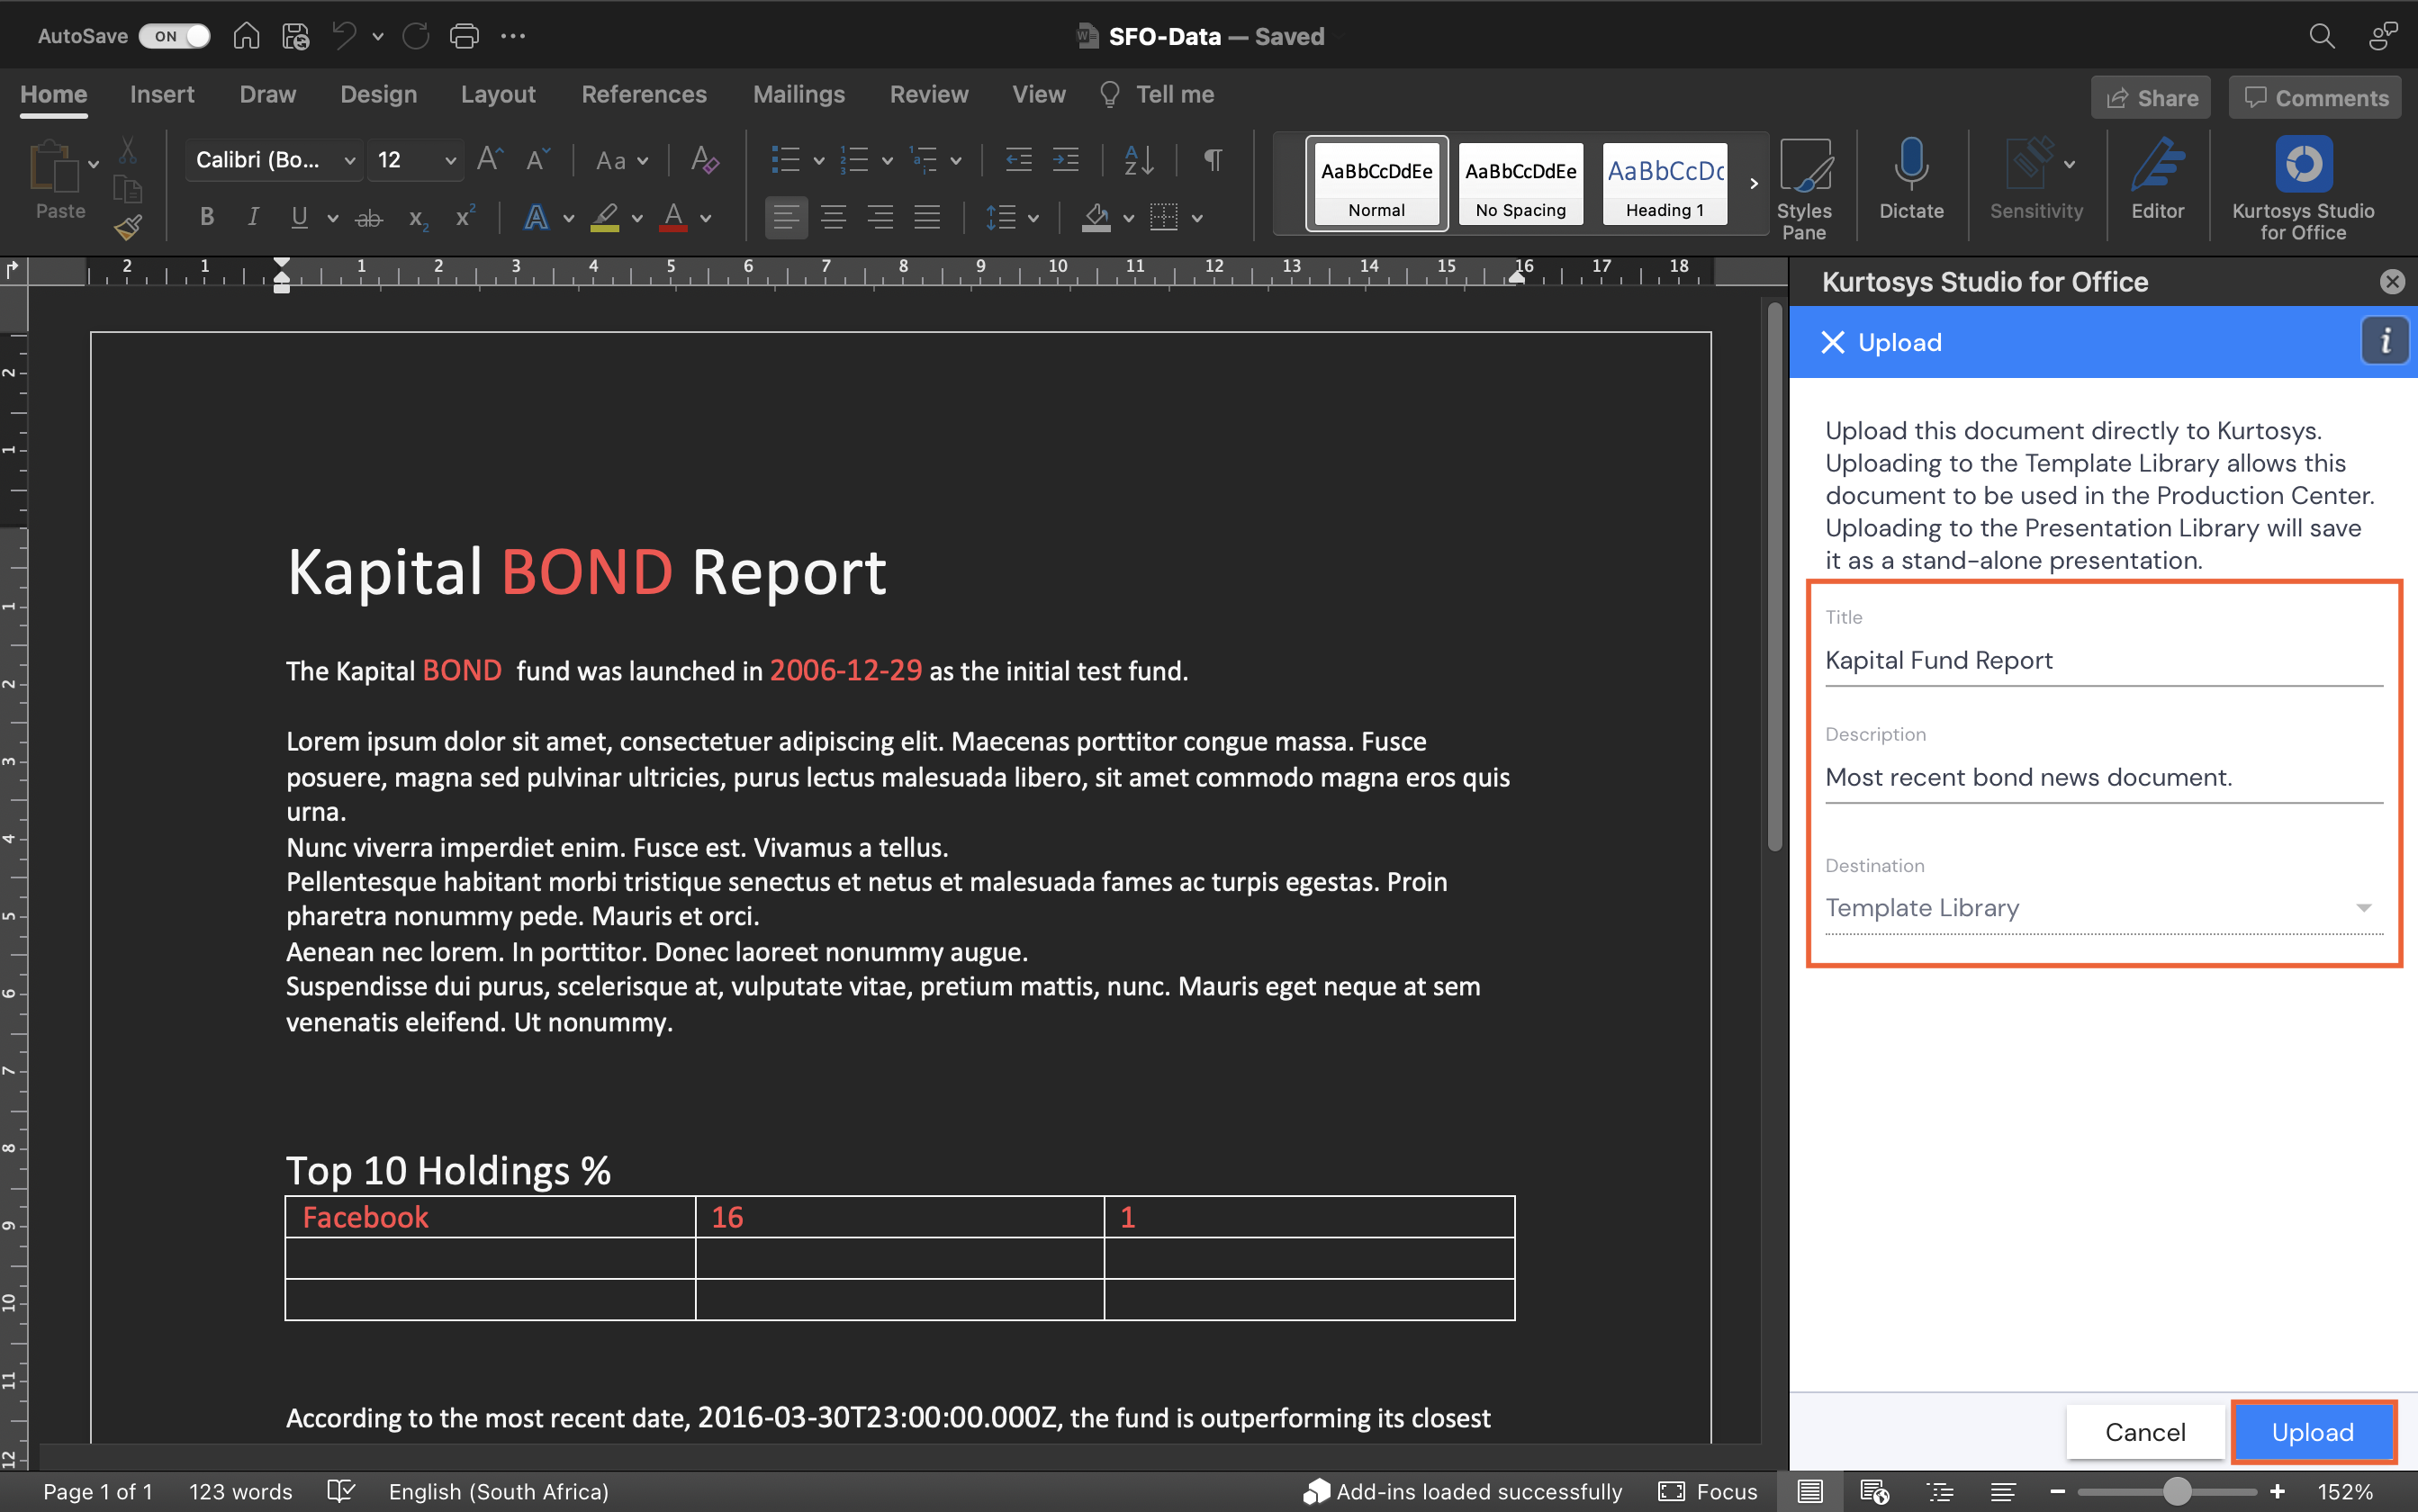
- When your document is complete, Save it, then click Upload.
- Type in a Title and Description for your document.
- Use the dropdown arrow to select a Destination for your document. Template Library in the Documents product will be the default destination.
- Click Upload.
A successful upload message will be displayed.
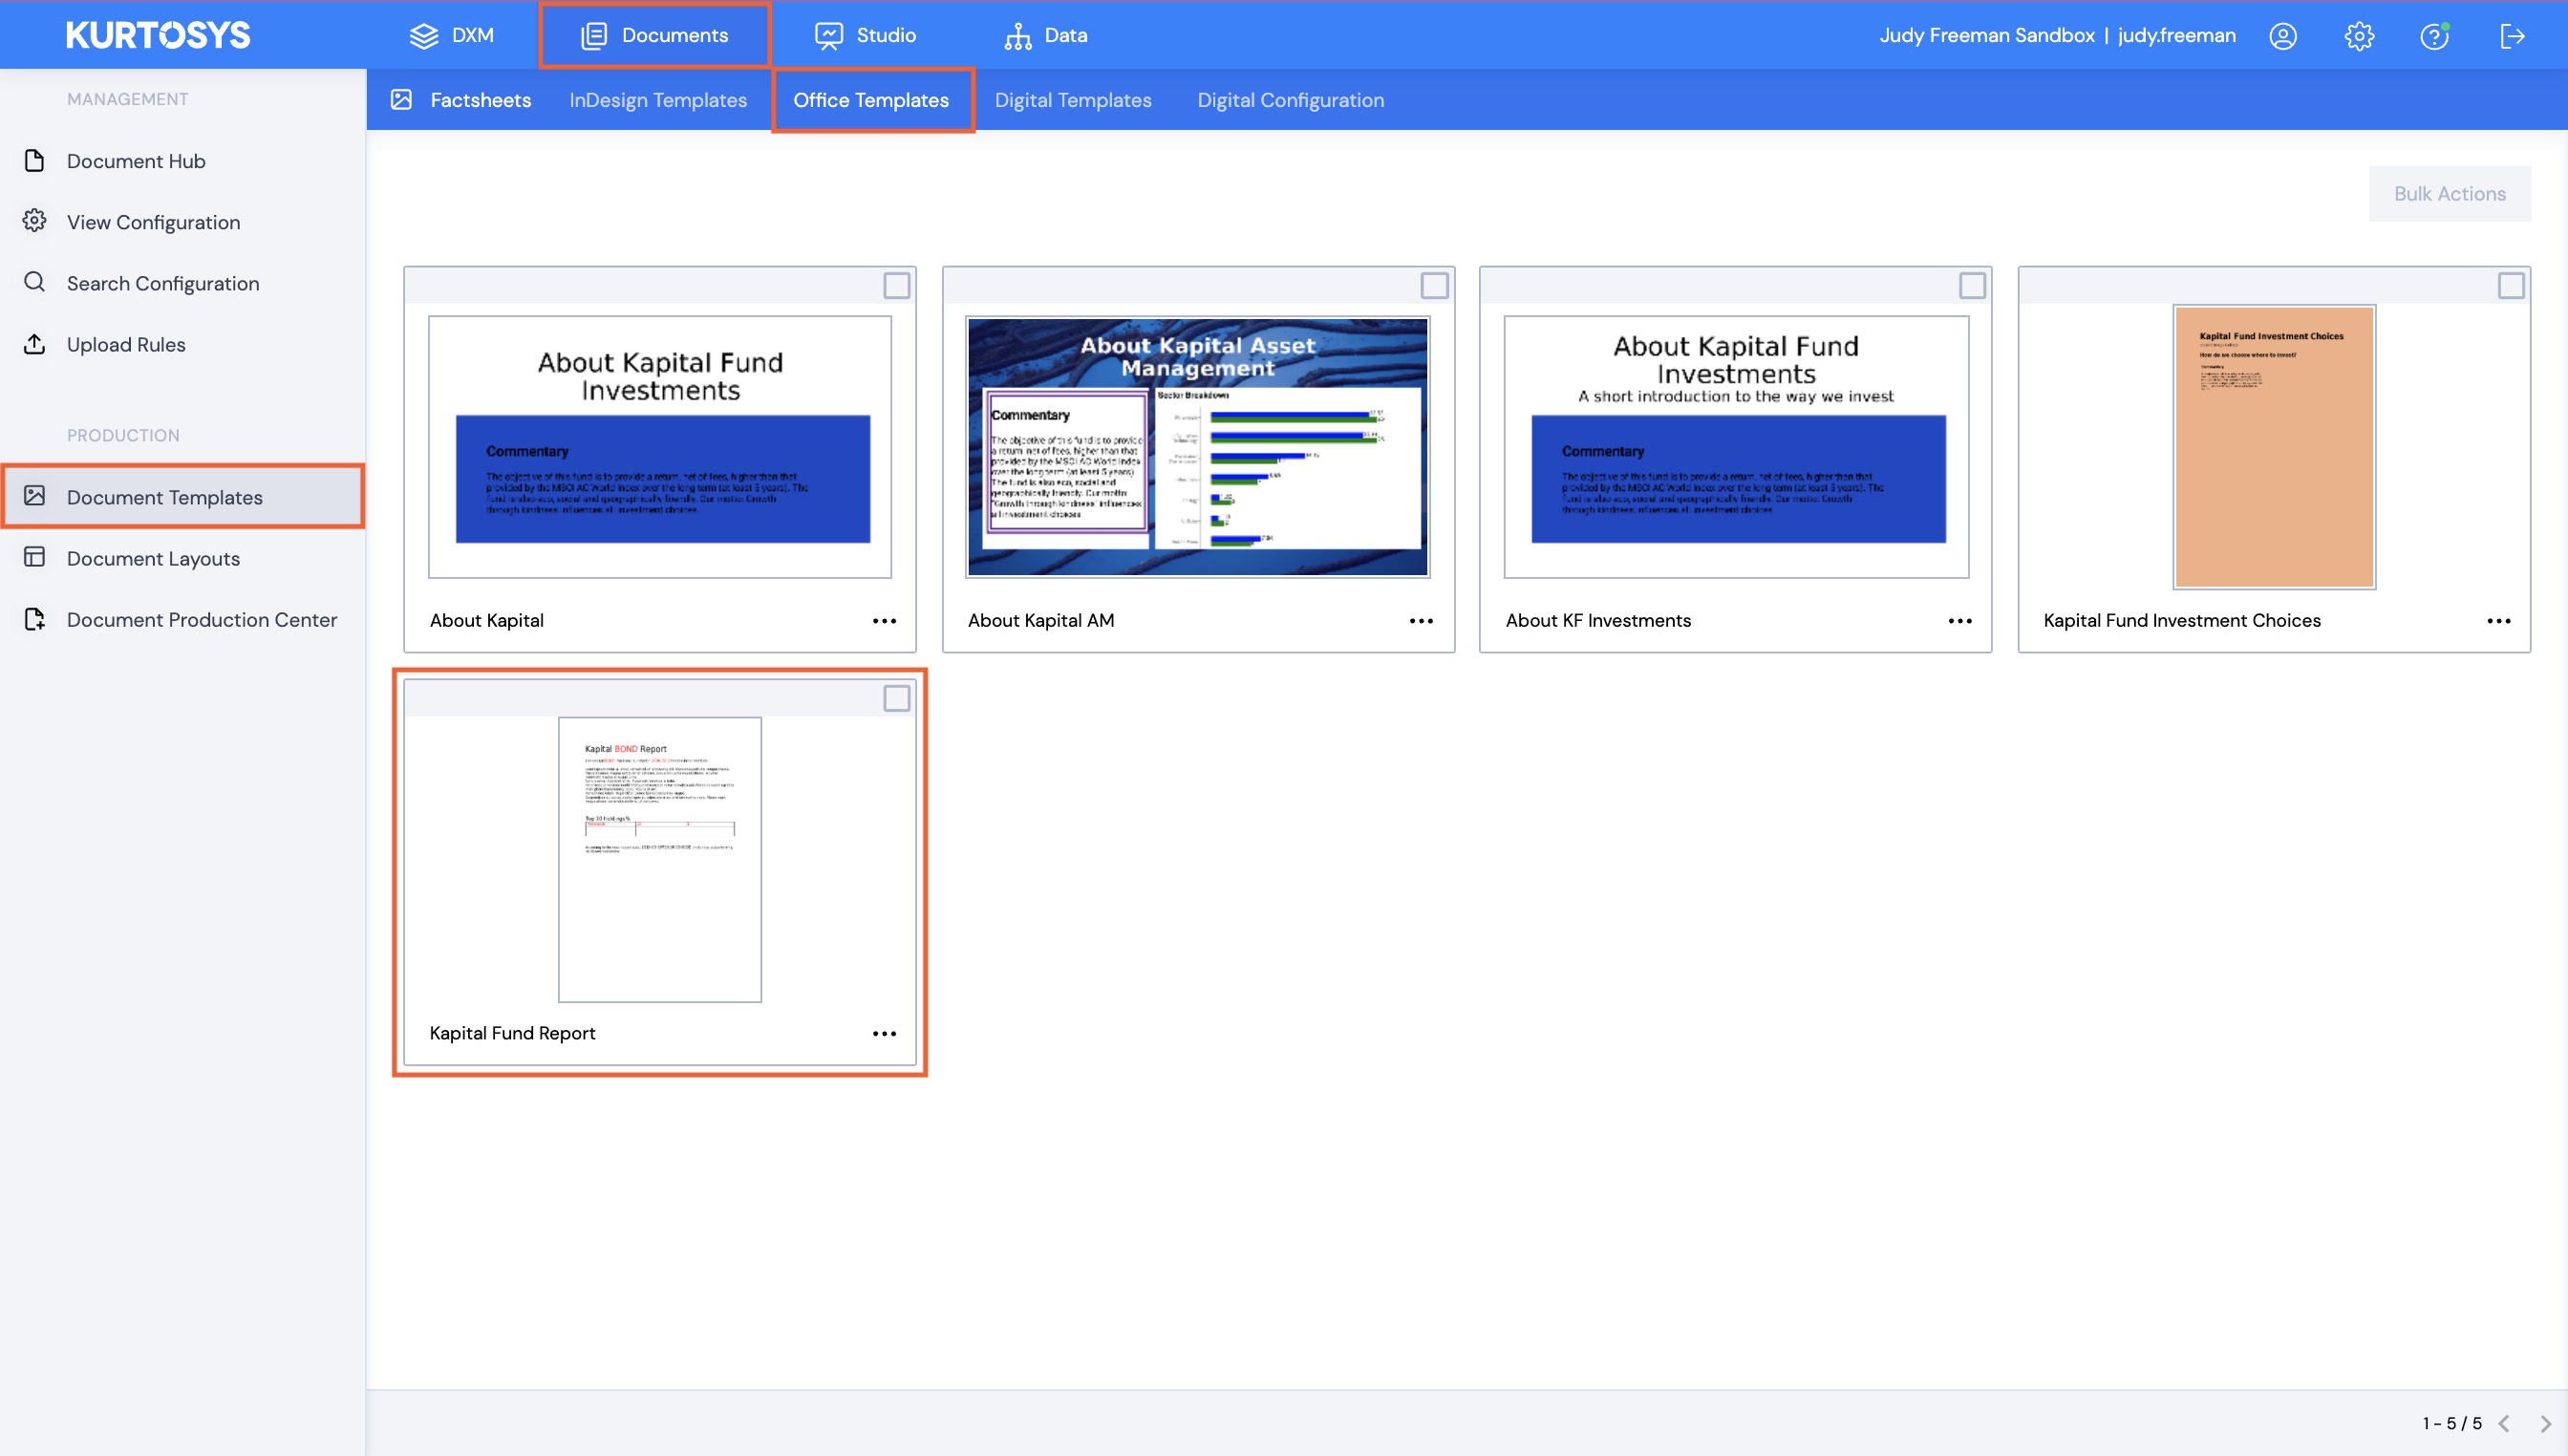
The document will be uploaded directly to the Documents product | Document Templates under the Office Templates tab where it can be used in Workflows in the Document Production Center.