Categories

System Admin
DXM
Documents
Data

Links

Advanced Timeline

The Advanced Timeline is used to create beautiful and custom timelines. This widget can be used in a lot of ways due to it being able to use both content and templates within the widget. It is most often used for the timeline of a company, displaying how the company has grown from their first year to the present. 

Table of Contents

This widget needs to be activated in the Network Admin area. 

How to add the Advanced Timeline Widget

  1. Create / Edit a Page in Elementor

  2. Go to the list of widgets and search for “Advanced Timeline”

  3. Drag and drop the widget onto the screen area on the right.

How to configure the Advanced Timeline Widget

General Settings
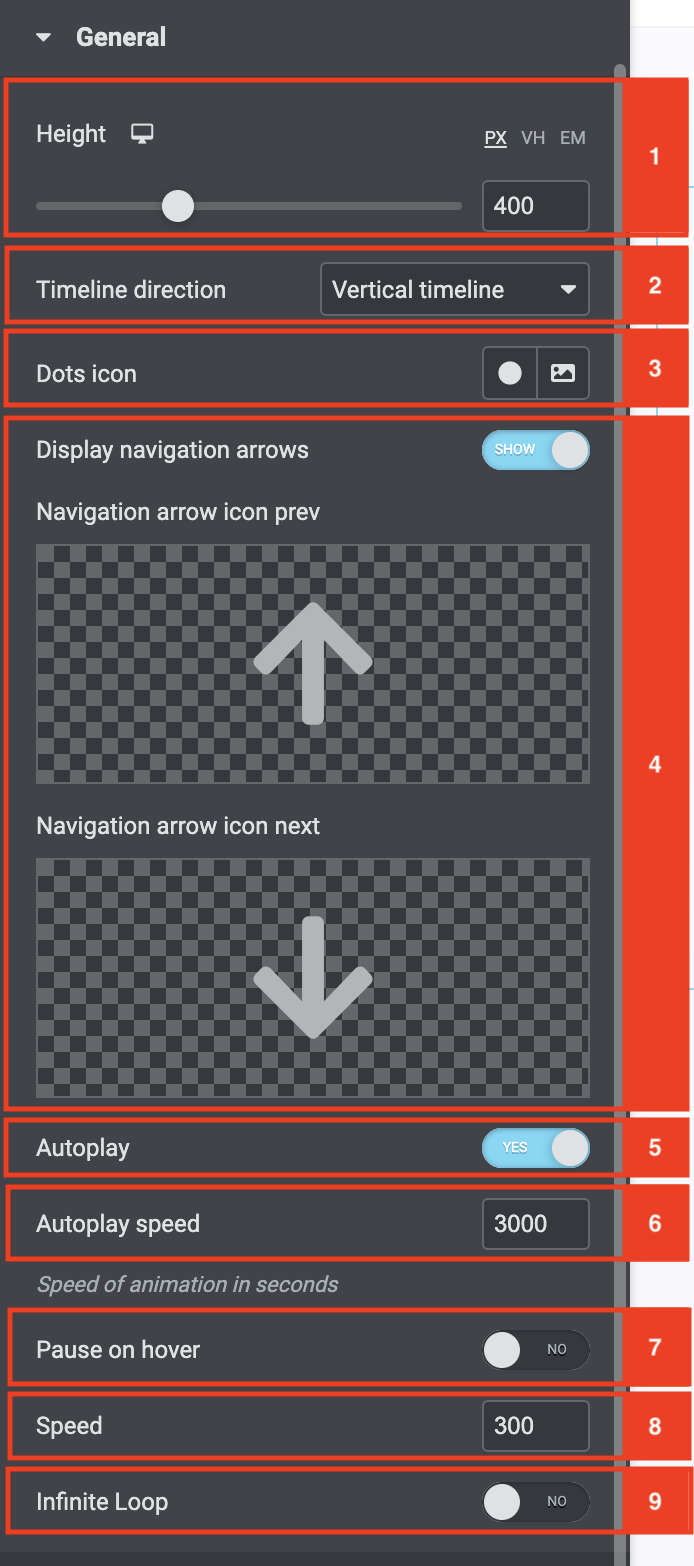
  1. The first item is the height. This controls the height of the widget. You can set it to match your relevant designs. By default it is on 400px. You can adjust the height by moving the little circle or by typing in a specific number.
  2. Next, we have the timeline direction and the position of the position of the arrows. By default it is on Vertical Timeline you can also set it to be horizontal.
    1. Example of a Horizontal Timeline
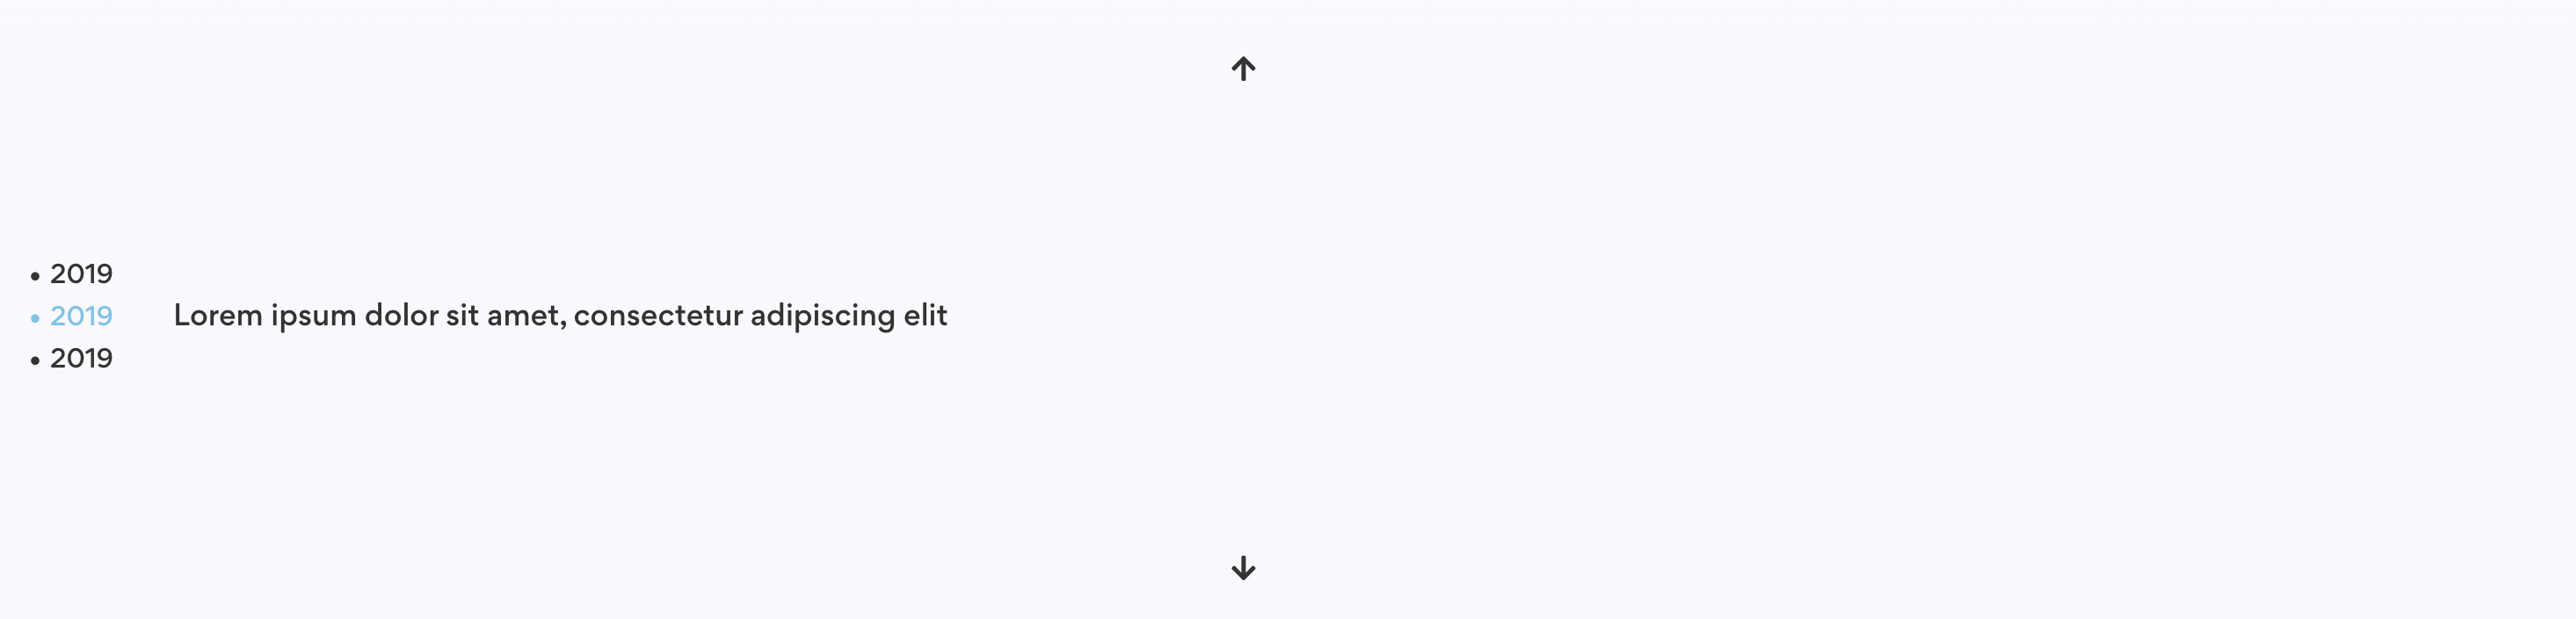
    2. Example of a Vertical Timeline
  3. The Dots Icon section is where you can select what type of icon you would like on the left of your label.
  4. The Display Navigation Arrows area allows you to choose if you want to use Navigation arrows.
  5. The autoplay toggle controls if you want your timeline to swap between the years automatically or if you want the user to click on the arrows to go between the years.
  6. If you toggled the Autoplay area on you will see that you can control the speed on the autoplay. The speed of the animation is in Seconds by default it is 3000 milliseconds.
  7. If you toggled the Autoplay area on you will see that you can also control if the animation pauses if the user hovers over it. You can toggle this off or on depending on the requirements.
  8. Next, we have the speed setting. This controls how many milliseconds it will take the content to flow in once you click on the relevant year label.
  9. The last area within the General Settings is the Infinite loop area. This controls if the content loops infinitely. Toggling this on will cause the timeline to keep going through the content even if it has hit the final item in the list.
Content Settings

To add items you can either add content in the editor, or add it via a section template (per item). This enables you to have a beautiful and versatile timeline.

  • Once you open the content settings area you will see an Add Item button. This will add a section area.
  • First, add in your label
  • Then select what your content type is (Content / Saved Templates)
 
Using an Editor
  • You can just add your text in the editor
Using a Template
  • You will see a panel like the one below. You have to start typing your template name to search and then add it in. Once it is added it will be displayed for that section.

Example of the widget

Play Video

How to activate Kurtosys Widgets

Some widgets within DXM are turned off by default and you will have to go into the site’s Network area to activate them. In this short tutorial, we will show you how to do that. 

  1. Open your instance
  2. Go to the network area
  3. Once the network site is loaded. You will see the Kurtosys Extensions side menu item. Click on it.
  4. This will take you to the Kurtosys Extensions. This area contains all of the Kurtosys widgets as well as some other extensions of DXM.
  5. Below each extension card, there is a toggle. With this toggle, you can switch a widget/extension on or off.