Take a look at our “An introduction to taxonomy” guide for an introduction to WordPress taxonomy.
Why you should manage your taxonomies
There are several reasons why you need to manage taxonomy, including ensuring that your site and content are easy to navigate for users and optimized for search engine ranking. For a detailed explanation of why taxonomy needs to be managed, and how to create a structure for your taxonomy, see our “How to set a WordPress taxonomy strategy” guide. For examples of good taxonomy, as well as popular categories and tags to help you get started, see here.
The native WordPress taxonomies are categories and tags, although there are a number of other taxonomies that can be created in order to suit your site. Here we will explain how to create and edit categories and tags.
Creating categories and tags in posts
Categories and tags can be created from within posts by certain users, dependent upon their user role; although for a good taxonomy strategy this is not recommended. In order to add a new category from within a post simply click on the “Add New Category” link within the “Categories” panel, enter the new category name into the field, then click the “Add New Category” button.
You can add a new tag within a post by simply typing the new tag name into the field within the “Tags” panel, then pressing Enter.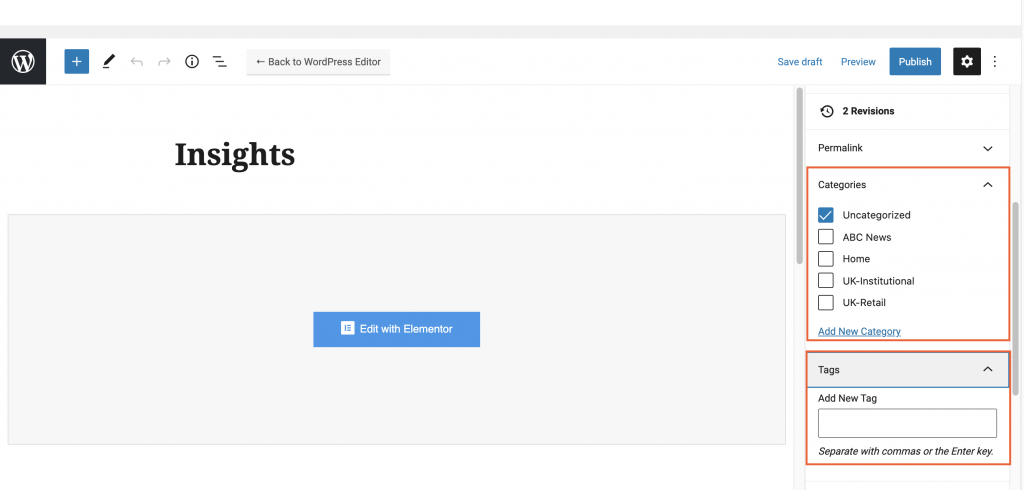
However, adding categories and tags within posts will mean that you cannot add a description or slug to the taxonomy. You also cannot edit taxonomies from within a post.
You can create new taxonomies, or edit or delete existing ones, within the “Posts” tab. Below are examples of how to manage the category and tag taxonomies, although other taxonomies can be managed in the same way.
Creating and editing categories
Categories can be created and edited from the “Categories” page within the “Posts” tab. This can be accessed from the left navigation bar by hovering over “Posts” and clicking on “Categories” from the menu.
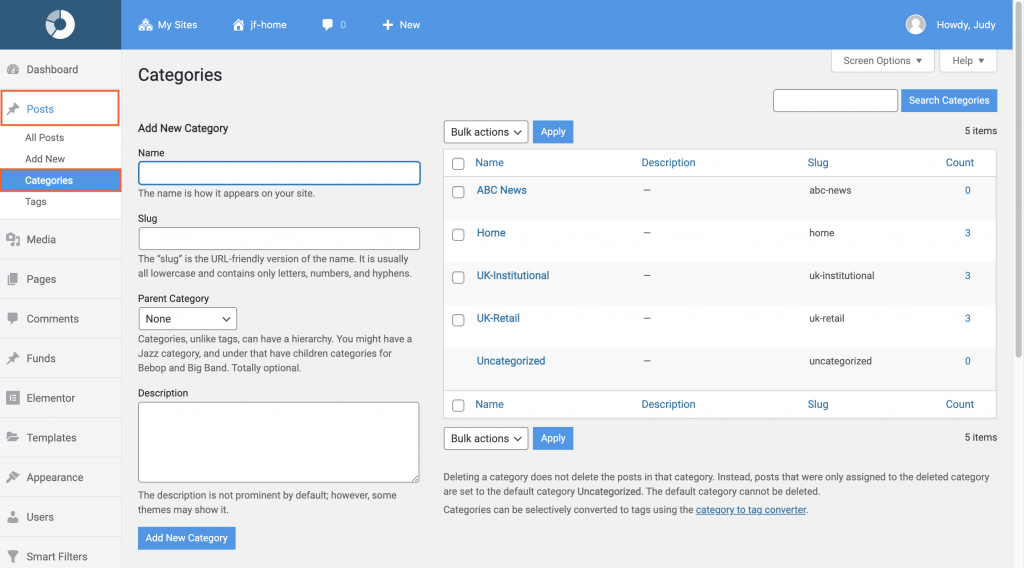
The categories page will display a section where you can create a new category on the left-hand side of the page.
It will also display all of the categories that you have added on your site, their description, slug, and a count of how many times each category has been used. There is also a search bar that will allow you to search for a category by name.
Hovering over the name of the category will allow you to edit the category, view all of the posts that have been assigned that category, or delete the category.
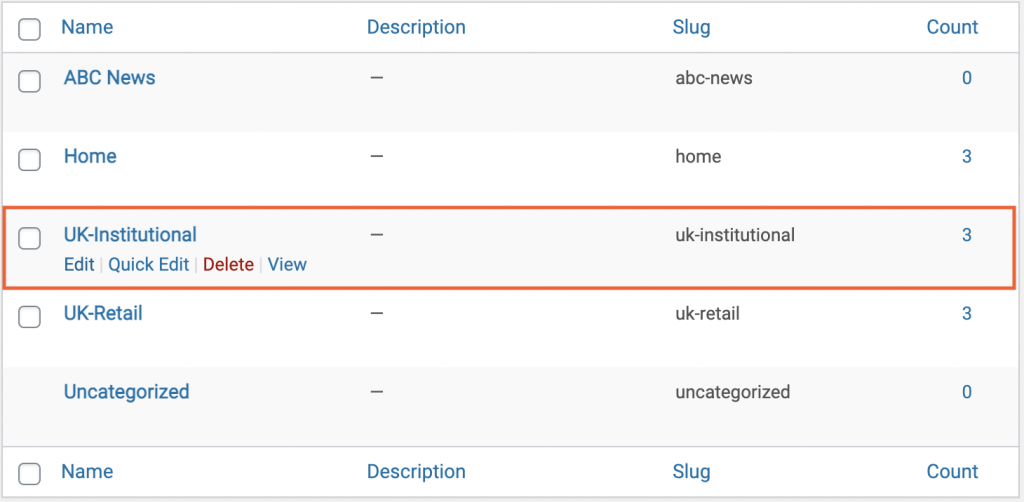
Clicking on the name of the category, or Edit to make amendments.
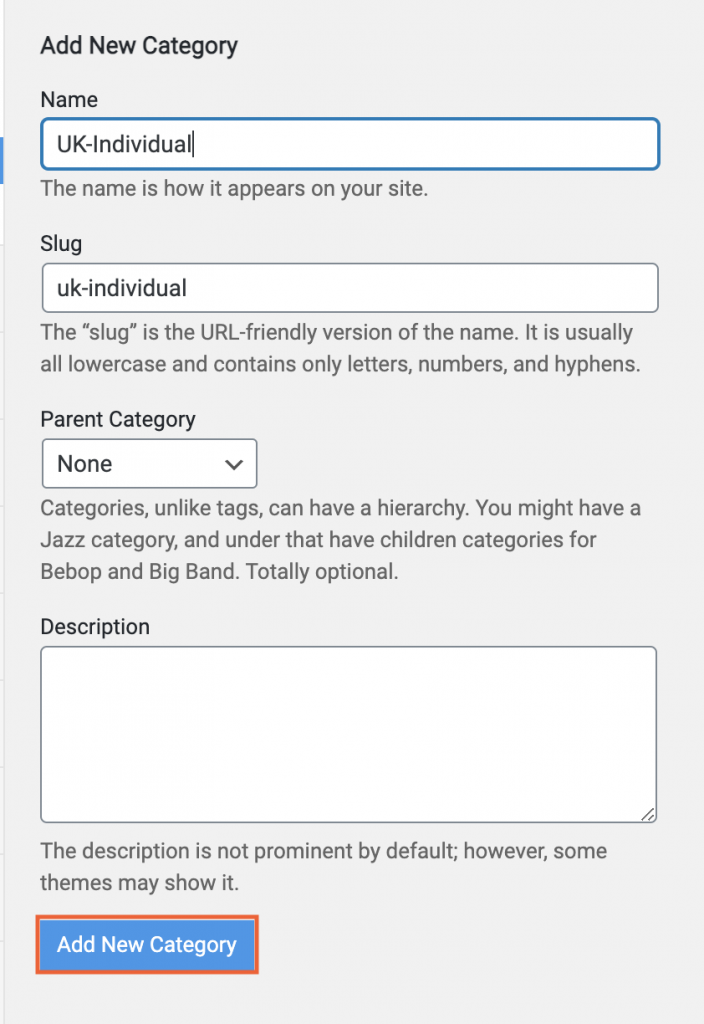
Both the “Add New Category” section on the left-hand side of the category page and the “Edit Category” page have the same fields.
You can add or edit the name of the category in the “Name” field. You can also add or edit the slug of the category in the “Slug” field. The slug is the URL-friendly name of the category, which will appear in any links.
You can also add or edit the ‘Parent’ category of your current category by selecting it from the dropdown menu.
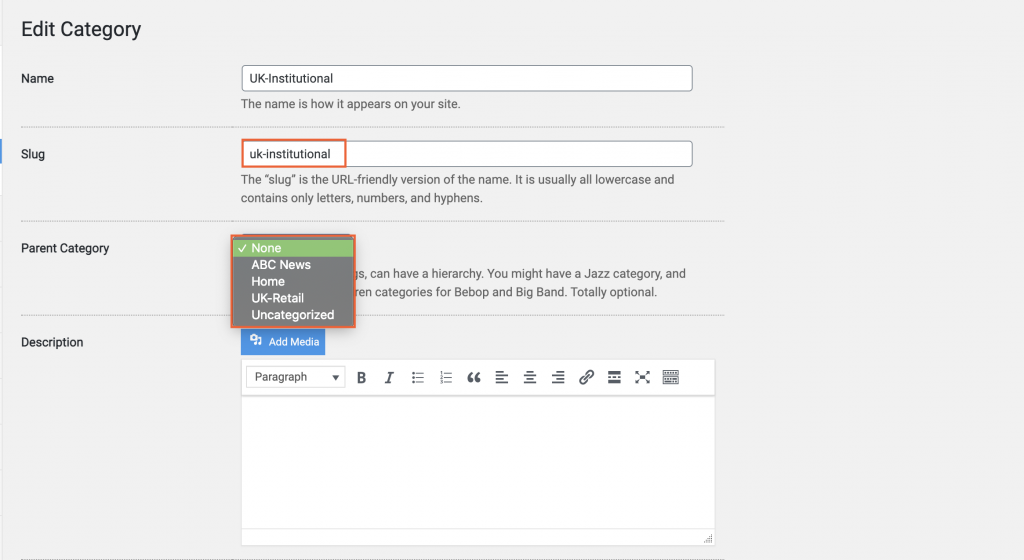
Finally, you can add or edit the description of the category in the wysiwyg field. This will not usually be shown, although it can be shown in certain themes.
Once you have made any changes to the category, click the “Add New Category” or “Update” button in order to implement them.
Creating and Editing tags
Tags can be added and edited from the “Tags” page within the “Posts” tab. This can be accessed from the left navigation bar by hovering over “Posts” and clicking on “Tags” from the menu.
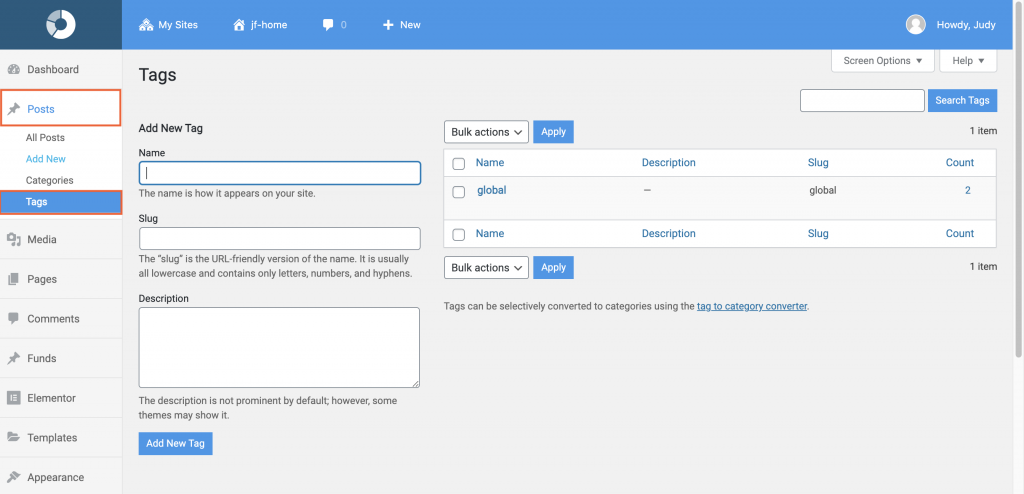
The tags page will display a section where you can create a new tag on the left-hand side of the page.
It will also display all of the tags that have been added on your site, their description, slug, and a count of how many times that tag has been used. There is also a search bar that will allow you to search for a tag by name.
Hovering over the name of the tag will allow you to edit the tag, view all of the posts that have been assigned that tag, or delete the tag.

Clicking on the name of the tag, or the edit button beneath its name, will then allow you to edit it.
Both the “Add New Tag” section on the left-hand side of the tag page and the “Edit Tag” page have the same fields.
From the “Edit Tag” page, you can add or edit the name of the tag in the “Name” field. You can also add or edit the slug of the tag in the “Slug” field. This is the URL-friendly name of the tag, which will appear in any links.
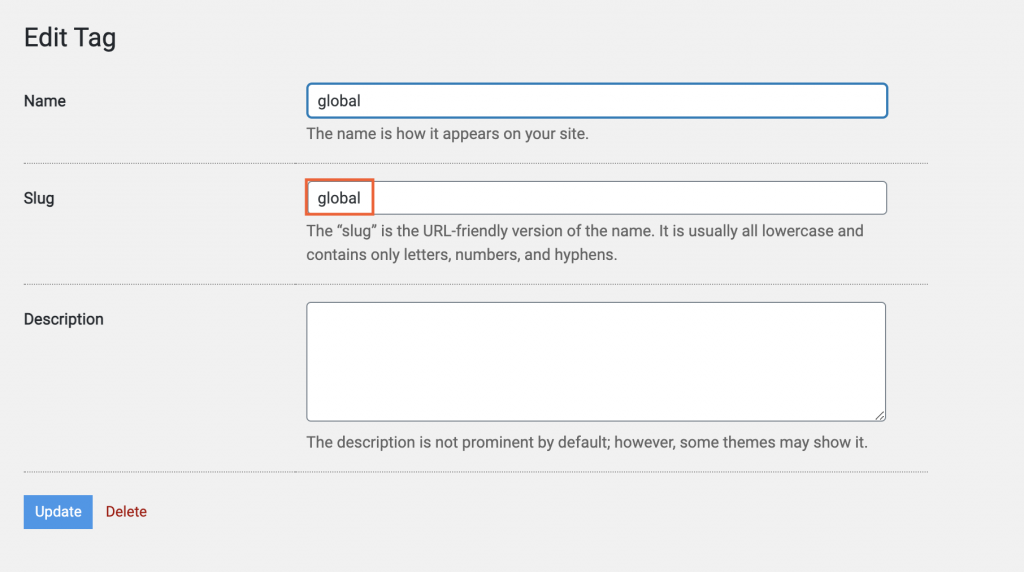
Finally, you can add or edit the description of the tag in the wysiwyg field. This will not usually be shown, although it can be shown in certain themes.
Once you have made any changes to the tag, click the “Add New Tag” or “Update” button in order to implement them.
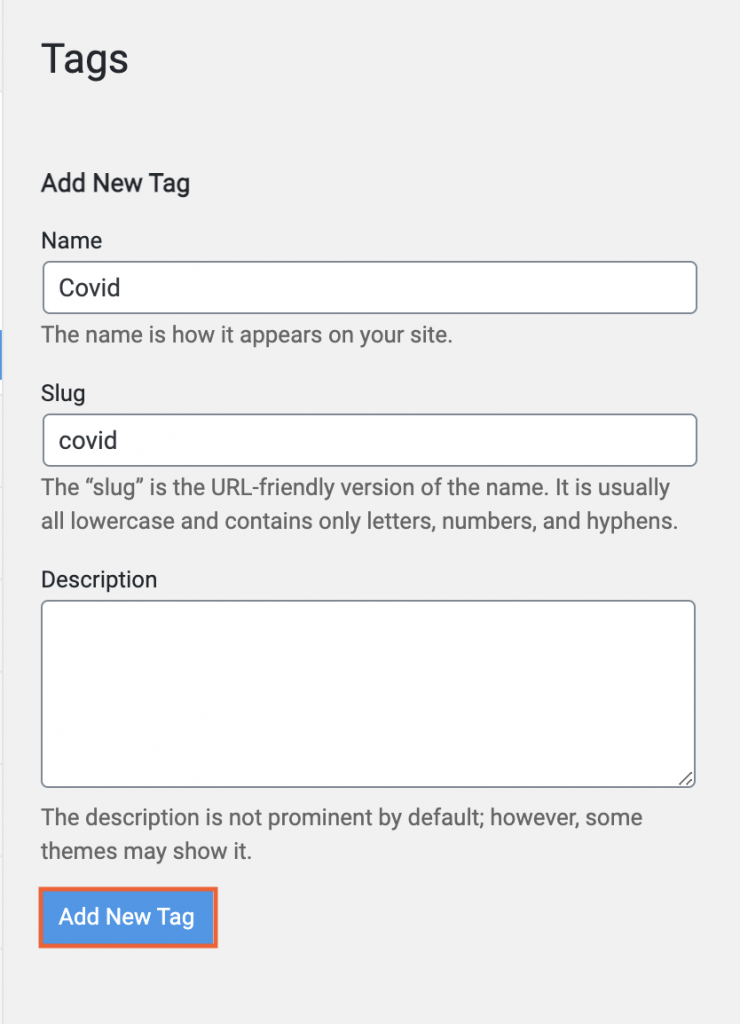
As you can see, you can create new categories and tags, and manage existing ones, from these pages as you set your taxonomy structure, or as your site grows. Taxonomy is not limited to just categories and tags and you may also have a number of other taxonomies on your site such as authors or content types. These can be accessed in the same place, and edited and managed in the same way.
Examples
Once you have created or edited your categories, you can then add them to your posts. These categories will then be used to organise your posts, and filter them with filter atoms. They will also usually be displayed on the posts themselves, giving your users a way to organise them at a glance. The website of BMO Global Asset Management is a good example of how the categories you assign to your posts will be displayed when the posts are shown in an insights atom. Clicking on the category on the post panel will automatically apply that category to the filter, bringing up all other posts with that category assigned.
Other websites display their taxonomy in similar ways, for example, Merian, so take a look at some for examples of how your categories will be displayed. Other taxonomies can also be displayed in a number of other atoms, for example the author of the post, or their post type specific taxonomies.
