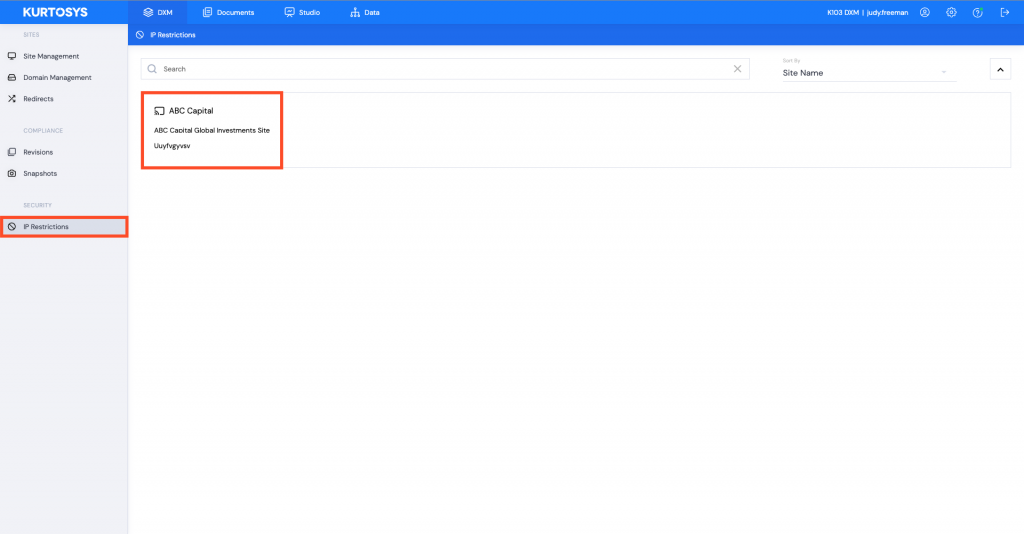
IP Restrictions allows you to list all IP addresses which can access the site instance. You can manage the list of IP addresses under DXM > Security > IP Restrictions.
Adding Authorized IPs to a Restricted Site
Select the site you want to add the IP restriction to.

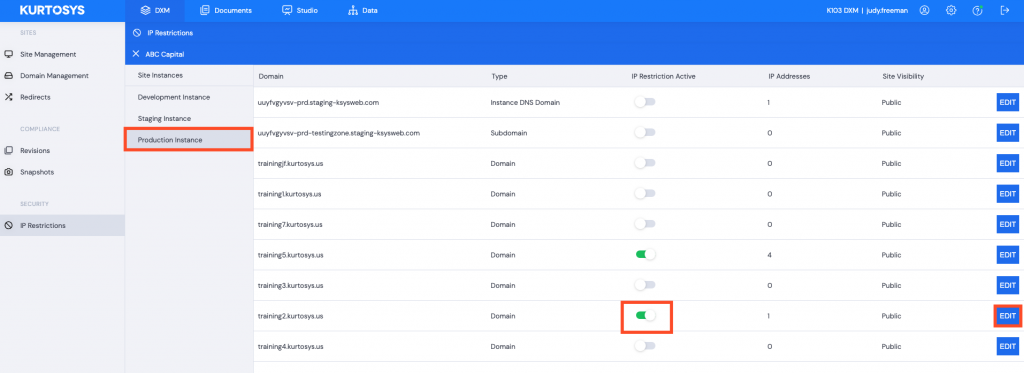
Select the specific Site Instance (Development, Staging or Production).
If there are different domains mapped to the instance, you will see those multiple domains listed underneath the specific instance.
Make sure you toggle the “IP Restriction Active” option to enable.
Add authorized IP Addresses to the restricted domain by clicking EDIT.

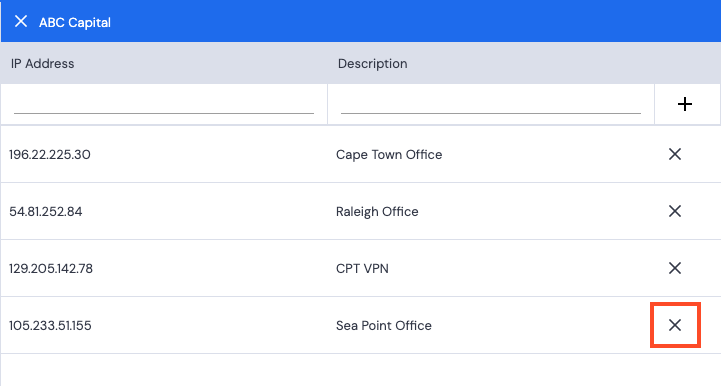
Add an IP address and description by selecting the + button.
You can add various types of IP’s:
- IPv4 (type it as you see it eg. 123.233.23.45)
- IPv6 (type it as you see it eg. 2001:0db8:85a3:0000:0000:8a2e:0370:7334)
- IP Ranges (to open the range 123.233.23.1 to 123.233.23.90, simply type 123.233.23.1/90)

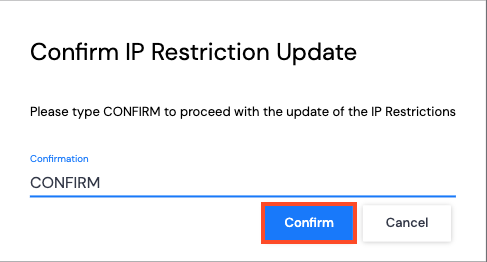
Save and Confirm the addition by typing CONFIRM into the field provided, then click Confirm.

Deleting Authorized IPs
To delete an authorized IP Address, select the X corresponding with the IP address you’d like to unblock.

Save and confirm that you would like to delete the authorized IP address by typing CONFIRM into the field provided.

Click Confirm.
